

VANAN
-
Posts
67 -
Joined
-
Last visited
-
Days Won
3
Content Type
Profiles
Forums
Gallery
Posts posted by VANAN
-
-
Wow... Really like the write up!
-
 1
1
-
-
Have been soaking the rocks and sand in the tank with RODI to pull out any hidden phosphates or nasties.
Gonna do full water change and mix in the salt. Time to start cycling!!!Any update from your tank?
Sent from Singapore Reef Club mobile app
-
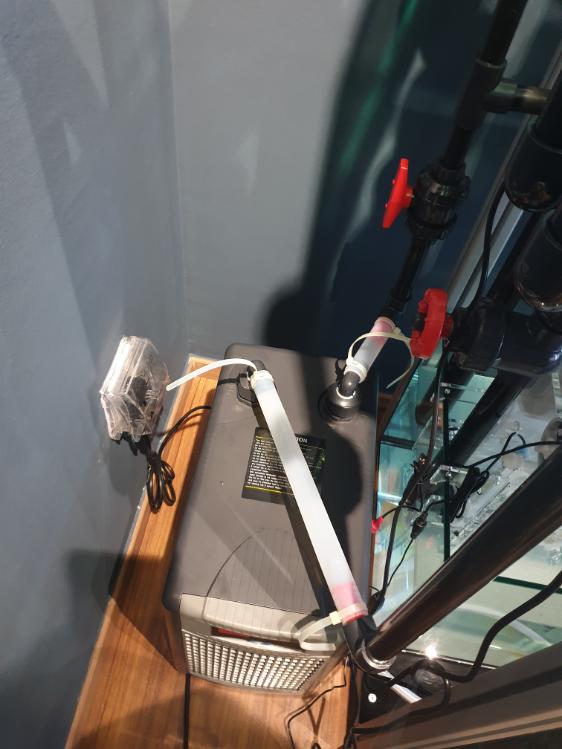
Thanks PCW and everyone who contacted me with suggestions and advice. Fixed the issue after having a a closet look at the confihuration and everything seems to be running smooth now.
The herbie was setup with a wet secondary drain but the height of the secondary drain was a little high. Also i need to be patient with the clarisea as it didnt have the load yet to maintain the water level inside it.The water level in your overflow box should not be fluctuating much. Have you tried tuning your herbie? If I may suggest, close your gate valve and then slowly open it to tune your siphon line such that (1) the siphon line always remains in operation as a full siphon; and (2) your emergency line has a slight trickle only. This should stabilise the water in your overflow box.
Sent from Singapore Reef Club mobile app
-
Anyone running herbie style overflow with a clarisea filter??
How do you stabilise the flow into clarisea? The water level in thenoverflow box fluctuates causing the return pump compartment water level to fluctuate quite a bit. If i was to put an ATO there it might go crazy.
Any advice/suggestion will help. First time using clarisea.
Sent from Singapore Reef Club mobile app -
I might look into the nyos pumps. Are they quiet?Oh that great your flooring look new!.
Sure different opinion when the scape is up it sure look a lot nicer. Vectra is a great pump try the NYOS pump if you are keen!
Sent from Singapore Reef Club mobile app
-
On 12/8/2020 at 11:16 PM, Ashtrax said:
Realized a few things.
1. You might want to inset a bigger base pad on the legs of your tank stand this to spread out the point load as it will leave mark on your new vinyl flooring over time.
2. Why don't you go our a black background paste black color vinyl on the back and over flow area. Perhaps a two sided view should be sufficient with such placement.
3. Don't need to upgrade the pump. Just buy a secondary pump for your chiller this is safer incase one of the pump fail.
Hi @Ashtrax
Thanks for the suggestion.
The feet have been swapped out for a 50mm pad The original felt too small for my comfort. Will test this out for stability and spread. The flooring is not new
 heh, about 5 yrs old but nonetheless I don't want to be damaging it.
As for the background, I always had oyama backgrounds (mostly black) to hide piping, wiring and camouflage the wavemakers. Recently I have come to like the see through panel at the back with the wall a short distance away. Gives the aquarium some depth at the back when there is lightning. The original plan was to have the tank as a peninsula tank but changed my mind and put it against the wall afterwards.
2nd pump is going to be one of the upgrades. Wasn't going to upgrade the pump, I just underestimated the headloss through the chiller which makes me run the current one at 90 to 100%. I have never tried the vectra, so trying out at the moment.
-
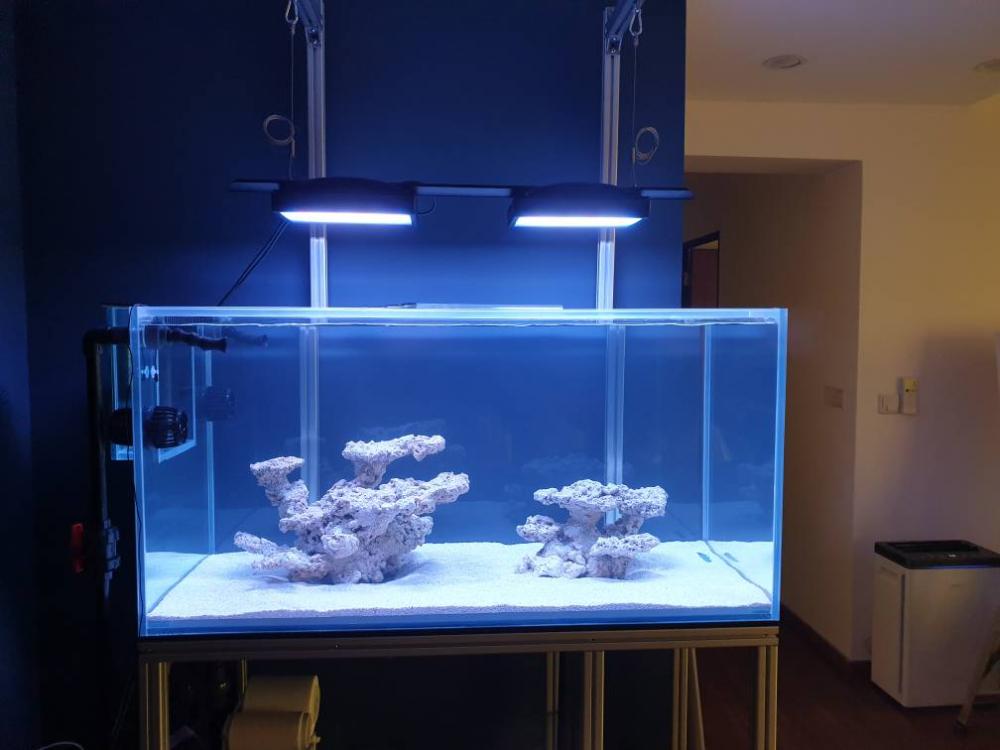
A Quick Update on the progress.
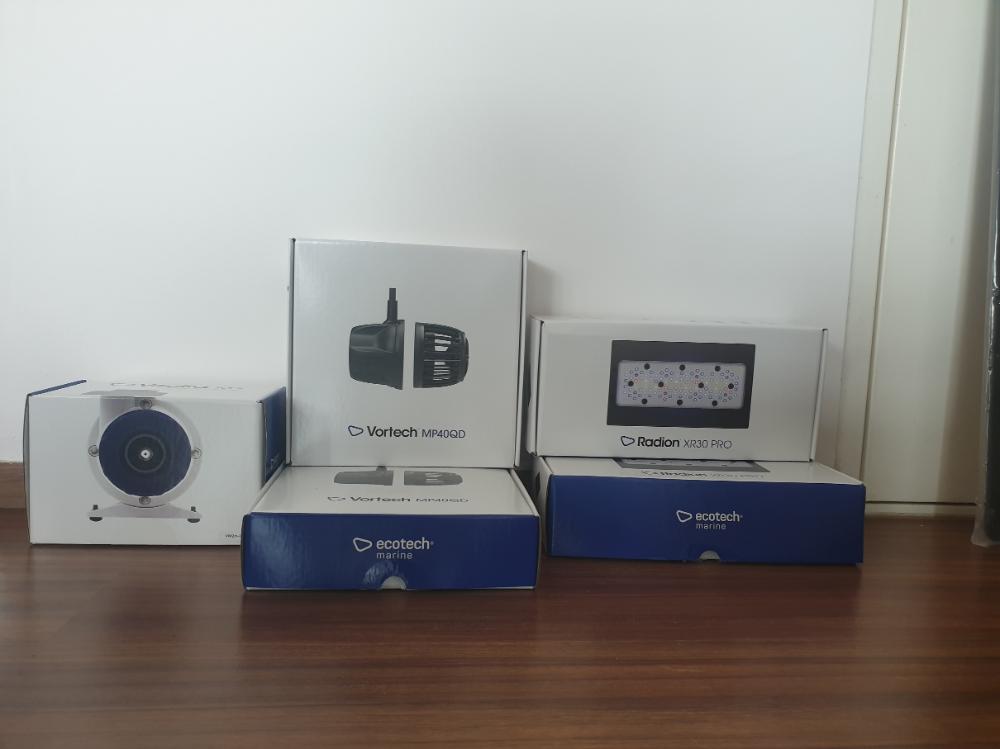
There has been some delays in getting some of the equipment partly due to COVID. Some of my preferred Ecotech products were out of stock for some time and they just came in 2 weeks ago. So the plan will still go ahead with the Radions and MP40s. I was contemplating on other options if stock didn't come in anytime soon.
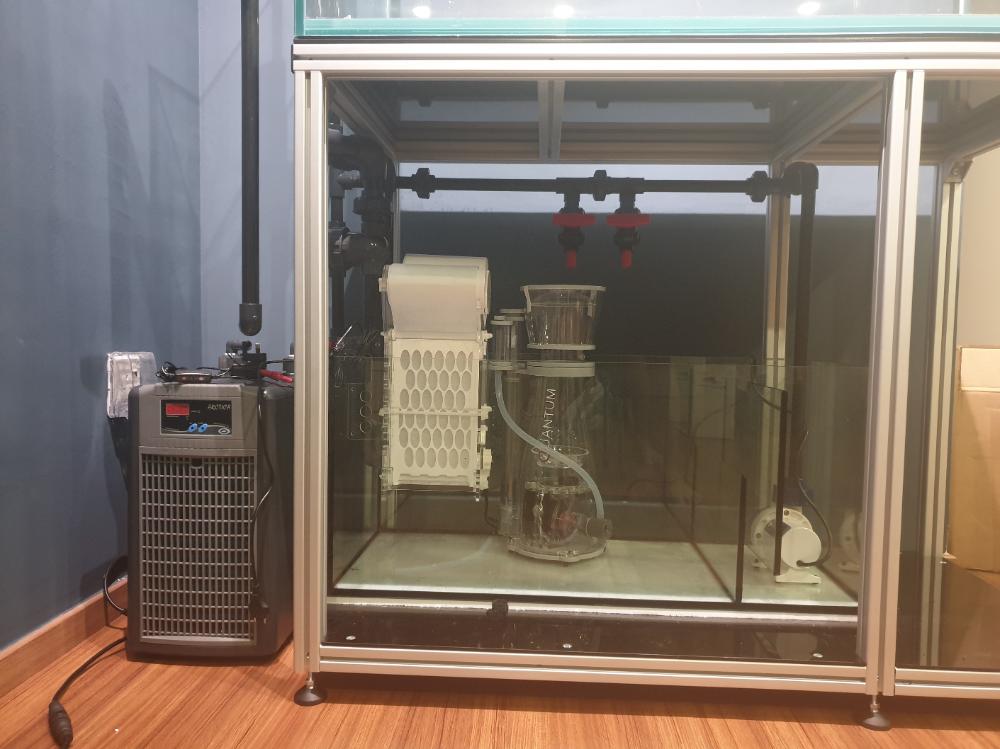
Wife and I wanted dark grey piping because we felt they looked nicer and they just arrived from overseas as well. Piping now done and fitted with Vectra M2, Clarisea 5000, Artica 1/4.
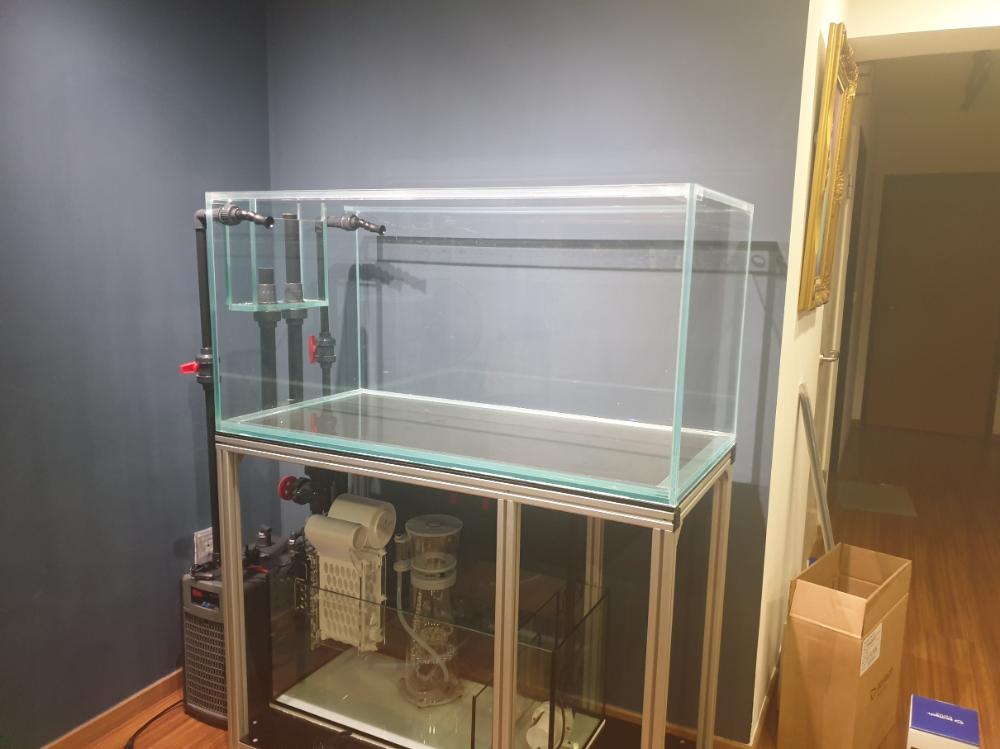
Piping was very neat. Wife was very happy with the way they turned out.
Leak test done! No huge "surprises". Only felt that I should have gone with a Vectra L2 as pressure loss due to the chiller is quite heavy. May consider to reconfigure flow through chiller.
Next step is to finalize my rockwork. Somehow I never seem to be happy with the outcome of the rockscape and keep adjusting its shape.
 Once i am happy with the rockwork, will fill up tank with RODI and soak all rocks and sand for a week or so to remove some of the potential leachates since I am using mined aragonite rocks.
Also waiting on the carpenter to ready a glossy white door panels for the aquarium and the light stand to hang the radions. Hopefully don't have to wait too long!
-
There’s been some delay because of my itchy fingers. Spotted some areas to touch up on the painted wall and decided do it myself. Which ended up making the wall worse with my not so good painting skills. Now I got to get the painter to come back redo the wall before tank delivery or setting up anything. The Wife is not impressed
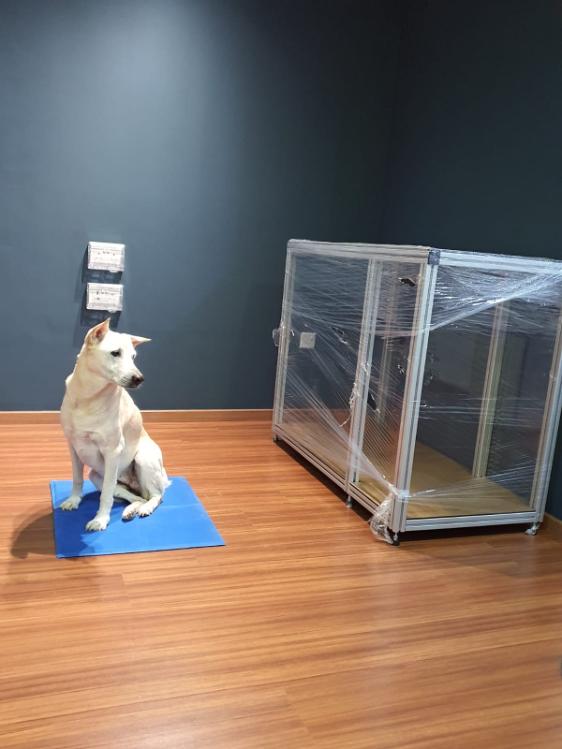
On another note, the tank stand from Prestech has arrived. 4040 Aluminium profile used and with the tank makers suggestion the centre support is off centre to allow maximum access to the sump. Acrylic bases for top and bottom to support the display and sump tank. The stand definitely feels solid and my wife’s first reaction was it looks well done and solid! I have always used wood and this is my first try with these aluminium profiles. My Doggo has been quite curious and doesn’t know what quite to make of it yet.
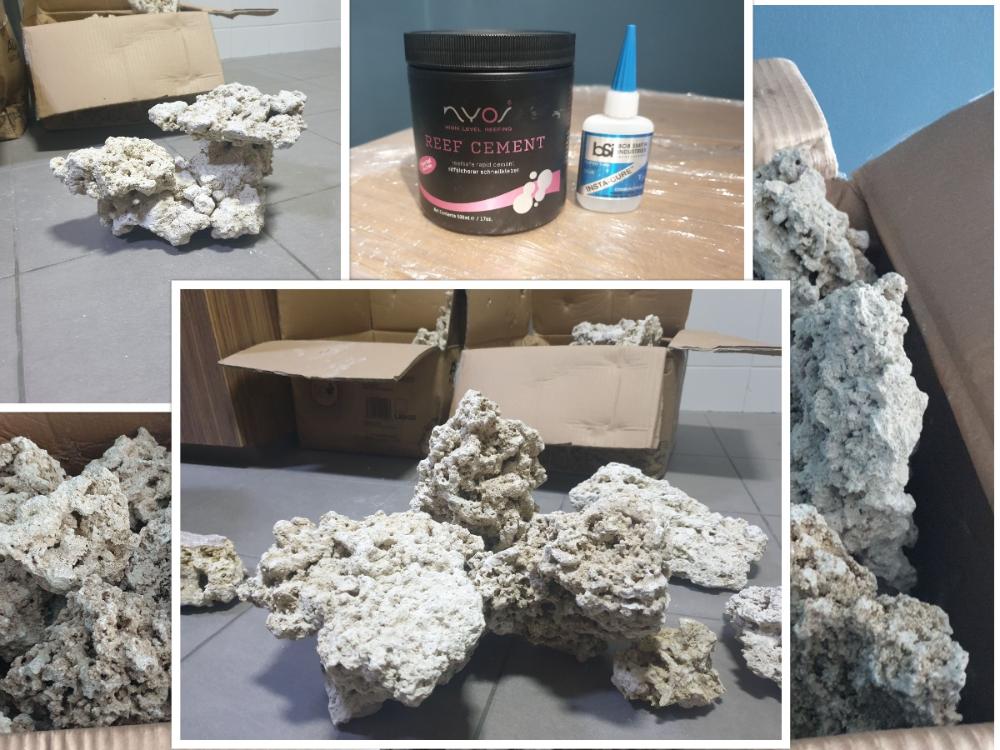
I also bought aragonite rocks to start having a go at aquascaping. Aquascaping to me is the hardest activity. I just can’t seem to be satisfied with whatever I come up with. All the more recently, I have taken a liking to the more Asian style of aquascaping where everything looks aesthetically pleasing and have been seeing videos and images of people with perfectly sculptured gravity defying negative space scapes which makes me want one of those. Evan Luo and Takaki Tanks that were featured in Reef Builders were a huge inspiration. Therefore I will be trying to go for the shelf and slightly lifted aquascape look so that there’s good water flow and lots of space for the fish to swim. I got 2 boxes of the DD Aquascape rocks (40kg) and they look really good, and porous but heavy. Been trying out some scapes while waiting for the wall to be ready and tank to be delivered. Will glue the rocks with BSI insta-cure superglue first and and finish off with NYOS reef cement.
-
 1
1
-
-
On 10/16/2020 at 11:43 PM, Nicholas Wong said:
Cool! Great job!
Sent from Singapore Reef Club mobile appOn 10/17/2020 at 11:45 AM, Admiraltian said:Look like a epic build. Very detailed explanation. Camping here.
On 10/17/2020 at 12:16 PM, Indeco said:Neat! waiting for more updates
On 10/17/2020 at 1:40 PM, Mdsalman said:Cool stuff, can't wait for more
Sent from Singapore Reef Club mobile app
On 10/19/2020 at 5:57 PM, Raheel said:Nice, cant wait to see more updates
On 10/19/2020 at 8:49 PM, MrArrogant08 said:Interesting

Sent from Singapore Reef Club mobile appThanks everyone. I will try to update as regularly as I can
")
-
Just some updates on the aquarium corner.
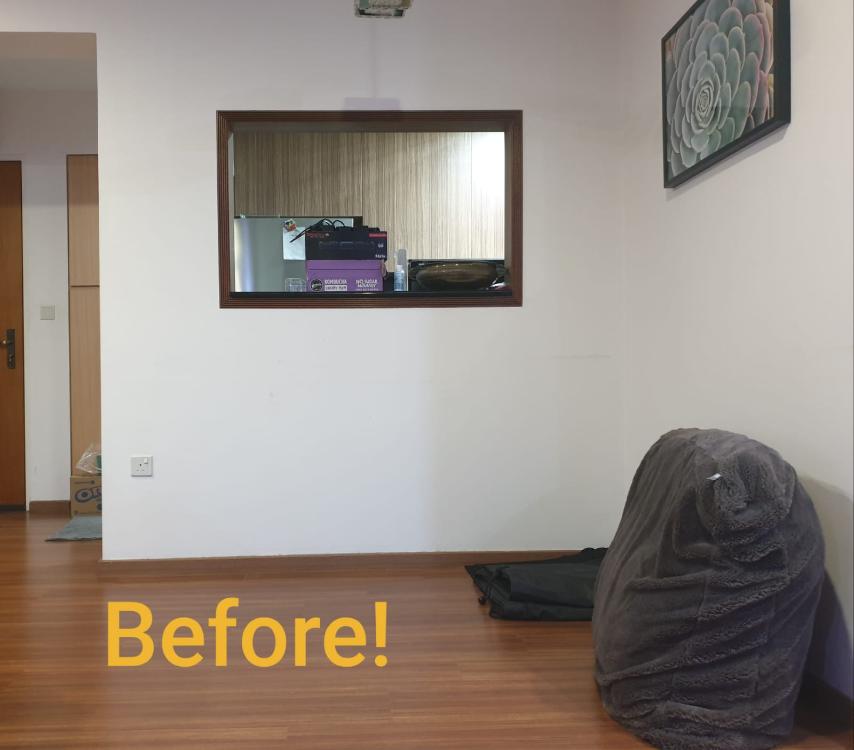
What used to be our dining area will be converted to as aquarium corner. We wanted to patch up the hole in the wall and give it a new coat of paint to give some contrast to that area as well as to absorb some of the lights that spill out from the aquarium once we have the lighting in place. Took this chance to add in a dedicated electrical circuit for the tank with its own breaker.
Here are some before , during and after pictures. Do let me know what you think!
.jpeg.b65e066069abe2b81deb40b7ff79d035.jpeg)
.jpeg.edc0beba452a4d2deb3e9e09a58b4ee1.jpeg)
-
2
-
-
Hi all.
I am starting a new thread here because the original got locked/archived.
Introduction
After putting it off for quite some time (years), I am re-entering the hobby and starting a new tank build! The catalyst for this build has been my wife who also expressed her interest in having an aquarium in the house and sparked back my interest in having a piece of the ocean at home.So, like most things we put our hearts into, we wanted this to be a well-planned, slow and steady project. The planning process started in Dec last year, where we begin exploring the idea of renovating a portion of the house and creating a cozy corner to relax and enjoy the aquarium.
We want to create a tank that looks awesome, simple, easy to maintain and hopefully follows some sustainable practices. I have never done a tank build thread before but thought to myself why not! This will help us journal our progress as well as share and hopefully learn from the wealth of experience in this forum.
Tank Philosophy
Now for the tank build, these are our basic requirements/principles that were used to guide the designing, placement, equipment and livestock.
Neat
Tank, equipment, sump and the whole package has to look clean, neat and presentable. If it can fit with the existing house style would be even better. Minimal exposed wires, pipes etc and if they have to be exposed it should look good. Routine maintenance should also be planned to keep things neat. My wife is very OCD and this was her first rule. The colour theme was also chosen by her to make that area look cozy, neat and seamless.
Safety
New power points to be added with a dedicated breaker for the tank. Power points will have the outdoor rated covers to protect against any splash.
Adhere to weight loading requirements of our apartment. A few emails to HDB and we had approval for the tank size and placement in our intended location.
Simple
The design of the tank and sump should allow us to interchangeably use different equipment as we upgrade or decide to follow a different system. The design should also be flexible enough for us to relocate the tank to any other parts of the house.
Aquacultured/maricultured Corals
The tank will be mostly SPS with some LPS therefore we want this project to be more environmentally friendly than my previous tanks and reduce the impact to the reefs. With more and more LFS bringing in maricultured/aquacultured corals and hobbyist sharing their frags, this hobby can be a little more environmentally friendly than it used to in the past. So as much as possible, we will aim to purchase aquacultured/maricultured corals. This may not always be possible but we will try to stick to this as much as we can.
We are hoping that in years to come, we will have little to no reason to take anything from the reef. Aquacultured corals and captive bred fishes should be encouraged and supported wherever possible.
Equipment
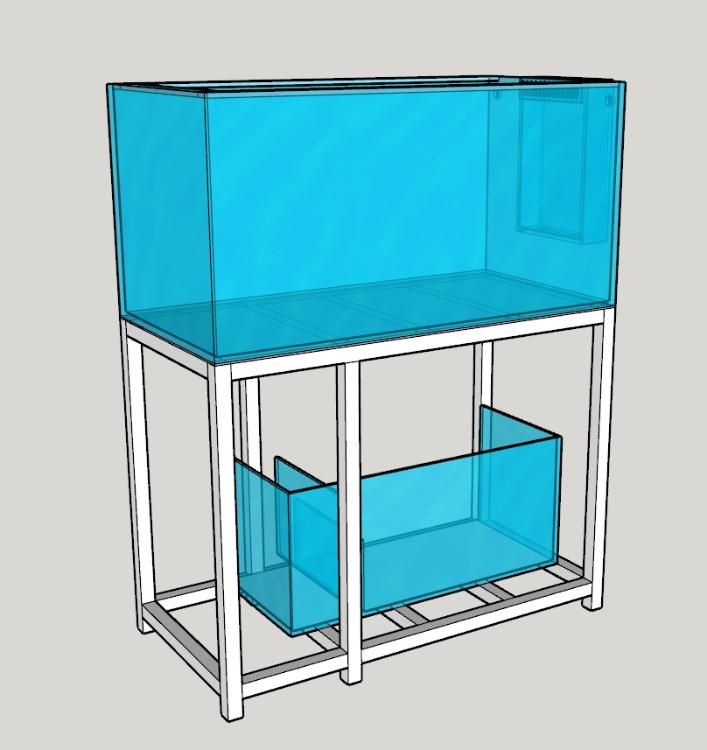
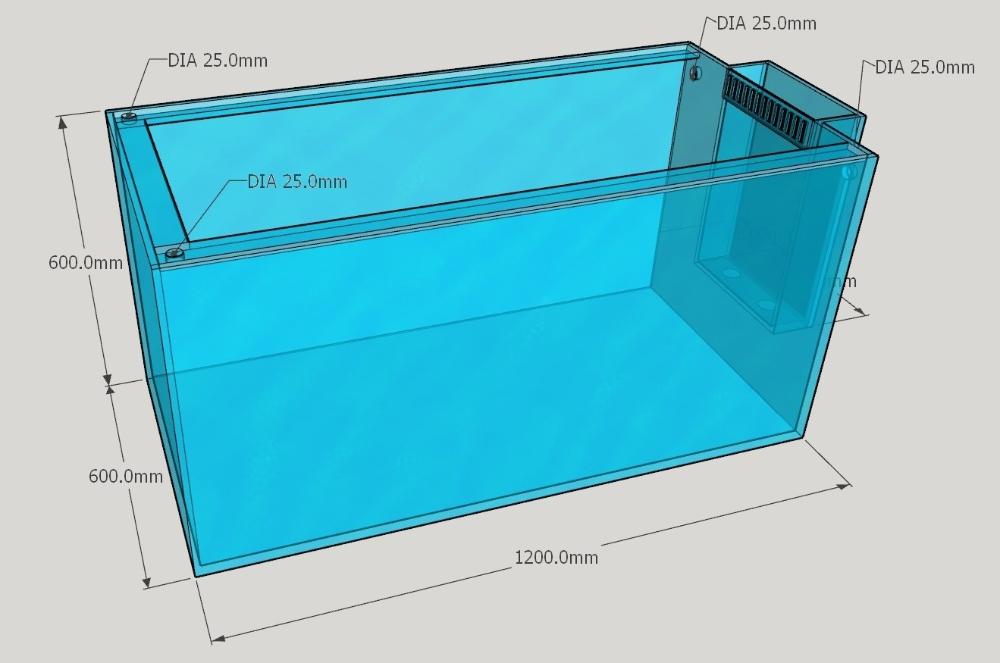
The tank will be a 120 X 60 X 60 cm external Herbie overflow system with 3 sides crystal glass. 12mm thick glass with clear silicone and euro-bracing. The tank will be peninsula style tank on an aluminium profile stand with hang-on wooden doors. Sump tank is 90 X40 X 40cm and baffled only for the return pump.
After going around to a few LFS and a few calls to tank makers, we decided to get Suprem9 to build our tank. We were not in a rush and wanted the builder to go through the tank design with us slowly and be patient enough for us to design out the tank according to our needs.
The type of filtration for the tank were based on my experience when I was in Australia working for the Marine Biology & aquaculture research facilities. I was involved in building algae scrubbers and carbon dosing biofilters. So naturally I wanted to this tank to be based on carbon dosing or a refugium dominant or both! Having heard so much about zeovit system, I thought why not try out the system and see what kind of results they produce. So, the tank filtration will be a simple 4 part starting with a mechanical filter, skimmer, zeovit reactor and a carbon.
Additives and water top up at the moment are still not completely decided. I might go with a 3-part balling method or a 1-part calcium hydroxide/calcium formate route. We will consider a calcium reactor in future when the tank becomes high demand. The sump design allows addition of a calcium reactor for future use. Auto water top up will be gravity fed and will be away from the tank in the kitchen.
As for other supporting equipment, we wanted the right equipment from the start as much as possible without the need to upgrade later on and eventually spend more money. Considerations were also taken for agent support for the critical and high cost items. Nothing will piss us more than having to spend so much money and not get any proper technical or warranty support. If the equipment can be repaired locally or have a 1 to 1 exchange it would be a plus. Below is the list of supporting equipment we have decided.
· 1/4HP Artica Chiller
· 2 X Radion G5 XR30 Pro (May add a 3rd in future or add strip LEDs)
· 2 X Vortech MP40
· 1 X Reefwave45
· Vectra M2 return pump
· Clarisea SK5000
· Nyos 160 Skimmer
· BM Zeovit reactor
.jpg.3adf0ca5259cbea57d40b0dbc1f4e676.jpg)
A rough flow diagram of the tanks piping and connections.
Tank sketches by S9 below
-
Introduction
After putting it off for quite some time (years), I am re-entering the hobby and starting a new tank build! The catalyst for this build has been my wife who also expressed her interest in having an aquarium in the house and sparked back my interest in having a piece of the ocean at home.So, like most things we put our hearts into, we wanted this to be a well-planned, slow and steady project. The planning process started in Dec last year, where we begin exploring the idea of renovating a portion of the house and creating a cozy corner to relax and enjoy the aquarium.
We want to create a tank that looks awesome, simple, easy to maintain and hopefully follows some sustainable practices. I have never done a tank build thread before but thought to myself why not! This will help us journal our progress as well as share and hopefully learn from the wealth of experience in this forum.
Tank Philosophy
Now for the tank build, these are our basic requirements/principles that were used to guide the designing, placement, equipment and livestock.
Neat
Tank, equipment, sump and the whole package has to look clean, neat and presentable. If it can fit with the existing house style would be even better. Minimal exposed wires, pipes etc and if they have to be exposed it should look good. Routine maintenance should also be planned to keep things neat. My wife is very OCD and this was her first rule.
The colour theme was also chosen by her to make that area look cozy, neat and seamless.
Safety
New power points to be added with a dedicated breaker for the tank. Power points will have the outdoor rated covers to protect against any splash.
Adhere to weight loading requirements of our apartment. A few emails to HDB and we had approval for the tank size and placement in our intended location.
Simple
The design of the tank and sump should allow us to interchangeably use different equipment as we upgrade or decide to follow a different system. The design should also be flexible enough for us to relocate the tank to any other parts of the house.
Aquacultured/maricultured Corals
The tank will be mostly SPS with some LPS therefore we want this project to be more environmentally friendly than my previous tanks and reduce the impact to the reefs. With more and more LFS bringing in maricultured/aquacultured corals amd hobbyist sharing their frags, this hobby can be a little more environmentally friendly than it used to in the past. So as much as possible, we will aim to purchase aquacultured/maricultured corals. Our rock work will be from mined aragonite rocks or the artificial rocks instead of live rock. We might also look at frag swaps as well once we have system running. This may not always be possible but we will try to stick to this as much as we can.
We are hoping that in years to come, we will have little to no reason to take anything from the reef. Aquacultured corals and captive bred fishes should be encouraged and supported wherever possible.
Equipment
The tank will be a 120 X 60 X 60 cm external herbie overflow system with 3 sides crystal glass. 12mm thick glass with clear silicone and euro-bracing. The tank will be peninsula style tank on an aluminium profile stand with hang-on wooden doors. Sump tank is 90 X40 X 40cm and baffled only for the return pump.
After going around to a few LFS and a few calls to tank makers, we decided to get Suprem9 to build our tank. We were not in a rush and wanted the builder to go through the tank design with slowly and be patient enough for us to design out the tank according to our needs.
The type of filtration for the tank were based on my experience when I was in Australia working for the Marine Biology & aquaculture research facilities. I was involved in building algae scrubbers and carbon dosing biofilters. So naturally I wanted to this tank to be based on carbon dosing or a refugium dominant or both! Having heard so much about zeovit system, I thought why not try out the system and see what kind of results they produce. So, the tank filtration will be a simple 4 part starting with a mechanical filter, skimmer, zeovit reactor and a carbon.
Additives and water top up at the moment are still not completely decided. I might go with a 3-part balling method or a 1-part calcium hydroxide/calcium formate route. We will consider a calcium reactor in future when the tank becomes high demand. The sump design allows addition of a calcium reactor for future use. Auto water top up will be gravity fed and will be away from the tank in the kitchen.
As for other supporting equipment, we wanted the right equipment from the start as much as possible without the need to upgrade later on and eventually spend more money. Considerations were also taken for agent support for the critical and high cost items. Nothing will piss us more than having to spend so much money and not get any proper technical or warranty support. If the equipment can be repaired locally or have a 1 to 1 exchange it would be a plus. Below is the list of supporting equipment we have decided.
· 1/4HP Artica Chiller
· 2 X Radion G5 XR30 Pro (May add a 3rd in future or add strip LEDs)
· 2 X Vortech MP40
· 1 X Reefwave45
· Vectra M2 return pump
· Clarisea SK5000
· Nyos 160 Skimmer
· BM Zeovit reactor

-
1
-
-
Looking for NYOS 160 Skimmer in good condition.
PM me if you have one.
-
its 90% accurate.... wonder how it got it right!


-
A mother passing by her daughter's bedroom was
astonished to see the bed was nicely made and
everything was picked up.
Then she saw an envelope propped up prominently
on the center of the bed.
It was addressed, "Mom." With the worst
premonition,
she opened the envelope and read the letter with
trembling hands:
Dear Mom,
It is with great regret and sorrow that I'm
writing to you. I had to elope with my new boyfriend
because I wanted to avoid a scene with Dad and
you I've been finding real passion with John and he
is so nice-even with all his piercings, tattoos,
beard, and his motorcycle clothes. But it's not only
the passion mom, I'm pregnant and John said that we
will be very happy. He already owns a trailer in the
woods and has a stack of firewood for the whole
winter.
He wants to have many more children with me and
that's now one of my dreams too.
John taught me that marijuana doesn't really hurt
anyone and we'll be growing it for us and trading
it with his friends for all the cocaine and ecstasy
we want.
In the meantime, we'll pray that science will
find a cure for AIDS so John can get better; he sure
deserves it!!
Don't worry Mom, I'm 15 years old now and I know
how to take care of myself. Some day I'm sure we'll
be back to visit so you can get to know your
grandchildren.
Your daughter,
Judith
PS: Mom, none of the above is true. I'm over at
the neighbor's house. I just wanted to remind you
that there are worse things in life than my report
card that's in my desk center drawer.
I love you!
Call when it is safe for me to come home.
- Platinum² -
-
hmmm....there are reefers in SP... but i will be graduating this august...
-
Wow! This is truly one solid tank.... Well done!


-
Powder blue tang
now that would be number 4
-
1. ah^siao (sengkang)
2. hghflyer (sengkang)
3. [P]owder Blue (Kallang)
4. Octopuffy (Bedok Reservoir Road)
5. Jas Soh (Lavender)
6. Hotsoup(Chai Chee)
7. Vanan (pasir ris)
-
oh...ok.
ur on off switch will be at the end wire.......if there are 3 pins on the switch, one will be the earth....
pls see below....hopes u can understand.
I tot it isn't safe to put the switch on the neutral wire... tot it was safer on the live wire....
Because if we were to switch the lights off... it doesn't cut they supply of electricity to the lighting just merely breaking the circuit. doesn't that mean the piece of equipment is still 'LIVE'. Tot it wasn't safe
Or maybe my electrical knowledge isn't good

-
nice to have met u danano in person ..... U have a superb looking tank over there...
-
name : kiki
breed : persian
Boy, this one looks as if its gonna take over the world

-

Phangs isn't this ur tank too???

-
Hi all,
I have been keeping saltwater aquaria since 1999...


Looking for used 4ft 10 bulb ATI powermodul
in Sell off/Pasar Malam Shop
Posted
Looking for a used and working condition 10x54w ATI powermodul (4ft). PM me if you have one for sale.
Thanks.