

SantaMonica
-
Posts
765 -
Joined
-
Last visited
-
Days Won
6
Content Type
Profiles
Forums
Gallery
Posts posted by SantaMonica
-
-
Reminder Of The Day:
Lighting Duration: Set up your scrubber lighting on a timer for 18 hours ON, and six hours OFF. The scrubber itself won't care when those hours are, but if you want, you can have them on when your display lights are off, so as to help balance pH in the system.
-
That's a good point about the white LED's.
Well since you are a LED user, you'd be in a good position to build an LED scrubber

You could use just the right size panel that would put the LED's only an inch from the screen, all the way across.
-
Glad you like the info
I'd have to see better pics to see how his flow really looks. But generally, you should cut a 1/8" (3-4mm) slot, like this:
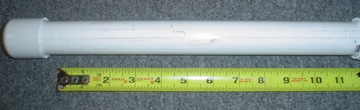


When you use this type of setup, you get perfect flow on both sides of the screen almost every time.
-
Well I'm trying to get caught up with the posts; gonna have to combine a few here to get them out without postponing anymore. Seems to be a lot of interest in scrubbers that are unique, like the giant one, and the solar one. Well today is another unique one, but first here are some results feedback:
"Pong" on the RF site said "i had a lot of green hair algae growing on my screen. noticed that the red algae in my DT has lessened dramatically."
"Johnt" on the UR site said "I've always used phosphate remover. I've tried most makes but always ended back using Rowa. since running the scrubber I've stopped the phosphate reactor and despite the scrubber not yet being at the Turf Algae stage the phosphate readings are dropping."
And "thauro77" on the SWF site said "Here are my test results, the dates are the water changes dates as well:
08/28
Calcium 660mg/l (when I first used the filter)
Carbonate 196.9 ppm/kh
Phosphate 0.5
Nitrates 20ppm
09/04
Calcium 500
Carbonate 214.8
Phosphate 0.5
Nitrates 10ppm
09/09
Calcium 440
carbonate 143.2
phosphate 0.5
nitrates 10ppm
09/23
calcium 440
carbonate 214.8
phosphate 0.25
nitrate 5.0ppm
And now for the first screen on any thread to use LEDs! "Snailrider" on the AC site built it:
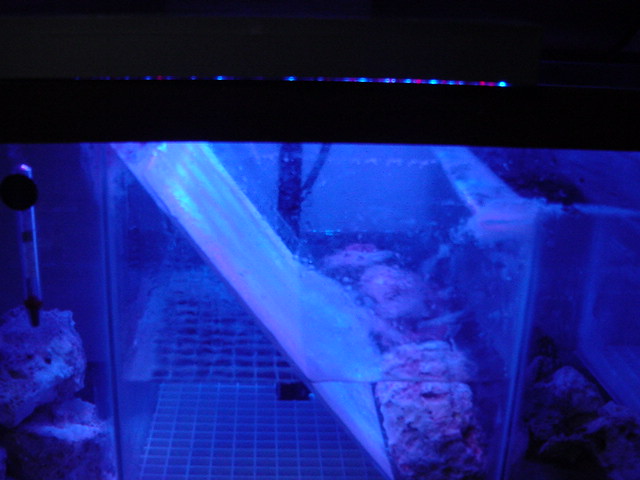
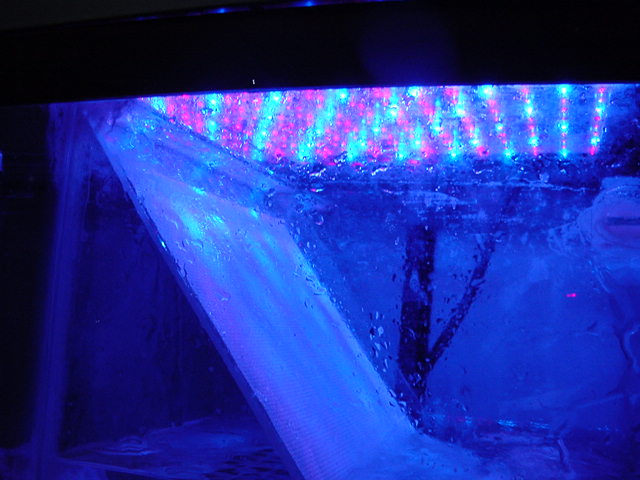
He knows that the part of the screen underwater will not contribute, so he made sure the part above the water had enough size to handle things. We'll see how LED's work!
.
.
.
-
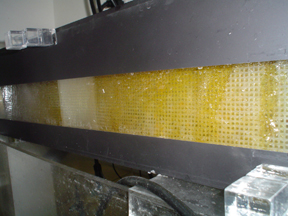
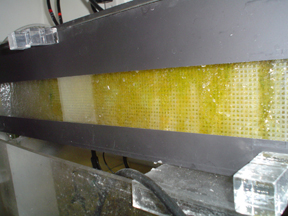
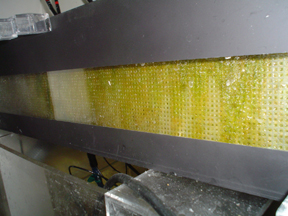
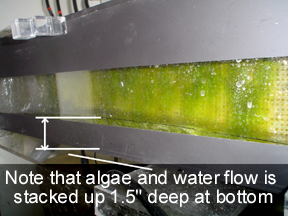
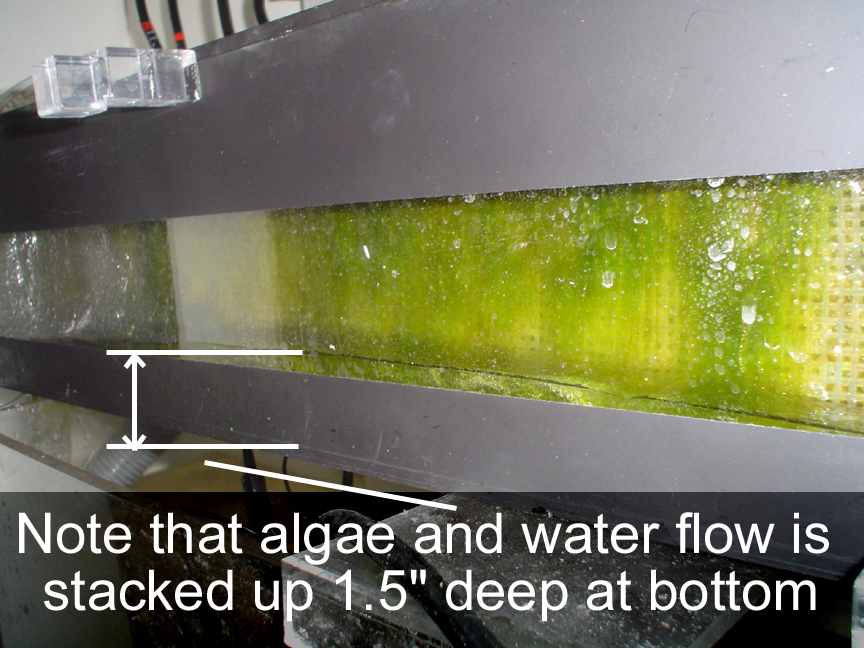
Don't bother with more seeding. How is the flow? Are both screen fully covered briskly? From your pic it looks like the water does not really cover the screen until near the bottom, at which point it's already more than 4" from the bulb. You want full brisk coverage, all the way across, right in front of the bulb (preferably 2-3" away.) I think that since you are on overflow only, dividing the flow up between two pipes is cause too little flow on each screen.
So: Consider doing a regular single screen, which will have double flow, even if you only use the light on one side. Also, increase the ON time to 18 hours. And start looking at getting some real screen, that you can just lay over your current one to get it started. The problem with your current ones are that when you clean, all the algae is going to come off. Real screen will keep some algae in the holes:
This "plastic canvas" one might be easier to get into the slot after cleaning, and the edges will not wear; it also will hold it's shape so that a solid frame may not be needed:
http://www.everythingplasticcanvas.com/pc-...sh-12-x-18.aspx
This "rug canvas" is made from fiber so that algae sticks to it the best; but it does not hold its shape when wet, so it will need a solid frame. Also, the edges will wear, so the frame will have to hold the edges down:
http://www.joann.com/joann/catalog.jsp?CAT...PRODID=prd12195
-
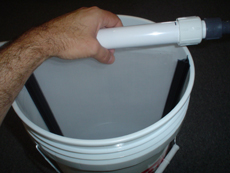
Yes, should be on 18 hours. Is the bulb down in the bucket? Also, is that acrylic sheet?
-
Looks like it just had a cleaning?
Any pics of the lighting in use?
-
.
Well this one takes the cake. Not only is it the biggest, but it's also the first one to use halides for lighting. "Reefski" on the MD site has a 700g tank and 800g sump, and had the entire garage to use for fish stuff, so he spared nothing in building his scrubber:
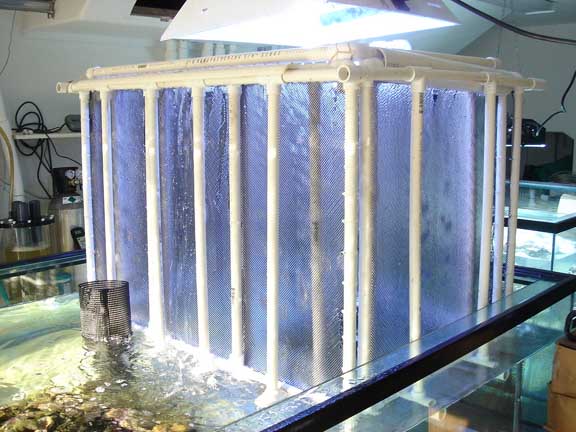

By the way, if this weren't enough, his entire back yard is a koi pond
.
.
.
-
Funny you ask. I'll be posting soon a request for manufacturers to do just that
-
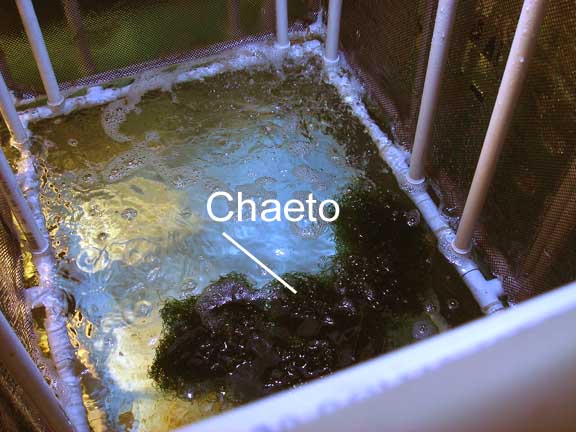
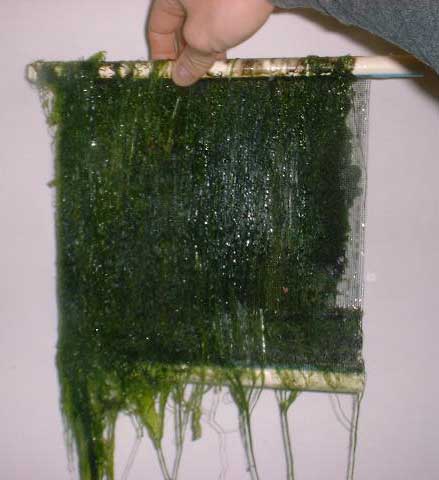
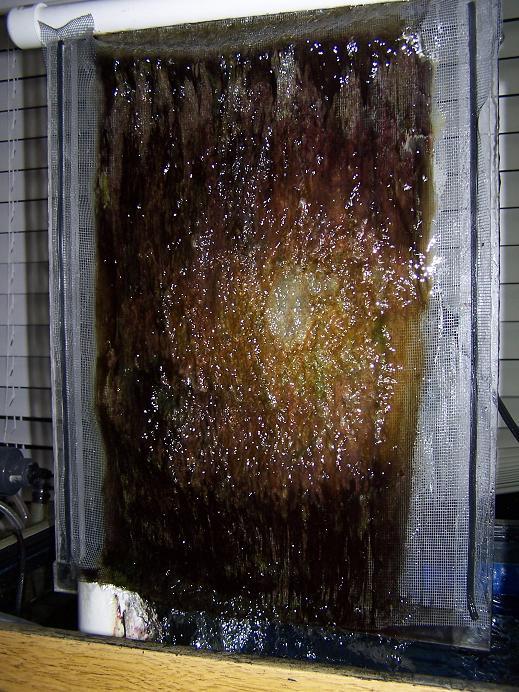
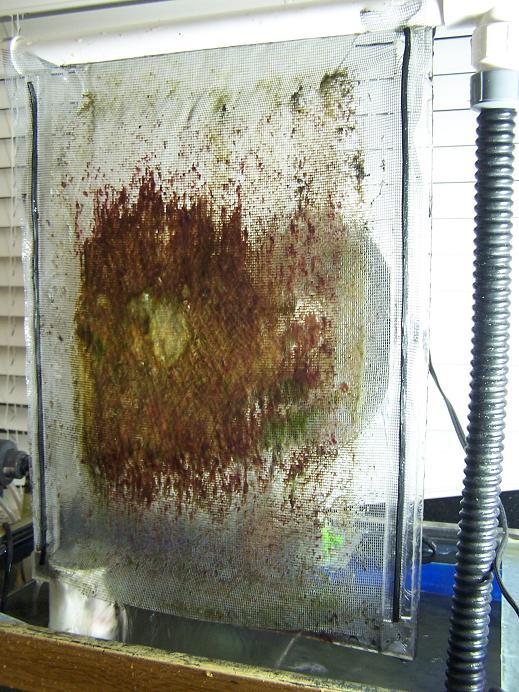
"Sly" on the SWF site is getting great growth in just 6 days from his trashcan-scrubber with built-in surge device:
.
.
.
.
.
.
.
.
.
And what is this.... dinner?
...Nope, it a week of growth from just one side (the 6500K side) of my acrylic unit.
.
.
-
Reminder Of The Day: Flow...
The basic rule of thumb for flow for a standard pipe slot is 35 gph (US gallons per hour) (140 liters per hour) per inch (2.2 cm) of screen width. Thus a screen 2" wide would need 70 gph. This should cover the entire screen with a swift flow on both sides, and leave you with a little room for adjustment. The more flow, the better, but this amount has proven to work well. How tall the screen is does not change the gph, however; only the width does. Here is the chart:
Screen Width-----Gallons Per Hour (GPH)
2" 70
3" 105
4" 140
5" 175
6" 210
7" 245
8" 280
9" 315
10" 350
11" 385
12" 420
13" 455
14" 490
15" 525
16" 560
17" 595
18" 630
19" 665
20" 700
-
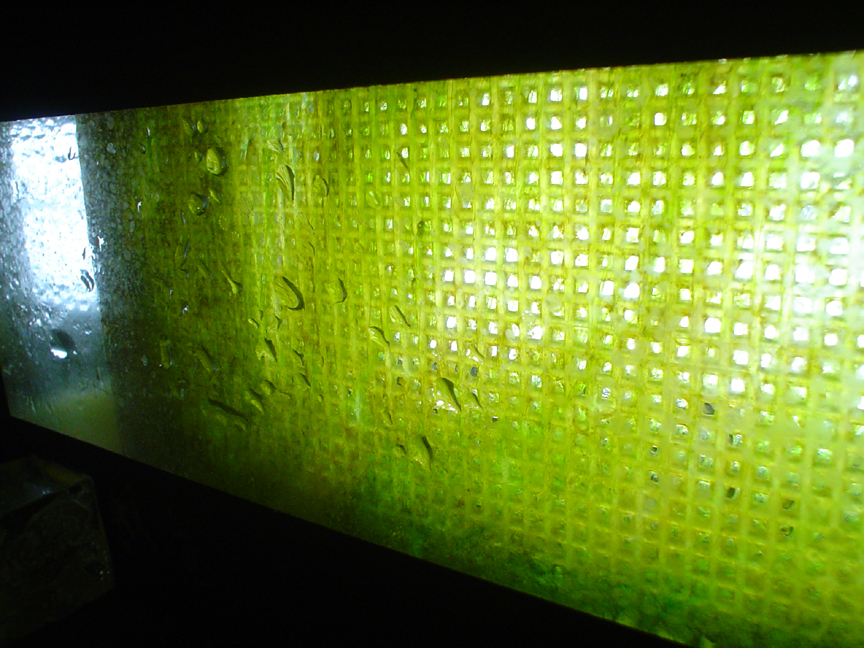
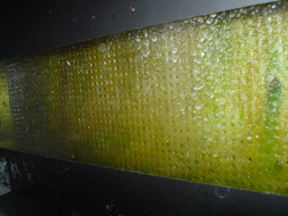
Part 2 of 2:
Notice that it takes several days before you can see any growth at all. And yes, I did seed the screen. Going back one day to Day 10, here are some closeups:
Hi-Res: http://www.radio-media.com/fish/AcrylicCloseup1Day10.jpg
http://www.radio-media.com/fish/AcrylicClo...2Day10small.jpg
Hi-Res: http://www.radio-media.com/fish/AcrylicCloseup2Day10.jpg
http://www.radio-media.com/fish/AcrylicClo...3Day10small.jpg
Hi-Res: http://www.radio-media.com/fish/AcrylicCloseup3Day10.jpg
Hi-Res: http://www.radio-media.com/fish/AcrylicCloseup4Day10.jpg

Hi-Res: http://www.radio-media.com/fish/AcrylicCloseup5Day10.jpg
And here is a closeup from Day 11:
Hi-Res: http://www.radio-media.com/fish/AcrylicDay11closeup.jpg
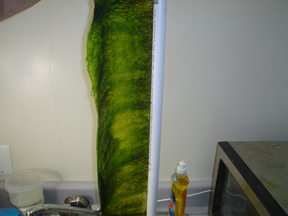
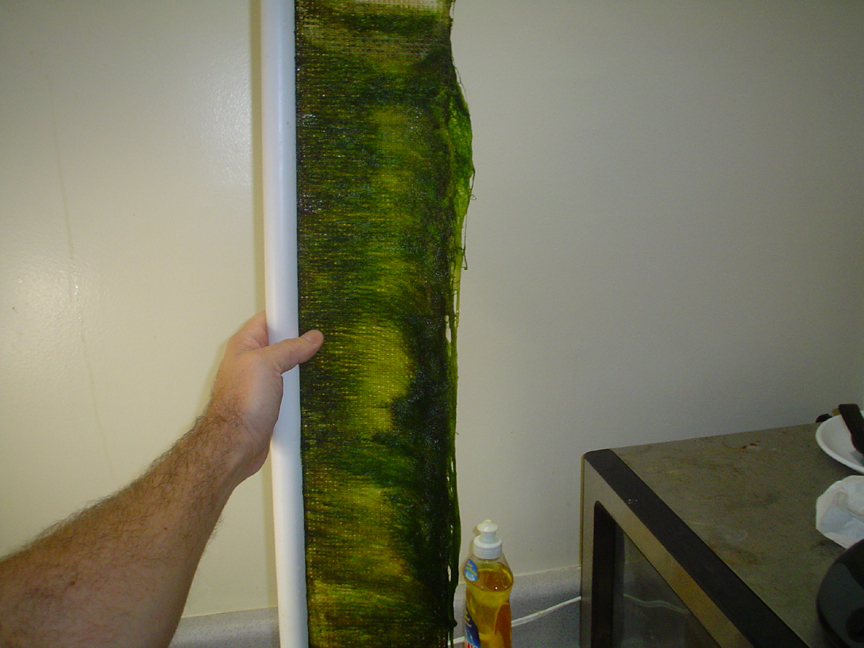
And what it looks like out of the stand. Note the algae coming out of drain; it was almost 2 feet long before I pulled it out for this pic:
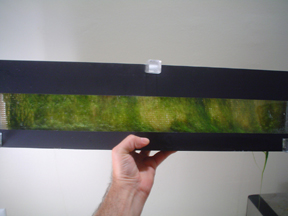
Hi-Res: http://www.radio-media.com/fish/AcrylicDay11heldup.jpg
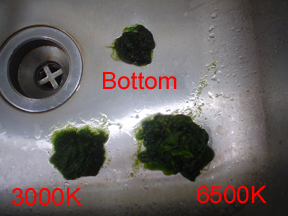
Here's the growth on the 3000K side:
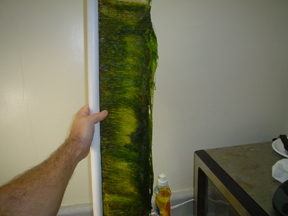
Hi-Res: http://www.radio-media.com/fish/AcrylicDay11out3000K.jpg
And the 6500K side:
Hi-Res: http://www.radio-media.com/fish/AcrylicDay11out6500K.jpg
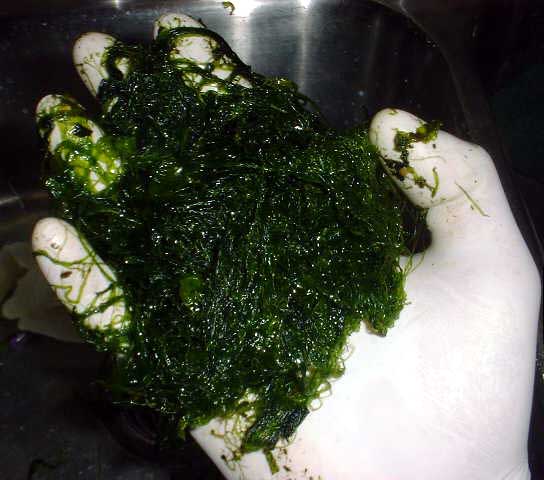
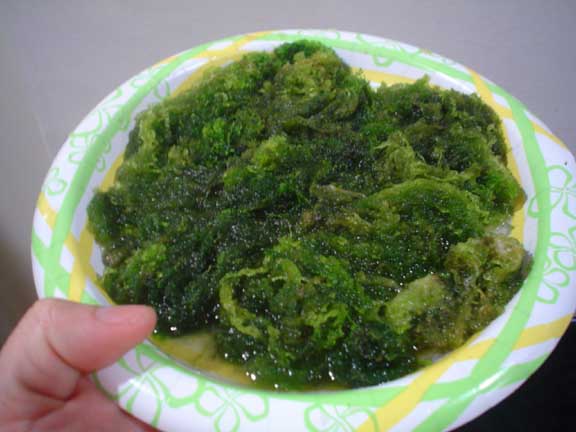
Instead of following the rule of cleaning only one side at a time, I had to do both in order to measure the algae of the 3000K side versus the 6500K side. Here is what was pulled off, like pulling a rope:
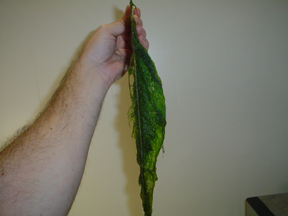
Here are the algae amounts removed, after a cleaning:
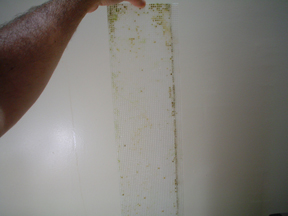
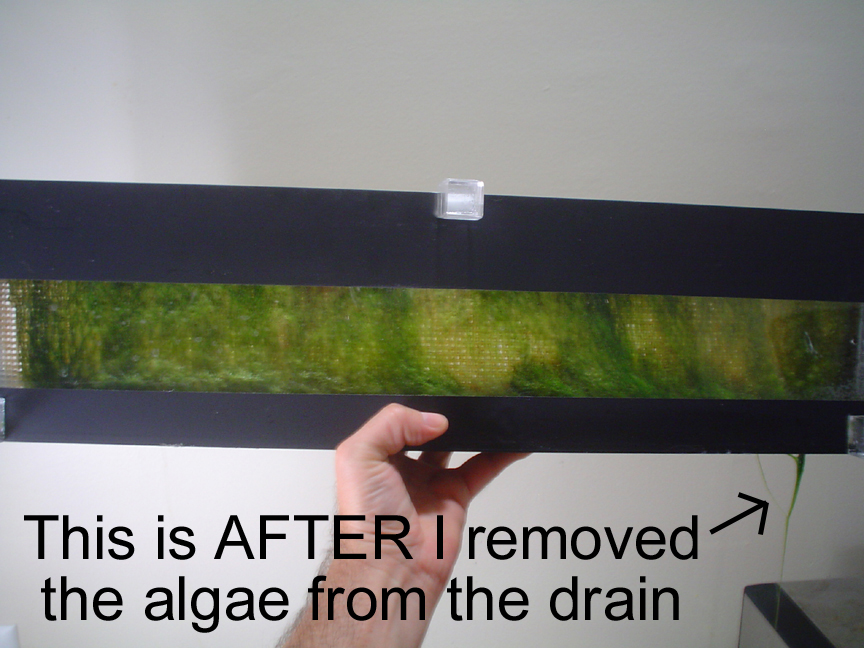
And here's the screen after cleaning; this is why you don't clean both sides, becuase it leaves left nothing on the screen for filtering:
A few notes:
o The screen is only 1.5 inches from the acrylic wall, and thus some water does get on the wall. But this unit is currently not setup for airflow with a fan, and it has a lid, so the water never gets a chance to evaporate. As a result very little saltcreep forms. I think I wiped it twice during the 11 days; however it did not do anything, just redistributed the droplets. On day 11 there was a small amount of creep; when I pulled the screen out I just reached in an splashed some water on it and it came off.
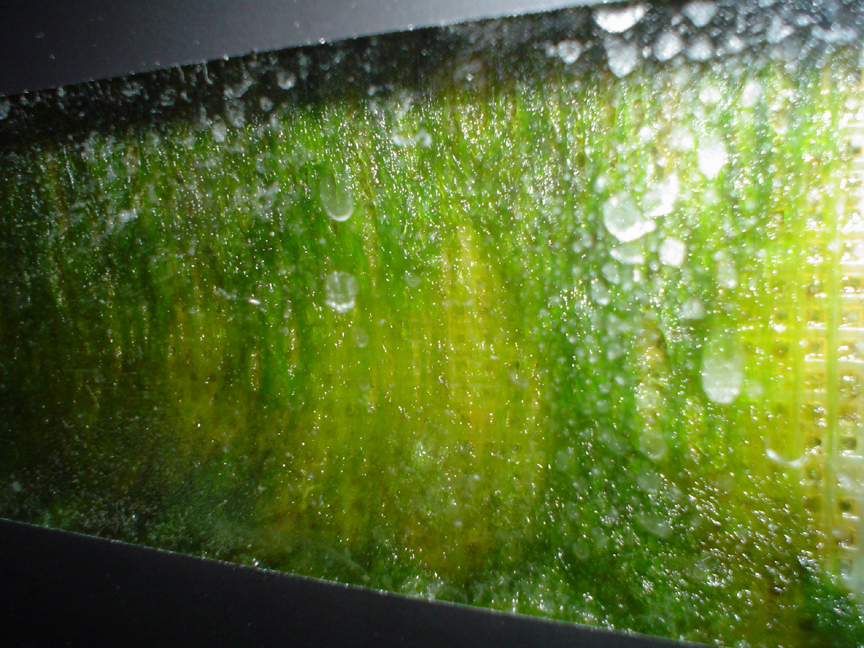
o There was a great increase in algae between day 10 and 11. I've seen this many times: once the hair algae gets to a certain point, the next day it covers everything.
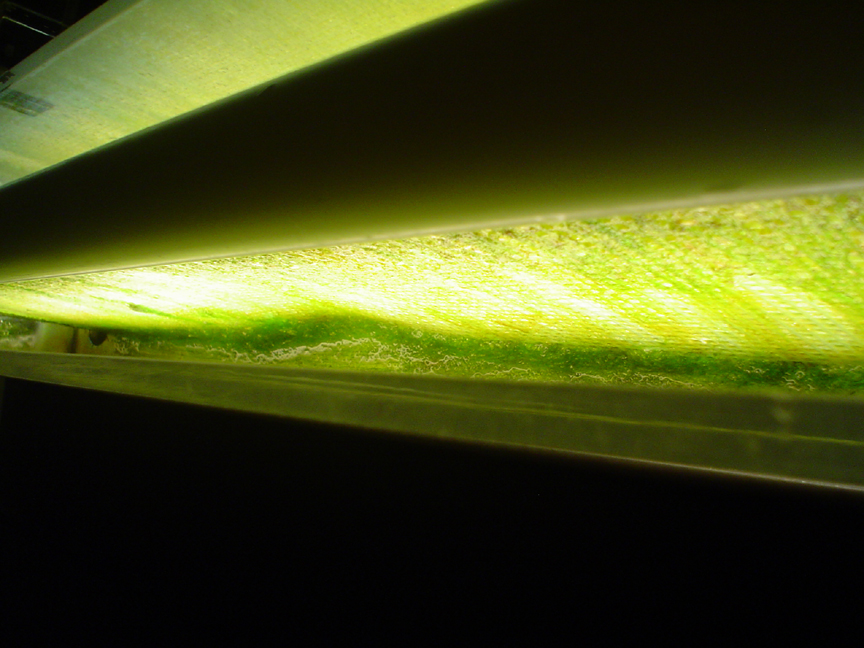
o When the screen get covered, algae start flowing down the scrubber and out the drain. Not a little, but a lot. It easily reached the botton of the sump 18" below. I just grabbed it and pulled it off. This might be a way to feed tangs, if the unit were placed on the hood of the tank.
-
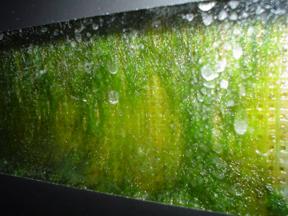
Part 1 of 2:
Growth Sequence of New Acrylic Screen
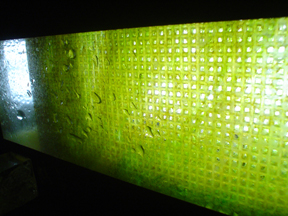
The new acrylic scrubber is up and kicking. These pics were taken while the original bucket was still operating, so the growth is slower than it would have been otherwise. I'm running 3000K on one side, and 6500K on the other, as a test. It probably won't make much difference until the holes in the screen are sealed off, but here are the daily pics. The T5 light on the front has been removed so you can see the screen:
Day 1
Hi-Res: http://www.radio-media.com/fish/AcrylicDay01.jpg
Day 2
http://www.radio-media.com/fish/AcrylicDay02small.jpg
Hi-Res: http://www.radio-media.com/fish/AcrylicDay02.jpg
Day 3
Hi-Res: http://www.radio-media.com/fish/AcrylicDay03.jpg
Day 4
Hi-Res: http://www.radio-media.com/fish/AcrylicDay04.jpg
Day 5
Hi-Res: http://www.radio-media.com/fish/AcrylicDay05.jpg
Day 6

Hi-Res: http://www.radio-media.com/fish/AcrylicDay06.jpg
Day 7

Hi-Res: http://www.radio-media.com/fish/AcrylicDay07.jpg
Day 8
Hi-Res: http://www.radio-media.com/fish/AcrylicDay08.jpg
Day 9
Hi-Res: http://www.radio-media.com/fish/AcrylicDay09.jpg
Day 10
Hi-Res: http://www.radio-media.com/fish/AcrylicDay10.jpg
Day 11 (a huge growth increase):
-
Many folks asked for pics of the jski711 no-skimmer tank whose test results I already posted, so here they are along with an update he posted:
"Well first i'll start by giving you a little background of my tank. its been up for 2 years now and am running t5 lighting. in the past i have had algae issues and phosphates tested above .1 from overfeeding. (i'm trying to fatten up my clowns and hopefully get them spawning). i've also got a 15g tank plumbed into my system that has a pair of mandarins in it which i am also trying to get spawning. i had a sick mandarin and dosed my tank with Maracyn to try and save him. after dosing this for a week i was unable to turn my skimmer on because it would just overflow from the medicine. after doing numerous water changes and about a month later i still was unable to turn it back on, thats when i saw [the scrubber] thread. I also had to turn off my calcium reactor because the co2 was dropping my ph too low; the bubbles from the skimmer were really helping me keep my ph up but with my skimmer not running, it had to be turned off. thats when i decided to give [the scrubber] a try. i purchased a pre grown screen from inland and off i went. since adding the "scrubber" i have noticed a major increase in ph which allowed me to turn my calcium reactor back on and get things stable again. the reactor has only been back on for about 2 weeks now and im "re dialing" it in. my ph fluctuates between 7.8 at night and 8.0 during the day. I have over 30 different types of sps in my tank, just did a quick count, and i have noticed no ill side effects at all. i have also been overfeeding a ton, especially to my mandarins! i have also noticed that the green film of algae i would get on the glass every few days has gone. I don't even remember the last time i scraped it, although in the pics you will see it needs to be done soon cause i have a ton of coraline algae on it. So IMO this "scrubber" has done wonders for me. I have been skimmerless for over 3 months now and still do my normal water changes, sometimes i do go 2 weeks but normally every weekend i do one. the turf that was on the screen from inland is still there but it doesnt seem to be spreading but not receding either. below are some pictures from today, they were just quick shots so sorry if they are blurry but you will see the colors i've got are great and like i said earlier i have had NO ill side effects at all."
.
.
.
-
If you clean your scrubber screen in your sink with tap water once a week, the tank will never turn yellow. If it ever did, then carbon would remove it. But nobody that is using one of these scrubbers is having any yellowing, at all.
-
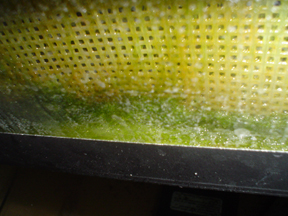
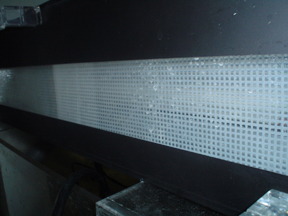
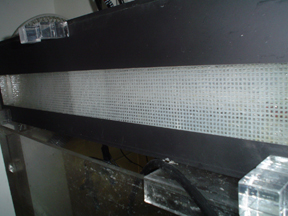
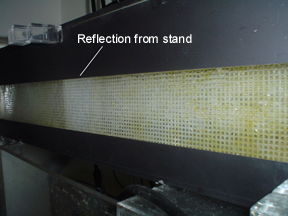
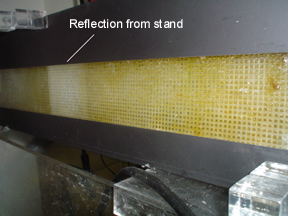
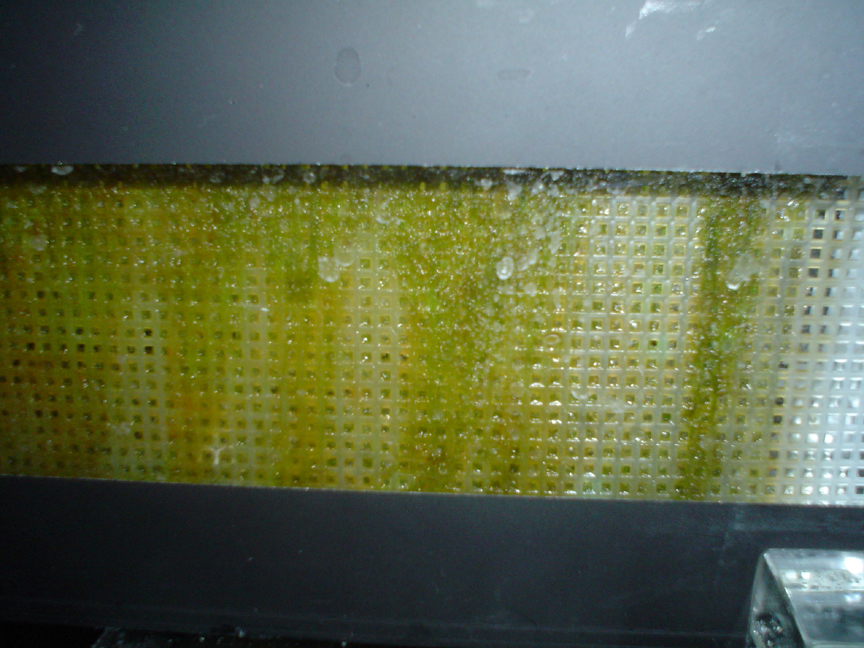
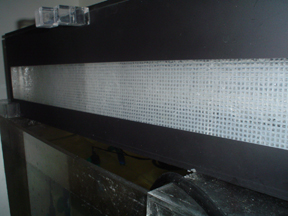
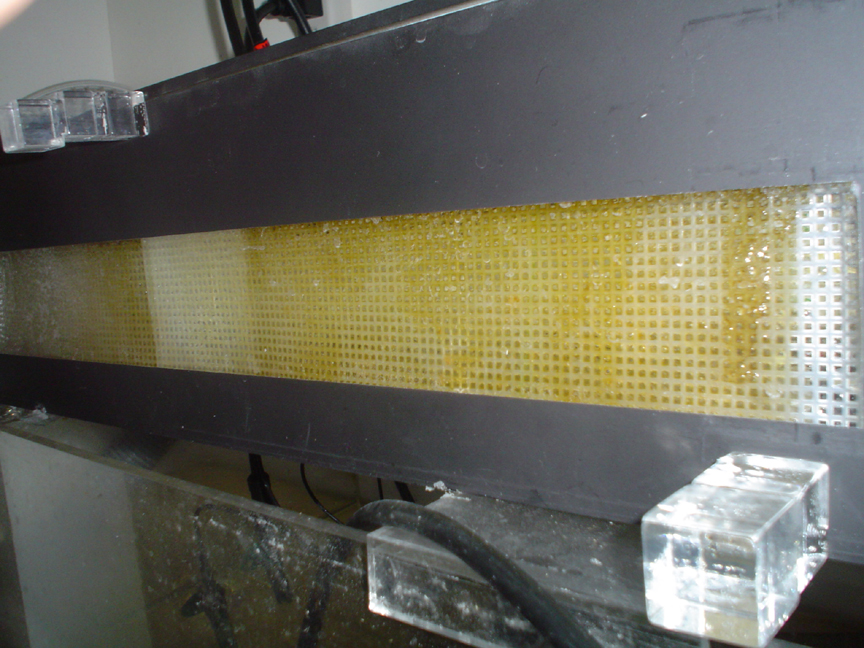
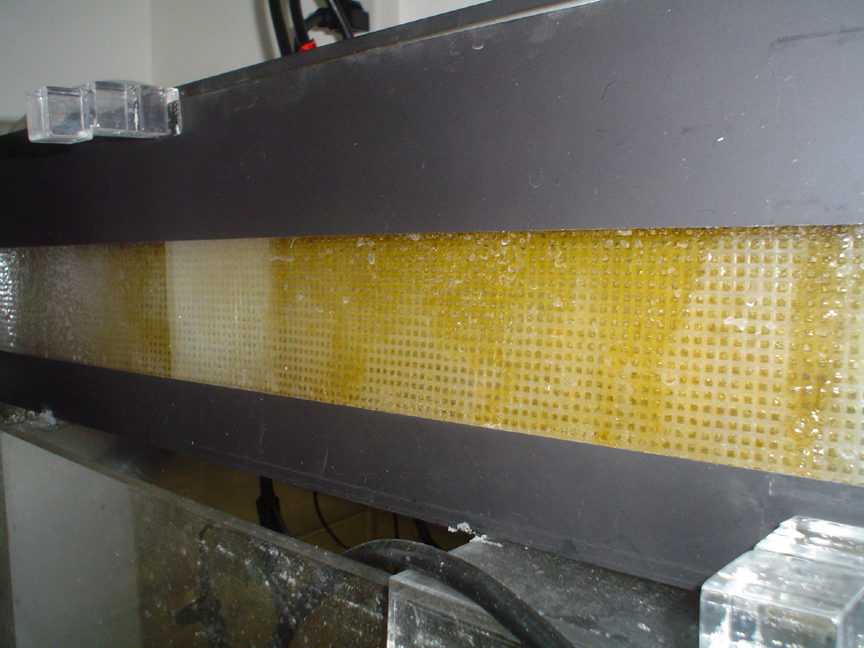
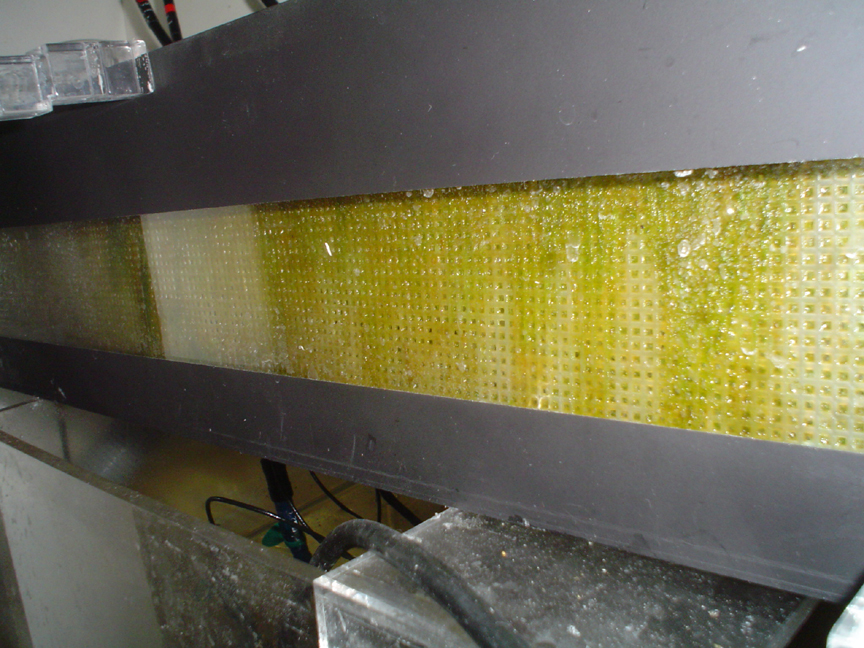
The Power Of Light, another example:
Reader "varga" on the RS site just did a cleaning and sent in these pics; here is before the cleaning... it looks like the screen has an even coverage all across it:
http://www.radio-media.com/fish/UserVargaS...RS&RF-3.jpg
But here is after:
http://www.radio-media.com/fish/UserVargaS...RS&RF-4.jpg
Notice that the center area has a tougher, stiffer algae that holds on stronger because it is made up of less water and more fibers (i.e., more N and P, less H20). Now why do you think that the stronger algae formed in the middle of the screen? Here's why:
http://www.radio-media.com/fish/UserVargaS...RS&RF-5.jpg
Yes, because of the lights. The screen may look evenly covered in light when you look at it, but your eyes can't tell the high power areas from the low power areas. Also, when you double the distance of the light, you would think the power of the light would be reduced to one-half; but it's actually reduced to ONE FOURTH of what it was. So when optimizing your design, you want the lights as close to the screen as possilbe, all the way across the screen.
-
Ok here is a four-part video I made of the last scraping of the screen of my original bucket before I give it to the LFS to replace the tank-divider screen he's been testing. This video is low-light (with a 5 year old 2-meg camera), so you can't see the algae on the screen, but the purpose is to see the technique of screen cleaning/scraping:
Hi-res:
Part 1: http://www.radio-media.com/fish/Scraping1.mpg
Part 2: http://www.radio-media.com/fish/Scraping2.mpg
Part 2: http://www.radio-media.com/fish/Scraping3.mpg
Part 3: http://www.radio-media.com/fish/Scraping4.mpg
YouTube:
-
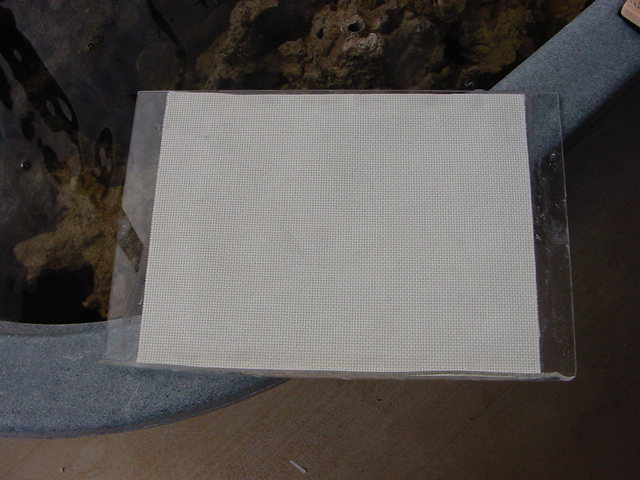
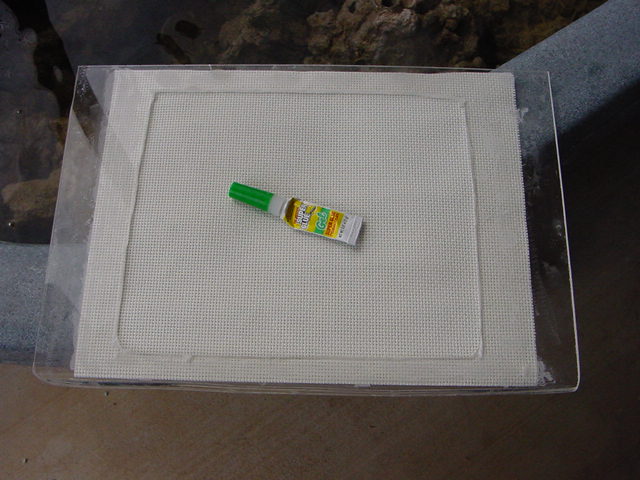
Underwater: You want to use a screen, which of course has holes in it:
This "plastic canvas" one might be easier to get into the slot after cleaning, and the edges will not wear; it also will hold it's shape so that a solid frame is not needed:
http://www.everythingplasticcanvas.com/pc-...sh-12-x-18.aspx
This "rug canvas" is made from fiber so that algae sticks to it the best; but it does not hold its shape when wet, so it will need a solid frame. Also, the edges will wear, so the frame will have to hold the edges down:
http://www.joann.com/joann/catalog.jsp?CAT...PRODID=prd12195
This "tank divider" is mentioned here because you can get them in any LFS, and because they come with clip-on edges that are great frames for any screen. However the screen material itself is very thin and smooth (needs sanding) with not many holes, thus during cleaning it's hard to get algae to stay on the screen:
http://www.aquaticeco.com/subcategories/2/...ank%20divider/0
Overall the rug canvas is the best but takes the most work; the tank divider is the easiest but works least well. I think the plastic canvas is best for most people. Many people ask about using the fiberglass screen from their windows (never use metal!). The main problem of this kind of "soft" screen will be getting it into the slot in the waterfall pipe; it will bend and fold too much. One way around this is to loop it around the waterfall pipe and attach it to itself, instead of slipping it into a slot. In this case you don't need a slot; a series of holes will work. This screen door method is only a last resort though, and will not work that well.
Ah-lim: Thanks. Hopefully you can transfer you great macro growth to a scrubber one day
-
Results of the day:
jski711 on the RF site says: "Well i ditched my euro reef skimmer and have not noticed any side effects from doing so. i'm still doing water changes on a regular basis but i have increased feedings tremendously and have no adverse side effects from doing so."
keithqueef on RC says: "Update. Well i received my screen from inland (12x12) last friday. and since putting it into my system my trates have gone from red to orange to now dark yellow not quite orange, i lost my color card so i dunno numbers. the screen is dense with it."
-
Part 2 of 2:
Then I placed the lights on the acrylic and marked off where the the bulbs will be shining through:
http://www.radio-media.com/fish/AcrylicMar...htPlacement.jpg
Some method has to be used to mount the lights to the sides. I'm using acrylic blocks and acrylic glue:
http://www.radio-media.com/fish/AcrylicMounts.jpg
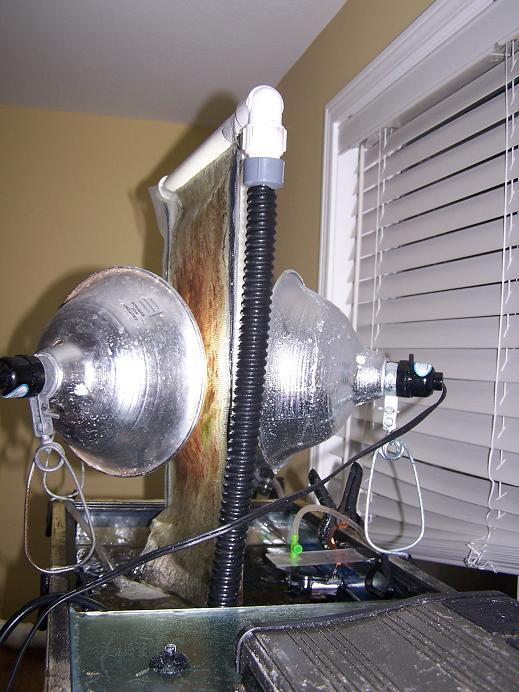
The light-mounting is a bit tricky, because the lights need to be removeable, yet be pressed up against the acrylic to minimize light leakage (which would be important for an above-the-tank placement in plain view). The lights are then placed in the mounts:
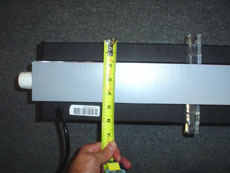
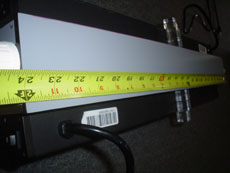
The overall size ended up being 6.5" high X 6" deep X 24" long:
http://www.radio-media.com/fish/AcrylicDepth.jpg
http://www.radio-media.com/fish/AcrylicHeight.jpg
http://www.radio-media.com/fish/AcrylicLength.jpg
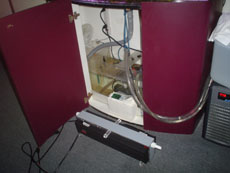
Here's a size comparison; the inside of the stand was once filled with filtration devices, and now it's just water:
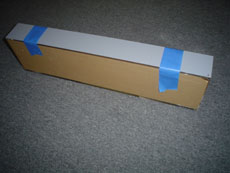
Taped and ready for spray painting:
http://www.radio-media.com/fish/AcrylicTaped.jpg
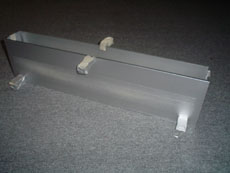
First coat was a metallic silver, so that the inside would reflect more:
http://www.radio-media.com/fish/AcrylicMetalic.jpg
After painting with black primer, and putting lights on:
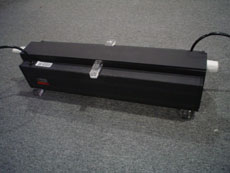
End view:
Side view:
Lid off, ready to use:
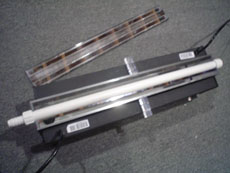
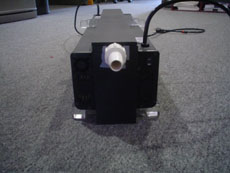
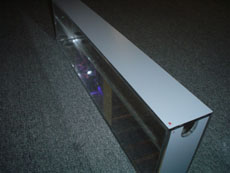
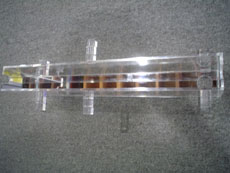
The long, low-profile pipe and screen:

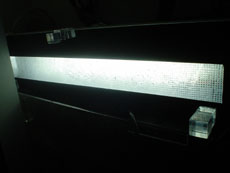
Lights on:
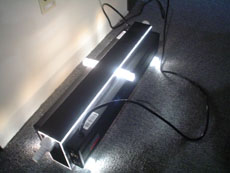
Setting on sump:
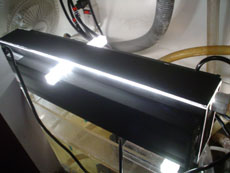
Running, with front light removed to see flow:
So, I rubbed algae from my original bucket into the new screen, then installed the screen and turned it on. I'm starting with the flow and lights on 24 hours, in order to speed up the growth. I'll decide later if I'm going to pulse the flow, and I'll wait for the algae to grow a bit before putting the lights on a timer. Also, there is no fan, because I wanted to make it as simple as possible for folks who wanted to try it themselves. I may try a fan later, but for now let's see how it does without one. Also also, I'm leaving my original bucket running, for safety, but of course this will slow down growth on the new screen.
-
Part 1 of 2:
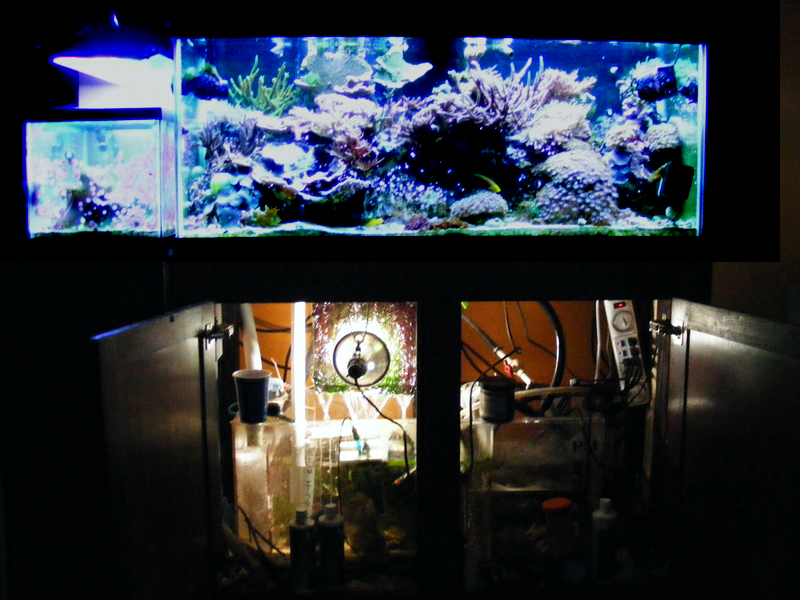
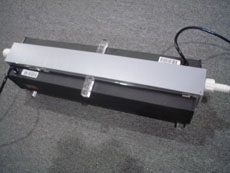
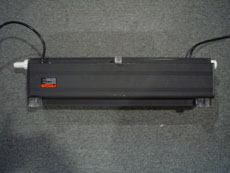
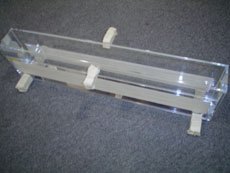
It's Time For The Santa Monica 120 Acrylic!
Ok it's time to move my screen from the ugly bucket by the sink (with hoses, wires, timers, etc) to under the tank where it can sit on the sump. The idea for this design came from all the readers who tried to install their screens over their sumps. Low profile is important for me, as it is to anyone without a fish room, so I picked 6" as the max height. That would give me room to lift out the screen and pull it out of the stand, with room to spare. And at 6" height, the pvc pipe will take up 1", leaving 5" for the screen. So the screen will be 5 X 24 = 120 sq in. This is good for a decently-stocked 90 like mine, or a lightly stocked 200 with no real nutrient problems. Here is the initial layout that I gave to the acrylic shop:

Wide screens like this are more efficient and powerful (with the same light) than tall narrow screens, but require more flow. My screen will need 24" X 35(gph/in) = 840 gph. However the same 120 sq in screen placed vertically would only need 5" X 35(gph/in) = 175 gph. The vertical placement has a disadvantage in that the water at the top gets filtered by the top of the screen, but then has to travel over the lower parts of the screen. Since it's already been filtered at the top, not much happens on the bottom part of the screen. This problem is eliminated with a horizontal screen since all the water that passes over the 5 inches of screen needs filtering.
Another good use for a low-profile screen like this would be for on-top of tank, when you want the pods to drain directly down into the display. Or, if you don't have a sump, the on-top placement would work great if you put the pump in the display.
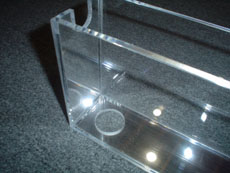
The acrylic box came back from the acrylic shop, finished beautifully. They still have the plans, so if anyone wants the same box, call Hastings Plastics at 310-829-3449 and say you want the "aquarium algae filter screen box". The only change would be the "U" cutouts for the pipe: Tell them to make them a little larger round, and a little deeper, since the pipe was hard to push into them (and it stuck out a bit which made the lid not close all the way. ). I did a little grinding, and now it's perfect. The cost was about $100, without shipping. Here's how is arrived:
Unwrapped. Notice the bottom and ends are mirrored acrylic, with the mirror facing inwards:
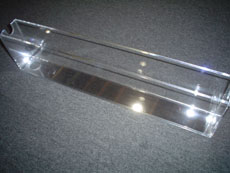
The lid fits mirror-side down:
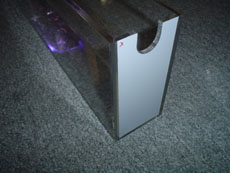
The pipe fits snug so that little light will escape. I had to grind the "U" cutouts a little bigger and deeper so the pipe would not block the lid:
The lid fit perfectly after the pipe cutouts were enlarged:

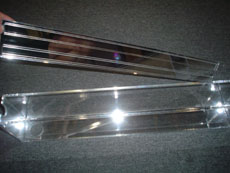
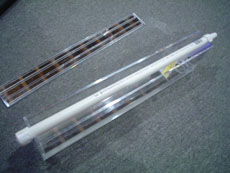
Here are the lights. They come with a combo of 10K and actinic:
www.petstore.com/ps_viewItem-idProduct-CU01124-tab-4.html
I removed the bulbs, and got 6500K and 3000K from here:
www.plantlightinghydroponics.com/ge-t5-ho-fluorescent-lamps-c-73_623.html
I'm going to set it up with 6500K on one side and 3000K on the other. Nobody recommednds 10K for macros, except for one person: The guy at Inland Aquatics that has been growing turf screens for 10 years. So, I'll try 10K soon, but not to start. Maybe you can start with 10K on yours and let us know how it works
-
Don't worry, it will grow well with that bulb
-
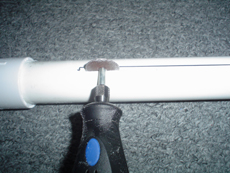
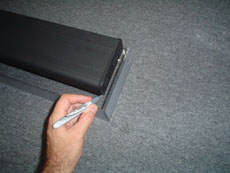
But we need a quick release design somewhere to make it easier to remove the screen for cleaning.
All the waterflow pipe designs lift right out for cleaning:
-
gny: Yep algae are like trees
Ah-lim: Cool, will be looking for the pics...
tunicate:
Sorry, but what's the purpose of removing the algae form the screen? I thought the more algae there is, the faster will nitrate & phosphate be removed.No, not the more there is. Instead, the more GROWTH there is, the more N and P are removed. And growth is best when the algae has been cleanned/scrapped leaving a thin amount remaining on the whole screen. Once the algae gets to be thick at all, three things happen:
1) It slows or stops growing all togther, and thus takes up no more N and P.
2) The outer layers start shading the inner layers, causing the inner layers to die and put N and P back into the water (just like a skimmer cup that is overflowing back into the sump).
3) Pods start getting out of control on the screen, eating the algae, and then flowing back into the tank, thus putting N and P back into the tank.
Harvesting (cleaning or scraping in your sink with running tap water) the algae off the screen (ONE side of the screen per week) removes all the N and P so you can through it away, and kills the pods too.
Mega Powerful Nitrate and Phosphate Remover - DIY!
in General Reefkeeping_
Posted
.
Here is a note to skimmer manufacturers, as well as manufacturers of acrylics/plastics, lighting, and pumps. One way to benefit from scrubbers is to start building them, so as to make life easier for aquarists. There is no patent, and I have no interest in building them, although designing them is fun. Promoting them is fun too. But manufacturing is not my thing, so hopefully some folks will start making at least a simple version (like the Santa Monica 120) available. Look at it like this: Manufacturers of skimmers currently make an expensive product that has pumps and acrylic/plastic parts. Manufacturers of lighting currently make an expensive product that has bulbs, ballasts, and frames. Neither of these products has all these parts in one unit.
Scrubbers, however, do. Instead of viewing scrubbers as a make-at-home rig that stops people from buying skimmers, manufacturers should instead view scrubbers as a piece of aquarium equipment they can manufacture which includes acrylic, plastic, lights, pumps, timers, fans and complex parts, all woven together. Imagine the designs that could be achieved which would allow the most water flow, the most air, the most light, all in the least space possible, and for the best price. It's a designer's dream. Sure, many folks will continue making their own scrubbers, but at some point these folks will upgrade their tanks and will not want to hassle with building larger versions. So, here are some things I thought of that manufacturers could offer:
o A simple low-cost design; just an acrylic box, preferably with a mirror inside finish. The customer would add all other parts. This is what I built.
o Complex designs that would be needed to fit into the many different places that aquarists have: Above a crowded sump, behind the tank, vertically next to tank, next to a tank in a stand-alone furniture finish, or on the wall as a decorative item.
o Skimmers designed to work with scrubbers, by having one connect/feed the other.
o Scrubber lights with built-in timers, for nanos.
o Ultra small scrubber boxes for nanos, possibly with self-contained LED lights, the size of a cell phone.
o Nano hoods with scrubbers built into them.
o Sumps with built in scrubbers, instead of built-in wet/dry's.
o Display lighting-fixtures with scrubbers connected to the back of them, such that the scrubber uses the same light.
o Tank options, such as scrubber-on-backside.
o Auto-cleaners that clean/scrub/scrape the screen automatically.
o Hand/electric tools specialized to clean the screen.
o RODI sprayers that give the screen a FW spray periodically (to kill pods), possibly doubling as a top off.
o Non-destructive pumps to get pods from the sump to the display.
o Self-priming pumps built in to scrubber, for placement on top of displays with no sump.
o Quick-disconnect waterfall pipes.
o Double and triple thick screens, which allow algae to stick better during cleanings.
o Multiple screens, with large areas for large tanks.
o Ultra thin LED powered flexible screens, which could weave around obstacles.
o Fan on a temp controller, to keep water temp preset.
o Uniquely shaped T5 panels, such as 12 X 12, to perfectly fit a screen.
o Safety switches that cut off the lights and/or flow during certain conditions.
A great first model could be targeted to smaller tanks (SW and FW) that may not have sumps, and thus would include a self-priming pump inside the scrubber. It would sit on or near the display and would pull water up to it. It would drain right back to the display, and would give the customer the option of letting the algae grow out the drain (and into the tank to feed the fish), or removing the algae as it comes out of the drain, before it gets to the display.
.
.