

SantaMonica
-
Posts
765 -
Joined
-
Last visited
-
Days Won
6
Content Type
Profiles
Forums
Gallery
Posts posted by SantaMonica
-
-
That's one of the design problems. One idea is to have heat sinks extend to the water surface. Or, have a heat-conductive layer on the PCB, below the clear resin layer.
-
.
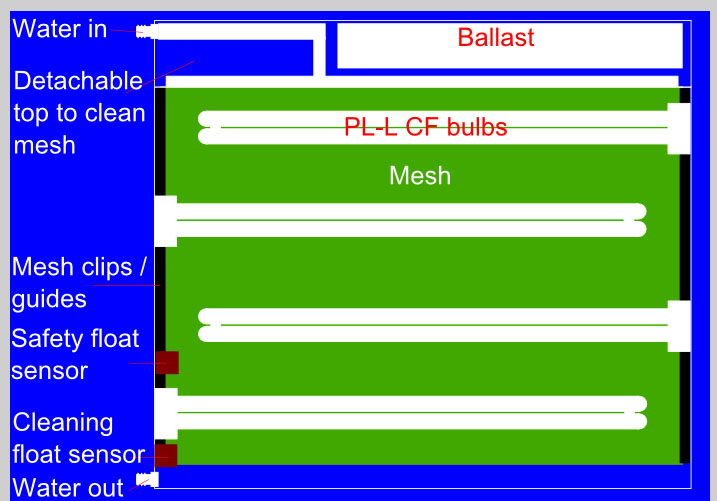
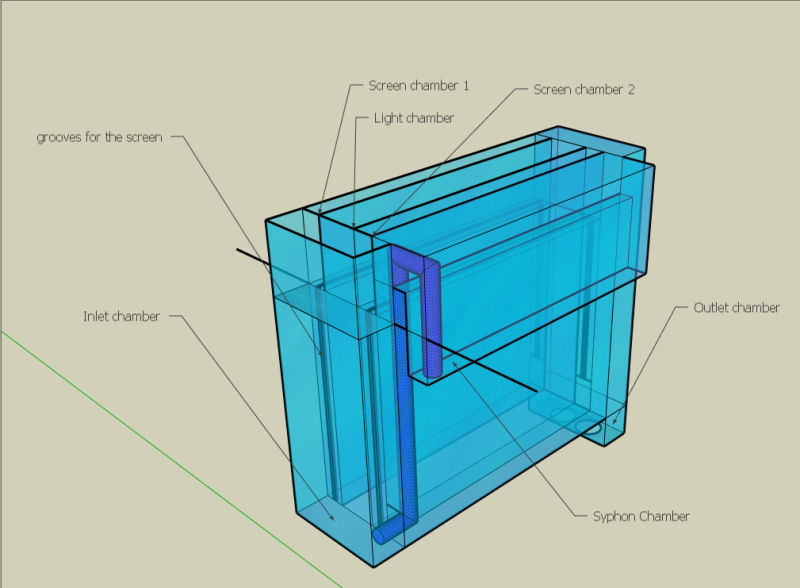
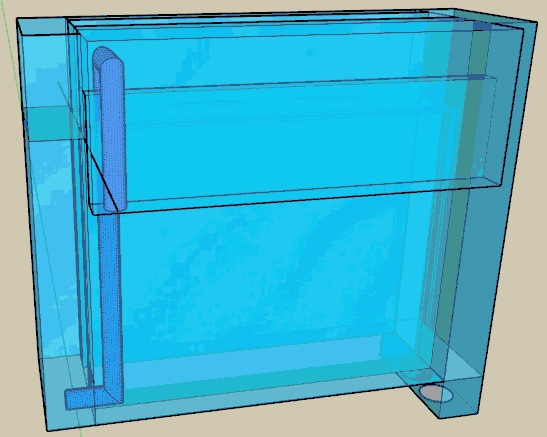
The Santa Monica Light-Screen
After much thought about design (but no ability to build), here is my version of a G3 scrubber:

A light-screen is a scrubber where the screen IS the light, and the light IS the screen. This changes the game when it come to scrubber performance in a small size. Unfortunately, you can't DIY these, unless you happen to be both a plastics engineer and an electronics engineer. However I thought that if I posted these, they may spark some ideas for regular scrubbers, or, someone may work for a manufacturer who can actually build them. I'll be the first to buy one.
As a reminder, G1 scrubbers are DIY sumps/buckets, while G2 scrubbers are enclosed acrylic boxes. G3 scrubbers have luminescent screens, whether they be LEDs, fiber optics, or lasers. My design is LEDs; so compared to buckets or acrylics, these plastic-covered LED light screens:
o Are ultra small/thin.
o Have no algae die-off (see drawing below).
o Are practically unbreakable.
o Are electrically safe (12 volts or less).
o Can be made as small as desired for nano's.
o Can easily be built into the hood of a nano.
o Are double-sided with almost no increase in size.
Disadvantages:
o They will be expensive (equivalent to good skimmers).
o They are impossible to DIY

Here is my version of a nano scrubber:

Same concept, just smaller, and replaces the skimmer, mechanical filter, and other filtering "devices" in pre-fab nano's like Aquapods, Red Sea Max's, etc. Would actually make nano's less expensive, better filtered, more compact, and more reliable.
.
.
-
Well after three months of testing color temps, I've determined that 3000K out performs 6500K. It's not a huge difference, but enough to notice. At first they are about equal, but as the green hair gets over an inch thick, the 3000K continues getting thicker until it hits the acrylic wall (at 1.5"), whereas the 6500 stalls and rarely grows enough to reach the wall. So I'm ordering all T5HO 3000K replacement bulbs.
-
Look in the Builder Directory... one of them can build it for you...
-
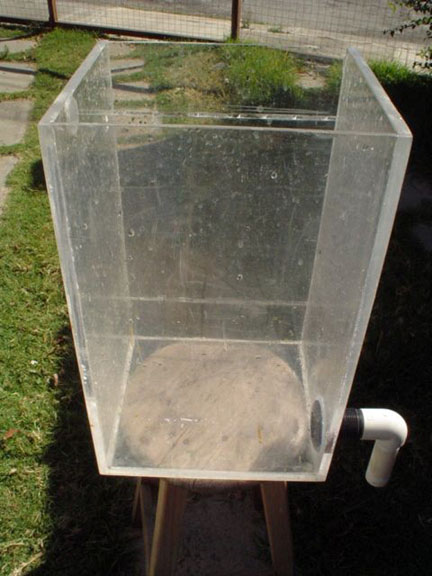
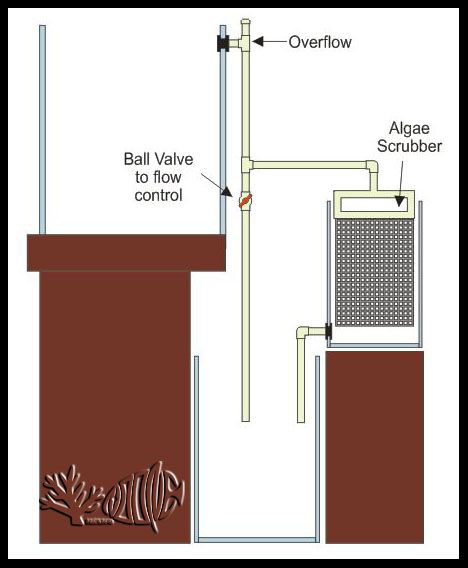
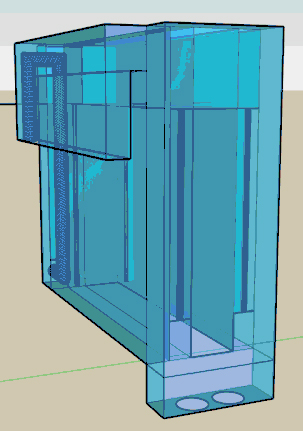
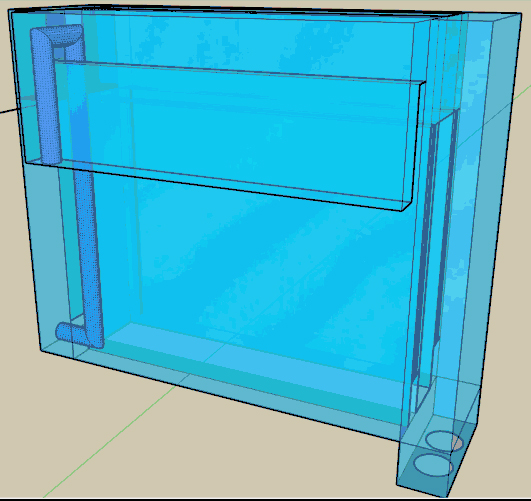
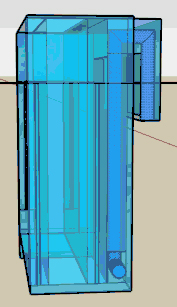
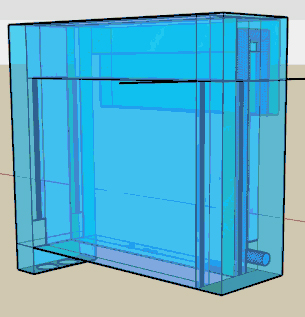
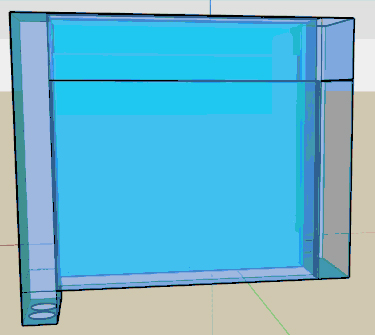
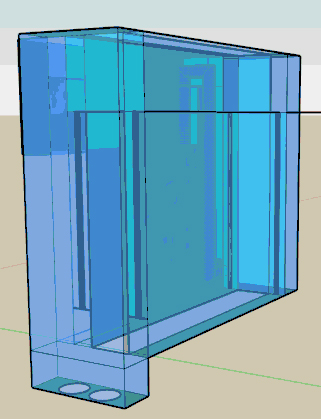
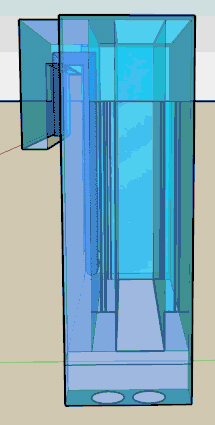
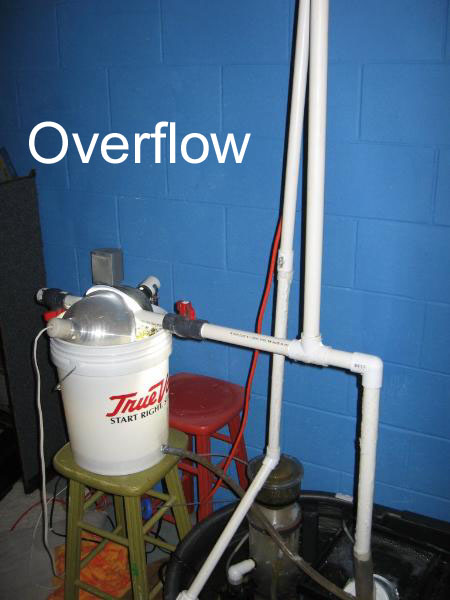
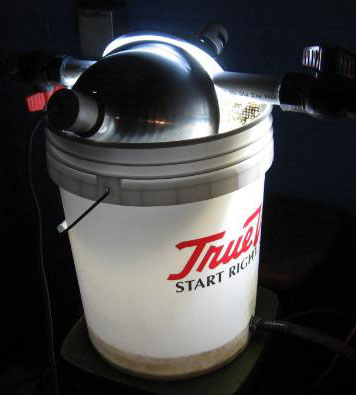
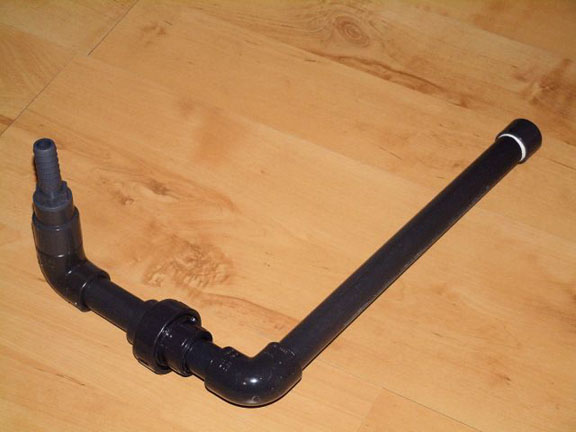
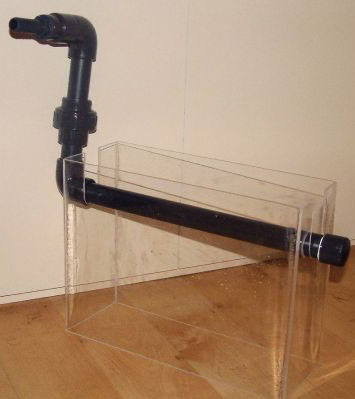
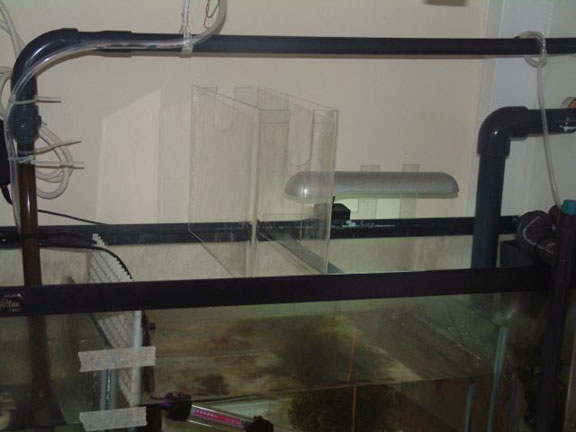
A Red Sea Max will be tough, without un-Maxing it. I think the easiest is to build an external sumpless version:
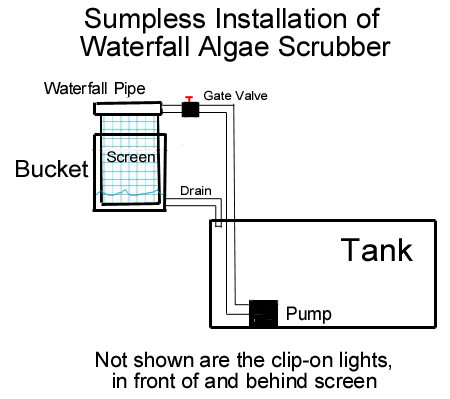
We are working on the design of an easy-to-attach nano version that could easily be made by a manufacturer, but until someone makes one, it's build-your-own.
-
Succeses of the Week:
small_ranchu on the MFK site: "Here is the progress on my goldfish tank. 90 gallon tank with 3 goldfish + heavy feeding. Nitrate reading at the end of the week is usually around 40 PPM with a lot of brown algae on the wall. After 1 month of installing the Scrubber filter, Nitrate reading is 10 PPM and brown algae is disappearing slowly."
argi on the MD site: "I set up my scrubber on my 54 gallon tank a few weeks after its initial set up (it has been running for around 3 months now). One thing I have noticed on this tank compared to all my past tanks is the lack of algae growing on the glass. In the past I always left a magnet cleaner in the tank because I would have to scrub the brown diatom algae off the glass at least once per week. Now with this current tank I haven't had to clean off the glass nearly as often. While I still clean it, usually weekly to every other week, I can still see in the tank after 2 weeks!!! So far I am very happy with the results."
johnt on the UR site: "after 10 weeks of running a screen I can say it's the best method I've used, it also takes out metals and other nasties, and I've not even reached the turf algae stage yet. In the 10 weeks it's been running I've not run any reactors or the skimmer (I'm saving a small fortune not having to buy phosphate remover). I'm still running the refugium, Chaeto and deep sand bed, all corals are doing exceptionaly well, N&P are remaining low and rocks are looking better by the day."
Elliott on RC: "I built one about 5 wks ago and so far it seems to be working well. My cyano has diminished and there is less cleaning to do on the glass."
Mtroboer on the MASA site: "my algae is already visibly starting to disappear after only 1 1/2 weeks! Also added a PC Server fan in front of the screen and dropped my temps from 29.8 avg to 25.8 avg, saved me from buying a energy hungry chiller! First time in little more than a year I got to see results regarding getting rid of nuisance algae as well as dropping my high tempratures!"
Keifer1122 on the RS site: "Aquapod 12 gallon update: Its been couple days short of a month, and still no water change, my N & P have been at zero for 3 weeks now. everything is still growing just daily dosing, daily 2-3 feeding times a day, and weekly scrubbing"
bigtanner on RC: "I built this little one for about $65, pump, light, and all plumbing needed. Some people frown on these things and some people praise them. It's about like anything else really. I have had success with mine. Since building it and hooking it up, my tank is basically algae free. I also went from running my magnet daily to only running it every three to four days. [...] I never have any bad algae in my tank, my water is always crystal clear, and since adding it, I run my magnet a lot less than I used to.
corinna on the AC site: "I started out as a sceptic, but after spending a fortune on phosphate absorbers, carbon, sponges, water changes etc, Im convinced. Two months in, ive not done a water change or cleaned the glass, just to see what happened. Zooanthids are reproducing, seahorses are fat and active, values are reading zeroes. Scallops are happy. Plus I feed a lot."
-
Part 3 of 3
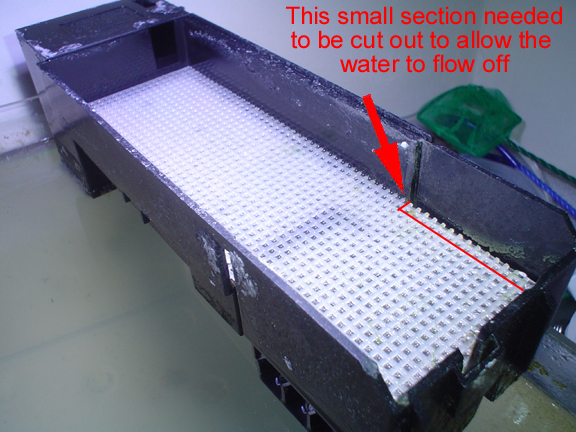
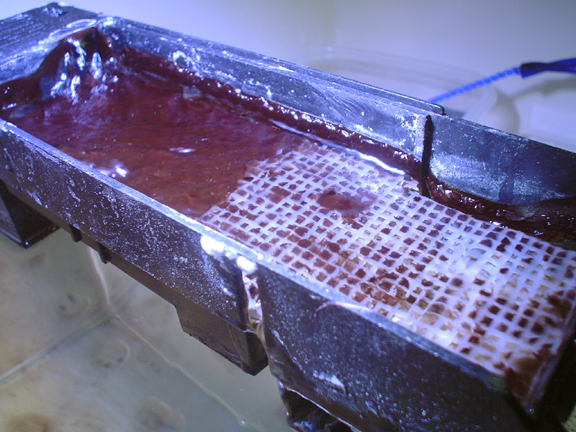
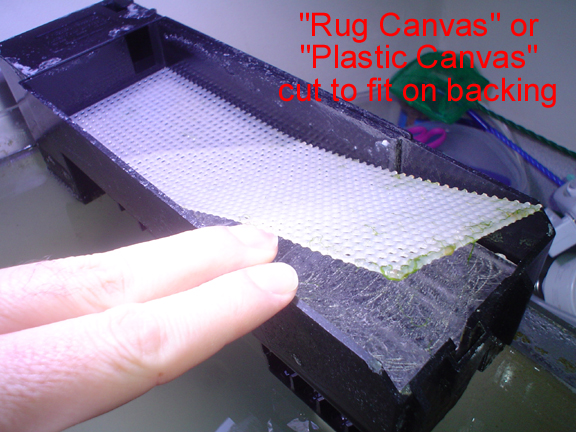
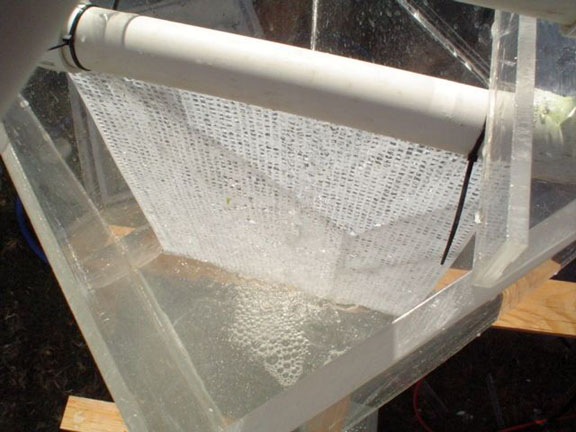
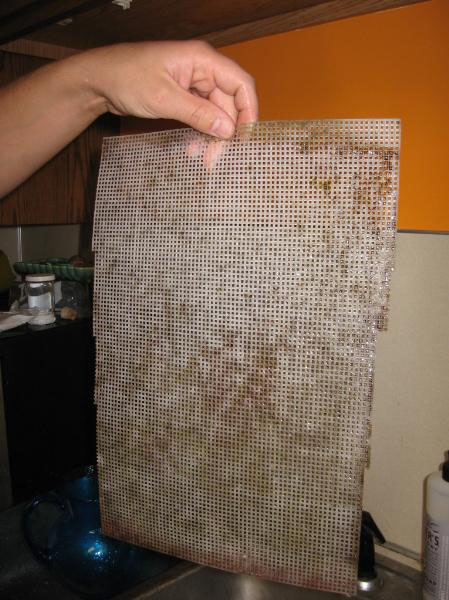
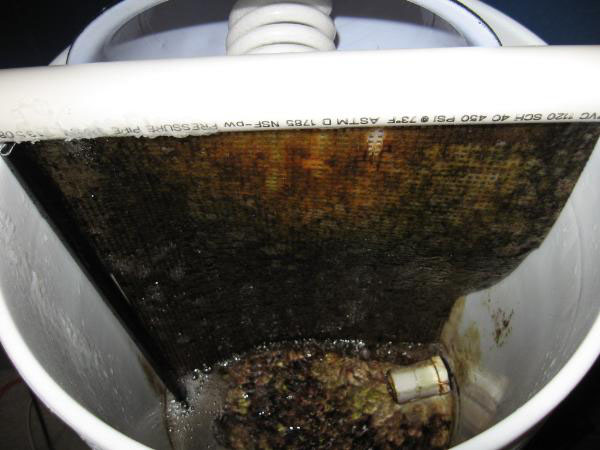
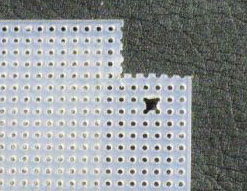
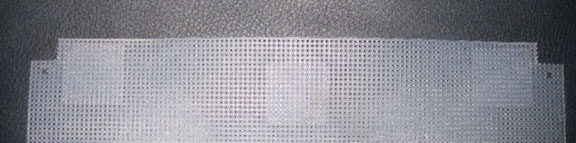
Rug canvas is preferred because it lets the algae to attach better, but since rug canvas is flimsy, you'll need to epoxy it to the backing. Plastic canvas (pictured) is rigid and can just be set down on the backing, but it does not hold algae as well.
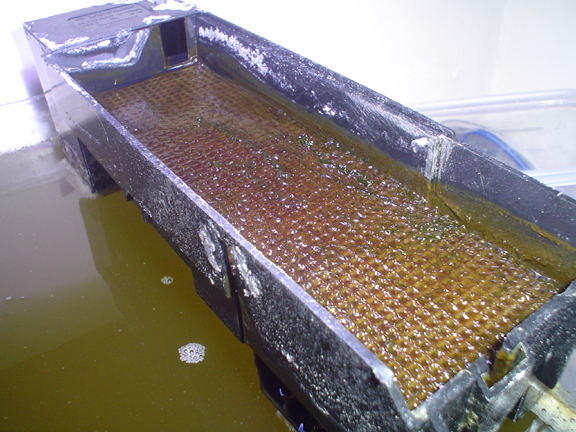
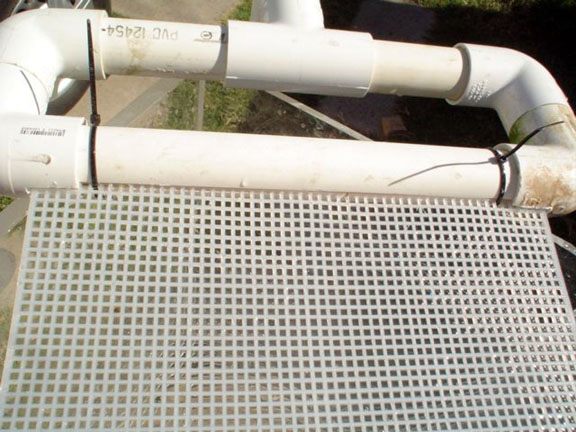
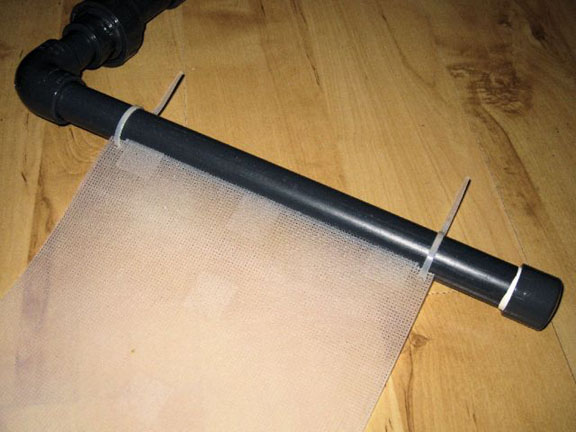
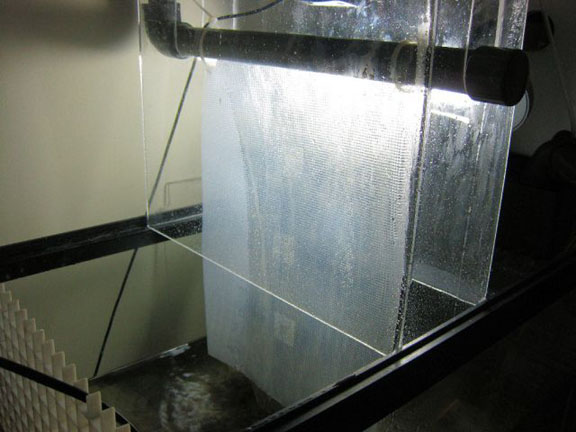
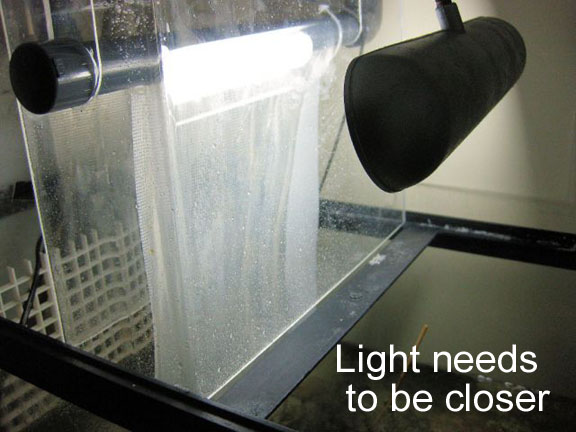
Here is the screen finished. Water should flow off the edges and drain out, but if it collects and gets too deep, cut a little section as shown and it will drain out rapidly:
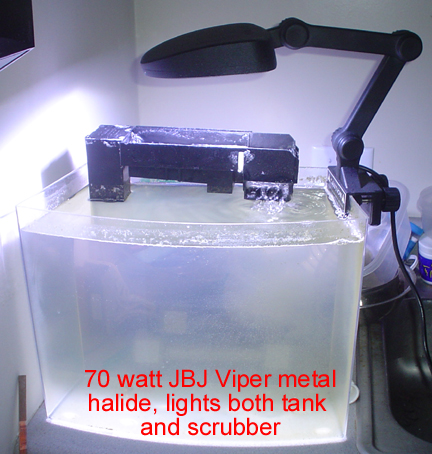
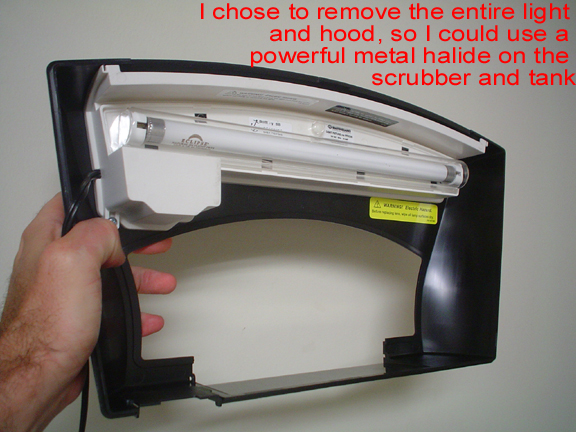
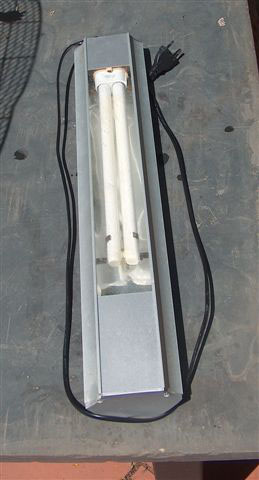
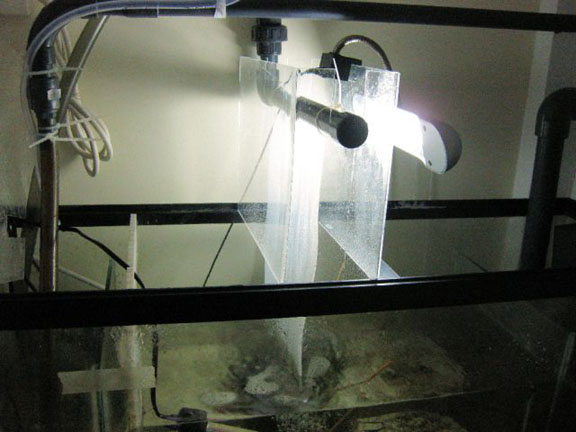
Attach your light; a halide was chosen so as to get good growth, easy attachment to the tank, and strong lighting for corals:
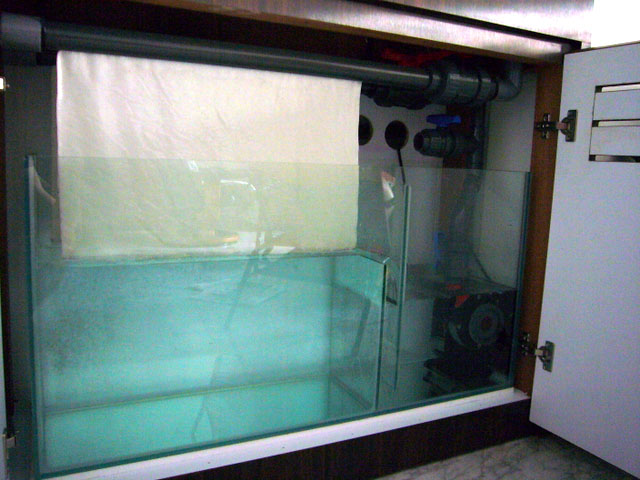
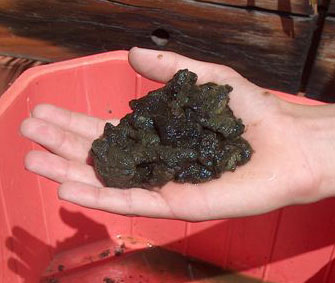
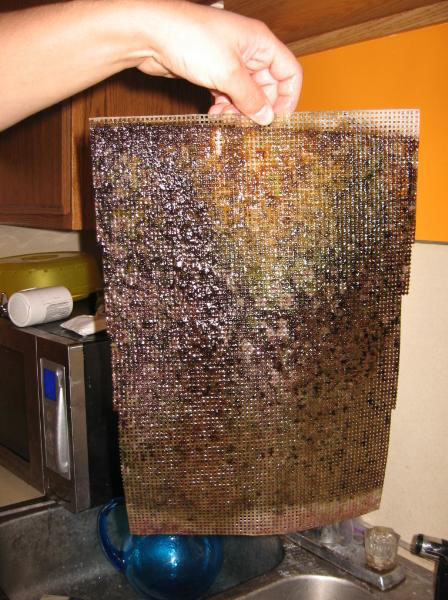
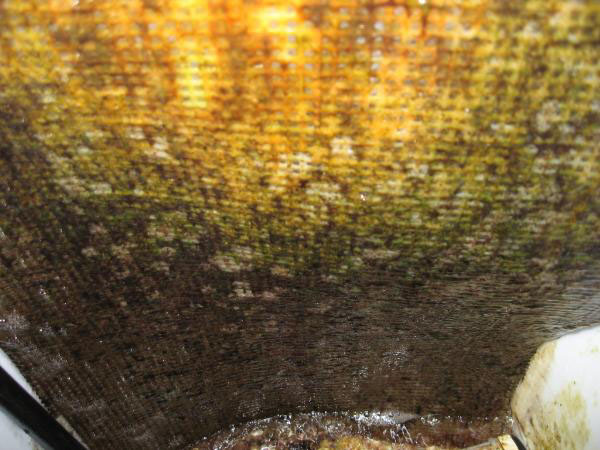
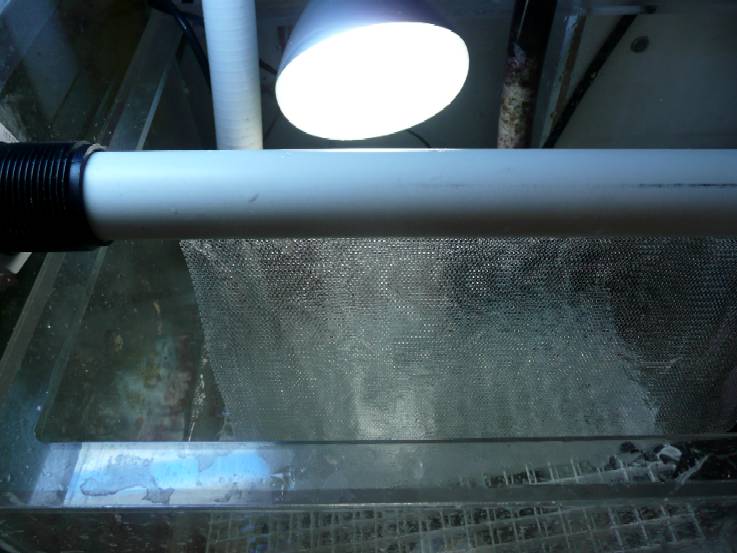
Here is the screen with a fews days of growth (food was put into the water to rot):
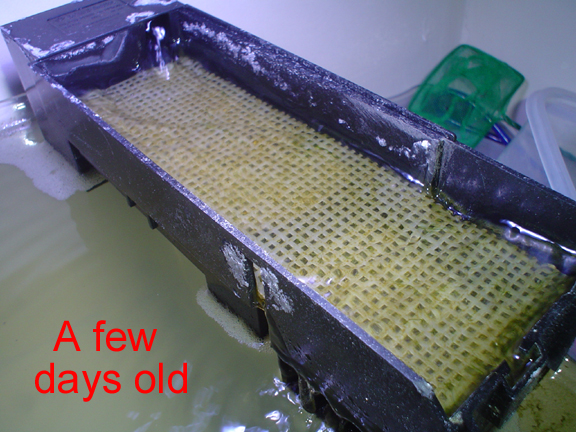
A few more days:
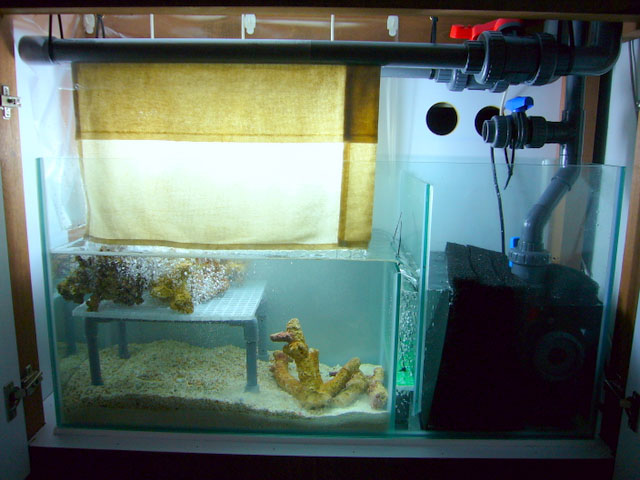
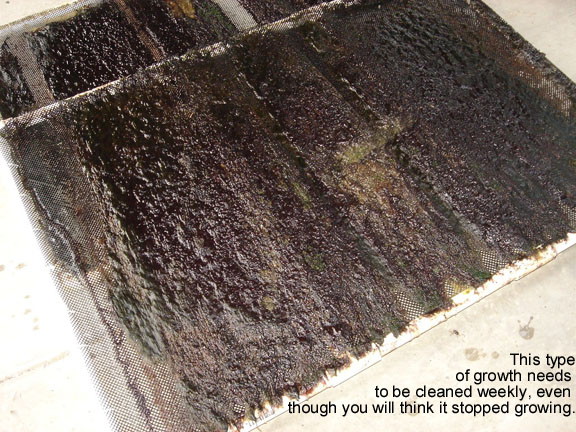
Begin to do your weekly cleanings, 1/2 per week:
Cleaning video:
http://www.radio-media.com/fish/6galCleaning.mpg
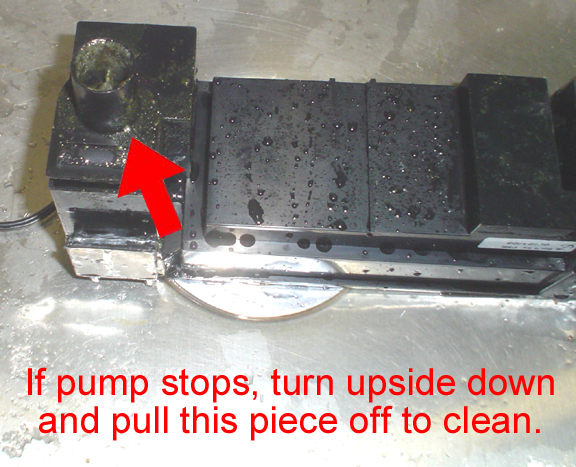
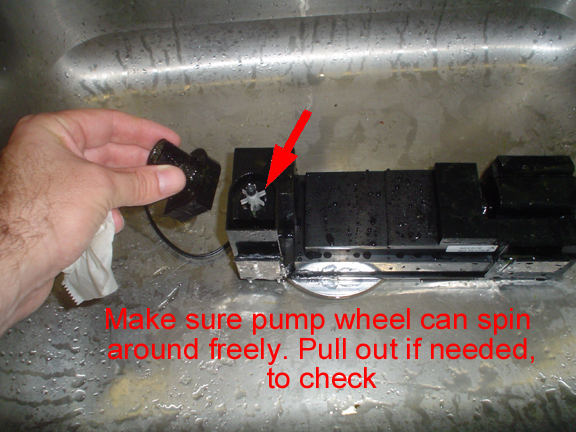
If the pump ever stops, turn it over and remove the round part, and check to make sure the little wheel can turn freely:
Pump check video:
http://www.radio-media.com/fish/6galPumpStop.mpg
That's it! Post your nano scrubber pics!
-
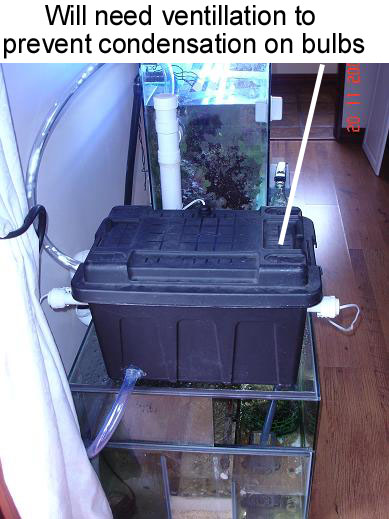
Part 2 of 3
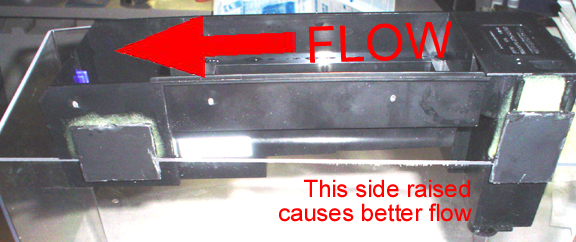
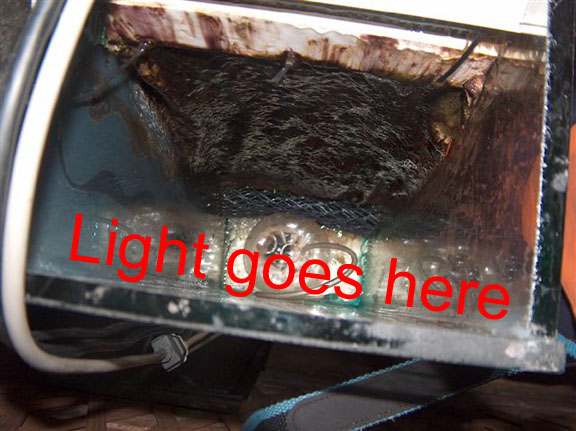
Looking from the backside, see how the filter box will set on the wall:
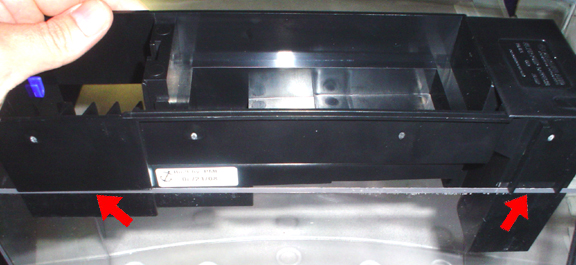
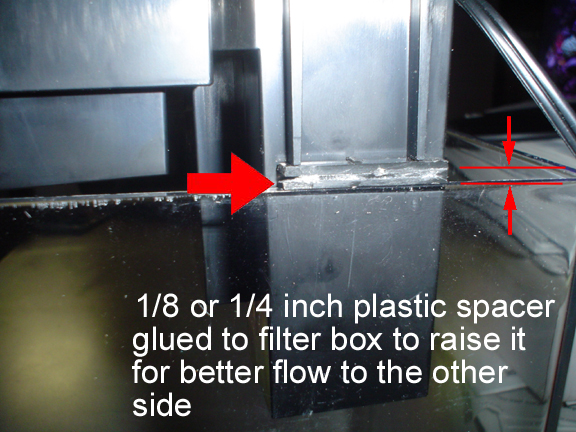
use a little bit of scrap plastic to raise this side a bit:
Now, epoxy some plastic sheet (I just cut them out from the hood material) onto the filter box so that it will hook onto the wall; the epoxy will also hold the little plastic scrap in place too:
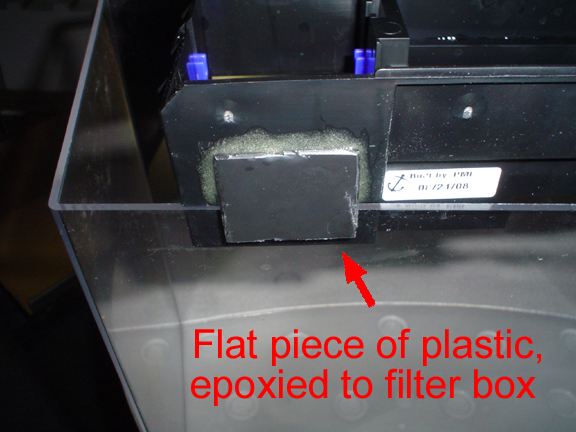
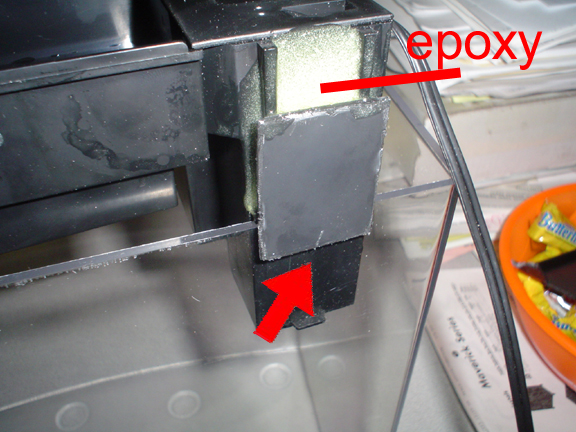
Mounting done:

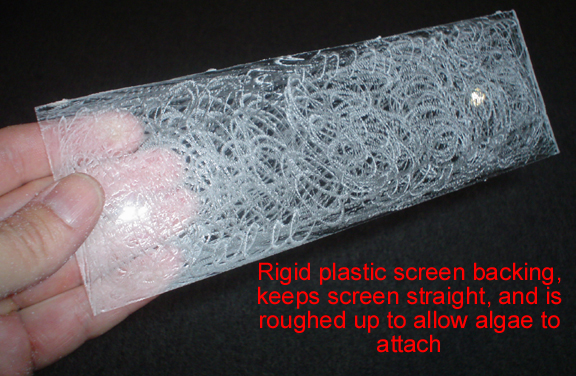
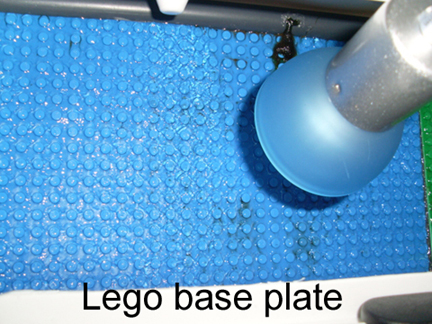
Now cut a piece of hard plastic (any color, any thickness) to fit in the filter box. Use sandpaper or a drill or a file to make the surface rough:
Now cut a piece of "Rug Canvas" or "Plastic Canvas" (found at any sewing or craft store, or online) to fit on the backing:
-
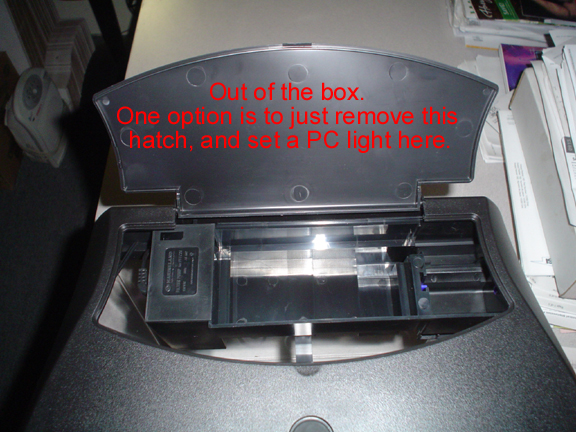
Part 1 of 3
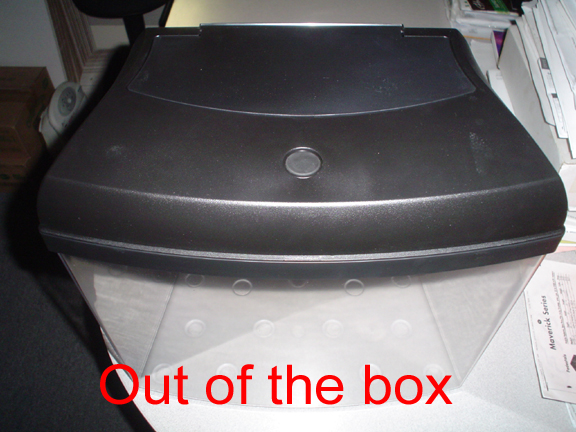
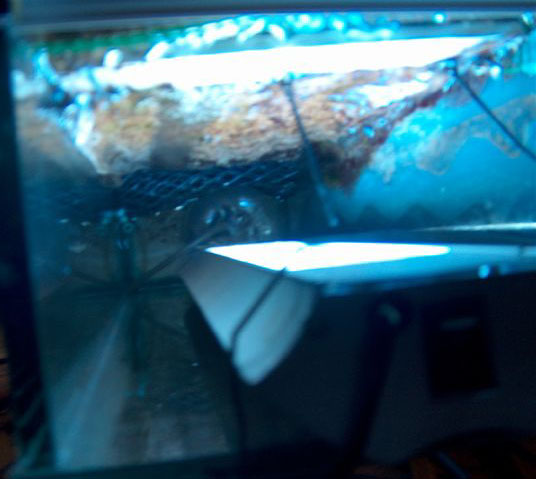
Here is an easy DIY for a nano. This one starts with a Marineland Eclipse 6 gallon, which was chosen because of the easy-to-access hatch on the top:
First thing you need to do to the filter box is cut out this section, using a Dremel cut-off tool, or even a soldering iron:
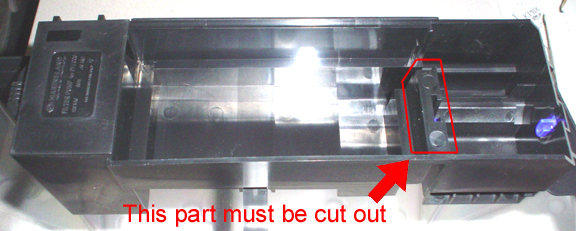
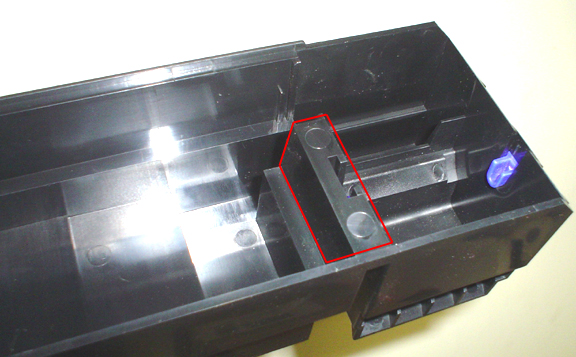
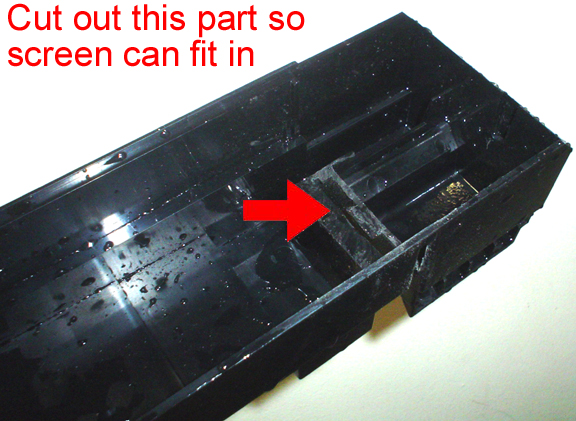
Doesn't need to be a smooth cut, since water will be draining down through the holes anyway.
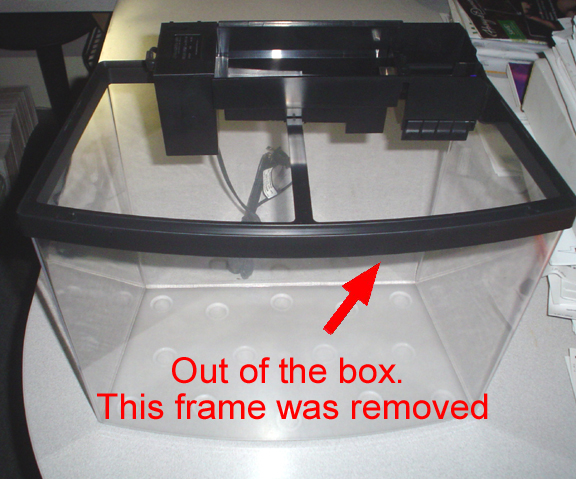
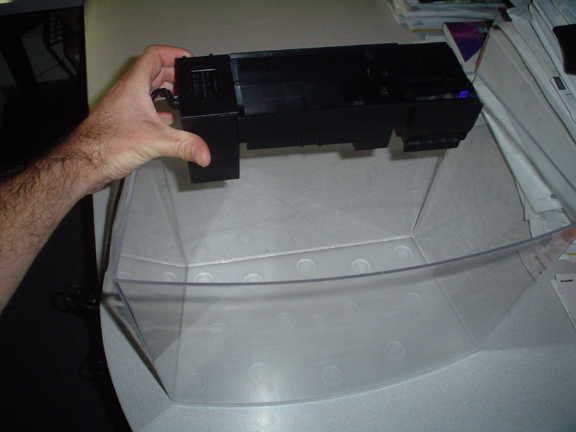
Now, test fit the filter box on the back wall:
-
.
Scrubber FAQ 1.0 is now complete, and will be updated periodically:
-
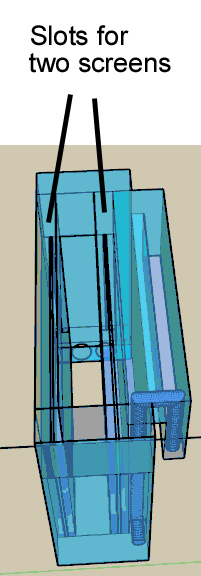
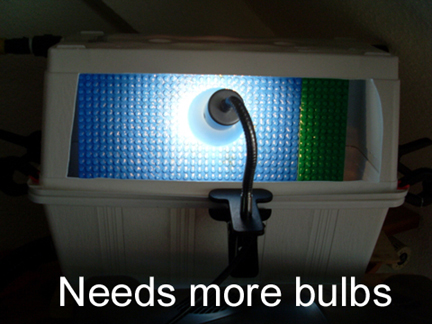
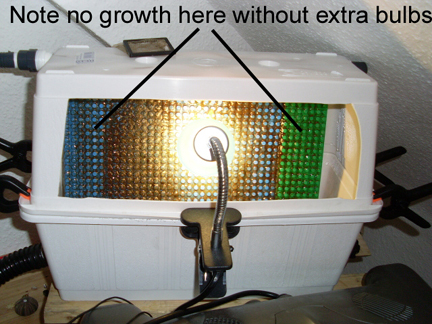
Reminder Of The Day: Number Of Lights/Screens
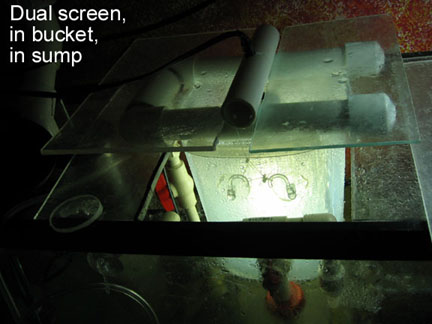
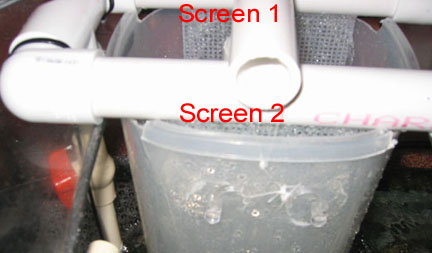
One-light between two-screens: Makes better use of the light, but leaves the other sides of the screens unused (in the dark), thus wasting half your flow. The big advantage is cleaning: You can clean one screen, and leave the other in operation, which give you more consistent filtering.
Two-lights on one-screen: Makes better use of the screen (both sides are lit), but can waste light if not reflected properly. Advantages are (1) redundancy of the lights: If one goes out, you'll still have filtering until you can buy a replacement, and (2) higher performance for its size, since each side of the screen gets hit by light from both sides, especially right after cleaning when the algae is thin.
Best of both worlds: Multiple lights between two screens. Uses the most flow and power, but is always filtering, and will never go totally "dark" unexpectedly.
-
Wow Ice that is now a powerful setup! Looks like you also even matched up the weave on both sides, so it looks like one
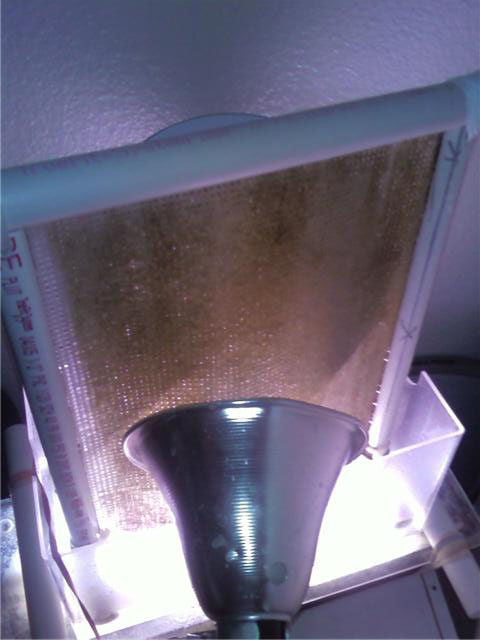
 Algae starts growing quickly in rug canvas.
 -
Probably is just the normal progression of the screen. I've had things decompose too, but found it did not increase scrubber growth. Turns out that just the regular rotting of leftover food is by far the biggest contributor.
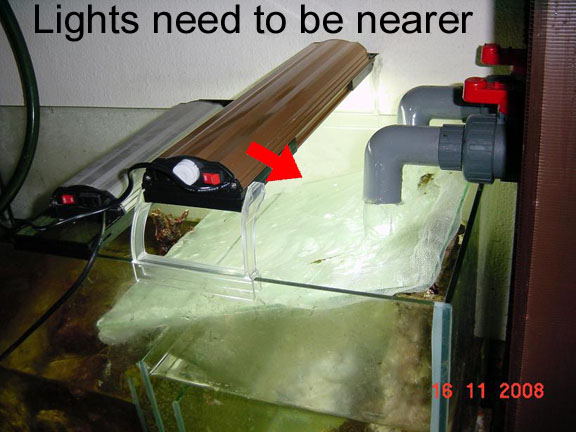
To reduce splashing, did you try to wided the slot?
-
Feeding update: I've begun increased feeding, because my clown tang is getting skinny, and also because I want to try to keep a variety of non-photo NPS corals. So in my 90g with scrubber-only filtration, I'm currently feeding 4 cubes mysis, 5 ml Reed's Shelfish Diet (phyto), 5 ml Reed's Rotifeast, and 5 ml Reed's Arctipods (copepods), and 2 krill (for white eel) daily. Also one whole silverside weekly (for blue eel). For reference, 1 ml is about 2 pumps from a typical phyto pump bottle.
Since I increased to this amount, I'm now getting my first detectable readings in several months (Salifert). Nitrate is a slight pink... varies between .1 and 1. Phosphate is a barely visible blue; sometimes I'm not sure if it's really blue or not, but it's definitely not the crystal clear it used to be.
Pink coralline is continuing to take over, and the last two square inches of nuisance film algae disappeared last week. Some spots of cyano are still trying to hold on, but the coralline is overtaking them.
So the goal now is to see how much I can actually feed while still keeping N an P low. I don't think they need to be undetectable; I think my goal is to keep nuisance algae from forming, while at the same time being able to sustain non-photo NPS corals. BTW I added a few SPS frags on my new frag tray, and they seem to be doing well.
-
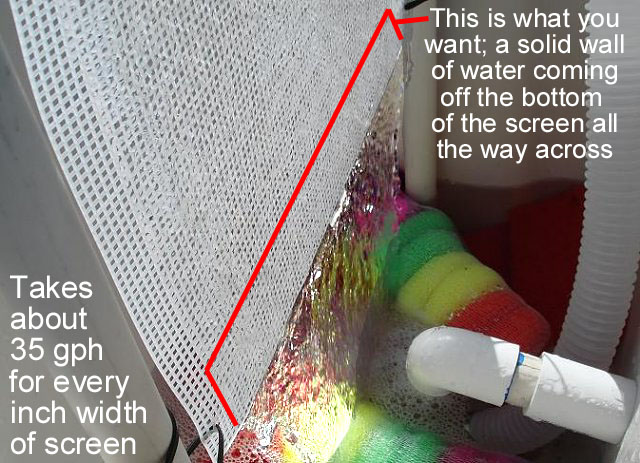
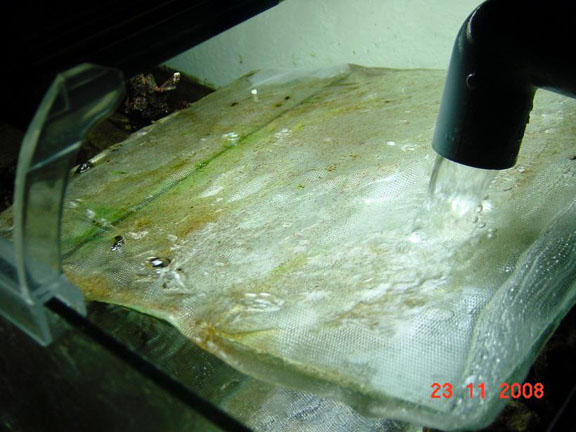
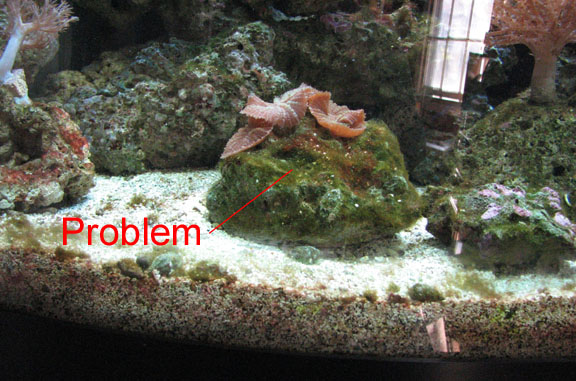
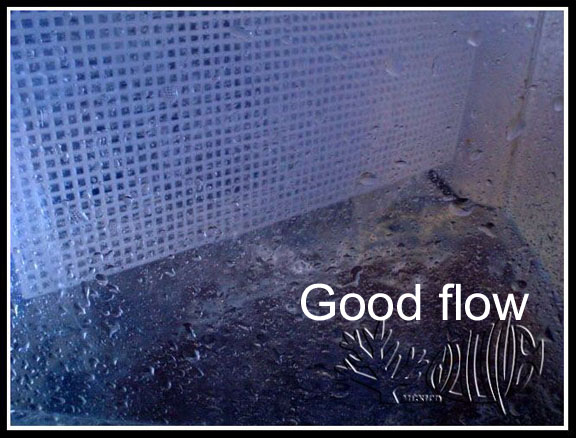
No, oil painting canvas has no large holes. Large holes is where the algae stays after you clean, and it starts growing from there. For flow, you want as much as you can get without spraying/splashing. You want water flowing off all parts of the bottom, like this:
-
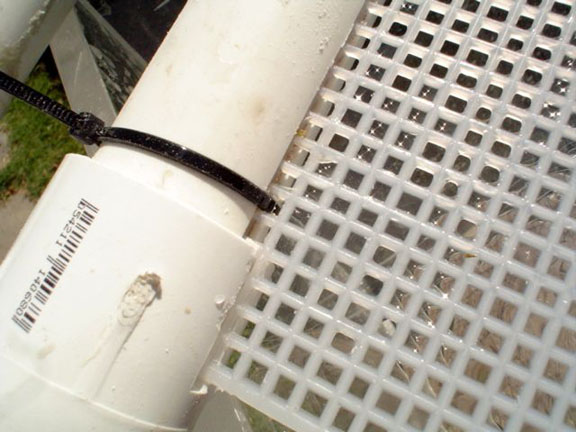
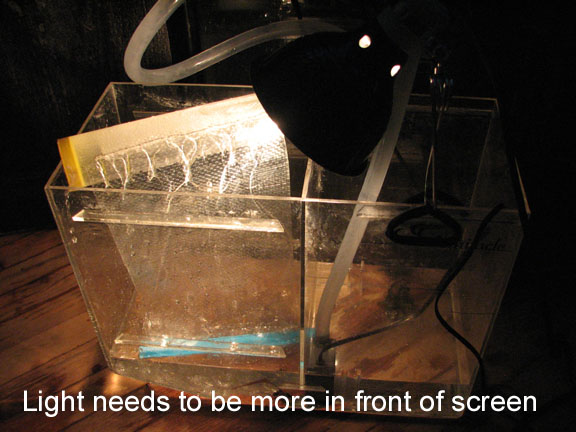
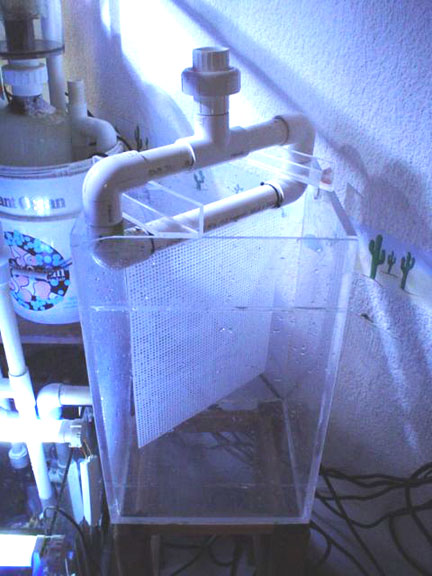
Congrats on a very nice acrylic build! I always like acrylics, because they let the light get right next to the screen for much better growth. Also the wide-screen is more effective than a tall screen. And the flow off the bottom looks good, so you are probably near the 22 X 35 = 770 gph recommended flow. Let me see if I have your design right: You are using a rigid 8 X 22 screen which sits on the tank below (thus you don't need tie-wraps to hold the screen on). Display is 60" x 30" x 29" = 225 gal (US).
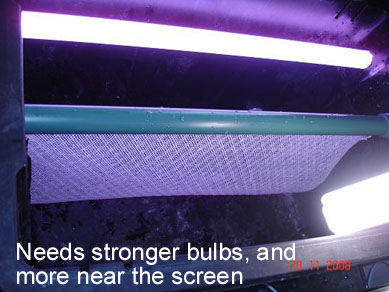
Well the great news is that the T5 lighting, being so near the screen, and with the good flow, is going to give great growth (I get 1.5" thick algae on each side of my screen). I'll give you the less-than-great news now, and you can decide if you want to change anything or just try it for a while and see.
My biggest concern is the screen material. Looks like you drilled a few holes in the sheet, which is better than smooth, but what's going to happen with thick growth is (1) the algae is going to slide right off the screen into the water, and (2) re-growth is going to be slow because no algae is going to stick to the screen after it falls off or after cleaning it. Quick partial fix: Get a power sander and rough-up the screen so much that you can't see through it any more. Proper fix: glue TWO layers of "rug canvas" to the sheet; go to a craft/sewing store near you, or order online at a place like this:
http://www.joann.com/joann/catalog.jsp?CAT...PRODID=prd12195
With this rug canvas, algae will not slide off, and when you clean it weekly, algae will remain stuck in the fibers and holes of the canvas. Thus it will re-grow immediately.
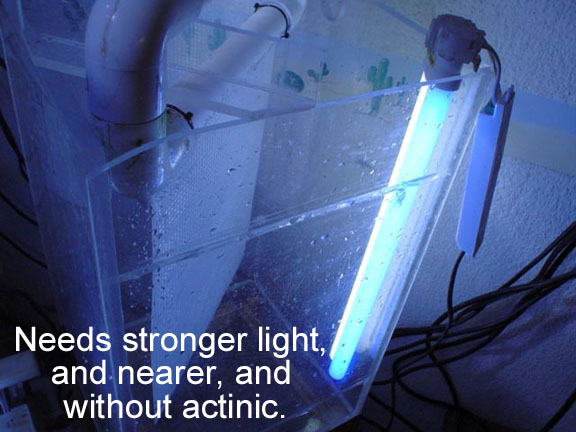
Second concern is the screen size. If I'm correct about your tank being a 225g, then the recommended screen size is 225 square inches, lit on both sides. If lit on only one side (like yours), the size should be doubled to about 450 square inches. Your screen is 176 square inches one-sided, which effectively is an 88 square inch filter. Undersized screens such as this work just as good a larger screens for about two days, then they fill up. If you clean it every three days, it will be ok, but you can see the hassle with this. If you dont' clean it this often, growth slows, and the underlying layers of algae get covered and shaded (by the newer layers) and die off. N and P get released back into the water. So constant cleaning is mandatory.
Solutions: (1) Light the other side. This will double the number of days between cleanings, probably from three to six. I know you said space was the issue, but it looks like if you slide it forward, you can do it. If so, you'd have a 176 square inch filter, which at least is not too far from 225. (2) Increase the height of the screen. I can't see if you'd have room for this, and of course it would require more building, but the more size the better.
The rug canvas fix is almost a must-have. The scrubber may not function at all without it. Increasing the screen lighting or size (best case, both!) would make the difference between have zero N and P continuously, versus not being sure that it's really helping things at all.
Anyway, congrats again on the great build; will be great watching it develop over the weeks.
-
-
.
Todj2002 on the SWF site:
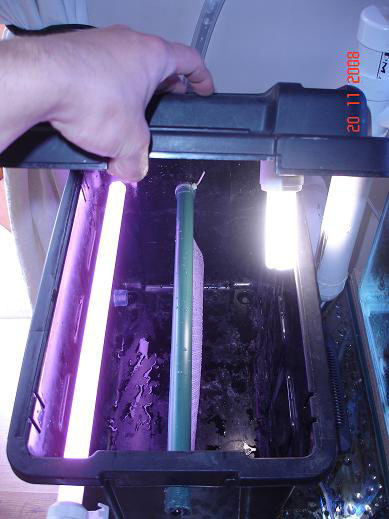
Worley on the AS site; this is for a high-power, very thin unit for HOB:
NoOne on the AS site:
-
.
Juzzmarine on the SG site:

Nitschke on the SWF site:


-
.
Enatiello on the RS site:

GlaringToast on the MFT site:
Jan on the RP site:
-
.
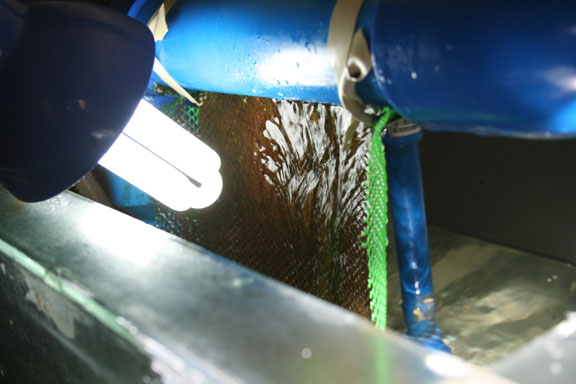
Riaanp on the MASA site; this is on the back of a nano. The light is actually inside of the compartment, and he says it does not get wet at all:

Franske on the MASA site:
-
.
Dohn on the MASA site; not DIY-able, but good idea for manufacturing:
-
.
Reefski on the MD site:
Christophe on the MD site:
Sharkey18 on the MD site:
Loveaneighbor on the MD site:
-
Bluespotjawfish on the RS site:
Mega Powerful Nitrate and Phosphate Remover - DIY!
in General Reefkeeping_
Posted
Very good... you'll see much more growth this next week, now that the algae has attached.