


oceanviper
-
Posts
1,035 -
Joined
-
Last visited
-
Days Won
7
Content Type
Profiles
Forums
Gallery
Posts posted by oceanviper
-
-
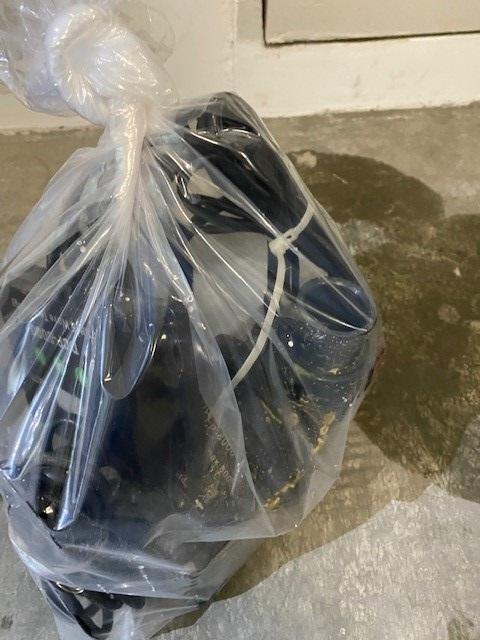
Left only water container.
Rest items reserve for tomorrow collection.
Sent from my iPhone using Tapatalk -
Hi there.
I have decomm and below are some items which I have is not properly cleaned as tired after decomm.
Collection or deal at Punggol.
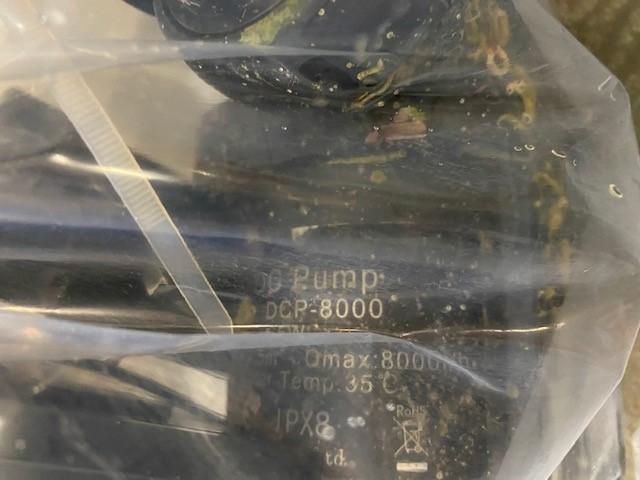
a. Jebao DC 8000 ( FOC )
b. 1hp Titanium coil used ( SGD 30 )

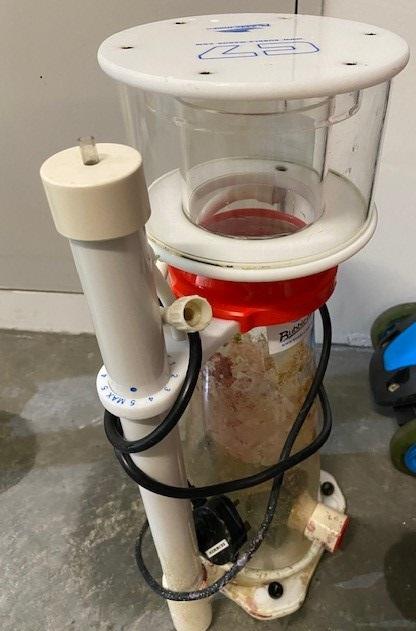
c. Bubble Magus C7 used ( SGD20 )
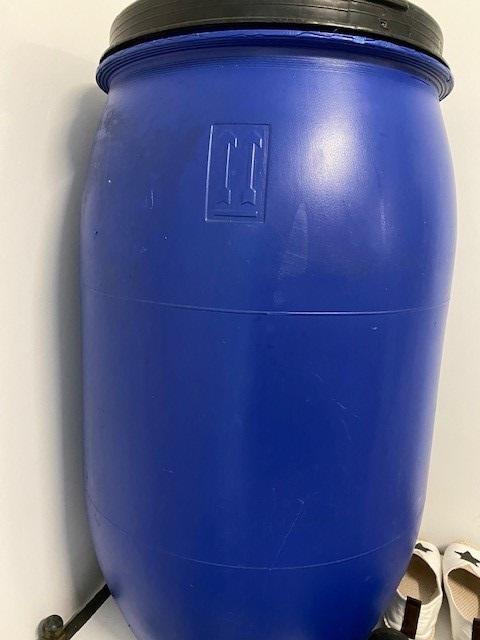
d. Blue Barrel used ( size can't recall ) sgd 25
-
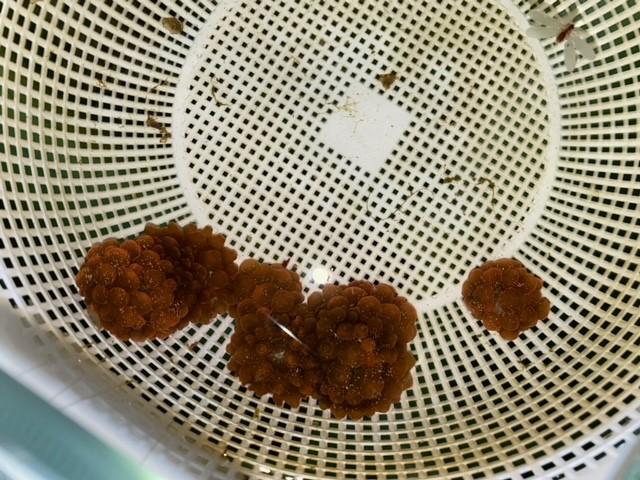
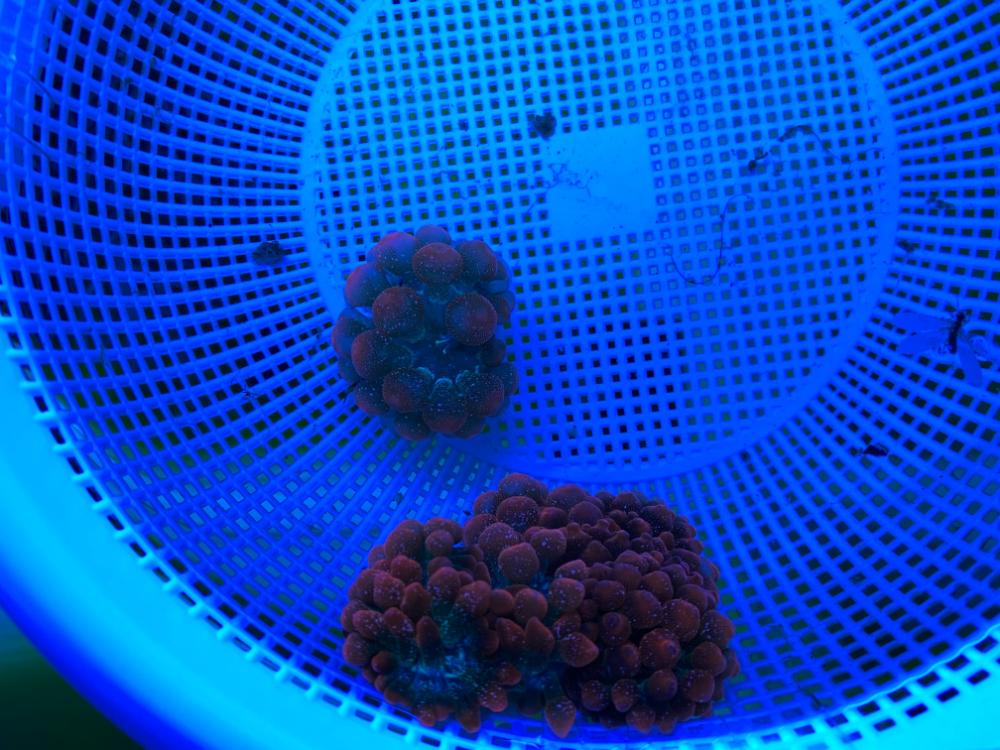
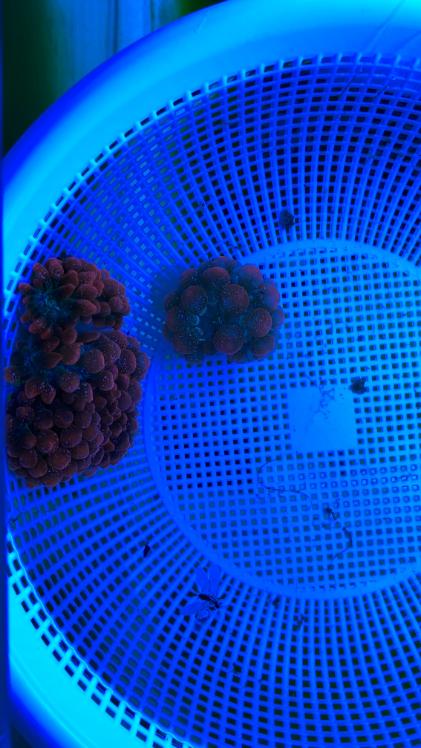
The color of the RBTA with lights off.

-
Hi all.
I have few pcs of RBTA for sale which i managed to remove from the liverock which i discard during decomm.
i probably have 4~5 pcs after reserved 4 for myself.
The size is from 20cents to 50cents.
Is still adapting in my new tank.
Deal location Punggol.
Selling sgd10 for small pc and sgd20 for bigger pc.
-
 1
1
-
-
If anyone wants to give away/ sell your rocks with aiptasia pls pm me! My peppermint shrimp hungry now that he cleared my tank
Sent from Singapore Reef Club mobile app
I have a lot that attached to the algae in my sump tank.
I can pass you if you want.
Location is Hougang.
Sent from my iPhone using Tapatalk -
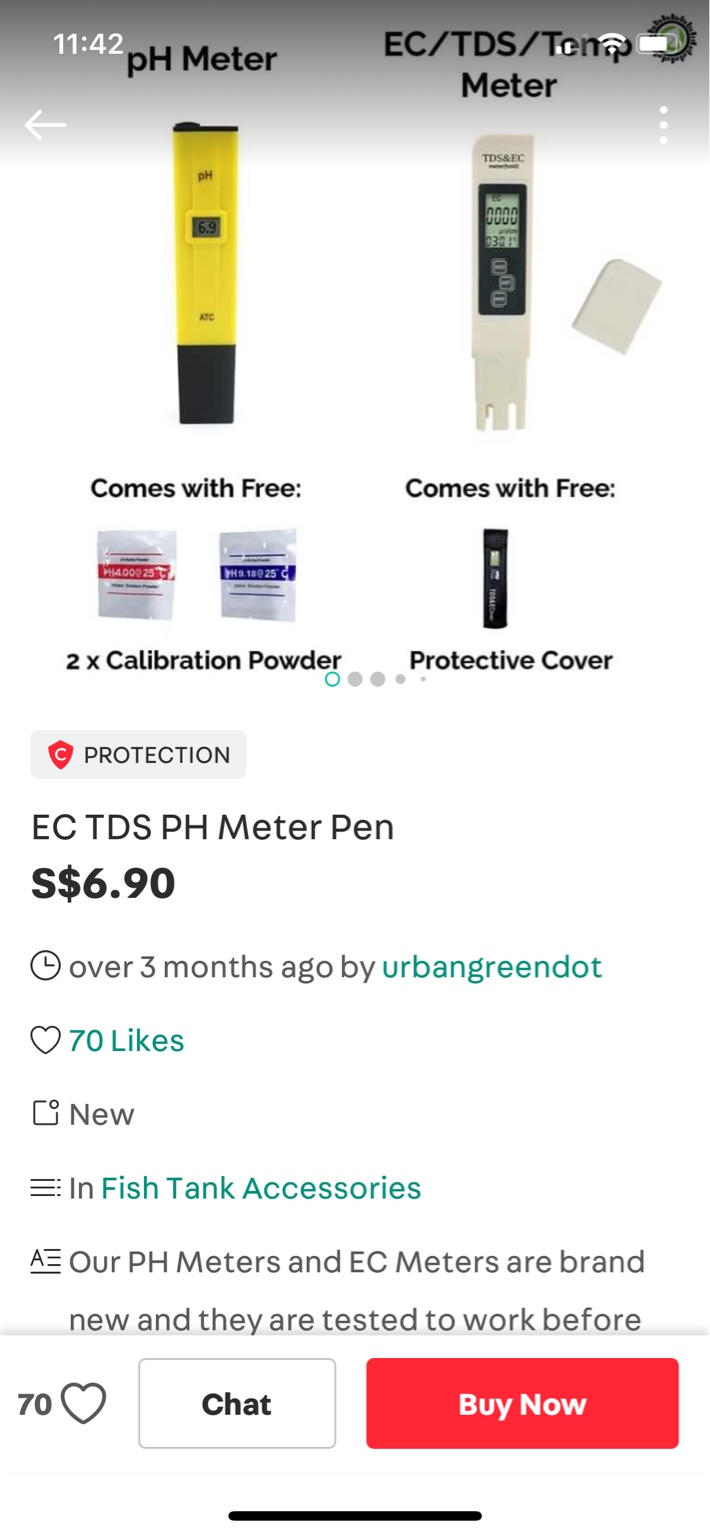
Hi, does anyone use these TDS and PH meter off carousell? Do they work well and give accurate readings? Thanks
Sent from Singapore Reef Club mobile app
You need to calibrate it prior on using.
Calibration require for certain duration or when battery replacement.
Sent from my iPhone using Tapatalk -
It's true but when coraline algae grows on it, maybe harder to see.
Bean animal drain is dead silent. So an audible warning is very obvious. And this can be done with minimum effort and little drawbacks.
Agree.
Sent from my iPhone using Tapatalk -
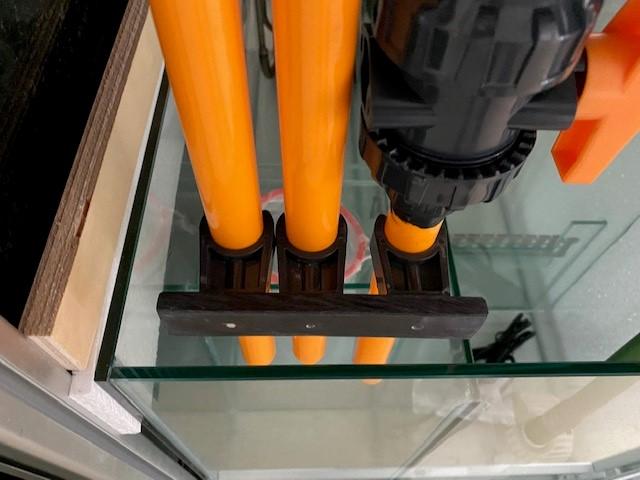
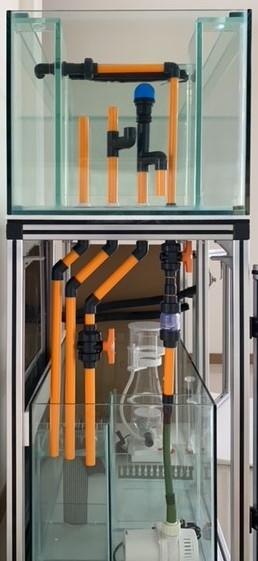
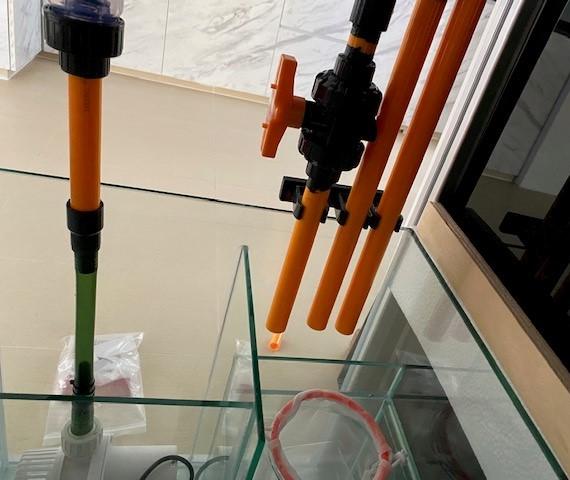
Awesome looking tank. Love the orange pipe.
Thanks bro
Sent from my iPhone using Tapatalk -
You can consider terminating the emergency drain higher above the sump water level.
In the event of emergency activation, you will have an audible cue.
Thanks for the suggestion.
As the overflow area is transparent, if the water level reaches the emergency pipe level or higher than the usual, is indicated some minor clogging at the normal pipe and would need to do some maintenance before it flow down from the emergency pipe.
Sent from my iPhone using Tapatalk -
Looks real nice. May I know where you got those coloured pvc pipes?
Sent from my SM-F916B using Tapatalk
I got it from Taobao
Sent from my iPhone using Tapatalk -
Updates on the progress with busy schedule after NSW deliver from Iwarna.

-
By the way, silicone does not stick well even with minor oil or stain.
You need to ensure the reglue area are free from oil etc
Sent from my iPhone using Tapatalk -
Ok.
One way which is tedious by drying up the overflow box and increase the water and see where and when the dry tissue placed in the overflow starts to get wet.
If is from the bottom, which can start after certain pressure appear with water.
When you see the tissue wet, take a dry and swipe along the vertical joint to see where it start to wet...
If vertical joint is not wet, then is your bottom joint leak and you start seal that joint after drying out the tank.
Sent from my iPhone using Tapatalk -
Hi bro.
The leak is seems to comes from your pipe joint.
I think you should scrap away the glue at the joint and wipe with thinner to remove any glue residue.
Also don’t use any rubber seal at the joint instead.
Place the joint with glue at the base while tighten by turning the other piece only.
Sent from my iPhone using Tapatalk -
hi all...notice my sump tank slight leak..at moment using silicon to patch up...call few tank maker to fabricate new sump..small project like they not very keen..any bros knows any tank maker willing to do up a new sump...glass or acrylic also ok..peter 88339962..thanks
Hi bro.
You can look for Kwang Lim
Sent from my iPhone using Tapatalk -
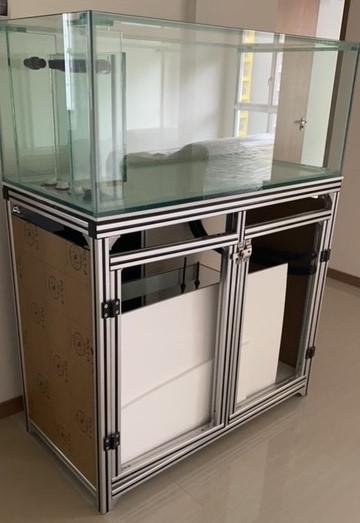
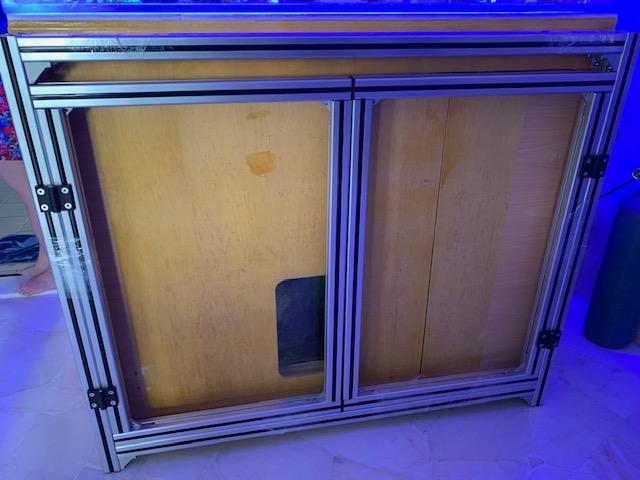
A snapshot of the aluminium extrusion on the font and back assemble to ensure the door size is able to fit into the frame.
-
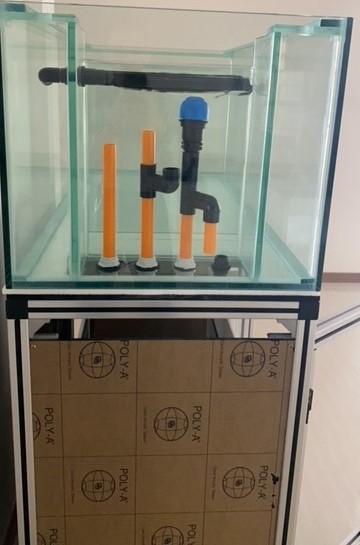
Change the display tank design a bit.
-
Hi Sherilyn.
What pipe size do you use for your tank...
My current is 32mm for overflow and return...
I’m planning to reduce the new one to 25mm for overflow and 20mm for the return..
My tank size is 4 x1.8 x2.
Sent from my iPhone using Tapatalk -
You can get it at a shop at the French Road area.
Can’t remember the shop name...
They sell all sorts of O rings
Sent from my iPhone using Tapatalk -
22 hours ago, Alco said:
Where are you customising this? Would love to do an aluminium profile cabinet.
Sent from Singapore Reef Club mobile app
Hi bro...
There are few sources available...
From SG :
Aluminium profile : Prestech ( Ubi area ), Alutech ( Bedok area ), can customized to your design.
Acrylic sheet : Dama Trading ( Ubi area ), Ying Kwang ( Boon Lay area ), Kings Material ( Kaki Bukit Area )
From Non-SG :
Order from taobao, etc...
-
1
-
-
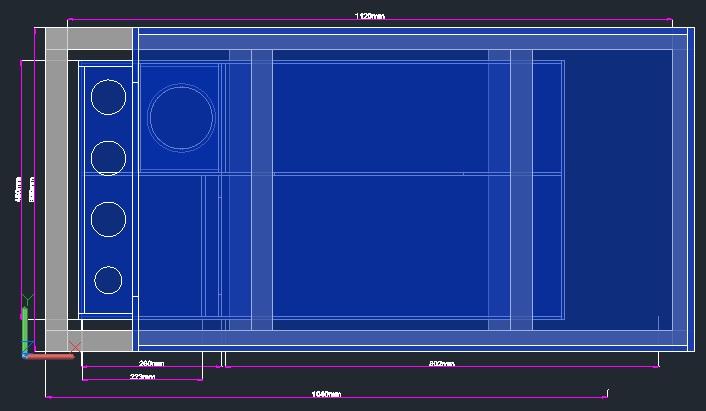
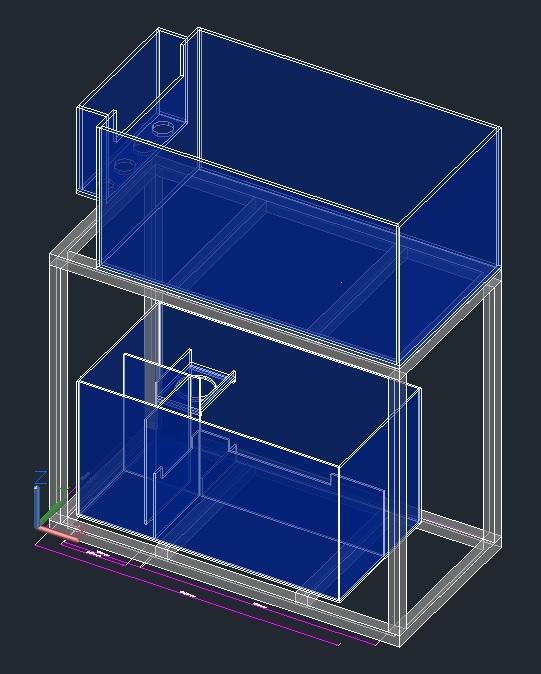
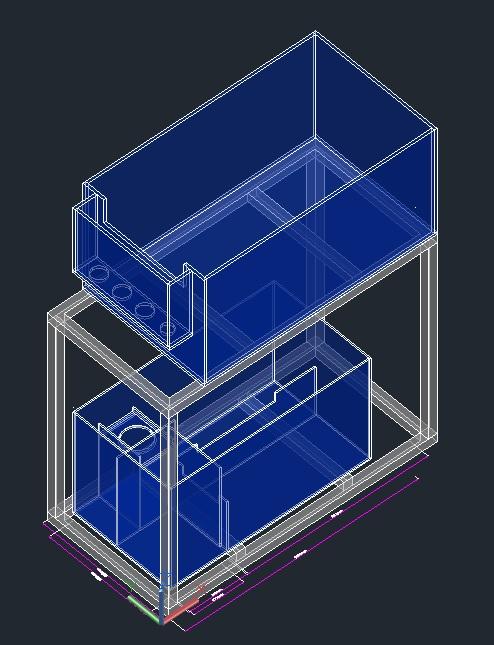
Hi reefers...
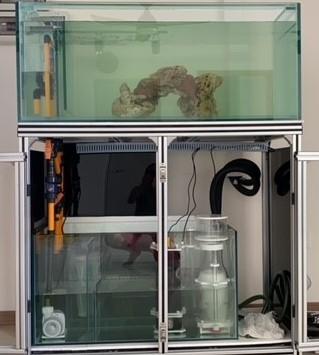
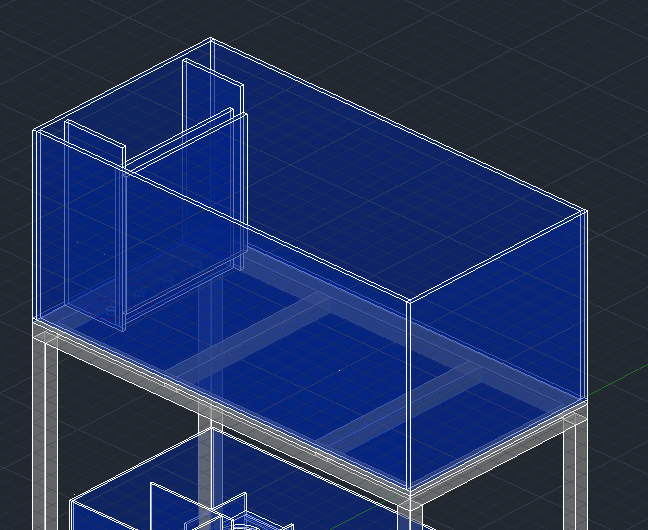
While slowing getting my new home key collection, also planning to setup a new tank at new place.
The tank will be 4x2x1.8 ( not so deep ) for mixed reef.
The cabinet will be using aluminum profile extrusion with acrylic for the cabinet wall ( easy maintenance, water resistant, variety of colors )
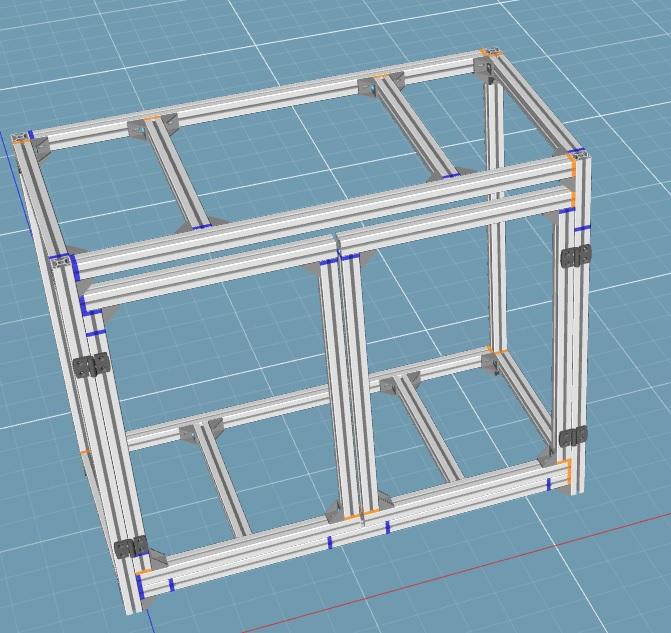
The display tank will be using 12mm~15mm glass with bracing on top and bottom. The top bracing is to prevent water splashing out although rimless is nice to have.
The overflow will be on the side with bean animal setup.

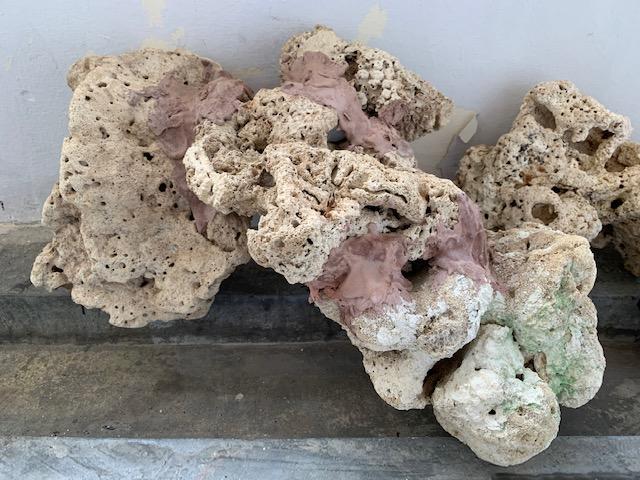
For rock, will start with dead rocks that vinegar clean, RODI rinse and dipped for 3 months ++ before take out and sunbath as seen on the picture below....
WIll place back for bacteria cure while waiting for the new tank ready....and cycle together....
For equipment :
1. Drop-in coil with existing 1HP LG compressor.
2. Bubble Magus C7/C9 Protein Skimmer
3. Skimz Calcium Reactor
4. DIY LED light ( with Maspect hanging kit and 2020 aluminium extrusion as frame )
5. Skimz SS18.0 x 3
6. Skimz Return Pump ( DC9.0 ) or higher ( current using Jebao DC9000 )
7. Media ( Marine Pure Sphere ).
8. China RODI ( 5-stages with local filter/media )
9. Inline TDS checker ( add-on ) to China RODI for monitoring TDS
10. Auto top-up using float switch to control connected to RODI output
11. Skimz Pur Reef Salt
Any comments, please feel free to post....
-
I suspect mine is this issue, but Reef Depot no longer has parts for this lights
Then will have to open up and check on the component follow by source from online...
Sent from my iPhone using Tapatalk -
The faulty can be due to the led driver or the led...
Hard to say unless open up and check.
Sent from my iPhone using Tapatalk -
Aquamarin has offers of buy 2 get 3rd free... while stock last.
I got from them 2 wks ago...sgd164 for 3 bucket
Can call to check...
Sent from my iPhone using Tapatalk
WTG and WTS misc item
in Sell off/Pasar Malam Shop
Posted
Water container reserve till next Monday for collection
Sent from my iPhone using Tapatalk