mafacifa
-
Posts
508 -
Joined
-
Last visited
-
Days Won
3
Content Type
Profiles
Forums
Gallery
Everything posted by mafacifa
-
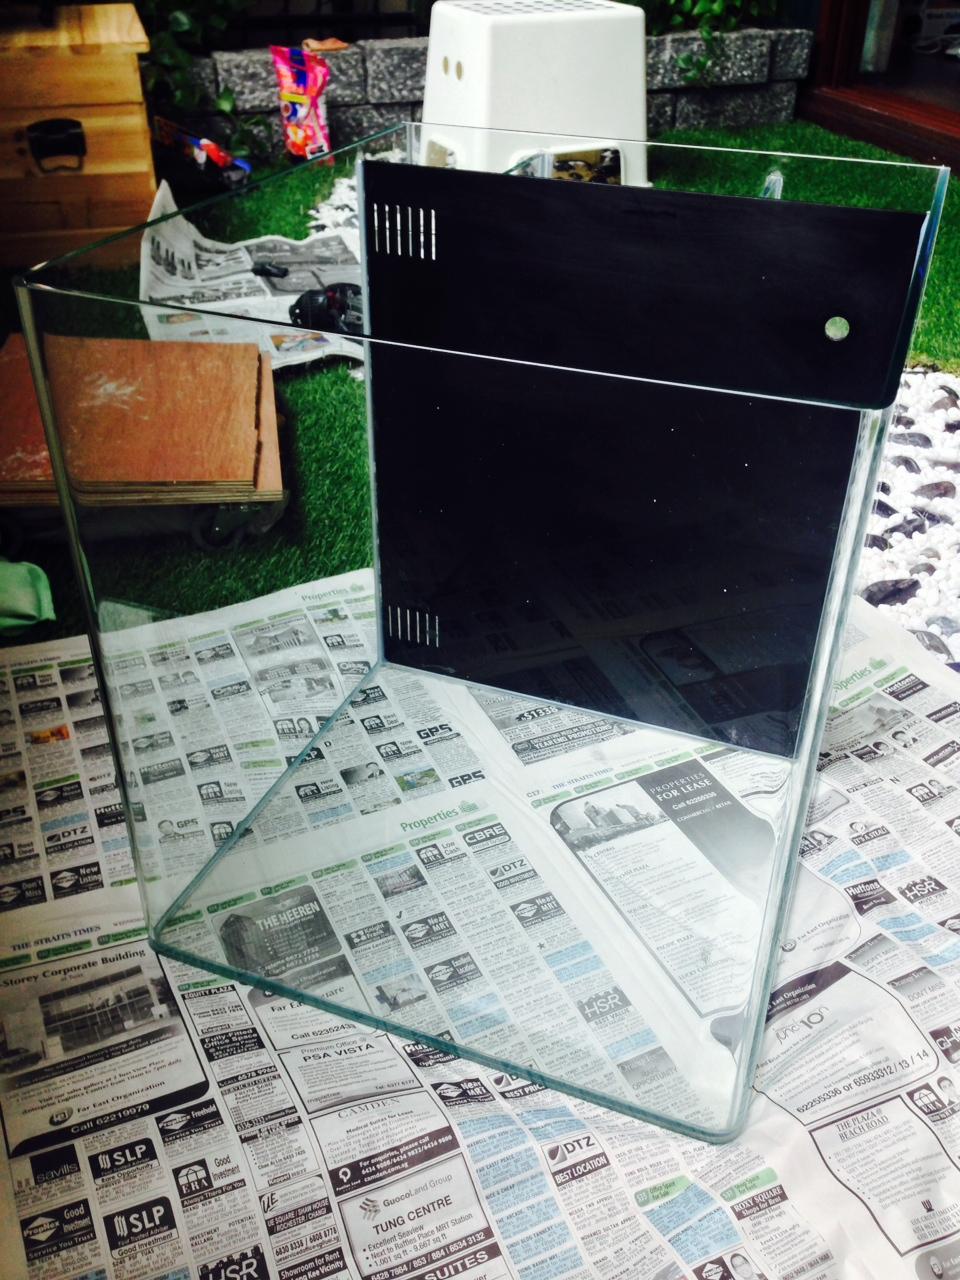
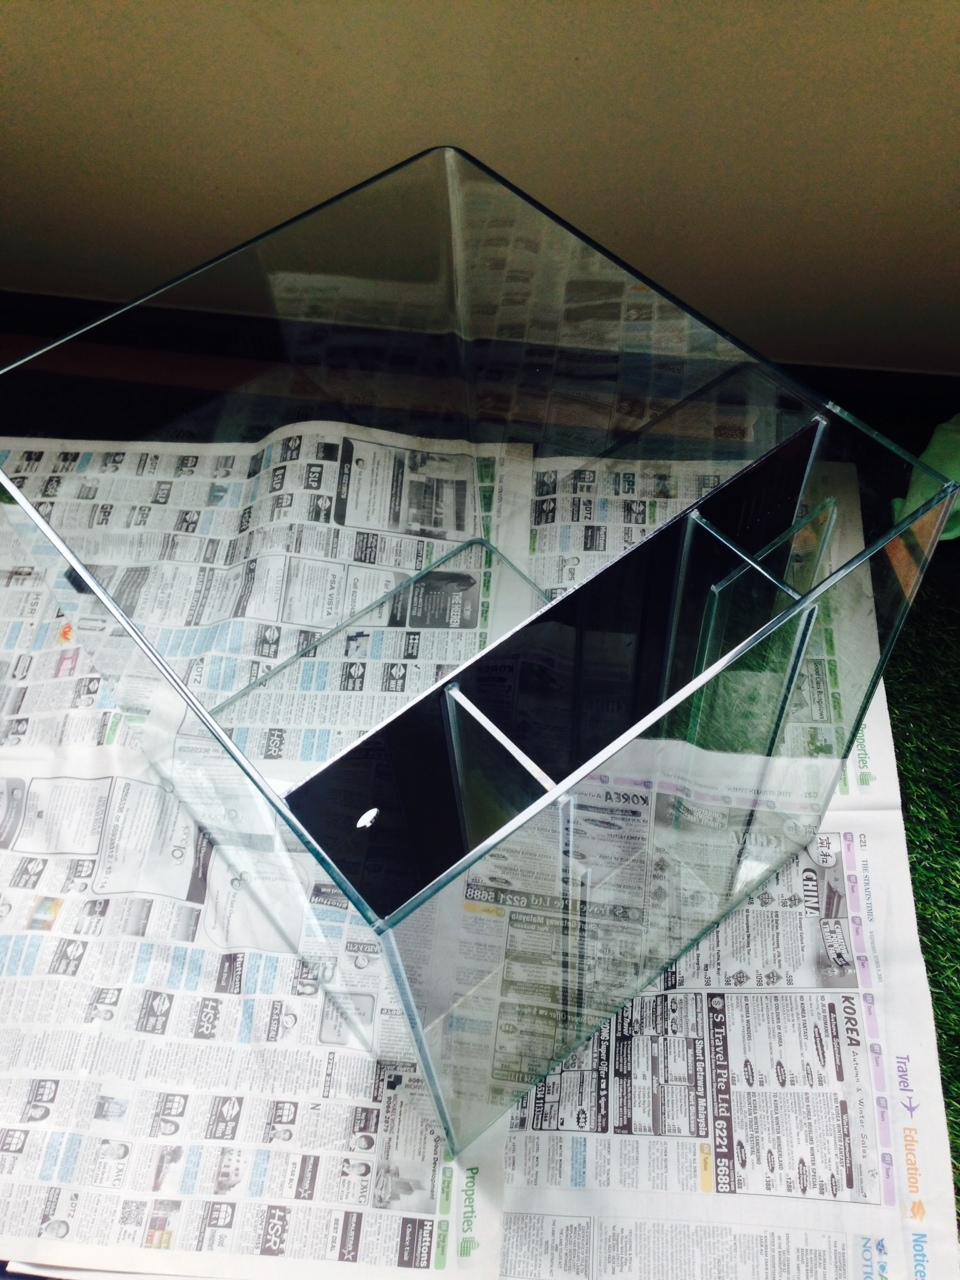
Used cube tank with internal overflow system. Curved front. Dimensions: 40 x 35 x 39 (height) $55 SMS /Whatsapp 96396574 to deal. Collect from Pasir Ris.

-
item 4 reserved.
-
Deal at Pasir Ris
-
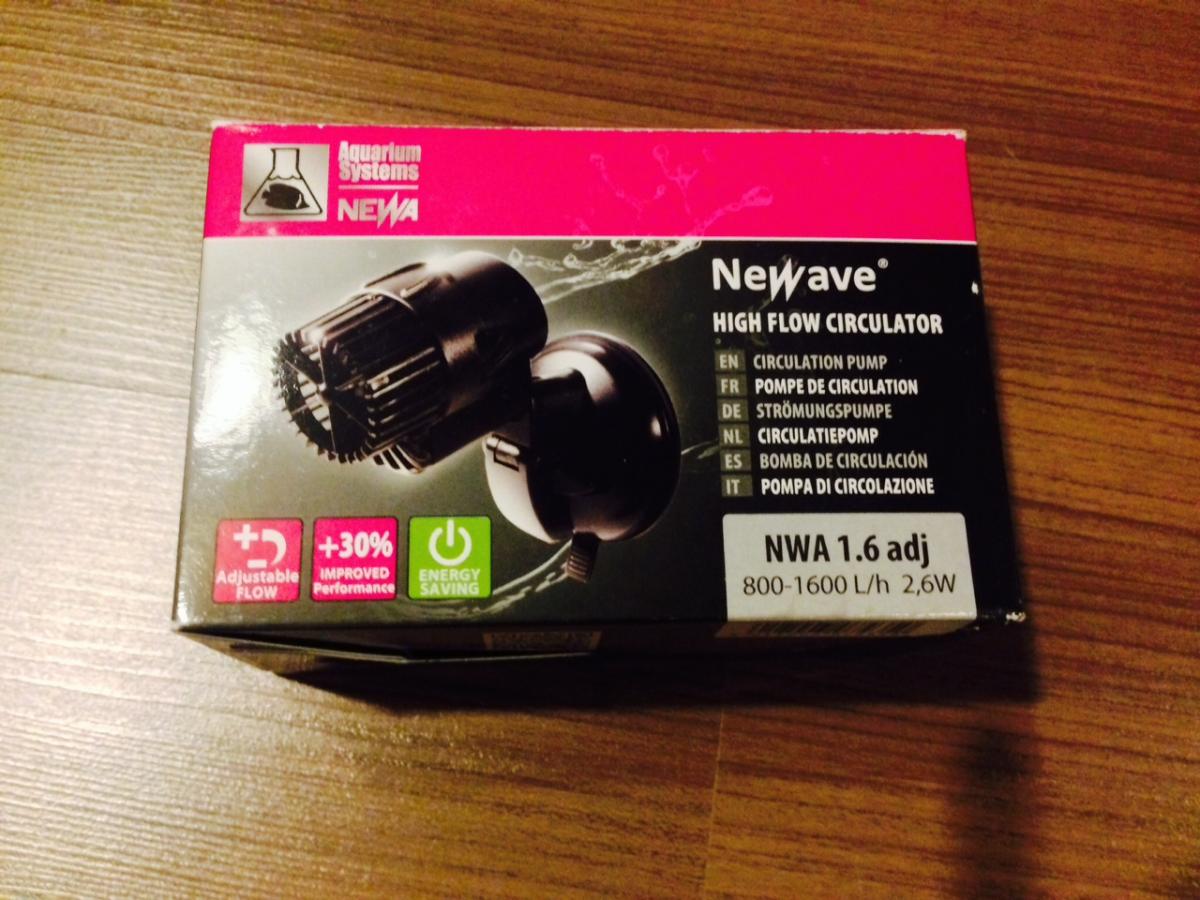
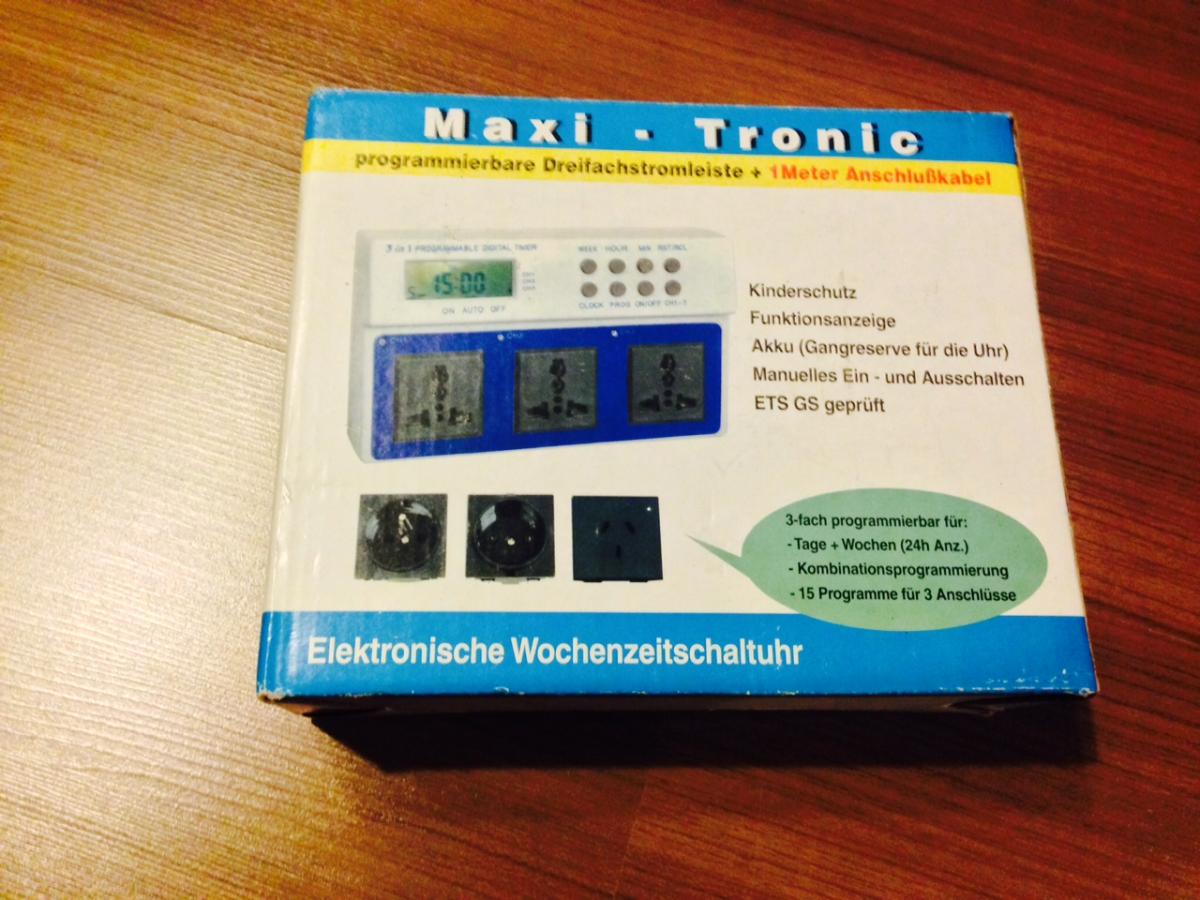
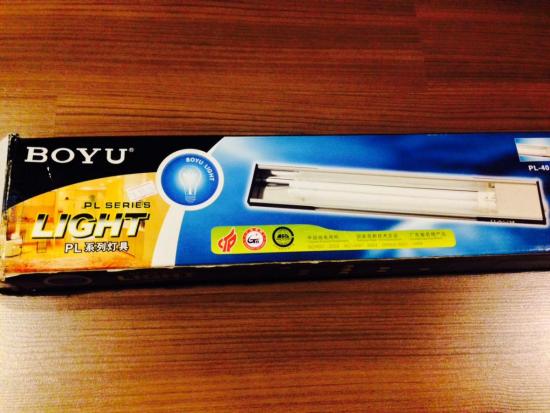
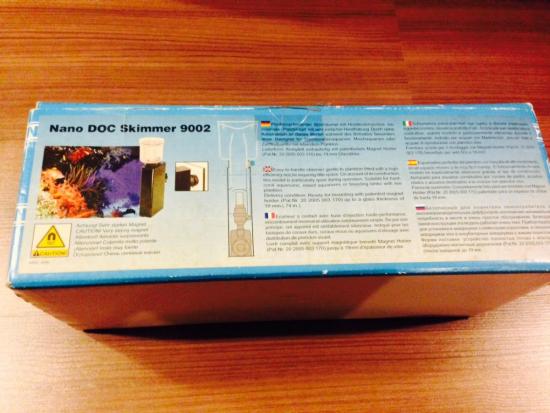
Hey all, just decomm my current setup. Have the following to let go: 1. Tunze doc nano 9002 skimmer. Modified to use external air inlet for more control and quiet operation. Can revert to original setup. Price: $80 2. Newave wavemaker NWA 1.6 adj 800-1600 l/h. Price: $40 3. BOYU PL light for 1 feet. Price: $10 4. Programmable timer (3 individual timing possible) for wavemaker, lighting. Sockets and plug needs adaptor as its those 3 slanted types (non-EU type). Unused. Price: $15. All items were previously used and are in good working condition. Please PM if keen. I have a nano ios back tank too. will be putting it up soon. If you are keen, do PM as well.


-
Used or unused. Prefer to collect in east, pasir ris. Thanks
-
Hi.. Yes already did the bracing and installed the overflow box. Need to update to new pics.
-
Hi bro, yeah. Proper bonding is necessary for a longer lasting acrylic tank. Same thing for glass too. If no silicon properly will also affect its integrity. For bigger capacity tanks the thickness does matters. I watched Tanked show (Animal planet - awesome show, highly recommend watching ) and ATM did their tanks like 3 inch thick acrylic! Don't think dama has these thickness. Haha! For me, its more of trying it out and acrylic is easy to work with and it has better qualities in terms of strength, insulation and clarity.
-
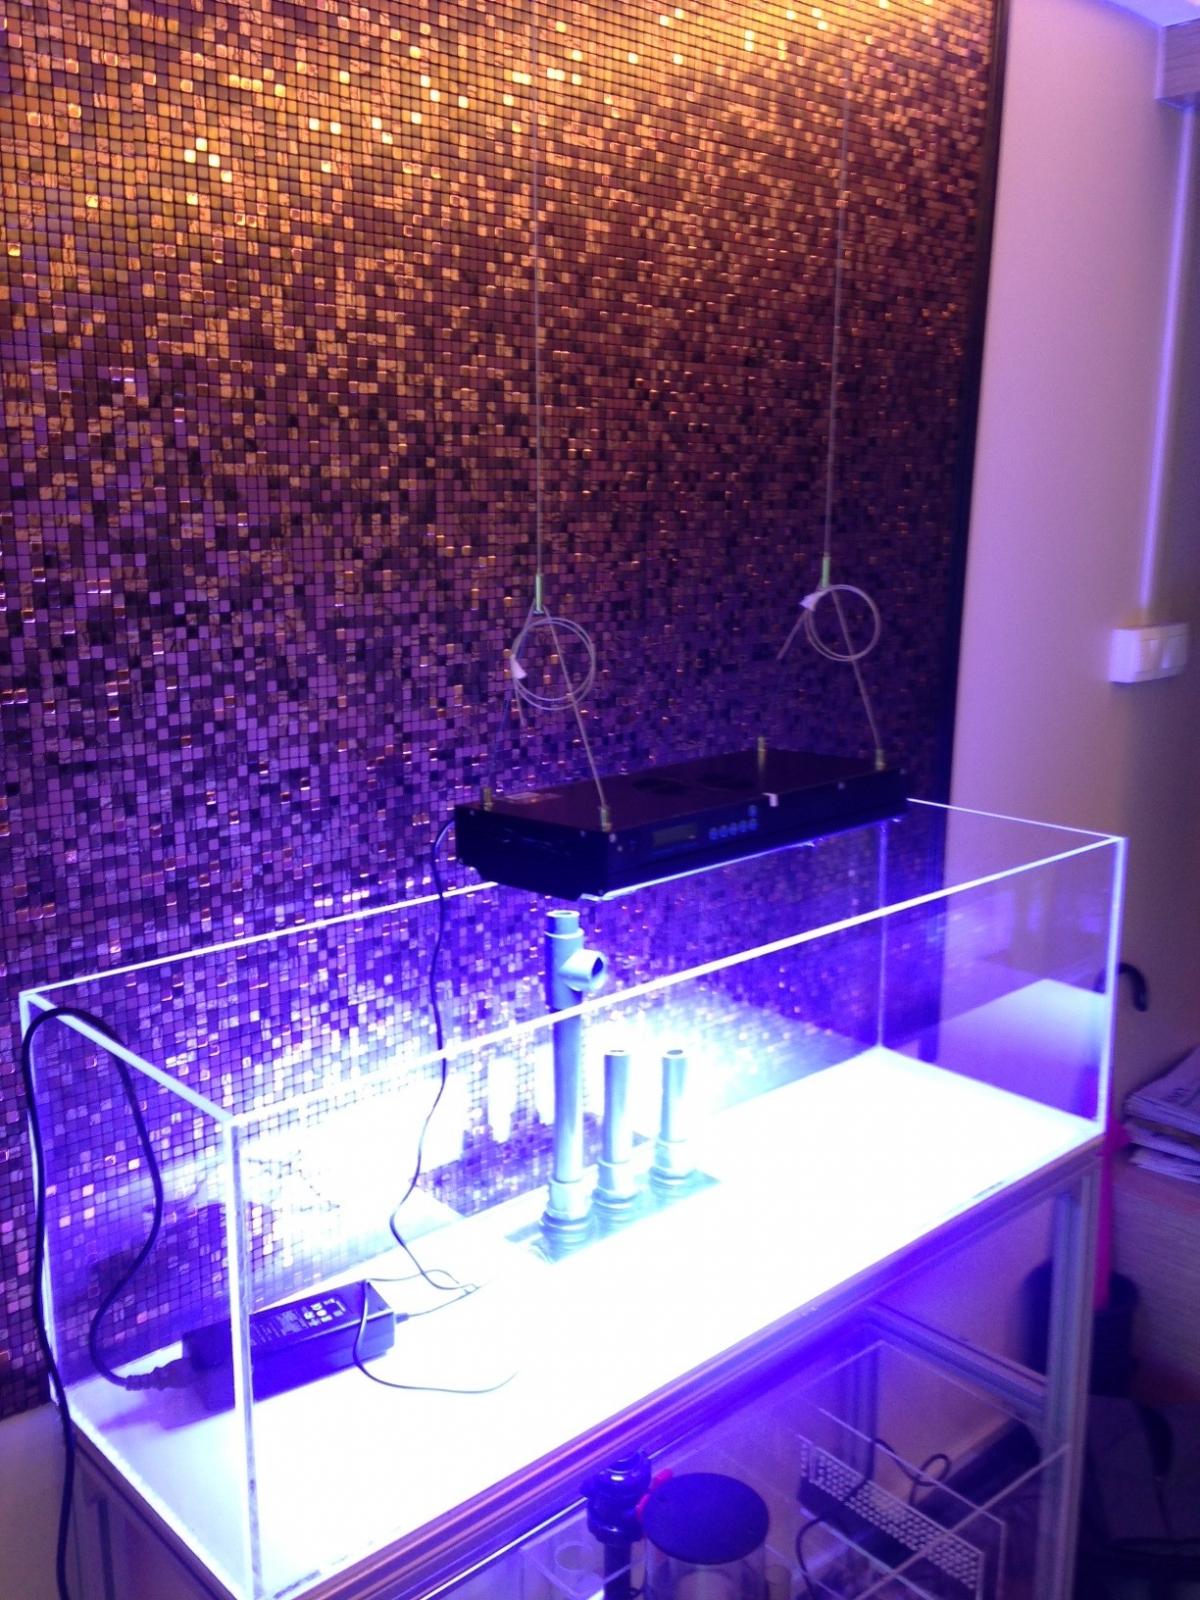
The return pipes shown above is just sample. The actual ones are actually higher. Right now, I've added some rocks and saltwater. Will be going down Pasir Ris Farmway tomorrow morning to get some remaining rocks for scaping.
-
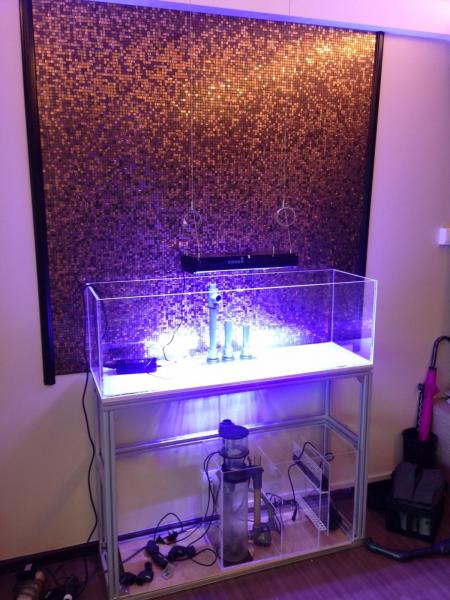
Haha dunno why the images got rotated previous. Here is the almost complete setup. What was done here: 1. The backsplash wall is now laid with mosaic tiles. Did this myself as well. These are mosaic tiles 30x30cm that comes with foam glue so its pretty easy to paste it. Challenge is to get is aligned. 2. The side borders. These are wooden profiles bought from Ban Heng Long. Smooth sand them and apply a few coats of exterior wooden paint. 3. The aluminium rack is up. Self-assembled. Pretty easy if you get the dimensions correct. 4. Main tank up with 3 bulk heads installed. Holes drilled using standard hole saw. However, do note that when drilling acrylic, too fast drill speed might not be good as it will heat up the acrylic and your hole saw may get stuck. Do it constant medium speed. 5. Ceiling hanged lights. This is the 36x3W Aquasun. There will be a shelf that will run from the sides of the tank. It will give it a suspended look. Cabinet doors will be installed last.

-
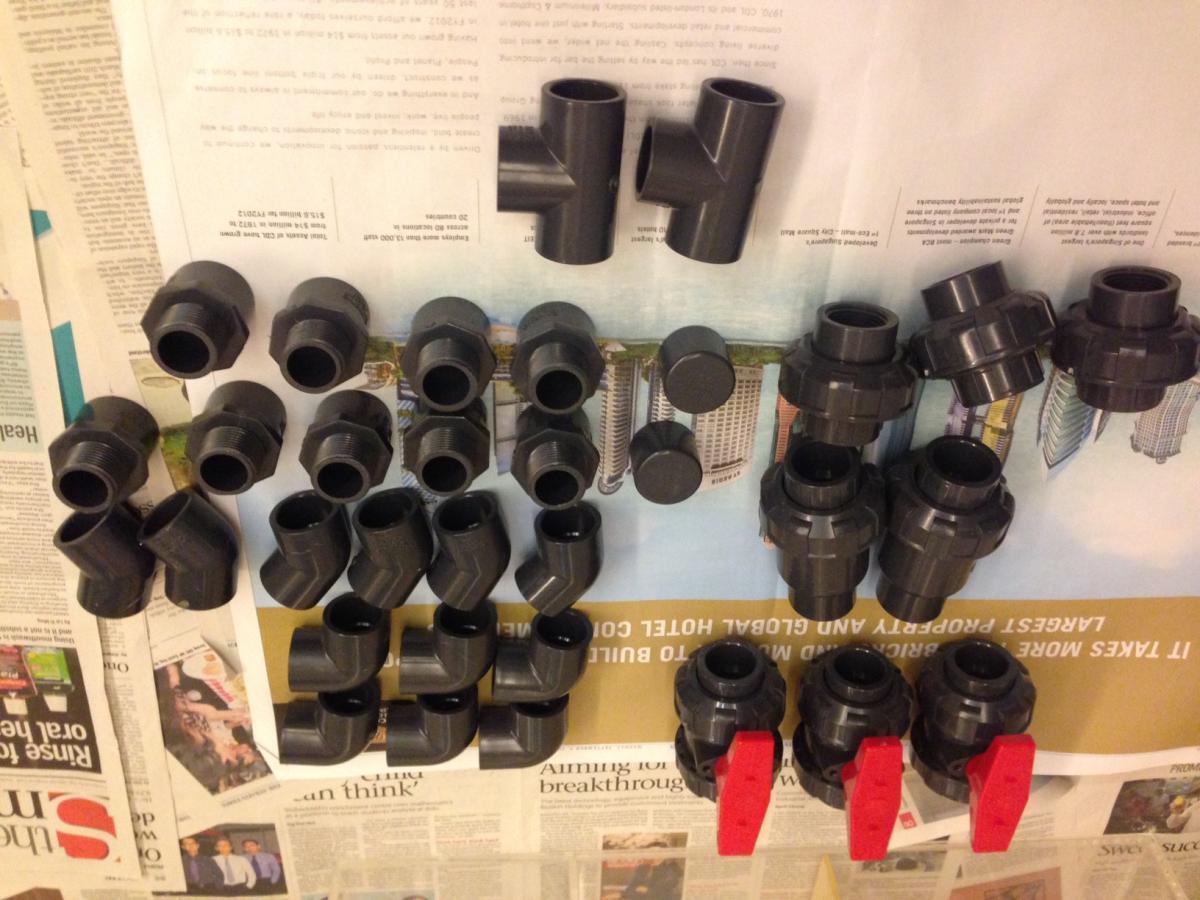
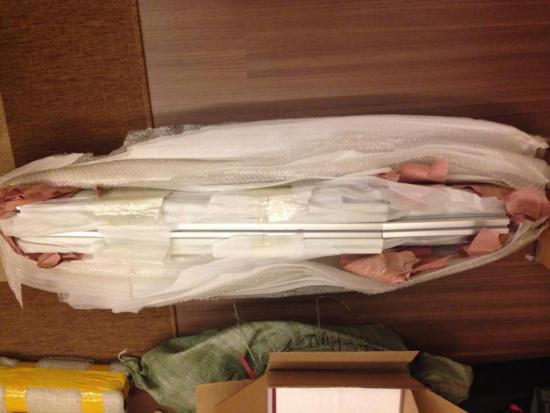
hi guys, as promised, photos! Aluminium profiles arrived. These are 4040 type. Industrial grade. Some PVC piping stuffs and valves.

-
thanks guys for those who responded. got what i needed for now.
-
Thanks for the comments. Now the main is up and wall background is done. Sorry been busy doing up the setup no time to update. Will upload pics soon. Sent from my iPhone using Tapatalk - now Free
-
Pm me if u have any to get rid of.
-
I can't remember exactly. It wasn't that much. Less than $10.
-
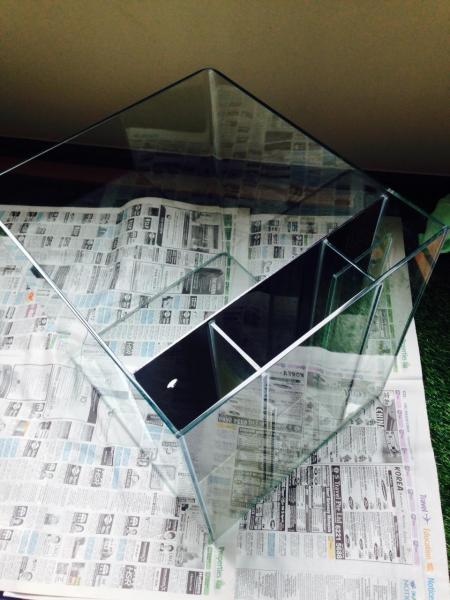
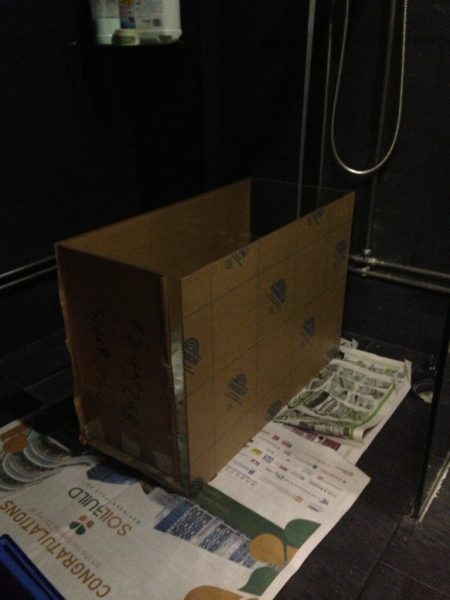
Final baffle is up and water test complete. Sump is now ready! As you can see from the photo, I've started on the main tank. Its in the background. Did water testing and it's good for now.

-
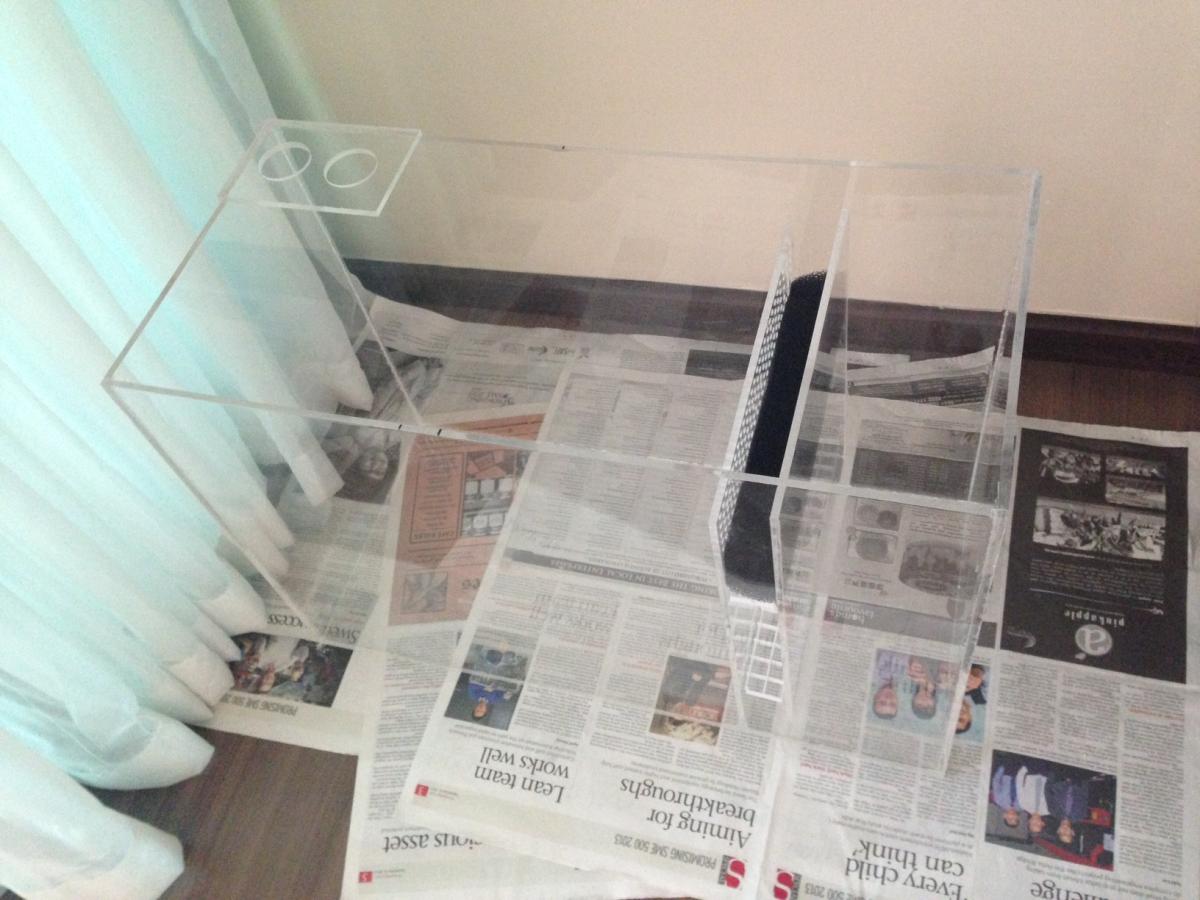
Sump almost complete. Awaiting one more baffle hopefully arriving tomorrow. Started on the main tank. Did a bit of buffing with Novus solution set. Very impressed with the results for the surface of the acrylic. But please use a buffer machine like those for car buffing. Also, there are 2 holes meant for sump inlet. Big compartment on left will be split for skimmer and refugium. Last compartment is the return. Once the last baffle installed between the first compartment, we do another round of leak and water flow test. Have a great weekend!

-
Sump update: 1. To get a nice smooth edge finish, I did try the flame polish method. Basically first sand smooth the edges, wipe clean and get a small hand torch and go over it. Here is a sample video: I used something similar to this for the torch, borrowed from my wife's baking stuffs: http://www.amazon.com/Torch-Butane-Burner-Ignition-Camping/dp/B00CJ8TOMG/ref=sr_1_15?s=kitchen&ie=UTF8&qid=1378967718&sr=1-15 The heat will smoothen out the edges nicely. Make sure you sand smoothly else it might not have that glossy effect. I did over did it so some of the edges got melted a little. But nevertheless, this is a sump, people wont see and doesn't impact the integrity of the structure. Will upload pics soon. Meanwhile, the sump is now leak free!
-
Great to hear that! LED lights low on the wattage.
-
Thanks! also must thank u for the inputs.
-
For the Novus 1,2,3 I got them from Power J hardware store. The have an online store or u can drop by their shop at yishun or aljunied. It comes in small individual bottles as well as larger ones. I think these are very good at future tank maintenance for scratches as well as other acrylic stuffs. It has many uses. I just bought them today but no chance to try it out.
-
@tunicate Thanks for the suggestion. I might also consider hanging the lights directly from the ceiling and make do without the top shelve. Another option that I'm considering is to have an aluminium flat bar custom made to arch over the top of the tank. Good thing is that the carpentry works are not placed yet. So I have time to do some mod. Awaiting my aluminium profiles for the base frames. Should reach this weekend.
-
Hi bro. Ur tank looks big. The water like solvent from dama I was told by the staff that it's not water proof. So I guess that must be the cause of leakage. I bought my weld-on from Highland. Weld-on 4 is recommended if u have bigger joint areas as it takes longer to cure. But when I went there, only left with weld-on 3 for the small bottle. So no choice, better than nothing. You might want to also get weld-on 16 for patching up leakages after using weld-on 3/4 if u have no acrifix 192. You can use the needle applicator and bottle for the weld-on 3/4. Here is their contact. http://www.highie.com/
-
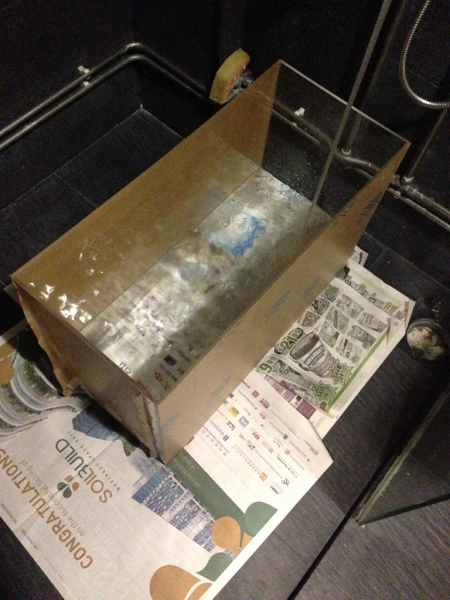
Alright, here is the post for the sump. The sump design was inspired by TriggerSystems sump. There too make acrylic sump and looking at online reviews and videos, I like their simple design and changed it accordingly to my requirements. Materials bought. My work area is currently at my balcony. Good as there is can be room ventilation as the glue smell can be very strong. 1. Started off my sanding the edges of the sheets with sandpaper grit 300 then by 400. My advice is to get a sanding plane where you could attach sandpaper to it. It will have better coverage and easier to sand back and forth. This step is necessary as the machine cut lines of the acrylic are not smooth at all. Just sand until but not to polish it. Around 3-5 mins each side. Can be messy with particles flying around. Ensure your area has no fan. Also, that extra N95 mask you got might be handy. 2. Wipe clean the edges with cloth. Micro fibre cloth is good to prevent scratching the acrylic. 3. I used Acryfix 192 for the glueing instead of Weld-on as I didn't have that when doing it and I'm anxious to start too. The Acryfix is not water like so I applied the edges together. So, I did not get a very nice bubble free finish. Also, use the f-clamps for keep it up straight. Acryfix takes about a day to dry and needs UV for that. So just leave it under sunlight should be fine. I took my time on this and did one side a day. I glue one side during evening after work and let it sun the next morning and continue for all sides. So I took around a week. Haha! You might want to watch these youtube videos on gluing, very useful (have 6 parts): So the end result for the sump tank can be seen here. Water test it. First time got leak so need to empty the tank and dry it before patch up with glue again. Please have buckets stand by so u can hold the water temporary till the next test. Minimal water waste and recycle later to wash toilet. Once there are no more leaks, I leave the water intact till the brim for two days. To see if it can withstand. As this sump is 8mm, the bowing on the longer side is noticeable. I have not installed the baffles so maybe thats why. Baffle installation has to wait since there are some custom cuts that I ordered somewhere. I don't have laser machine to cut inner holes or those teeth like design. So this part best to outsourced. Will update on baffles and rest of sump soon!
-
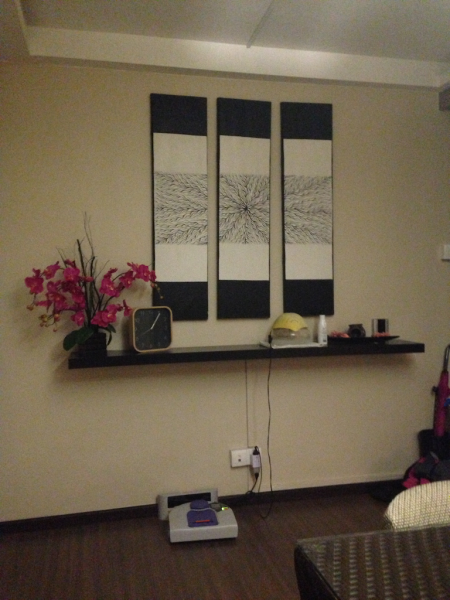
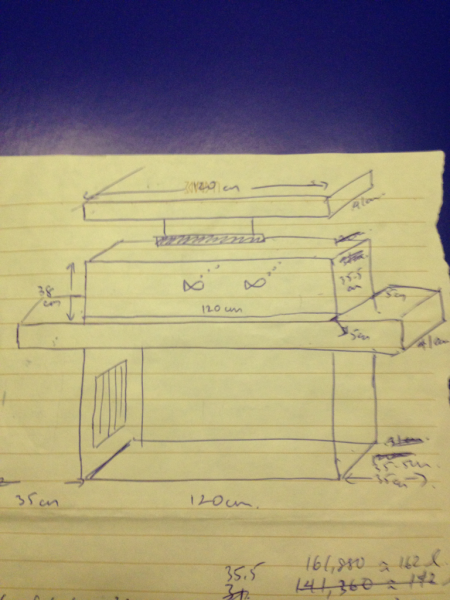
Hey fellow reefers After looking at so many DIY posts and kena poison by the nice tanks around, I decided to just take the plunge and start my own slightly bigger system by do it myself as much as possible. Did some research and ask around fellow DIY-ers to get the initial idea and planning. I choose acrylic as it is easy to deal with and I have done smaller acrylic projects before (not aquarium stuffs) and also last time D & T knowledge. Haha! My idea of a home tank system has to be something that must compliment my current home decor and theme. And personally, a standalone tank system in the middle of living or dining area might not fit that criteria. It is practical of course.. So here we go. This is the current area in my dining area. Paintings from Bali will be replaced with some mosaic tiles. Yes, I'm gonna put mosaic tiles here, unconventional as it is usually placed at kitchen or bathroom. We'll see. Here is a sketch of what it would look like. We will have two suspended shelves that will span across the bottom of the tank as a base and another above it from which the lights will hang from underneath it. A summary of the materials purchased for this project together with estimate costs: 1. Cast acrylic from Dama (10mm for main tank, 8mm for sump). I actually bought 4'x6' size for each thickness and have them cut to my dimensions. I do quite have quite a bit of extra which will for another planted tank project after this. Cost: < $255 2. Acryfix 192 tube form glue from Dama. Cost: ~ $14. 3. Weld-on 3, needle and bottle applicator. Cost: < $20. 4. Two L-clamps. Cost: $14 5. Electric hand-drill. Cost: $16 6. Novus 1,2,3 acrylic scratch remove. Cost: < $40 7. Buffing attachment for the hand-drill. Cost: < $15 8. A bundle of sandpaper having grit 300, 400, 1000, 2000. Cost: < $20 9. Hand-held blow torch: Already have used by my wife to torch her creme brule. So aside from the material costs, the equipment costs can be well distributed for future projects if this works out well. The process of DIY will include the following (for now): 1. Sump 2. Main display tank 3. Mosaic tiles. -> not reef related but just to document the entire build 4. Aluminium profile cabinet base
-
thanks for the responses. I've already started the DIY process. Got motivated after watching TANKED! Haha. Sure will provide updates soon either in DIY or new tank forum.