chipson1
-
Posts
135 -
Joined
-
Last visited
Content Type
Profiles
Forums
Gallery
Everything posted by chipson1
-
Terryz, You can either use the union ball valve or a simple ball valve, I normally perfer the union ball valve, it is easier in case of valve leaks, I then just replace the valve alone. Hope u understand what I meant. Cheers! Chipson1
-
The end cap is to prevent air breaking the water flow, it will be air tight and hence provide a suction that promote the flow rate. Cheers! Chipson1
-
The whole set up should be around $50.
-
Terryz, It is a ball valve, to open or the shut the flow, I think it's about $10, I don't have the exact price, can get it from Hai Cheong Plastic at Kallang Place, may be shop at Lavender. Cheers! Chipson1
-
I guess if the neck is not too close to the lid, that means the gap between the riser neck and the cover of the cup is not wide enough for the skimate to roll over into the collection cup. My Redsea Berlin skimmer has a beautiful molded deflector, bcos the gap is rather small, the ETS downdraft 800 I used was without the deflector, the gap in between is about 2" big enough for the skimate to fall into the cup. I think bigger the riser neck, wider gap is required. Hope this will help. Cheers! Chipson1
-
Remove the end cap, close the ball valve, (if you do not have a ball valve, use end cap to close the drain pipe) use your mouth to suck the vertical pipe, do not suck to hard, else you will be drinking your tank water. As you slowly suck the pipe, you will hear the bubbling of the water, unitl the water reaches your mouth, put the end cap on the vertical pipe, then remove the end cap on teh drain pipe below. Simple and foul proof.
-
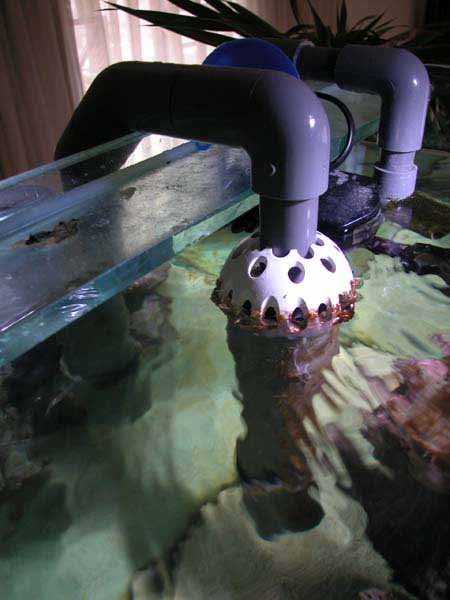
One more pict to show the end cap and the 45 degree L. Hope you understand and happy overflowing!! Cheers! Chipson1
-
I put this ball valve is to serve as in case, you don't really need it to save cost. Picture attached

-
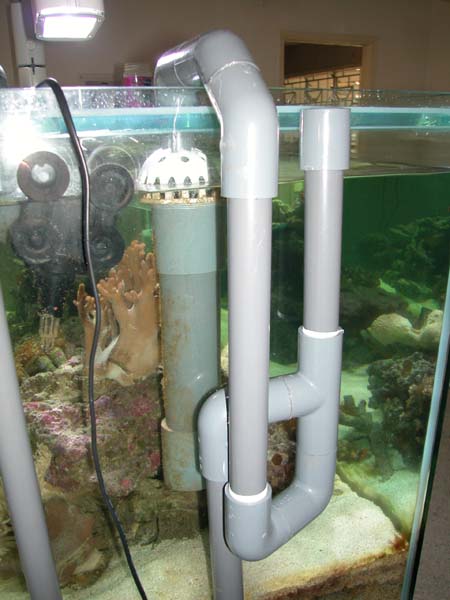
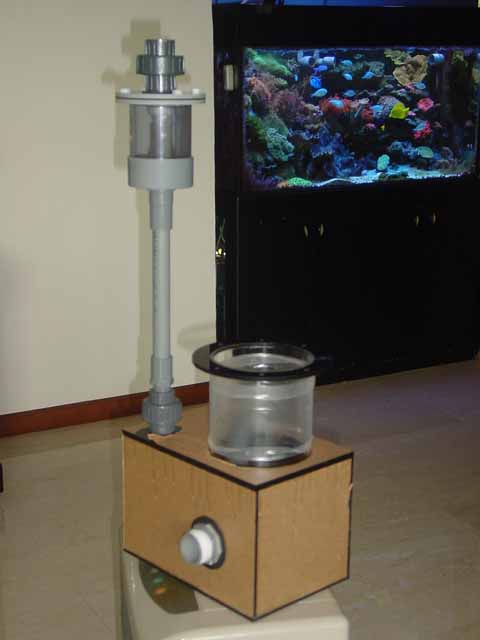
I have arranged the down pipe inside to save space. To initiate the flow, remove the right hand side end cap and suck the water from the main tank, once the water starts to move, put the end cap back tightly. You will see the suction so strong and the water is gushing to the sump box. DO NOT DRILL HOLE ON TEH END CAP!!!! See picture

-
Hi guys, sorry for the long delay of images. Finally I got the pictures. As you can see the overflow cone is make of floor / drainage trap. The grip onto the pipe is very tight, so that you can move the skimmer tube up or down to deicde the water level of the main tank. The flow rate is fantastic, presently my friend is running on 3500 lph, it should be able to run up to 4200 lph. Melvin, I have made some changes, such as a 45 degree L instead of 90 degree, some other will be shown in next few pictures. Cheers! Chipson1
-
Hi Ian, I am flattered the compliment from the pro, thanks very much for your encouragement. I will try to DIY more to share with the local reefers. Cheers! Chipson1
-
Thanks AT, You have set very high standard and expectation, thanks for your forum that I can learn a lot from it and hopefully return a bit of my knowledge to the fellow reefers. I did not secure the down pipe permanently bcos I was not sure what hieght is the best for the injector, once its confirmed, I will glue the down piep and secure it firmly, thanks for the kind advise. Cheers! Chipson1
-
Hi Deepblue, This is my first acrylic DIY, so no experience on this material, PVC easier to handle, so choosen convenient way. Next time I will use full acrylic. Thanks for your advise. Cheers Chipson1
-
Typrobin, The Acrifix is similar to weldon from the US, you can get it from Dama or Highlander.
-
Thanks Roidan, I am inspired by both the SRC & Reefcentral DIYers, so hopefully local reefers who wants to DIY can find more help in their DIY dreams. Cheers, Chipson1
-
Alfa, This tube are sold in min 1 meter, so evrey different size need 1 meter. I paid in total about 4++ close to 500. Its more an interest. I do not need baffle as the injector nozzle is slightly higher than the reaction riser.
-
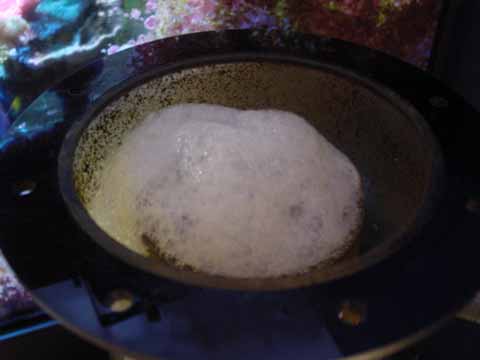
Skimmate after 1 day
-
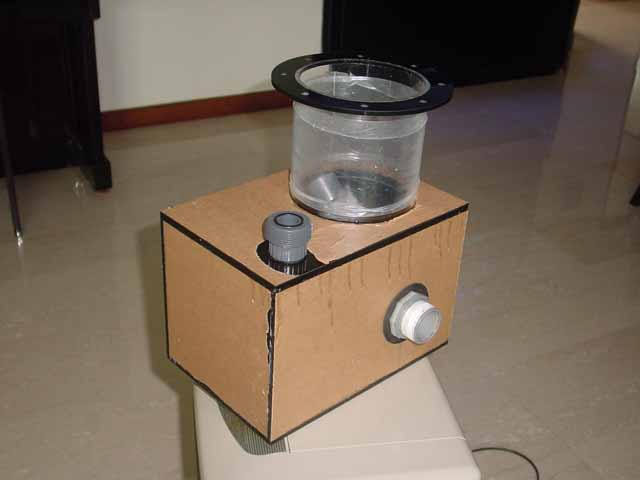
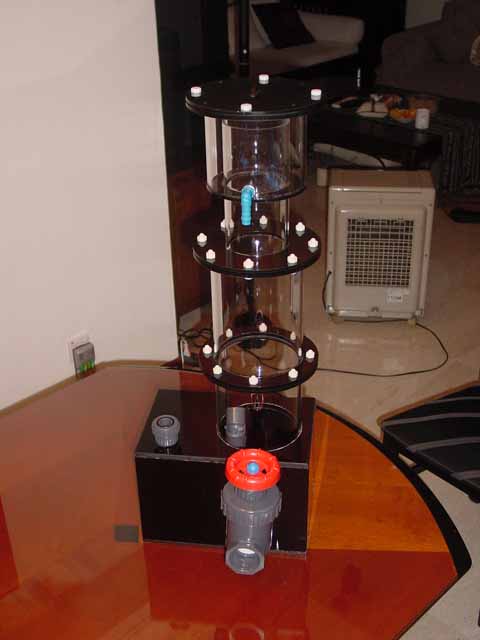
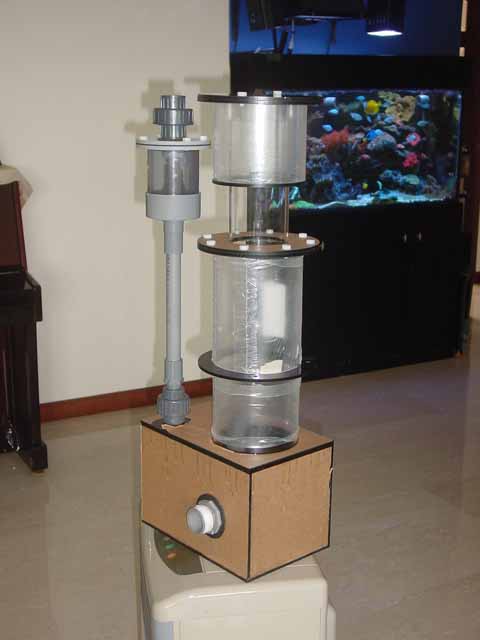
DIY Beckett Skimmer ready to put in action

-
Finished product
-
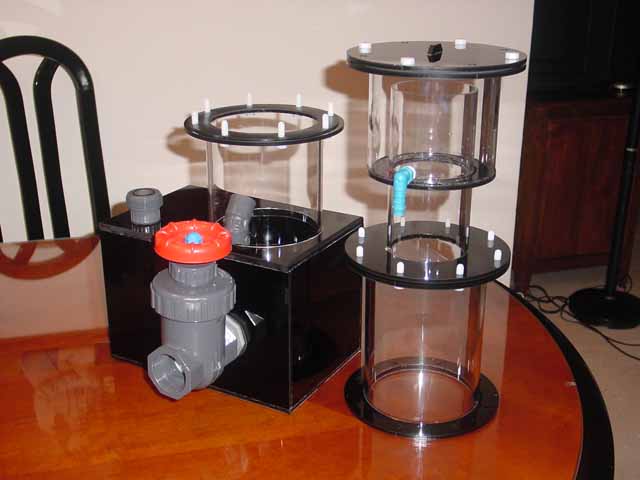
Another pict
-
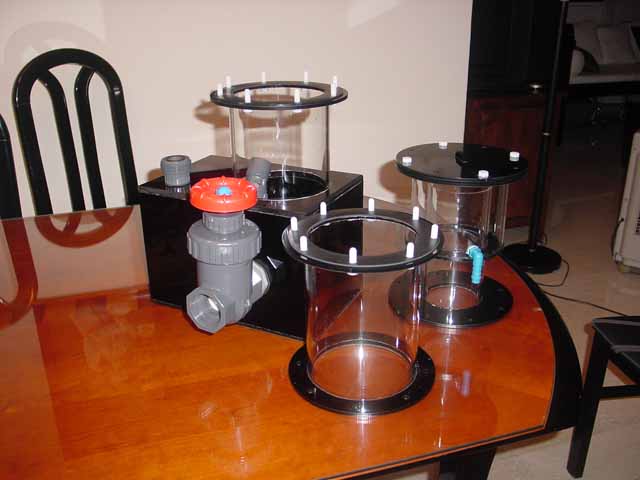
Finished parts ready for assembly
-
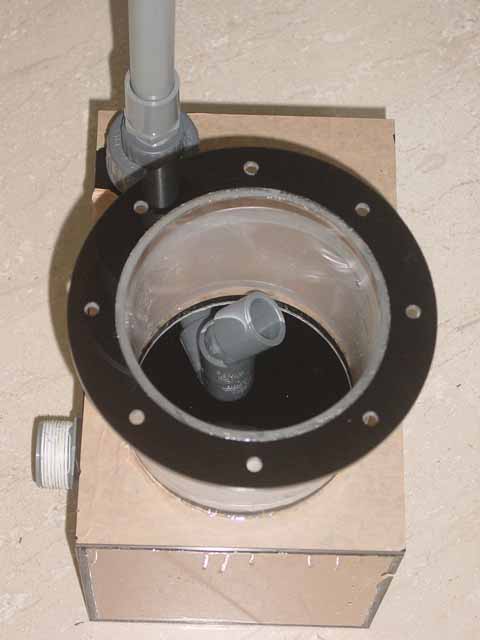
showing the injector nozzle
-
Assembled unit
-
Riser chamber with injector
-
another image