


chrisyew
-
Posts
593 -
Joined
-
Last visited
Content Type
Profiles
Forums
Gallery
Everything posted by chrisyew
-
If you are going to DIY a T5 light set, do consider a individual reflector for each tube - this will be better than one common reflector. The setback is a much wider width is required, thus you got to check your tank width whether it can commondate that. Also consider to install ventilation fans (blowing out not in) on the side of the set or on top. It helps even the ballast may be outside the light set.
-
modular surface skimmer for 24g nanocube
chrisyew replied to Aquablue's topic in Members Tank & Specs
You may try that shop at T95 Jalan Kayu or Pasir Ris Farmway - now on the left side at the T-junction (the lady with the bird and dog shop). Think that shop is selling at $3.00 a piece but check on the box if it's meant for your model. -
Thanks bro. I don't have good hands but shaky hands as I still can't quit smoking hehe.
-
Thanks guys for the compliments. Will update once the skimmer is done.
-
Thanks for the info. But where is Aquamart? BTW is this strip some kind of electrical parts? What is it called? Thanks once again.
-
Anyone has any idea which shop sells such surface skimming strip? Thank you.
-
Think so he probably misquoted as transformer. Anyway it's not my intention to confuse him lah. I've bought those with 20 leds connected directly to a 5V adapter (or converter) without resistors. The connection is in parallel. BTW there are already 5V leds and onli whether Sim Lim sell them - I don't know. Frankly the place is so much difference compared to 20 years + back when I was doing my project. Can't even find those shops that I juz to go hehe. Think it's better to change his adapter or converter to probably a 5V one or better still one that suit the led. There are lots to choose from in SL.
-
Unless you are using those like handphone charger or built in AC to DC converter, else a normal step down transformer from 240V to 24V - the output is still AC and not DC. Sim Lim sells a wide range of AC to DC converter and is not expensive. Probably best to get those AC 240V to 5V DC. You may connect the LED (5V types) directly in parallet to the output then. Those in Sim Lim selling 20 LEDs also do not have resistor connected in series with the LEDs, though it's better to have resistor. In fact, juz buy these type and plug and play is the easiest. Usually they have some simple rectifier circuit like this built in; http://www.play-hookey.com/ac_theory/ps_rectifiers.html
-
Thanks. Guess we can all exchange pointers. Next I'll be doing a Pico skimmer for the Nano Cube.
-
You can get all these from c328 (near to the entrance those barang barang things, must see carefully else you miss it). Check the elbow and T-junction to see if it can fit the tubes size. There are 2 sizes. Don't buy wrongly. I change the stock pump to Ehiem compact 600 as it's more powerful and very silent. You may use the Minijet 606 as it's mentioned in the other Nano Forum. Don't hesitate to exchange pointers, Max! BTW the surface skimmer is ok and in place. Not a problem.
-
Thanks. The temperature is not more than 31 deg. with the fan off. But once the fan is on, is less than 30 deg. If I open up the feeding front part of the canopy, it's slightly lower. May change the 2 fans to a higher power fans hehe. Let me know if you can find the C-clip for the PL tubes.
-
Thanks. I got the LED light from Sim Lim - think it's about $20+. But it's cheaper to diy coz it isn't difficult.
-
Here is the completed job; First is under the 2x24W PL tubes. The bottom one is under the 20 LED 'Moonlite'. Sorri, temporary transfer all my old live stock from my old nano tank to this nano cube. So it doesn't look good as my old tank is used for experiment hehe. Under the 20 LEDs Moonlite.
-
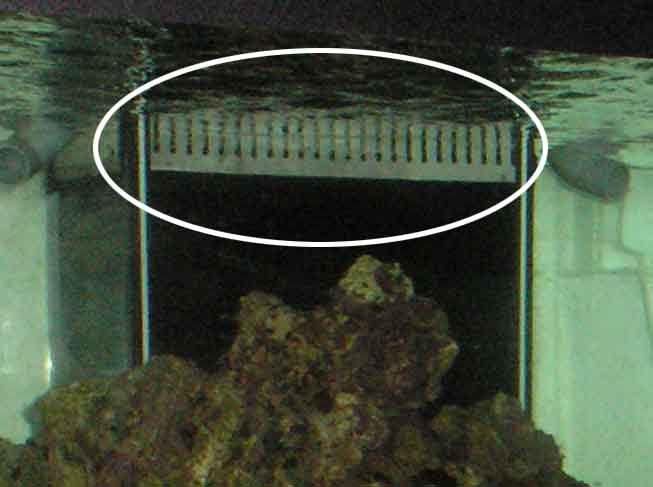
Remove all those standard items from the chamber except the replaced pump. I did some add on to the flow by using some plastic tubes and elbows / T-joint. Juz plug the tubes to the outlet hole. I'm splitting the flow into 2; one to the right side of the tank and the other bottom left. Now I juz put a floss at the top 1st chamber (but must change it frequently) and also a surface skimmer. Also a bag of Aquaz Pure Phos in the second chamber. The surface skimmer juz attached to the overflow as the water will pressed it against the 'wall'.
-
Now juz install the 20 LED strip using a telephone conduit and some velcro behind. I would preferred to fix it at the top space there. The standard stock pump is a 106Gph pump; Since I already have a Ehiem compact 600 (600l/hr or 160G/h) pump, I'm replacing the standard stock pump with this for higher flow. You may also replaced it with Minijet 606. The size will fit in the last chamber.
-
Once the 2 PL light tubes are installed and the external assembly for the electronic ballast and transformer / AC to DC converter are done, they should fit like this. Secure back the plastic cover to ensure that it can fit nicely. If you will to take note, both fans are actually ###### air out instead of blowing air in. You may wish to reverse the fan on the left (away from the pump), so that it is blowing air in. Some claimed that it ventilate better this way with one blowing in and one ###### air out. Juz remove the 4 screws and reverse the fan; then screwed it back.
-
I'm using some acrylic to place my electronic ballast (Elbiru 2x24W) and the transformer / AC to DC converter externally and sheltered them from getting salt wter splash. Here show the wires from the PL lights to the electronic ballast. Also how the how assembly like. It's rather straigh forward wiring. The completed assembly viewed from top.
-
Buy a 4ft reflector and cut 2 pcs to size to suit the canopy. Leave some space on both ends so that it won't cut the wires later on. Once it's cut to sizes, screwed the reflectors to the canopy using the existing holes. You may note that it's difficult to find the C-clips for the PL tubes - temporary you may use one each for each tube instead of 2. After preparing both reflectors and PL tubes, now you may start to prepare the wire connectors to the PL light. Take note that you may wish to solder the wire to the connector for better conductivity. Go for a 60W soldering iron as it's faster and better than a 40W. You need to do 2 pairs of these for 1 PL light, so a total of 4 pairs are required. Sleeve them up after soldering for better insulation. You may use a hairdryer to shrink the sleeve.
-
Now remove everything until left the 2 fans. Be careful when you are cutting the wires. The transformer and the AC to DC converter need to be installed externally so don't damage them when removing them. These transformer and AC to DC converter are to be installed externally.
-
Decided to use 2 x 24W PL light tubes instead of 4 x 8W T4 tubes though T4 are cheaper; as for PL the total wattage is 48W while T4 onli 32W. The T4 8W also can fit in the canopy;
-
Objective of Mod : - To convert it to 2 PL tubes (2 x 24W) and install a 20 LED 'moonlite' in the canopy. - To install an Electronic Ballast and put it externally to reduce heat. - To install the AC to DC converter and transformer externally also to reduce heat. First, remove the transparent plastic splash guard and the stock reflector. Be careful when dealing with reflector as the edges are very sharp. Here is what you will see after removing them;
-
The standard items come with it are; - 1 24W PL tube 6400k - Magnetic ballast with starter - 1 106G/hr pump - 2 12V Fans with AC to DC converter and stepdown transformer - Some cotton frost or wool, ceramic rings, bio balls and charcoal bags.
-
This 12G O Pink Nano Cube was purchased during a roadshow at Pasir Ris Farmway and cost onli S$30! The onli setback is it's Pink and it's the older version of the 12G Nano Cube. This means there are 4 Chambers at the back of the tank and the glass thickness is thiner - 3.83mm onli. You may read thru the JBJ products here; http://jbjlighting.com/aquarium_prods.html
-
Thanks Shoelvy for the infos and pictures. Woh, your last chamber is like lots of fishing line with pumps haha.
-
Output from the transformer is AC, you still need to convert the AC to DC before stepping down the voltages.