R0B
-
Posts
313 -
Joined
-
Last visited
-
Days Won
25
Content Type
Profiles
Forums
Gallery
Everything posted by R0B
-
Rockscape are a personal choice. And depends much on what you plan on keeping. Just think about how you are going to keep the tank clean and how water is going to flow, on top of fish hiding places. The trend nowadays is to have a small footprint allowing for more water flow around the structure. Sent from Singapore Reef Club mobile app
-
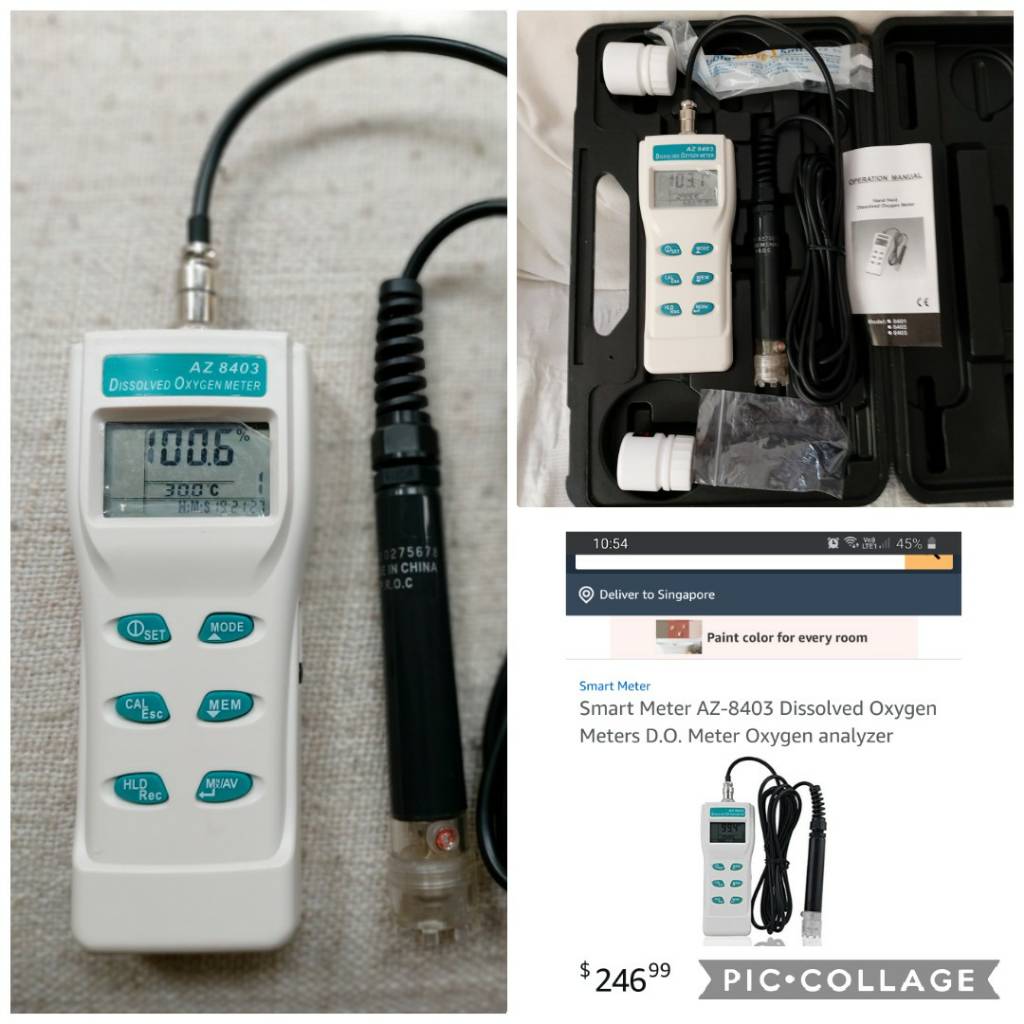
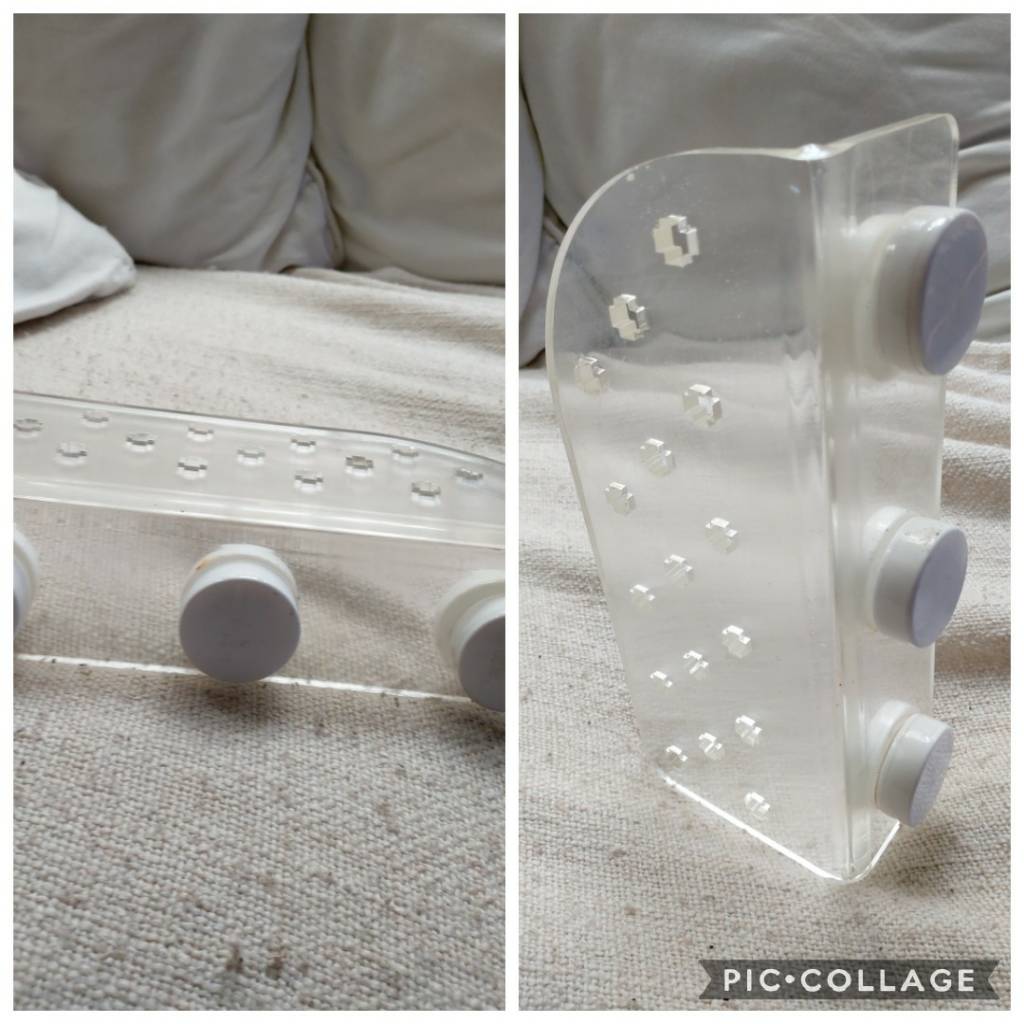
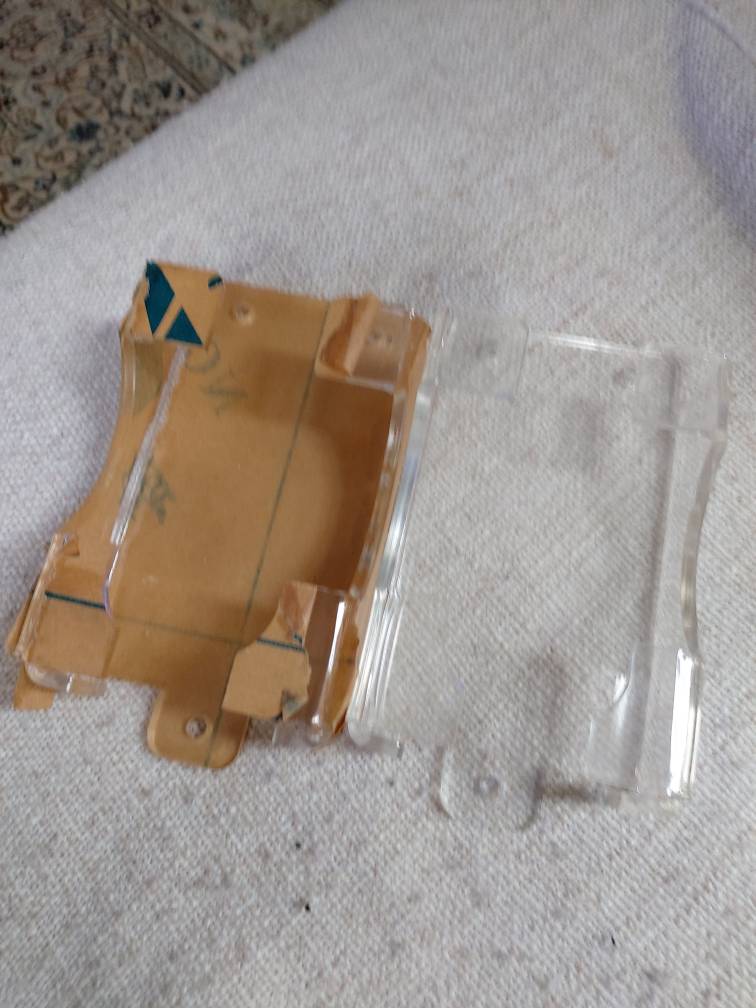
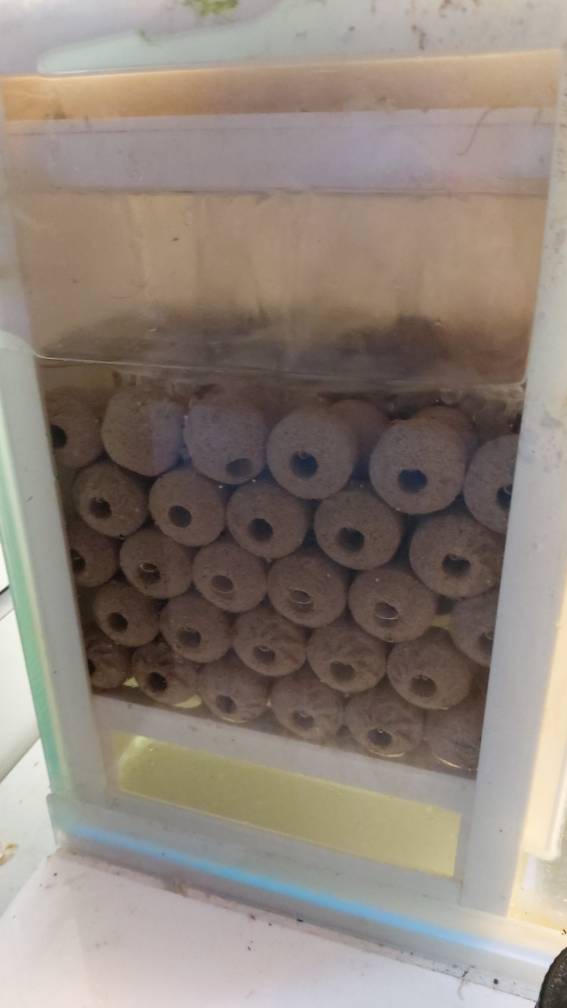
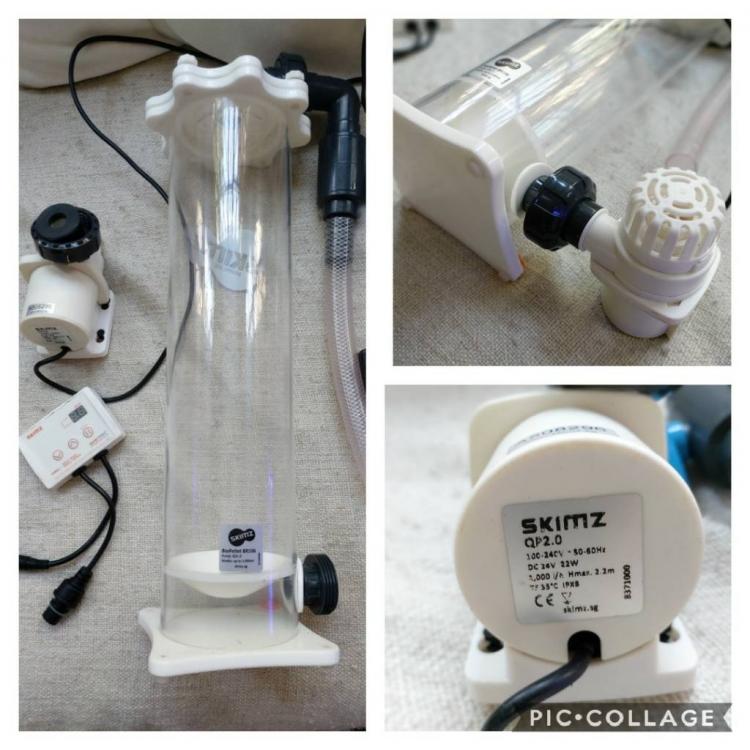
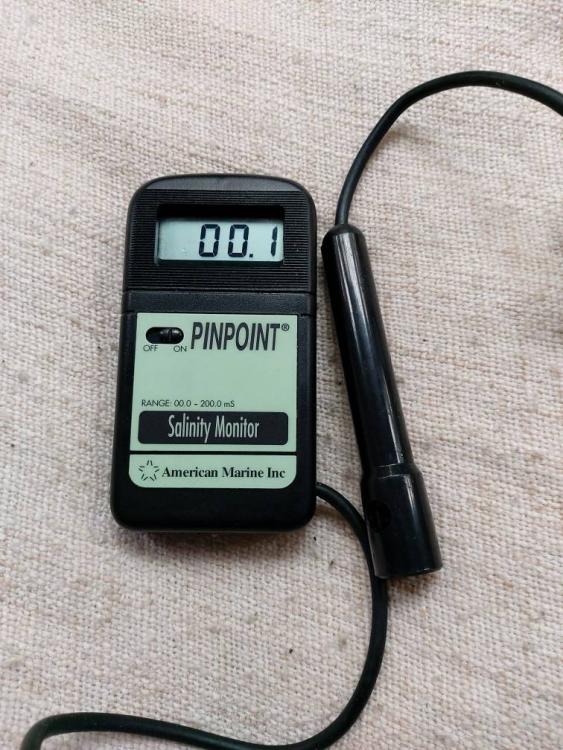
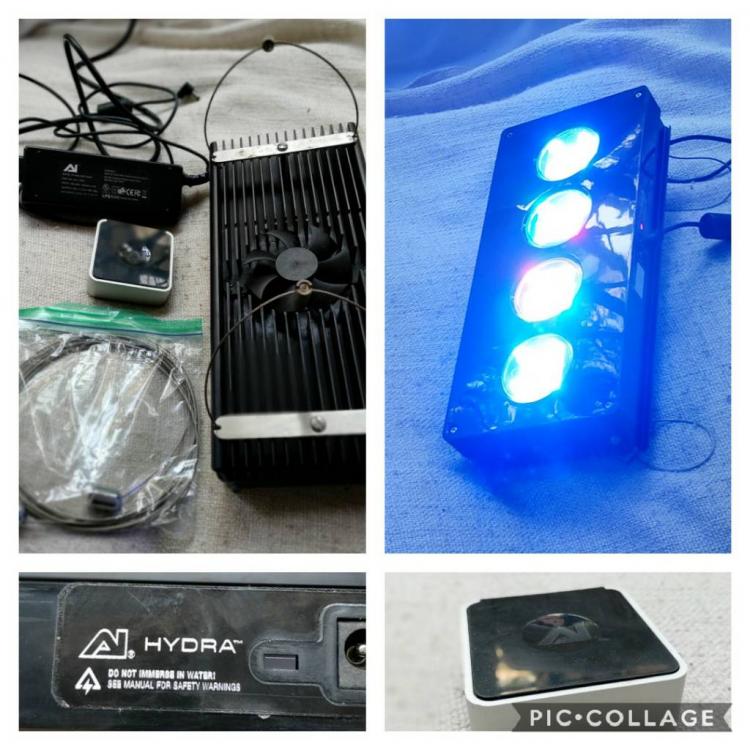
Hope everyone is having a wonderful national day holiday. I have to following goodies to offer you... Triton Core 7 system (triton method). Unopened. Got from Germany last year. Selling as decided to go with Tropic Marin Balling method. $75 Kessil Gooseneck (as shown) $25 Skimz BR106 reactor (upgraded with QP2.0 DC pump for additional control). $75 American Marine Pinpoint Salinity Monitor. $65 Dissolved Oxygen Meter (AZ-8403). Comes with a few spare parts, instructions, calibration fluids and original storage case. $95 AI Hydra, AI Director and hanging kit available (see prev post). All for just $125. Skimz CR16 frag rack (plus frag plugs) $10 Vortech driver acrylic holders 2 for $5 1000ml Tropic Marin All For Reef. Unopened. $28 WhatsApp 88080763 or PM me. Pick up near NUS. Or it may be possible to drop off if you are getting a few items. Happy Holidays Sent from Singapore Reef Club mobile app


-
First I suggest you retest to make sure your result is accurate. API test kits are notoriously inaccurate. Once result is confirmed start to do a series of water changes to get the value down. 20 or 30% at a time if possible. You may need to do two or even three changes over the course of a week or 10 days. After doing the water changes you need to address the possible causes... Look at inital water source. Move to RODI where possible. Look at soures of nitrate being generated, are you adding in too much food or have too many fish? It could also come from an accumulation of waste. So make sure you are cleaning out filter socks regularily, cleaning sand bed, and cleaning out sump. After addressing possible causes, you need to think about nitrate management. Take a good look at your mechanical and biological filtration and make sure it is adequate. Does the tank have enough flow to get the detritus suspended, is the skimmer turned in and size appropriately. Are you on top of your regular water changes and cleaning.. After mechanical look at your biological filtration. You have some macro algea so that should start growing and absorbing that undesirable nutrients. Just remember to harvest it regularily. Also you can give your biological filration a boost by adding in bacteria and additonal bio media if you don't already have (especially if you are running bare bottom tank). Carbon dosing and/or adding bio pellets, or even going down the zeovit route are other options to boost the beneficial biological filtration of you tank. Anyways, Good luck. Hope this helps get your nitrates in check. Sent from Singapore Reef Club mobile app
-
Doable, but not advisable. A lot depends on ambient tempreture and tank size. However, stability is key as you move to the hard to keep corals like SPS. So whilst an individual coral may adapt to a higher tempreture over time it is the swings in tempreture during the day that are a challenge. If you have a large tank then the swings will be lessened. IMHO with a larger system it is almost essential to have a chiller here in Singapore if you plan on keeping SPS corals. Sent from Singapore Reef Club mobile app
-
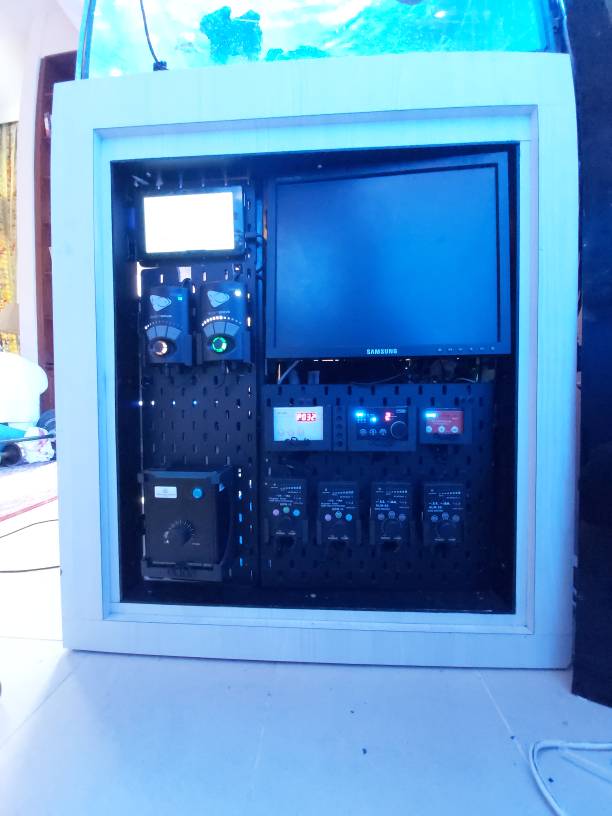
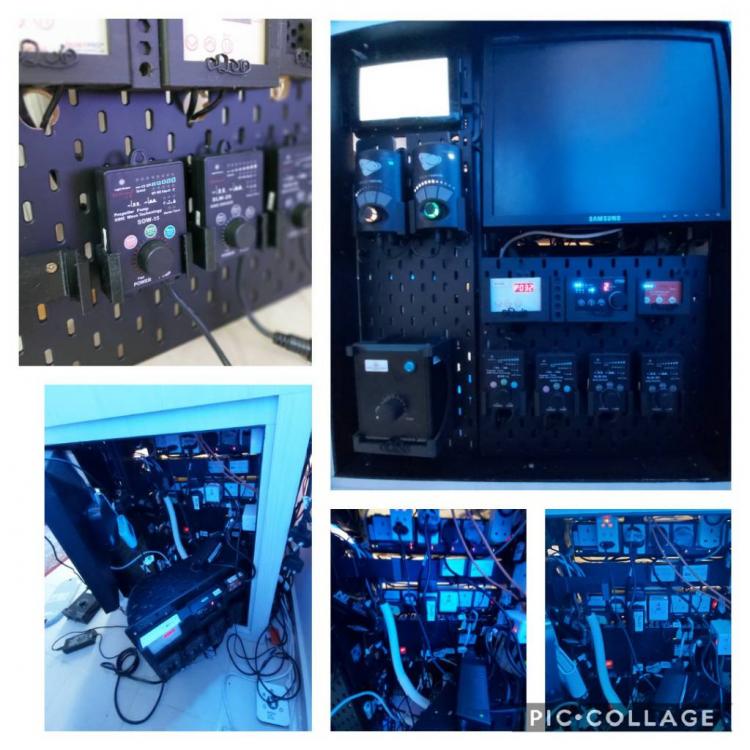
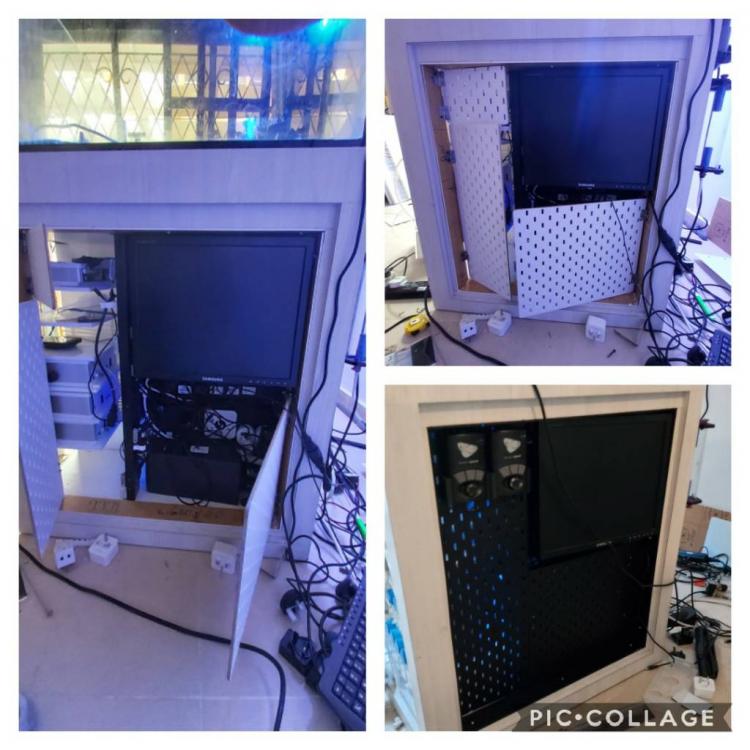
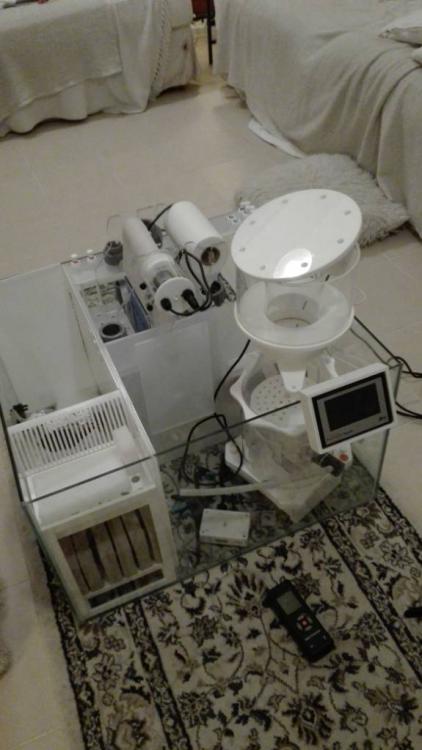
Carrying on the build thread... So with the circuit breaker behind us, and now I have some extra time on my hands (anybody hiring??) I have been busy finishing off projects on the tank. Just completed my electronics section... Basically with some peg board from ikea, a few magnetic door clasps, and spray paint. I am hopeful that I have managed to hide the power bars and inevitable rats nest of cables in a suitably usable and accessible manner. A $15 monitor from cash converters and a $28 amazon fire tablet provide me with constant dashboards and a place to programme the GHL. Whilst some 3D printed brackets hold all the controllers. In hindsight I would have taken a seperate cupboard and placed all my electronics there. Maybe I will move the electronics one day, until then I am hopeful this configuration will work out - would be interesting to hear your views?! Sent from Singapore Reef Club mobile app

-
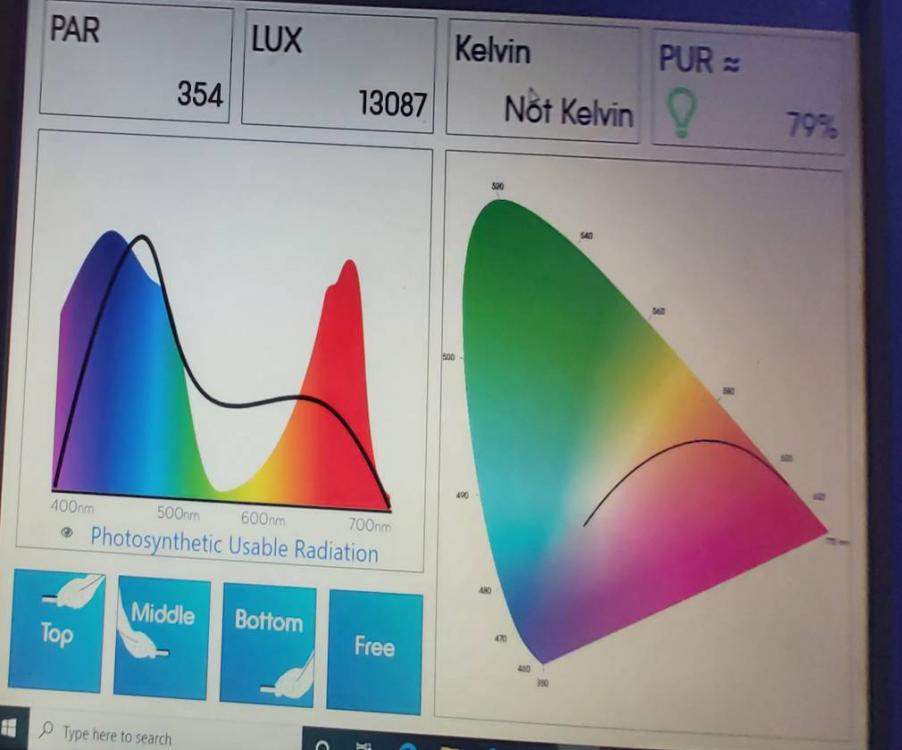
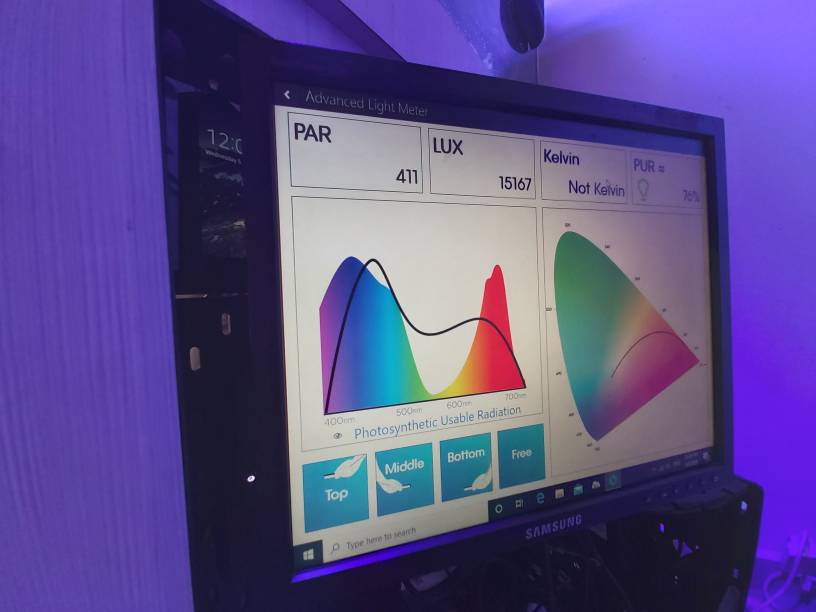
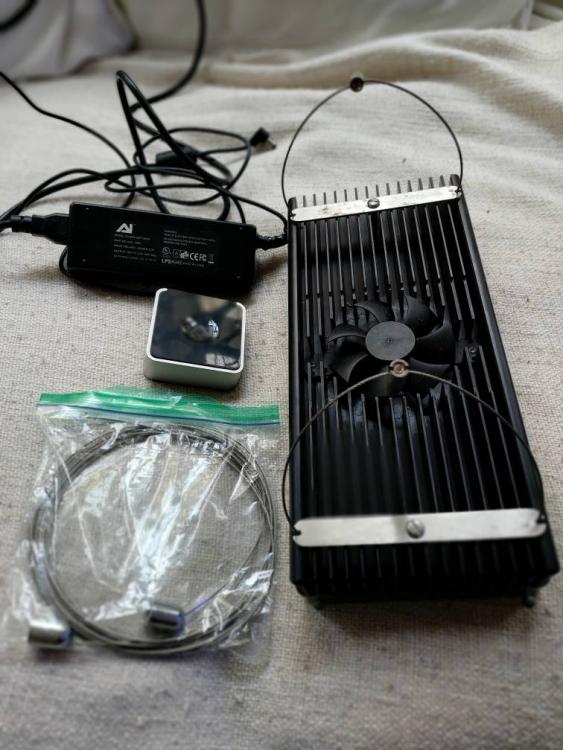
...continuing the stock room clear out. I have an original AI Hydra unit. This is the model that came out after the highly successful AI Vega's but before the HD range (so this is not a HD 52 before you ask) ALSO.... will include an AI DIRECTOR, which allows you to control the different channels and can set schedules etc. Also comes with a HANGING KIT Please Note the hydra has two leds which don't appear to be functioning. Otherwise all is good. I just took some PAR readings on my Seneye. It was measured with the light at 8 inches above the water and at a depth of 12 inches, here I got a PAR reading between 320 and 350 (pic shown). At a 7 inch depth the PAR was as high as 400 (other photo). So still plenty good enough for an SPS reef. Selling everything as a set for $175. Collection West, Pasir Panjang Or can arrange to meet if needed WhatsApp 88080763 or PM me. Thanks. Sent from Singapore Reef Club mobile app

-
Haha. There are several reasons why either reading could be slightly out. One typical issue with titration accuracy depends on what you see is the endpoint... the hanna will be more consistent in this matter. Whilst Salifert and others is based on perception, afterall do you measure it when there is the slightest colour change, or when there is a full colour change?? This can easily make a 0.3dkh difference. Add in the test accuracy on either Salifert or Hanna (+/- 0.1dkh), and you can easily see a variance between the two for the same water sample. For stability I suggest you pick one test kit and use that to review your DKH over time (I would personally choose the Hanna). As for accuracy, you could pick up a dkh reference (I know GHL sell one) or go one giant leap forward and do an ICP test comparing all three methods. Good luck, be interesting to see which ones are more accurate. Sent from Singapore Reef Club mobile app
-

WTS 50L Tank, skimmer and TLF phosban reactors
R0B replied to R0B's topic in Sell off/Pasar Malam Shop
Hi. All reserved. Mods please feel free to close thread. Thanks Sent from Singapore Reef Club mobile app -
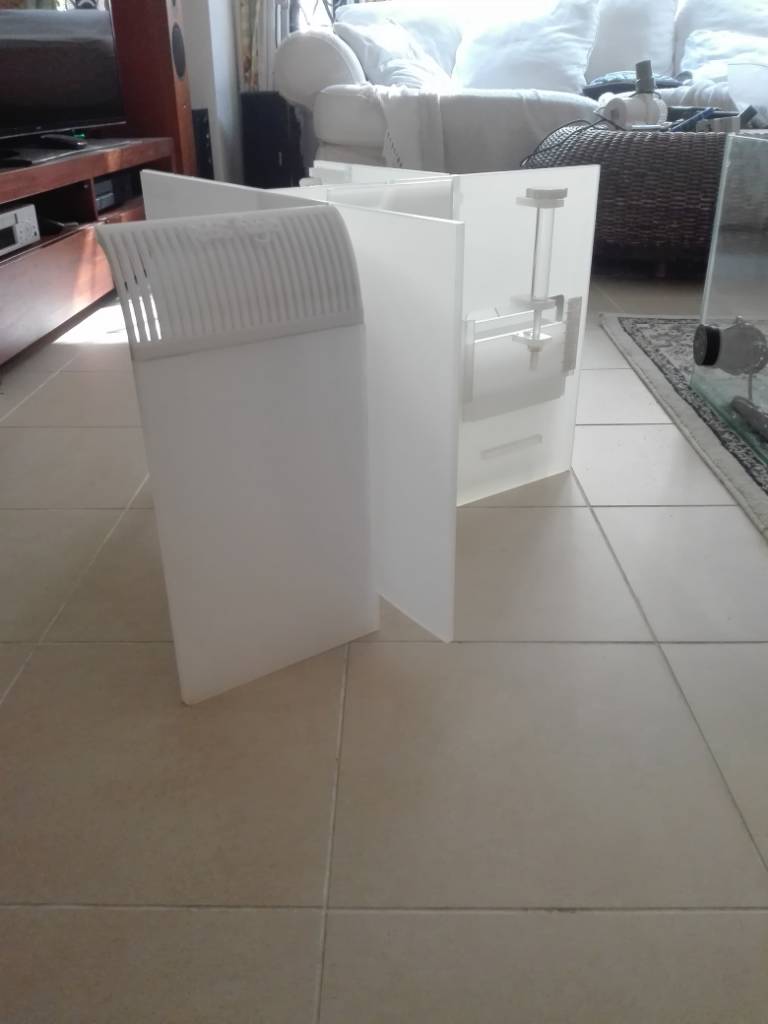
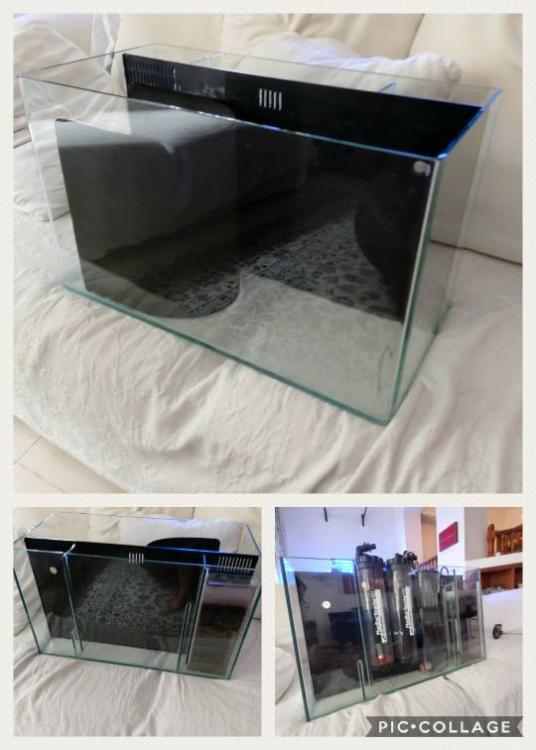
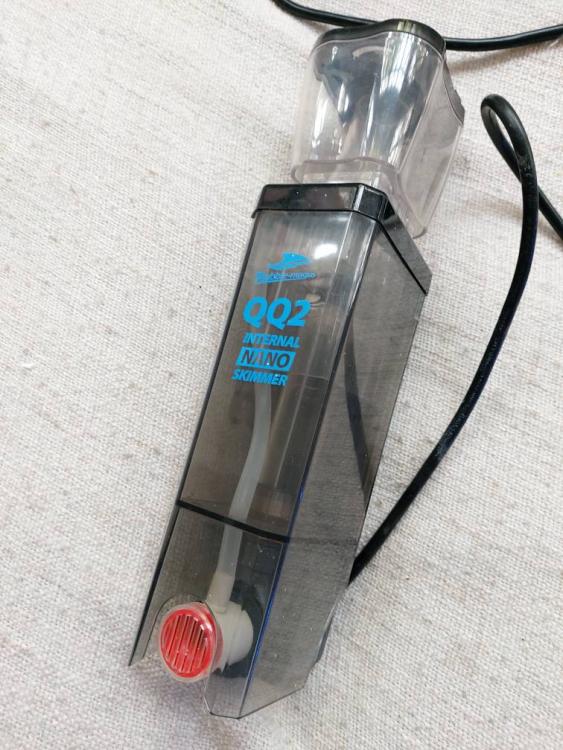
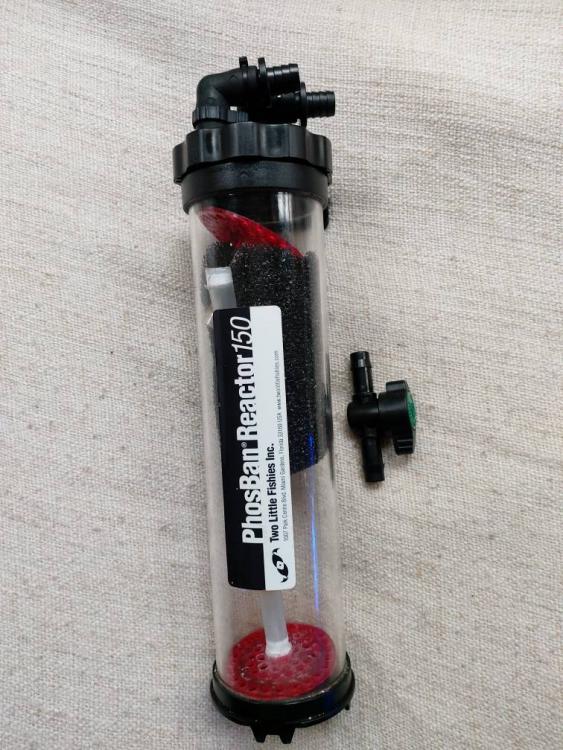
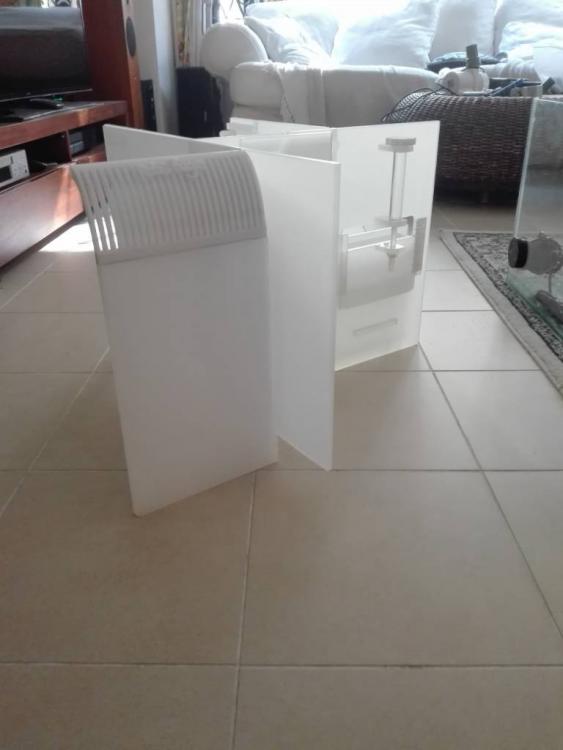
Hi. Looking to clear a few items... 24Lx12wx14h (5mm glass) all in one internal overflow tank. Comes with custom caddy for filter media, carbon and bio media. The tank has three compartments in the back the largest middle compartment has enough room to house a small skimmer and several reactors (as per photo, items also for sale). Tank $40. Also selling BM QQ2 skimmer $25. [Please note that the height adjustment bracket has been removed which was done to fit in a IM tank. It now easily sits on small shelf. No impact to performance] Finally, I have two TLF phosban 150 Reactors. Comes with all the fittings and additonal ball valves. Selling the 2 units for $70 or $40 each. ...Take everything for $100 WhatsApp 88080763 or PM me here. Sent from Singapore Reef Club mobile app
- 1 reply
-
- 1
-

-
I think it's a matter of Good, Better and Best practice. It is certainly good practice to test, it is better to test and adjust dosing, it is IMHO Best practice to do this more regularily. Now do you need an automated tester to do this, no not really. But it helps! I certainly valued getting information on regular DKH status to understand my tanks character. Now I value it telling me if something is going wrong as much as I valued how much it told me my corals were happy uptaking ca/alk. To me it is worth the value in terms of knowledge, stability and safety. I can be aware of changes so much quicker. The new ION probes are certainly interesting technology so in future firmwear updates no doubt this will allow them to test more and more. I for one am a fan of auto testing. Sent from Singapore Reef Club mobile app
-
Any air tight container could work, just have two holes and some 1/4 inch push connect bulkheads fittings along with some airline tube. You could use something like a refillable inline DI resin filter. Whilst not a large volume it is however sturdy and in many ways already purpose built... costs about $10. Sent from Singapore Reef Club mobile app
-
Yes. They don't like change. So if you are thinking of getting a coral be prepared. For example if you buy a coral from a fellow reefer whom has spent month after month getting their corals used to 27degrees, and you buy it and in an hour or two (of floating and drip acclimation) you expect it to flourish in a tank set consistently at 25 degrees, it won't be happy. Corals can adapt to differing temperatures and different water parameters but it takes time. Consistency and minimal change is what you want to aim for. Sent from Singapore Reef Club mobile app
-
Yes one or two degrees is no problem. The sea temperature does vary with tides and weather conditions, and there is some argument to say that keeping coral within a 0.5 or 1 degree tolerance is in fact unnatural and reduces a corals resilience to temp swings. That said stability is key to reefing and nothing good happens quickly. So keeping the average temp of your tank stable is important so I think you are on the right track. Sent from Singapore Reef Club mobile app
-
If it is velvet... Suggest you do the following. Remove all fish from your tank. Put in a fresh water dip (try match temp and ph). Min 2 mins. Then place fish in a quarantine system (buckets will work). Add air stone. Treat with copper. Be prepared to loose a lot of the fish. https://www.thesprucepets.com/marine-ich-velvet-coral-fish-disease-2924982 Also google humblefish on reef2reef. Good luck!!!! Sent from Singapore Reef Club mobile app
-
Not an expert on disease, but I have to say that the pic looks like marine velvet. Have a look for White spots, dusty looking skin, difficulty breathing, scratching on rocks. Fingers crossed that I am wrong. Sent from Singapore Reef Club mobile app
-
Chillers are typically rated on what the manufacturers suggest regarding aquarium size. This is opposed to rated a chiller based on how much tempreture it has to take out of the water (which is more important). As we live in a rather hot climate it is always best to over size the chiller so that you have efficient cooling. An undersized chiller will either be on 24/7 or constantly on/off, either way this reduces the life of the chiller, adds to the electric Bill's and worst still adds ambient heat into your room making the chillers job even harder! (That is unless you install it outside... which is highly recommended). So if you live in a well cooled house where the AC is on already it may not be as much of an issue, but if your house isn't consistently cool you may (and I would strongly suggest) want to go for one rated even bigger then 160L (possibly 300/400L min 1/10hp). Either way make sure any chiller has a digital tempreture controller and you get a pump that matches the recommended flow rate. Good luck. Hope it works out for you. Sent from Singapore Reef Club mobile app
-
Looks like a fun project. Keep the updates coming. Sent from Singapore Reef Club mobile app
-
Could be many reasons. Typically I would initially think is water chemistry - but you said all params ok but, did you test for Ammonia? (I would suggest you rule out ammonia issues). It could be something attacking the immune system of the fish (e.g. velvet, did you add any new fish? QT?). You mentioned your return was faulty. This could cause a few issues if you are not running water through your filters (eg. carbon), but this would show up in you Params. It could a lack of CO2 displacement/exchange in this case adding an air stone (like you did) would help as it causes more gas exchange. Make sure wavemakers are creating enough agitation. Just some ideas. Hope it helps. Sent from Singapore Reef Club mobile app
-
Nice! tell us more... Sent from Singapore Reef Club mobile app
-
Looking really good. I am enjoying your rockscape, which will look awesome covered in spa. I just went through the four month cycle too, and have not had any algea at all, did you experience the same? Wondering what will happen when the lights come on. (I have been switching them on for 4 hrs a day now). Wish you loads of success. Sent from Singapore Reef Club mobile app
-
Great tank. So what is your secret to sucess?? Sent from Singapore Reef Club mobile app
-
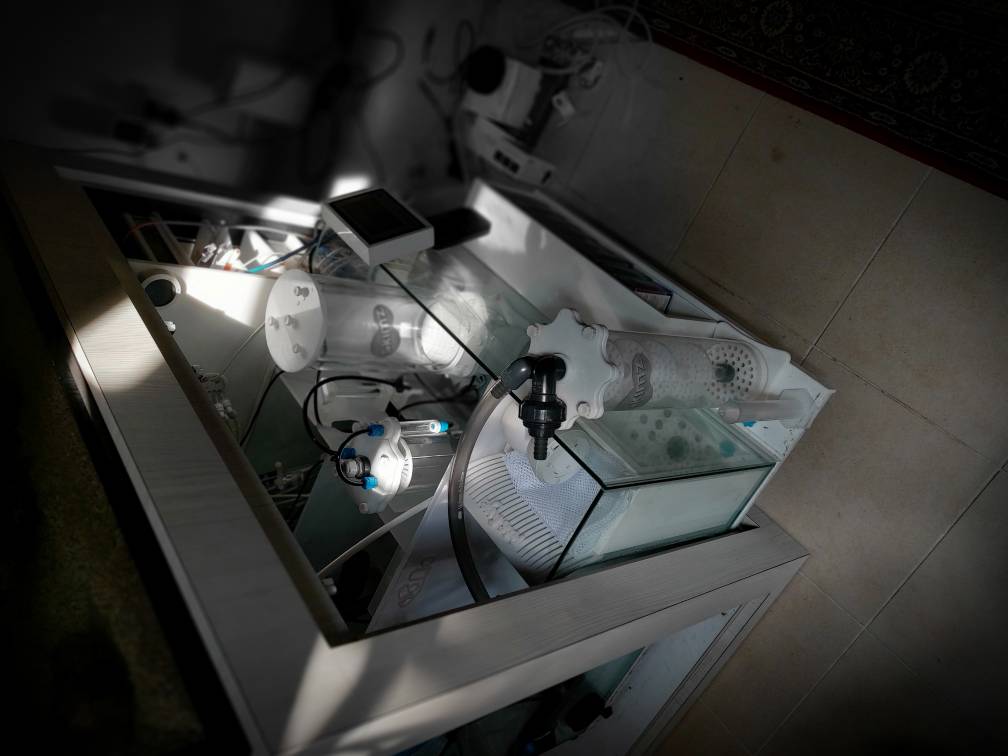
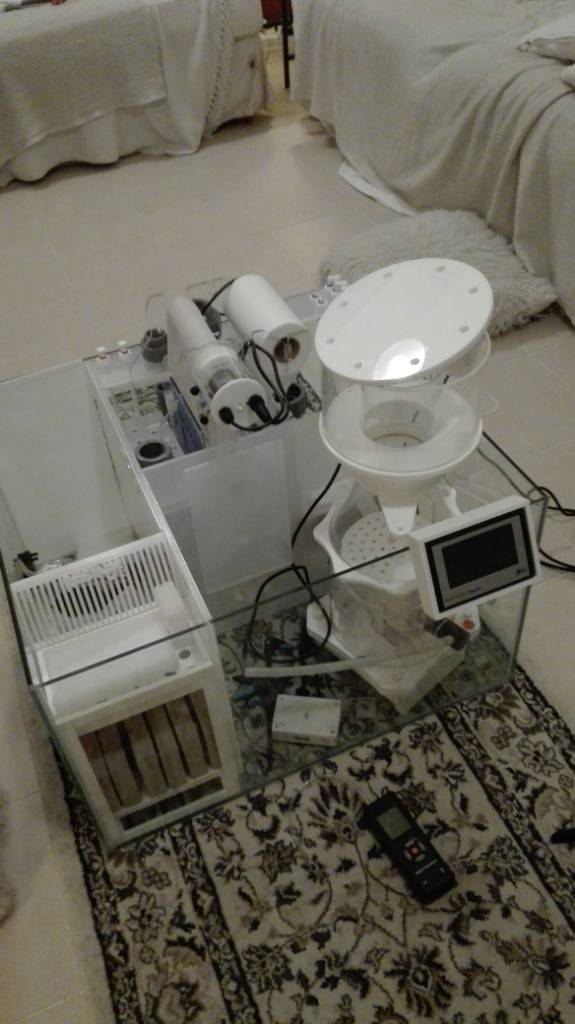
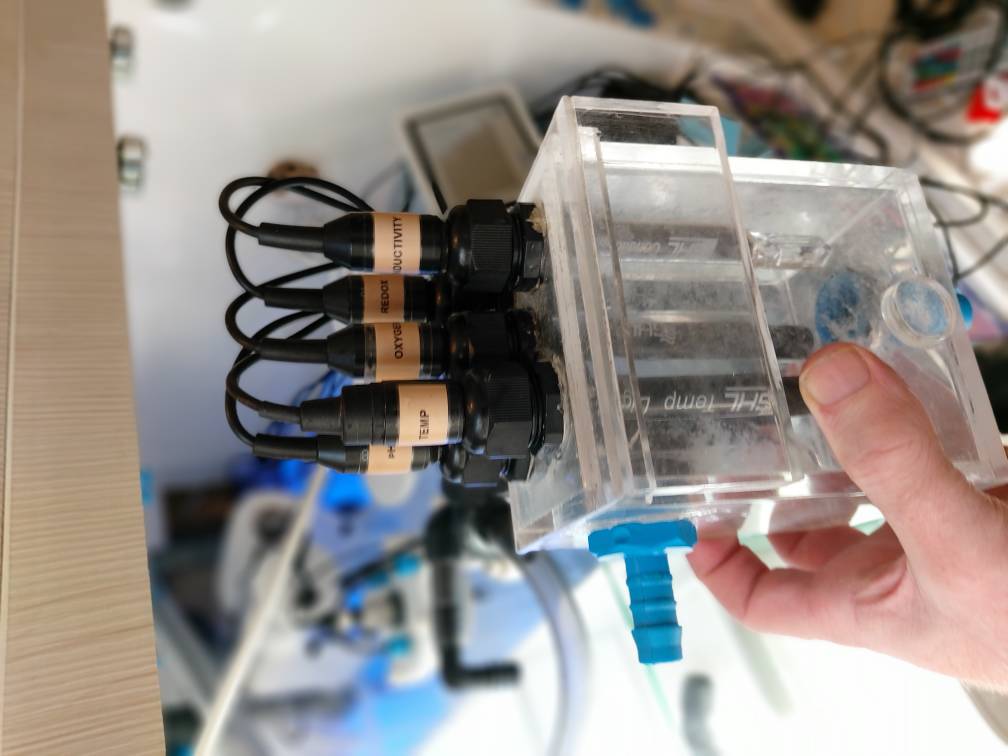
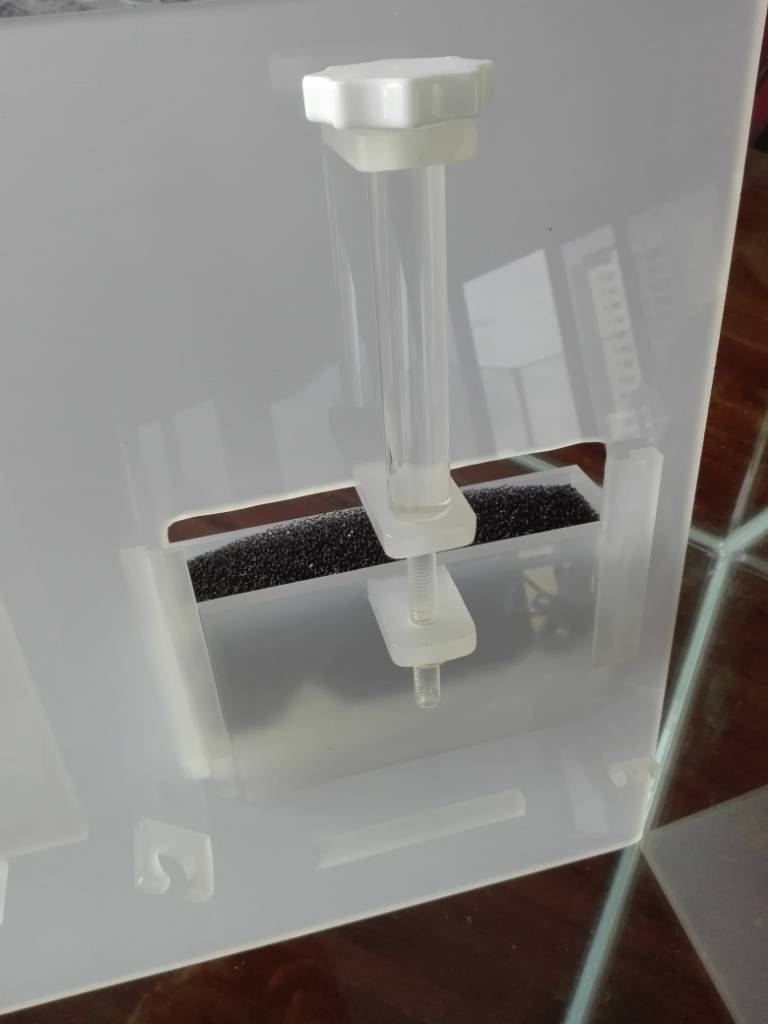
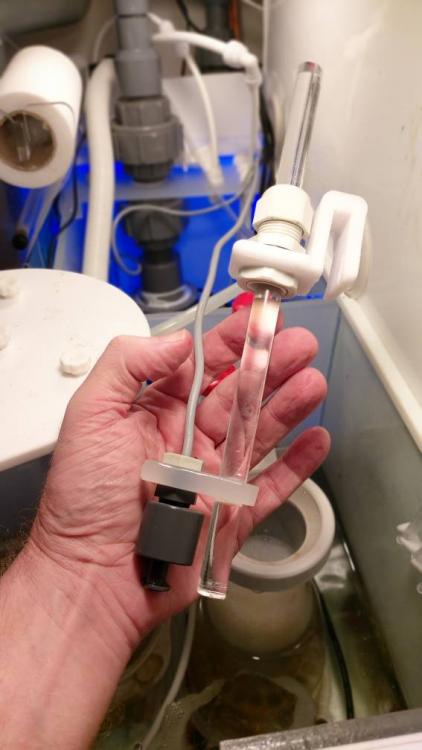
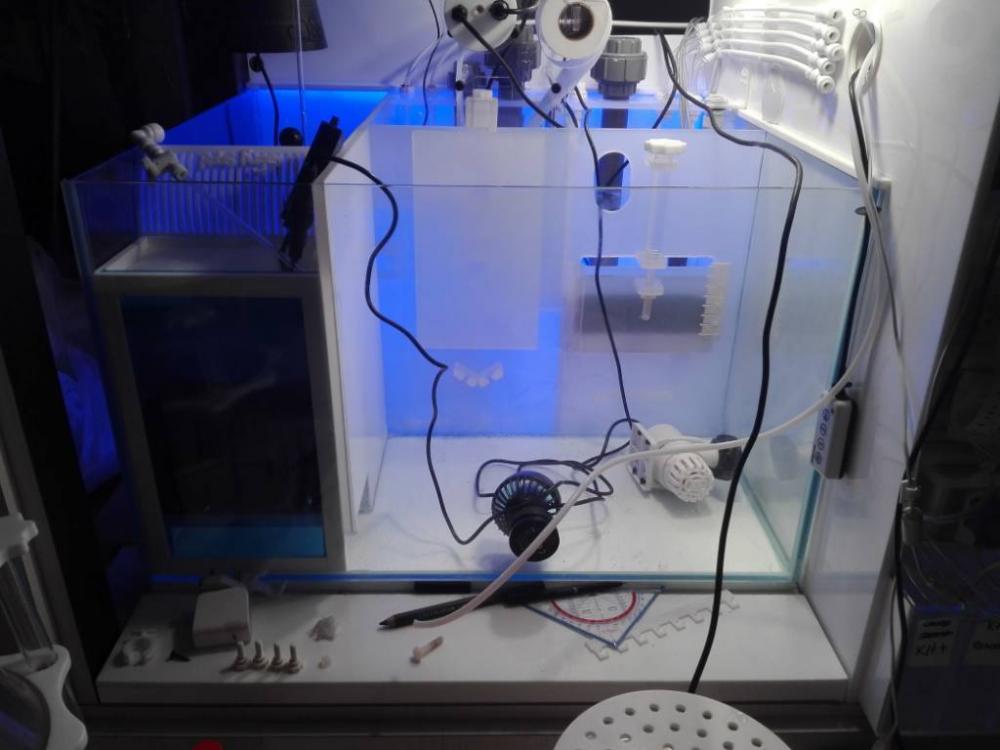
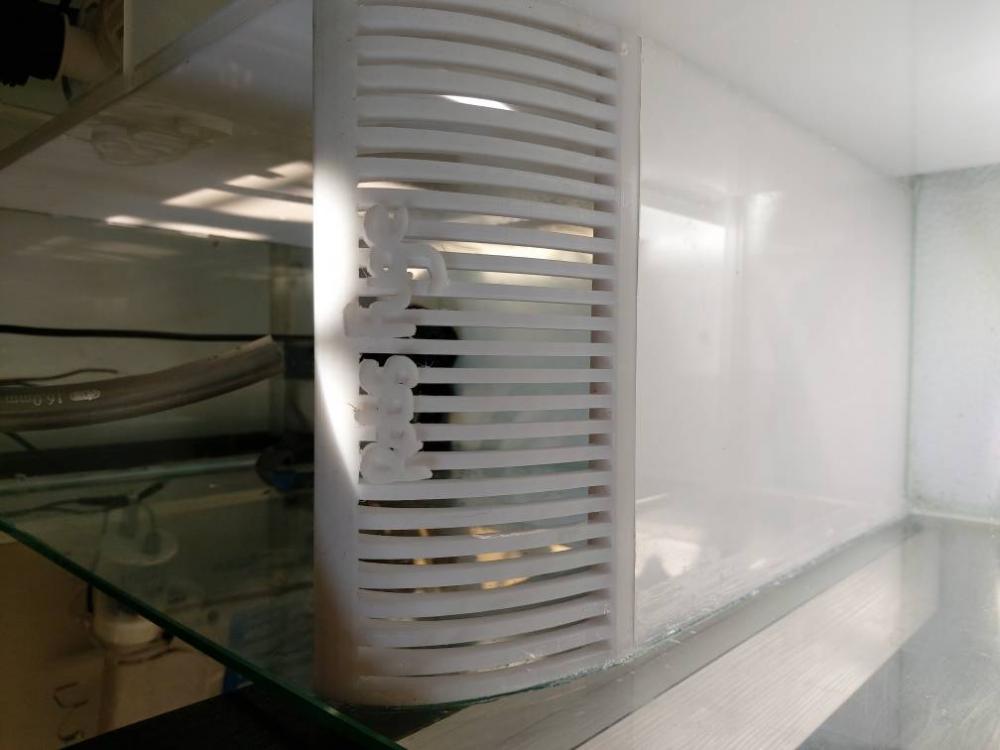
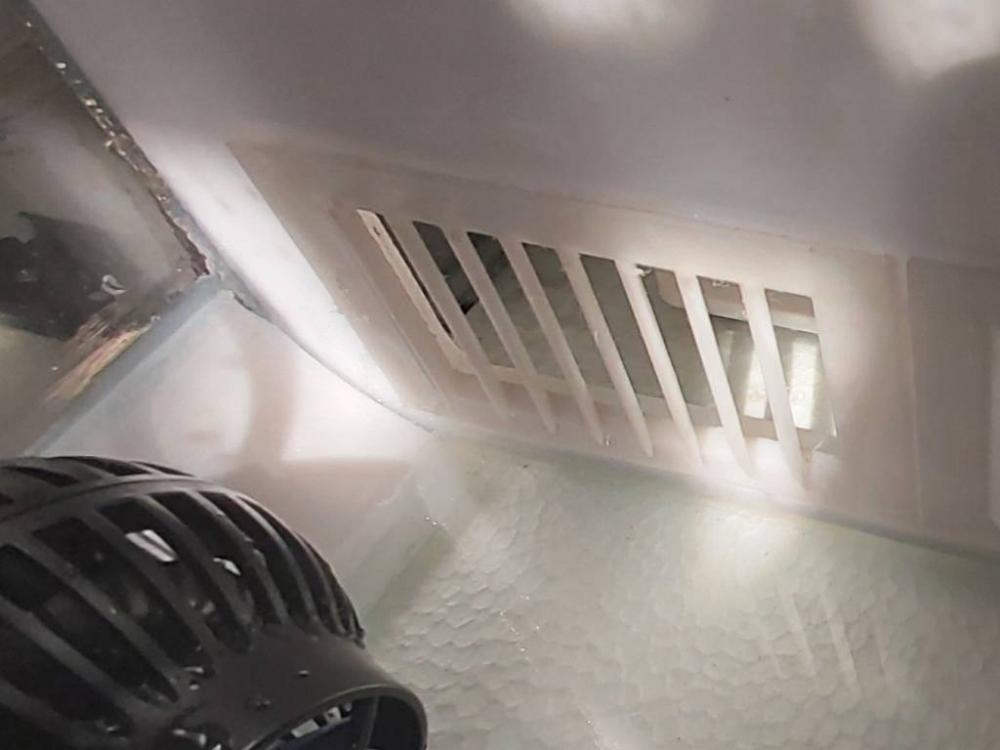
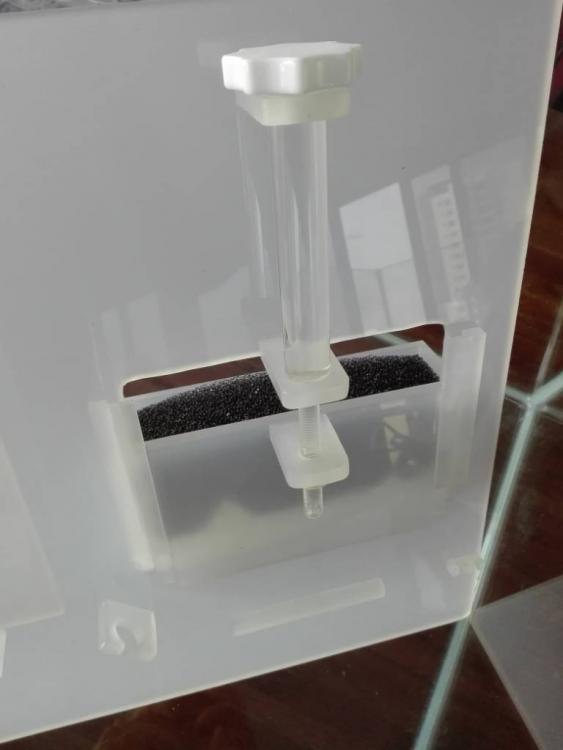
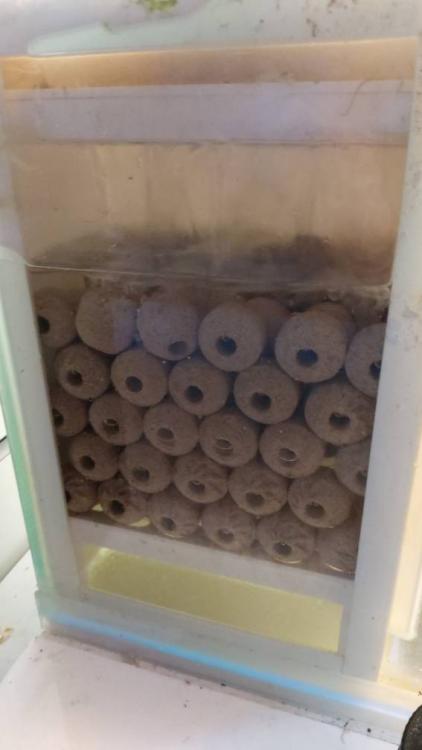
To carry on my build thread. Let's look what is going on under the hood, namely THE SUMP. (Be warned this is a rather long post even by my standards as I try explain why everything is placed where it is.. hopefully its helpful advice) Do you need a sump for a successful reef tank? Nope, but it certainly makes life easier and it allows you to scale up the quality of your filtration. So when setting up my new tank I decided to make my own sump put of a 67x60cm 6mm glass tank and some 8mm semi transparent acrylic. Key considerations were: 1) Installation of an automated Roller Filter 2) Refugium (Have mechanisms to promote rotation of Cheato. A method to ensure no stray chaeto escapes into next chamber. 3) Biomedia section (ensure doesn't become a detritus trap 4) Skimmer and reactor chamber (with capability to amend water height) 5) Dual return pumps (for redundancy and flow control) 6) Adjustable float switches 7) Probe holder 8) I also have limited space 70cm by 70cm. As I wanted a seperate section for electronics. So with these needs/constraints in mind... this is what I came up with.... Water drains from the DT into the Roller Filter. I played around with different plumbing methods, but discovered the stock flexible tubing is best. At one point it was hard plumbed with a union and a custom made adaptor, but it was really difficult to unplug for maintence, so I went back to the plumbing the roller filter originally came with. Now, whilst the Bubble Magus roller filter can hang on the side walls I decided to build some little shelves for it to stand on within the drainage section of the sump. There are two shelves, one towards the bottom of the chamber on which the roller filter sits, and another placed at water level that catches the roller filter lip, evening out the load. That said it's amazing how strong 8mm acrylic is even when acrylic welded in place. Probes: After a slight misadventure building a probe holding box (works really well but difficult to clean thus I wanted a maintenance free method) I decided to drill some holes in the shelves holding the roller filter in order to secure the probes. (I have five probes currently). This way the top of each probe would always stay out of the water for longer life, whilst ensuring the probe head is always in a consistent water level. By placing the probes in this first chamber I was hoping to get a more accurate reading of tank conditions. I think alot of sump designs mean that most people place their probes directly in the return section. This is where the water is the cleanest and least representative of what is actually happening in your tank. So without placing the probes directly into the main display, placing them just after the roller filter, and before any dosing occurred felt like the right thing to do. I did some tests on probe placement and it's amazing how they can change depending on where they are placed (will write that up in a future post) My Second Return Pump: Within the first chamber I have a return pump (skimz QP12.0 running at 30w) which powers a manifold covering my carbon reactor, UV and chiller before going back into the DT. I decided to place the second return pump here for a few reasons. Firstly I have arranged my plumbing sp that either return pump can feed my chiller and go to the DT, so if one broke down then the essentials were covered. Secondly I thought it doesn't make sense to power the manifold from the main return line once the water has been polished already. It made more sense to take the more 'dirty' water - which has only gone through the 20micron roller filter to remove the larger detritus And then feed that water through the carbon filter and the UV. I suppose it may make my carbon deplete quicker but it seems ok. The chamber also has a wave maker installed (a Jebao SW15) which helps keep the water churning away, making sure detritus doesn't settle. It switches on for 10-15 mins each hour. The SW15 is big enough to really move the water at a reasonable cost. Water exits the first chamber via some directional outlet holes that I placed in the bottom of the wall adjoining the refugium. I 3D printed them and thought this was a great idea to have fins move the water in a set direction, thus, promoting rhe macroalgea to rotate. Honestly I am not sure if they are very effective. I placed bubbles into the chamber and the flow was rather dismal, so I decided to add a wavemaker. I found that positioning the wavemaker near the top and pointing it downwars towards the rear wall works best (as the cheato doesn't get tangled in the blades). To help the wavemaker along I also 3D printed some curved wedges which sit either side of the refugium at the bottom, these do a good job of directing the water rotationally. Note the Refugium is/was lit by a Kessil H380 providing amble light (which stopped working... #verysad). Talking of lighting I am tempted (given the refugium is positioned towards the very end of the sump) to also light the refugium from the side. This way I won't suffer from the Cheato acting as a light barrier as it forms into a tight ball preventing the light getting into the middle (risking die off). Thinking out aloud, by simply placing a mirror on inside of the stand to bounce light into the side of the refugium could work as I could attack the cheato from both angles with just one light. hmmmm still pondering that idea, Let me know what you think? Water builds up in the refugium (which is about 40L in Capacity) before it is eventually skimed off and cascades through a custom 3D printed filter comb into the biomedia chamber. As the water comes through the comb, it pours onto a polyester filter pad, which catches all the detritus from the refugium. I change this pad about once every week. One bonus is that the water is aerated (degassing co2) as it falls silently on to the bio media. Note that the bio media water level is same as the skimmer section. The media is made up of 2kg of stacked maxspect biospheres. Whilst the chamber is walled it actually houses a removable acrylic box, very similar to the media caddies you get in back of IOS tanks, just a little larger. This was done to aid maintenance although I think I made it fit a little too snug as it's a fight to get it out (ooops). The box has a removable shelf at the top where the filter pad sits. It also has a removable viewing window towards the front, which not only makes sure all the water flows down through the structure but mainly is there to stop the media falling out when you remove the box. Water then proceeds out the bottom of this box, through a hole in the bottom of the chamber wall and into the main skimmer compartment. This third chamber is where I keep my zeovit reactor, carbon reactor (fed by overhead manifold) and Skimmer. Again I have another SW15 wavemaker in the skimmer section which is used for water flow. By placing the wavemaker directly opposite of the exit from the bio chamber (all be it on the other side of the compartment, I can create some backpresure and produce a little swell within the biomedia chamber, effectively cleaning the biomedia. It acts just like a zeovit reactor, pumping water in raises and lowers the water level removing any detritus / mulm. It is great to watch the water rise up and down in the biomedia chamber knowing it is giving the media a good wash. (FYI I have the wavemakers set on random flow, at about 80% capacity and they are controlled by my GHL system, which will switch then on for 10-15mins each hour) ...Thinking of it maybe i didn't need the zeovit reactor afterall. I could just have placed the zeovit in this section instead dialed up the wavemaker to 100% and made myself a mini reactor. That said I can control flow far better with the Skimz reactor... plus the skimz zeovit reactor is so awesome I wouldn't go without it! The water now enters the main reactor/skimmer section, my main concern was being able to get the correct water height. To control this I built my own control gate. The gate can be lowered or raised accordingly in super fine increments. Here I can set from a min 7inch height through to a max 9.75 inches, this gives me loads of control (it is currently set at arlund 8.1 inches). In order to build this I got a replacement skimz threaded handle from one of their skimmers and used it along with a glued in threaded nut as the main means of adjustment. (Hopefully the pic allows you to see how this works) Water flows over the adjustable gate into a bubble trap, which again uses the polyester filter pad to catch any detritus. Water goes into the bubble trap and is forced first down onto the filter pad (removing any more detritus) then it flows under a baffle before flowing up over another removable baffle. By changing water direction you remove micro bubbles. (To be fair getting correctly sized skimmer will help reduce your chances of getting micro bubbles). The water is now within the main return section. Within the return section I have an old Jebao 6000 return pump, along with a Rossmont mover wavemaker and a maxspect bio brick I also built some adjustable water level sensor holders. Here I have three sensors that sit attached to an acrylic rod. One sensor is used to control low water, this switches off the return pump and creates an alarm. Just above this is the second sensor that drives the ATO (which feeds into this chamber). Above this is the third high level water sensor, which switches off the skimmer (Used when you switch off the return). These were fairly easy to make and super easy to adjust. Having both low and high water sensors will allow me to use GHL's auto water change functionality (once I update the firmware ... a future project I have planned). As we are at the return section I thought I would mention about the return pump. As mentioned I have water flow sensors (placed just before the return nozzles at the back of the DT). I was amazed that my Jebao 6000Lhr pump gives me just 1000L out of the return nozzle. So maybe in the future I will get something a little stronger (anybody have an Abyzz 200 they dont want? Haha). So one consideration is making sure your sump has sufficient water flow through each section to cope with a bigger pump. #Fail: So despite my efforts my sump still sucks in several ways.... Firstly because my tank is fairly deep (back to front) my sump is also reasonably deep (around 70cm), and because of all the chambers I put in, getting my hands into the back chamber is really really very hard. And unless I disconnect the return and drainage lines and pull the sump out (it does fit on rails afterall) it is only with alot of sweat and bad language that am I able to maintain those sections. It is the price you have to pay I guess. I also have had a flood, as I didn't reconnect my return to the union correctly. As mentioned (and as from the photos) my sump pulls out from the stand. So in order for this to happen the union have to sit above the height of the sump, any leak then fell onto the skirting of the sump and dripped onto the subfloor where it spread everywhere, eek!! So whilst it seemed a good idea at the time. Unions may not be the best idea. Oh well lessons learnt for the future dream build. Anyway hope that helps. (Next time I will get into my electrics section) Sent from Singapore Reef Club mobile app


-
Looking good. Keep the update coming! Sent from Singapore Reef Club mobile app
-
Great. How big is the tank? Sent from Singapore Reef Club mobile app
-
Keep the posts coming looking forward to hearing and seeing your tank. The CB at least teaches patience, a key skill. Haha. Sent from Singapore Reef Club mobile app