


-
Topics
-
-
Latest Update
-
1
-
5
-
1
-
2
Wts redsea light hanging rack 3ft
Below 2 racks also included. I was thinking to remove this post because the price above not correct. -
0
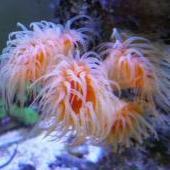
Wts coral
4 item all for $170 92328813 wa for more photo Collect @ toa payoh VID20240606222319.mp4
-


Recommended Posts
Join the conversation
You can post now and register later. If you have an account, sign in now to post with your account.