Search the Community
Showing results for tags 'newbie'.
Found 12 results
-
 Top 10 common mistakes newbies make when starting up a marine tank. People study other people’s past so they won’t make the same mistake, that is why we call it his story. (Get the puns?… ok fine sorry). Anyway here are the TOP 10 mistakes newbies make when starting up a marine tank. Number 10: Jumping into the hobby without research. When people start to get interested in the hobby, some people tend to try to save money on the equipment they use and at the same time, they don’t do any research on what they are buying. Of course, a piece of better quality equipment will definitely be more pricey than a cheaper one. For example, using a cooling fan to chill off the aquarium instead of running a more expensive chiller not knowing that it actually cause issues such as accelerated evaporation and sudden change in salinity which actually cause more work to maintain those level. And due to this, they might actually end up upgrading their equipment and spending more to getting a chiller later on. Another example for which some people tend to buy fishes or corals without learning their compatibility and care level and finding out later that they cannot take care of it well eventually causing livestock suffering or even death. Which finally, they might find themselves giving up on the hobby or they will finally decide to do some research to learn about it. (We have a SRC forum for you to do your research on!) Be a responsible reef keeper and know what you are buying and able to care for it before your next purchase! A refractometer is a more common means of salinity measurement in the hobby Another example is the wrong equipment choice (could be a budget-related concern ) but might find himself ended up with terrible equipment choices not suitable for his/her tank system. For Example, getting a cheaper Swing arm hydrometer comparing to a refractometer to measure salinity which is less accurate. Or buying an optical refractometer from online shops without first checking and knowing that it is not meant for other purposes rather than for the saltwater aquarium (eg for beer-making) . To summaries, selection of equipment base on suitability is more important than solely on prices alone only. Picture showing tank cycling process. Number 9: Skipping the cycling process / Adding livestock before cycling process is complete Very understandable – we are all anxious to see our new tanks come to life when we get our new marine tank setup . Well, it is a mistake that was even made by me in the past. We tend to think after spending hundreds of dollars on equipment, it definitely makes keeping marine life easier. WRONG. Tank Cycling is still a must regardless of how much a product says it can cut off its cycling time. So what can we do to know cycling is done? With water testing, we can be able to test our water to see if the tank cycling process has been completed anot. In that case when ammonia ( NH4) and nitrite (N02) is zero. Your tank is ready to introduce your first guest into your new tank! Number 8: Not doing water change. Water change is tiring and it could be a huge hassle for some, however as time goes by, nutrients in your tank will build up and elements like calcium, magnesium, trace element and etc will deplete too. The best way to maintain your tank is doing a regular partial water change. Not only do you reduce the nutrient, you also replenish the element that is depleted in the system. You still need to test your water and top up elements that are low. Number 7: Adding more fishes than your system can handle Well if you google it will show the Rule of Thumb which means The short “Rule of Thumb” answer generally accepted in the marine aquarium hobby is: “One inch of fish (measured from the nose to the base of the tail) per 5 gallons (20L) of system saltwater. However, it also depends on the species of your fishes and how big is your tank is. Don’t be afraid to always post online to ask about the care level of that particular fish. As for this article, I’ll recommend to always monitor your ammonia and Nitrite level ( Which is toxic to fish ) as well as your nutrient level ( Mainly Nitrate & Phosphate ). Number 6: Cleaning the sand bed. Having Sandbed in a reef tank is a beautiful addition in a marine tank, however, if you decided to have a sandbed but not taking care of it could actually cause more harm than good. For a shallow sandbed, it is advisable to do some vacuuming to remove any debris or leftover fish food on the sand surface to prevent any debris from building up. However, if you have a deep sand bed ( DSB ) , it might not be a good thing to stir the sand bed to prevent any disruption to the biological filtration function of it. Alternatively, it is good to have some cleaning crew like the tiger nassarius snails, and sand shifting star etc to helps keep the sandbed clean… Number 5: Not acclimating newly bought livestock into tank. If you ever bought healthy livestock and decided to throw it in the tank thinking everything will be ok, you could be wrong. There could be a great variant of water parameter and temperature differences between the water at the live fish shop store and your tank. The sudden shift in water parameter if you did not acclimatize your newly bought fish/coral correctly will stress the corals which could result in the death of the newly purchased livestock. Acclimating simple mean adjusting the water parameter for example temperature, PH, and salinity etc of the water between the new and the old to avoid any sudden shift. This should be done in a slow manner to allow the new fish to adapt to the new water parameter without causing any stress to the new livestock. Be sure to check on the fish compatibility before the introduction of the new livestock, and check out on our detail fish acclimating guide. Photo showing fishes in an LFS (ABA) that are going through quarantine or medical treatment process. Number 6: Adding fish without proper quarantine. Quarantine simply means to isolate all new livestock that has arrived from another location that may have been exposed to infectious or contagious disease/parasites, before introducing it into the current system to prevent any form of diseases spreading to existing healthy fishes in the system. The quarantine period is typically 2-4 weeks to observe if the newly purchased fish shows any signs of illness or disease and make any treatment if necessary in an isolated tank before introducing it into the main display tank. You can read about setting up a simple Quarantine system here Fish might appear to be well-fed and actively swimming in a fish shop. Even though it went through quarantine in the fish shop, it is surely a good practice to do our own diligence to do our own quarantine as well to prevent any chance of diseases introduction into our existing system. With a proper quarantine system in place, you will not risk risking your existing healthy livestock when you are adding any new fish or corals. Coral are going through dipping to remove unwanted pests. Number 7: Not dipping your newly bought corals. If you think that you are ONLY adding your new coral into your new system every time you purchase a new coral. You might be WRONG, hitchhiker like coral Pest could be hidden inside your coral without you knowing it, and these hitchhikers could be invisible to our naked eye. These coral pests could also be buried inside the rock that came with it, and the only way you can actually stop them from introducing into your tank is to perform a coral dip. After performing a corals dip, you will reduce the risk of introducing any form of the coral pest into your system that could have devasting effects. Number 8: Adding salt directly into your tank without mixing or testing. Well well, if you happen to make this mistake, that’s something to learn from. Introducing salt directly to an established tank system which might contain an undissolved component which not only giving you a false salinity reading but might cause other sudden parameter shift as well ( Example, sudden calcium, KH, increase ). Not only that, you might unintentionally raise more salinity, than needed without testing the salinity in the first place. The sudden increase in salinity could have a serious effect on the livestock in your system. So be sure to always mix it separately in a pail first, and testing the salinity after all salt is fully dissolved before trying to increase the salinity of your existing system. Number 9: Not performing regular water testing on your water parameter. Wow, my corals are so beautifully open and fishes are eating aggressively (too hungry?) Joke aside. Doesn’t it really mean that everything in the tank is good? If you decided not to perform your regular water parameter testing regularly and dosing and topping up the elements blindly, you might actually find yourself overdosing certain elements and causing harm to your livestock then actually helping it. Without performing a regular water testing, you will not be able to tell and replenish any loss or drop of the element to the optimal level for a thriving reef tank to be healthy. Take my advice and schedule to do a regular test . Let us have a beautiful marine tank. Tangs are aggressive territorial fishes and are to introduce together. Number 10: Adding fishes without doing a properly research I believe many new reefers has suffered this mistake of happily buying a beautiful fish during one of the trips to a local LFS before making any research or asking the store owner about its care requirement. Which for an example is the bicolour dottyback. As beautiful it is like a royal gramma, however, due to the fish behaviour nature, once introduced into your tank, it’s aggressive nature may attack any smaller or weaker fish that comes to its path which causing it to die. What is next? New fish lose their appetite and die from stress? From broken fins to death? As previously mentioned, always Always ALWAYS research on the species before purchasing. Get the smaller to bigger fish so it won’t bully the bigger one when introducing the latter. And ya avoid buying a fish if you do not know it feeding requirement and behaviour. Thank you all for reading my articles. If you want more, hit the like button. If there are any more articles you want me to write about, comment down below! Author - @Willy Guccivera Yap
 -
Starting your first marine tank. Overview to plan your equipment and budget (Part 1) Starting a beautiful marine tank is exciting. But upon doing research online, the information may be overwhelming, contradicting & often confusing. This guide aims to provide a high level overview of areas to consider when embarking on the reefing journey. To help you make educated choices in planning & purchasing the right equipment. Most of the article will refer to a reef tank. General planning : What do you want to keep? The most popular set up is a reef tank – a mix of both fish & corals. And when it comes to corals, there are options of LPS (Large Polyp Stony Corals), SPS (Small Polyp Stony Corals) and softies. In general, LPS & softies are easier & less demanding than SPS. LPS are more tolerant of imperfect water conditions, require less flow & less light. On the other hand, SPS demand pristine water conditions, strong flow & very strong light. These affect your equipment choice. Left : Small Polyp Stony Coral (SPS), Right : Large Polyp Stony Coral (LPS) Another popular setup is a fish only system with no corals – commonly abbreviated as FOWLR (Fish Only With Live Rocks). For example, beautiful fish like Angelfish eat fleshy corals & nip on SPS are best kept in FOWLR systems. Less common is a species tank, where certain species have specific requirements. For example, seahorses are weak swimmers and require very low flow in the tank. They are compatible with most soft corals and gorgonians. You must avoid any stony corals that have a strong sting as this often leads to injury & infection. AIO (All in One) tanks. These are usually smaller setups ranging from 10L to 300L. The compartment to place small filtration equipment & bio media are at the back of the tank. AIO tanks are great for reefers with limited space or those starting out to learn the ropes. Display tank with sump (Recommended set up for marine tanks). A sump is an additional tank usually below the main display tank where equipment and additional filtration capabilities can be enabled. You can have proper mechanical filtration, large skimmer, more biological media and multiple media reactors. A sump allows easy access to the filter & equipment which makes maintenance easier which typically leads to a more successful tank. The dedicated cabinet helps hide the sump & clutter of containers & equipment For both the AIO and Tank/Sump options, you can choose from purchasing ready made system, or to have them custom designed. Ready made tanks have the necessary components included and are more straight forward to set up. Custom made tanks offer options such as tank size, glass type, overflow, piping & cabinet customization. Approach your local fish shop for further advice. Simple bare tanks (not recommended for a marine reef aquarium). There are some who covert their simple & bare freshwater tanks to saltwater. And attempt to re-use the tank by using canister filters or hang on back filters. Such setups are not recommended as the filtration is not adequate. Using an external canister filter is troublesome & will result in neglect & possible failure. On the other hand, a simple bare tank is adequate as a short term quarantine/hospital tank. Equipment Once you have decided on the tank type, start planning for some other equipment. Namely : Return pumps Return pumps move water from the sump or IOS compartment back to the main display section. The 2 main types are DC (Direct Current) & AC (Alternating Current) pumps. DC pumps allows adjustable pump speed but are more expensive than AC pumps. DC pumps are useful if you plan to T-off the return pump for reactors & chillers. As you add more equipment, you can adjust the pump speed accordingly. DC pumps. Example of how T-off piping to feed various reactors AC pumps have fixed speeds. You need to purchase the right size for your needs. Various sizes of AC pumps Turnover rate from sump to display tank of about 4x is sufficient. For example, for a 500L tank, a return pump speed of 2000l/hr (liters per hour) is sufficient. Note the advertised flow rate on the box depicts maximum flow of a pump (no pipe restrictions or height pressure losses). In a tank system, pipe restrictions (bends, elbows & valves) slow the flow rate down. A general rule of thumb is to assume it slows the pump flow rate by half. If you T-off the water flow (i.e. feed water to other equipment as well), then pick an even higher rated pump accordingly. With a DC pump, you can easily reduce the power & flow rate. Wavemakers & Flow Flow is important for a healthy reef tank to bring oxygen & food to the corals. Most popular wavemakers allow adjustable propeller speed & duration. The goal is to create pulses & random flow patterns in the tank, just like in the ocean. Size the wavemakers correctly for your tank size. Do not place them directly in front of corals as the continuous direct flow will damage coral tissue. Larger tanks will require more wavemakers for better coverage. Some higher end wavemakers have the motor outside the tank and magnetically coupled to the propeller/wet side inside the tank. This unique feature with 2 key advantages Motor heat is not absorbed by the water. Allows the wet side be removed easily for cleaning. Gyre pump blades Another popular design are gyre pumps which use a different style fan blade to produce wide laminar flows. You will need fewer wavamakers in a tank with these since they cover a wider flow width. The downside is these pumps tend to be more troublesome to clean Lights The 2 common light options are T5 & LEDs. T5 provide a blanket of diffused light to the entire tank so there is less shadowing of corals. You can configure it with different light tube types (colour temperature). While T5 fixtures have lower up front cost, the T5 tubes should be replaced every 9-12 months – they deteriorate & become less bright. ATI Sunpower T5 light fixture LED light fixtures are the more popular choice these days. While they may have slightly higher initial cost, a good LED set should last many years. LEDs are extremely efficient and can produce a lot of light and less heat compared to T5. You have the flexibility to tune the light to simulate sunrise, daylight & sunset. Or tune the spectrum based on personal preference or to the type of corals kept. Depending on the tank size, rock scape & type of corals kept, you may need multiple sets of LED fixtures to provide sufficient light energy for the corals to thrive – similar to the energy they receive from the sun. LED lights are typically mounted about 30cm from the water surface level. This should provide good light spread & not have hotspots (areas of concentrated light which can burn corals) PAR (Photosynthetically active radiation) is measure of the amount of light available for photosynthesis. Corals, clams & other animals originate from different depths of the ocean and have different PAR requirements. In general SPS need more PAR. Conversely LPS require less PAR. Having too strong light can also cause corals to bleach & die. Measuring the PAR levels using a PAR meter takes away the guess work of coral placement. Ask around the reefing community to loan or rent one. Lighting period The general guideline is to have about 6-8 hours of bright light for the corals to photosynthesize. It is common to have a few hours of bluish light at night to enjoy the beautiful glow of the corals. This is more of an individual preference. Below is an example of a light profile. Example of settings for Aqua Illumination Hydra lights Filtration There are 3 main types of filtration – Mechanical, Biological & Chemical. Mechanical filtration is the use of physical media or equipment to trap solid particles from the water. These are often placed in the 1st stage of the sump or IOS filter system to trap large particles before they clog the pores of biological filtration media. Key points : Filter wool comes in pre-cut sheets or long rolls Filter wool. Made of synthetic material. A cheap & convenient option. Use & discard Filter socks Filter sock. More elegant solution but more costly. Socks are made of nylon or felt. Nylon socks are easier to wash under the tap but has less filtering capacity compared to felt socks. Felt filter socks are quite inconvenient to flip & wash thoroughly. Sock pore size are typically in the 200-300 micron range. Clarisea SK 5000 Filter rollers. These automatic filters use a thin sheet of filter material (known as fleece) to capture dirt. A motor advances the filter material automatically when clogged. By removing food/dirt quickly from the water, filter rollers ensures minimal decay & contamination of the water. Fleece pore size are in the 25-50 micron range. A roll of fleece should last about 1.5-3 months Protein Skimmer is also another form of mechanical filtration. Often placed after the initial filter wool/sock/fleece. A skimmer uses a needle wheel pump to generate large amount of fine bubbles. This causes organic waste (fish food, fish waste & suspended particles) to stick to the surface of the bubbles which bursts when it reaches the top of skimmer. The splattered waste then flows into the collection cup. Having a good protein skimmer results in cleaner water & less frequent water changes. Protein skimmers have a secondary advantage of improving gas exchange & increasing the oxygen content of the water due to the bubbles it forms. Biological filtration refers to the use of bacteria in the tank to break down dangerous ammonia to less toxic nitrite & nitrates; commonly known as the nitrogen cycle. A term often mentioned in articles is ‘live rocks’ – this refers to a rock where bacteria reside. Current trend is to have minimal rocks in the display tank so that there is more space for corals & fish to swim, and the supplement with additional biological media (eg. ceramic balls, cylinder or blocks) in the IOS or sump to increase the surface area/population of this beneficial bacteria. Place loose media in a mesh bag or basket for easy removal for the occasional quick rinse with old tank water. Chemical filtration is a way to removed dissolved particulates using activated carbon, resins or other absorbent media. Resins for absorbing phosphates Activated carbon to remove toxins/clarify water. Measuring the right amount of media to place in a reactor. Chemical filtration media are best placed in a reactor to enable sufficient contact time between water & media for the reaction to take place. A less effective but acceptable alternative is to put the media in a mesh bag placed in a high flow area. Cooling Given the warm ambient temperatures here in Singapore, there is a need to cool the water to the 26-28 degree Celsius range. Cooling Fan. For those on a budget & smaller tanks, you can get away with a cooling fan blowing on the water surface. With this method, evaporation rates increase & you must have a good auto top up system to replenish the evaporated water quickly. Else, water parameters (eg salinity) will have big swings which is bad for livestock. TEC (Thermo Electric Chiller). An alternative for very small tanks (10-30L range) is a mini chiller using Peltier cooling technology. Such mini chillers are not very energy efficient (about 5% of electrical energy is used for cooling). They have a typical equipment life of 2-3 years. Chiller. A more energy efficient option is the refrigerant type chillers. Select one that is correctly sized for your tank. Electricity cost is not too high. One example of usage for a 1/4hp (~440 watts) chiller running 20min to chill. Turns on once every 3hrs to maintain a tank between 27-28degC. Based on rough calculation, this works out to SGD $0.21 per day. Or SGD $6.40 per month. For larger 4ft & larger tanks, it is common to use an non-invertor air con compressor with cooling coil. The compressor is best placed outside the house so the hot air goes is blown away. If this is not possible, it is also possible to place the compressor next to the aquarium. Compressors are extremely efficient & cools the tank fairly quickly. For example, a 4ft tank may take about 20min to cool and turns on once every 3 hours. 1HP non-invertor compressor unit & titanium drop in coil Auto Top off Water will naturally evaporate from the aquarium. Evaporation rates can be much higher when using a fan to cool the tank. As we are dealing with saltwater, only the water component evaporates (the salt remains). Salinity increases if no fresh water is added and leads to unstable water parameters. An Auto Top Off (ATO) is a device that detects the water level in the tank or sump. If it is too low, it then triggers a pump to top up fresh water from a reservoir back in. Take note the ATO should be using water only & not salt water (since only the water component evaporates) ….. to be continued in Part 2 Author - @SubzeroLT
-
Starting your first marine tank. Overview to plan your equipment and budget (Part 2) This is a continuation of a 2 part series. Saltwater The ideal situation is to start the salt mix with the cleanest possible water. RODI (Reverse Osmosis De-Ionize) filters produce pure water by deploying a series of filters to remove sediments, chlorine and other contaminants such as copper, chromium, ammonia, nitrate & phosphorous that may be present in tap water. A typical RODI system consists of A polyester filter to remove sediments 2 carbon blocks to remove chlorine & other contaminants Reverse Osmosis (RO) membrane that performs the majority of filtration, followed by de-ionisation (DI) resin to remove the remaining dissolved solids. The ultimate goal is to produce 0 TDS (Total Dissolved Solids). Measure this with a handled or in-line TDS meter. While the RODI filter may seem expensive, the convenience will pay off in the long term. RODI system will generate some waste water (that’s how the RO filter works). Some reefers collect the waste water to be re-purposed (laundry, washing floor). RODI systems need at least 50psi water pressure to operate efficiently (i.e. able to push water through the RO membrane). Generally higher pressure will result with less waste water. If your home does not have such high pressure, then an additional water pressure booster pump needs to be installed. Hot tip : If you live in a high rise apartment, collect water late at night or very early in the morning. Water pressure tend to be higher (because there are less people using water) For smaller tanks that do not need much water, a more economical option is to use an DI filter which skips the reverse osmosis (RO) membrane. It is possible to use tap water with anti-chlorine. However, there is a chance of letting contaminants slip through – possibly leading to algae growth or coral/fish health issues. Salt mix You make saltwater by mixing RODI with aquarium salt. Some brands are made from evaporated sea waters while others are synthetic. Both are good. For reef tanks, prepare your salt mix in a large container or water drum to a salinity of 35PPT (parts per thousand) or 1.026SG (specific gravity). There is a misconception that the ideal salinity is 1.025SG. The general accepted natural sea water salinity is 35PPT. For fish only tanks, it is OK to use 30.5ppt or 1.023SG Salinity is best measured with an optical refractometer. NEVER use a swing arm hydrometer as they are extremely inaccurate. Key parameters & testing It is important to test your water parameters weekly to ensure the well being of your livestock. Fluctuations will result in nuisance algae, cyanobacteria bloom & even fish death. With testing, you will know which parameter has drifted & be able to quickly adjust it back. Similarly, by testing the water, you ensure your dosing regime is done correctly. Experienced reefers may get away with not testing their waters since they may have their processes dialled in. But for new reefers & new tank setup, best practice to test weekly (or even more often for a start). Home test kits are available for the parameters highlighted in bold blue font below. Column in green shows the target for my own tank. Trace elements and heavy metal contaminants that cannot be detected with home hobby test kits. Once you have set up the tank and settled into a dosing routine, consider going into the next level of testing by sending your water for external ICP (Inductively Coupled Plasma) testing. LFS organise water collection occasionally. Depending on the brand, these typically costs between S$60-S$120 per test. Additives Sufficient water change can be done to replenish depleted elements. Water change alone may be possible for small tanks but impractical for larger ones. Hence, adding back elements such as Calcium, Magnesium & Alkalinity can be done using a dosing pump or a calcium reactor. If you have corals, you should also add trace elements (needed for biological cell function) and amino acids (building blocks of protein needed by animals) There are many additive products and brands in the market. Do not be tempted to try too many products as some may have overlapping effects. When dosing a new product, take the conservative approach to dose half the recommended amount first. Monitor & adjust the dose accordingly. Tank maintenance requirements Water change is a way to reduce nutrients (nitrates, phosphates, waste) by diluting it with clean water. Water change also replenishes depleted elements. A general guideline is to change 20% of water every 1-2 weeks. It is a good idea to siphon the sand bed during water change to get rid of trapped detritus. Clean the glass. A healthy tank will have some bio film & algae growth on the tank after a few days. Magnet scrapers are popular. Be careful not to get sand trapped between the cleaner & the tank glass/acrylic as this can scratch the glass. Some have magnetic blade attachments which is an efficient way to scrape off stubborn algae. Hand held scrapers are good for hard to reach areas and close to the sand bed. Do not apply excessive uneven pressure when using hand held scrapers as they tend to scratch glass easily. If you have an acrylic tank, use only cleaners with a soft cleaning pad. Metal blades will scratch acrylic. Cycling & adding livestock Once the tank is set up, cycle the tank with bacteria additives. This takes about 4-6 weeks to complete. After which you can start to add livestock slowly. Read up about care requirements & whether your aquarium set up is ready or suitable for it. Key points : Marine fish can be territorial & aggressive towards fish of similar species, shape or color. Some are just bullies to everything else Aggression often lead to injuries, stress & often death. Check compatibility Corals of the same family in general will not sting each other. Corals can be aggressive & sting corals of other species. Some fish or invertebrates eat corals. Author - @SubzeroLT
-
Custom Tank or ready-made? Hi everyone, today I’ll be sharing my own unique short experience about building a custom tank compared to a ready make tank, and hopefully, it will help someone decide on their next project. To be frank, I would strongly advise to only go for a customize tank build, if you have experience with setting up a marine aquarium before with some experience of the problem and issue of your last build and have also done some research of your own before deciding to go into this route. There are many reasons for this statement however I’ll drop the pros and cons below for you to compare. PROS Custom size to fit in your space. You can choose to be as tall as you if you want, or a customize size to fit a unique corner in your house. Enable customization and your own design of the Sump for your equipment. Able to choose your own color, wood, lamination , piping and types of glass of the tank and many more depending on what you want. Limitless potential depends on how you want to design. Able to design where the overflow is. (Bean Animal, Corner, Center, etc… Able to expand your creativity allows you to proudly show off your idea. Price could be cheaper in my opinion, comparing to a branded ready make setup. CONS If a non-Standize size tank is made, there could be an issue of finding the suitable equipment for it, i.e; light and stand come in standardise size in 2ft,3ft and 4ft etc.. Risk of water overflow from the system if we design the system ourselves without planning for any emergency siphon break ect, however, this can be solved if the tank makers is experienced on this. It could be Harder to sell the tank away in the event of decommissioning of your existing tank, as custom size only fit in your own SPACE and maybe not other people’s house. Longer waiting time/duration to receive the tank, as a customize project will generally require more time to build the tank comparing to a ready-made one. Enough said! Now I will personally show you how I built my own custom tank! I’ve engaged with Aquarium Artist to build my tank because of the consistency of the integrity of the tank (Especially the piping because it is removable and won’t leak!) Why don’t we go through with steps so it will be easier to understand. The excitement of moving into a new house, and finding a suitable area for my new tank. Step 1 : Choosing a location / Planning stage. I’ve decided the location of my new build to be a partition between my living room and my dining table. Most importantly, the selected location must have enough power point to cater for the numbers of equipment that I will be using. Although it blocks the view of the TV, the tank is the VIEW too! I personally find that it will also look nicer as it connects the corridor together and whenever i return back to my home, I would be greeted by the view of my beloved tank t. Brillant! Finding the right space and measurement required some skills. Step 2: Measurement. Plan out your desired size of the tank you wish to have. Invite the tank maker to your house to double confirm the size incase we measure wrongly (Is an assurance as we are not really good at measuring unless we do it often). Do note to give the tank maker the design you want including the inches of the tank glasses, color of the piping, color of silicon, placing of the bracing and how high is the hood, etc… Equipment I choose are custom fit inorder to hide and place everything neatly. Step 3: Choosing your equipment. Plan your types of equipment that you wish to have in your new build. Not only this will allow you to plan your budget, it will also allow the tank maker to know and cater the space for it during the construction of the sump and tank etc.. In any case, do try to discuss with your tank maker and hear his opinion on the design and equipment during the planing stage, as this will helps avoid any problem that you might encounter in future. Try to choose a bigger tank that your budget allowed, as Bigger is always better especially in a marine tank setup, but it also depends on your space as well. After choosing your equipment or letting your tank maker know your equipment list, he will then be able to cater the sump design for the equipment used. Personally, I prefer custom fit as I do not like to see empty space in my sump. PS: Chiller inside the cabinet indeed make the cabinet HOT, that is why I have a ventilation cover on my door. Everything that can squeezed into one sump! Including a frag tank. Step 4: “Skin and Emblem.” Ok not really emblem but making a reference to gaming. Skin is choosing the color of your cabinet and hood, well also to choose the type of glass you want your tank to make of. A crystal glass will result in better clarity compared to normal glass. Best to ask for a sample of each to compare so you won’t make the wrong choice and regret later on. And also to choose the type of door you want like hinges, magnetic or sliding door. For mine I choose a magnetic door because I want it to be minimal. My tank after a month of cycle. Start to put some fish into it. Step 5: Getting update (Optional). There might be instances where some problems arise if due to some miscalculation or change of equipment, i.e our skimmer is too big to put into your sump or you might suddenly recall you want the silicon of the tank to be in black instead of transparent or you want the pipping to be in a different color, that is where you have to inform your tank maker in a timing manner for them to change it for you. For a ready make tank, this is definitely not posibble. Tank at 3 months. Feeding mysis to the fishes. Step 6: Receiving the tank. This is the last step of making a custom tank. When we receive the tank, try to insect for any crack or scratch on the glass or cabinet, conduct a water test to see if there is any leak. That is all for building a custom tank! Please understand that it is from my opinion of building a custom tank. The most important of success of keeping a marine tank is more on your discipline on water change or measuring parameters. Thank you. Author - @Willy Guccivera Yap
-
Are you ready to start a Marine Tank? As a newbie in the salty side of the hobby, you might have heard people telling you that starting a marine aquarium tank is relatively expensive compare to a freshwater tank and it is hard to upkeep it. If you ever have thoughts of starting a marine reef or fish only tank and not sure if you are able to do so, in this article I will share with you more insight, tips and possible worst scenario and solution for you to judge if you are ready for the saltwater journey. Commitment Be it setting up a freshwater or saltwater tank, everything will always start with the level of commitment that you are willing to take. Are you be ready to take care of your new found hobby? What is the comfortable tank size that you are able to upkeep and maintenance on your own ? If not, are you be willing to pay someone to do it for you ? So what is like doing your own maintenance? Regular Maintenance usually consists of replacement, cleaning of the filter wool, conducting water parameter testing to ensure that all parameter is in check especially if you are keeping a coral tank, also ensuring that your fish are well fed with proper nutritional foods. If any of the elements is found to be out of range or imbalance during your routine water testing, you would need to adjust your daily dosing or supplement it to ensure it stay on the optimal level. What other preparation do I need to start a marine tank? I will break down most of them below. Will you able to find space to build a tank? Space / planning We are talking about the place and space that you are going to need and location where you are going to place your new tank. Are you planning to keep a reef aquarium or a FOWLR ( Fish Only With Live Rocks) or even a species only setup which could be seahorse tank, jellyfish tank etc.. Do you want a ready make tank or go for a customise setup ? How big of a tank do you want to have? What kind of fish do you want to keep? Knowing and planing these beforehand is important as not only it helps in your budget planning, it also determines the types of equipment that you would require later on. If you do intend to set up a fish only tank, what types of fishes do you intend to keep? For example, fishes like the tang family will require a tank size of more than 3ft to have plenty of space for it to swim around. If you intend to start small and upgrade to a bigger tank later, do you have space for another tank when your corals and fishes grow bigger? This ain’t a goldfish in a fishbowl nor a goldfish can do well just in a fishbowl. Not sure about the fish compatibility and what fishes that you can keep? You can always ask around in the discussion community by starting a new thread in the forum or check out our marine fish database knowing what you will be getting. Cost / Budget The marine aquarium itself isn’t really an expensive hobby if know what you are getting. Especially so if you’re not chasing popular names of corals or chasing expensive fishes, which could be even more affordable compared to some of the freshwater fishes. A common marine tank sump setup with equipment like reactor, skimmer and chiller. It is always debatable that equipment should always buy oversize which will affect your overall budget, however, it might not be necessary so depending on your bioload and what do you intend to keep as well, as it makes no sense to buy an oversize skimmer if you only have a few fishes or corals in your tank. So how much do i need to spend? It is advisable to check for quotation from a few tank maker and do some research online as well as our forum, or our saltwater hobby group to check and ask around what equipment suits your budget. After setting up the initial budget for the basic equipment and tank setup, do prepare to budget for your fish stock list as well as some basic supplement like for example, bacteria to start your tank cycling and maintenance aspect of it. Some of the common and basic supplement used in a marine tank. The last aspect would just be stocking up on your new tank, waiting for your favourite fish / coral to come along in one of the shipments from the local fish store. Not sure when the fish is coming? You can always subscribe to our telegram shipment broadcast channel HERE to be the first to know. Knowledge Knowledge is Power – As a beginner in this hobby, the salty side of the setup might be new or alien to you. Even if you browse or search online which is full of resource, stubborn people like me tends to experience hardship, paying endless school fees before being reliase that being stubborn is actually wrong ! And start to listen to experience reefer in this hobby what they shared is actually true ! (That is why I am writing this now). If you happen to read this article, Good. Please take our advice on what the experienced hobbyist share with you on the forum . Conclusion A coral reef display tank at one of the local fish store. Although this might be a short and brief article regarding the new tank setup, I hope this article would be able to assist new hobbyist that is jumping into the salty side of the aquarium to have some basic information and knowledge what you are in for. Yes, Reefing could be slightly more tedious as compared to setting up a freshwater tank but the reward of it is a beautiful and colourful coral and marine fishes that a freshwater tank cannot compare to. When you step into the marine hobby, you will also be able to learn more about water chemistry and the important aspect of it and start to appreciate the uniqueness of the marine life in our mother ocean. Starting a marine tank do required patient, knowledge and discipline but it will reward you with the best ever master pcs of an ocean in your own space. Thank you for reading. Author - @Willy Guccivera Yap
-
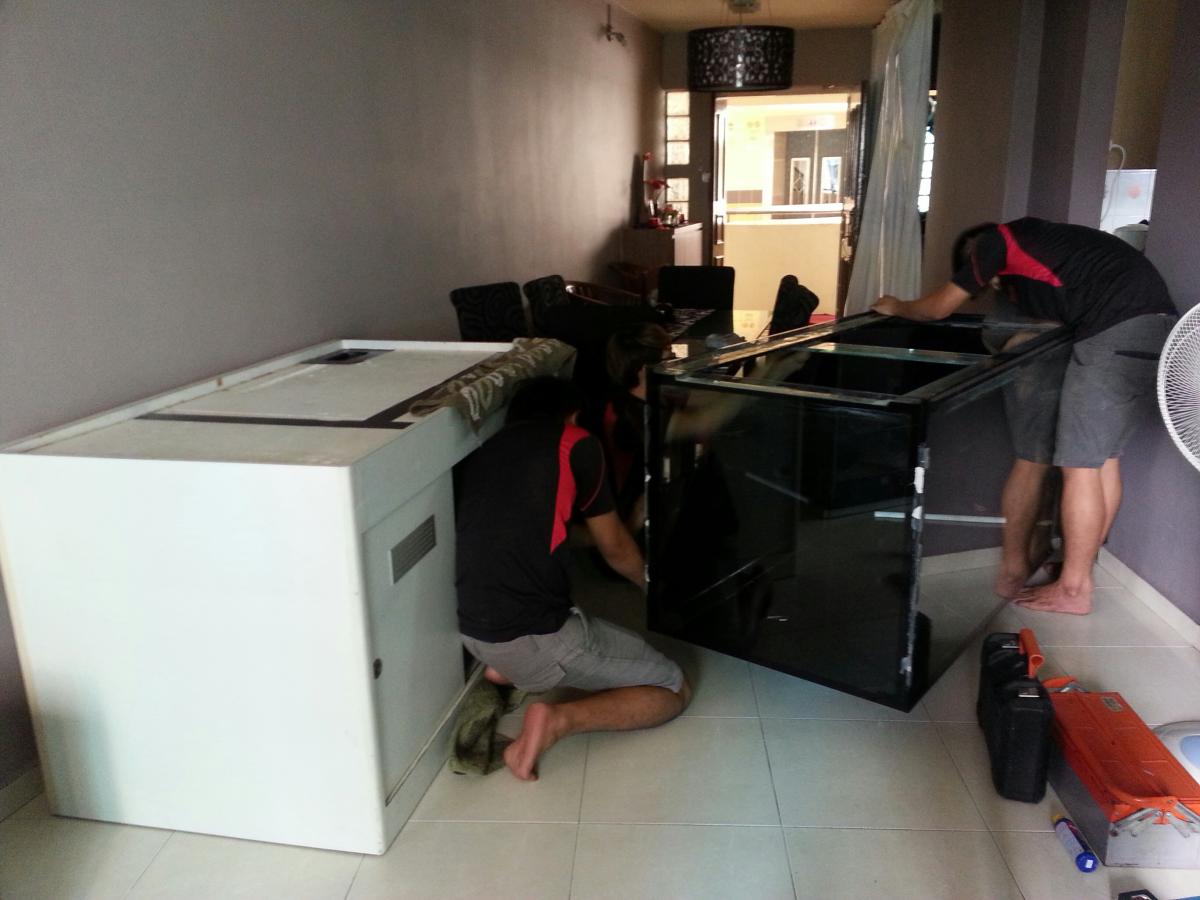
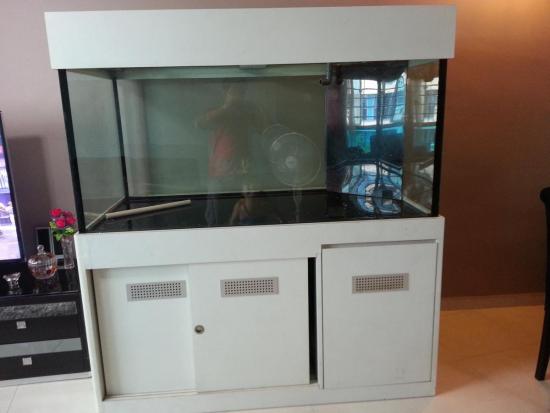
Bought a new house more than a year ago and it took me that long to realize i have a good spot for reef tank right in front of me. I was originally looking at buying a used 4feet tank but didnt find any that suites my budget and likes in terms of design (specially the overflow design). Finally last month I've found a 5ft tank thats close to what im looking for and its been delivered to my place by sgbros. finish setting up. will add more pics...

-
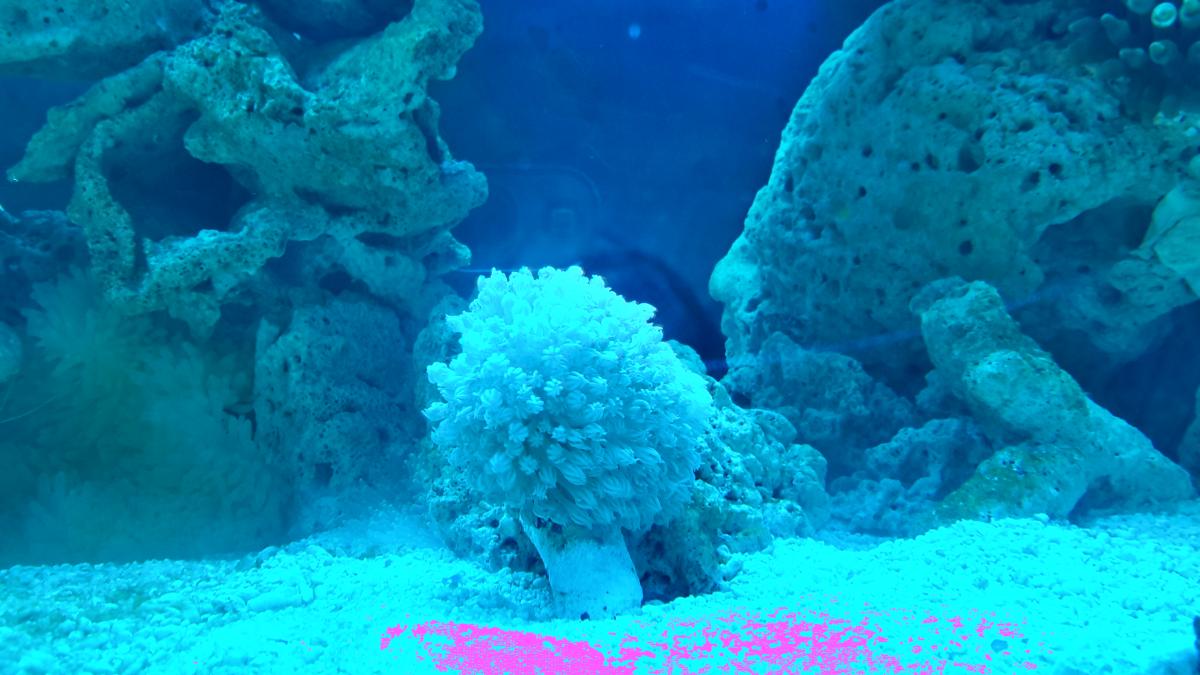
I bought a xenia yesterday and after 12hrs+ its still not opening. just want to know how long does it usually take for xenia to acclimate? i really like this one to survive coz the last one i bought didnt do well. water parameters are good except a bit of nitrate and im fixing it now by a diy scrubber.
-
Hi Guys , i'm really new to this saltwater hobby and it would be nice if i could get some advice from the Experienced Hobbyist. I've yet to buy any of the stuff , as i want to fully plan out before i get the stuff. & i know this hobby isnt cheap as well. Can someone advice mi how to start this hobby from scratch? I;ve read many sites but its all over the place & i cnt seem to have a clear picture. also i would like to know if a chiller or heater is neccessary? thank you
-
Hi all, I've decided to keeping a marine fish tank. totally no experience in this because i only use to keep freshwater fish. I've gotten quotes from various supplier, the estimated cost for a 3 X 2 X 2 full system tank with a full height cabinet ranges from 3-4k. however, these packages does not comes with a chiller. How are the prices? am i being carroted? I want to keep corals so i guess chiller is essential?? but i dont plan on stocking too heavily on it as i'm still a newbie, so im looking at like just a few maybe 2-3 soft corals . anyway, one of the supplier quoted me 3k with no chiller, but i noticed his tanks has those soft corals im planing to keep. he explained that those are anemone and i have to hand feed them. actually what is the main difference between soft corals and anemone? i still have to feed the corals right? and it's a bit difficult for me to understand why does soft corals need a chiller but a tank with anemone do not. Hope somebody can enlighten me. (originally posted at DIY forum, realized it is more appropriate here)
-
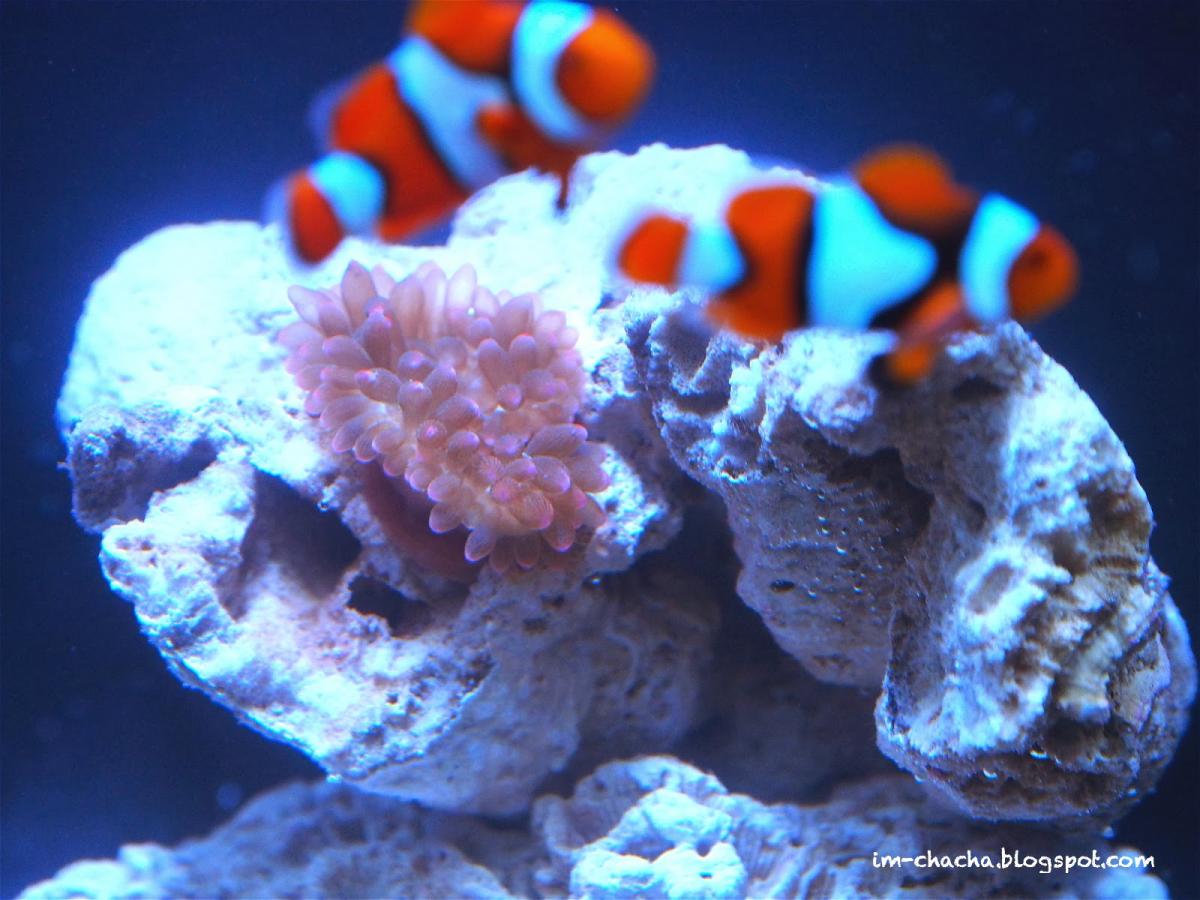
Hey, a newbie here who bought herself a new little tank, Dymax iQ5. I got a pair of true percula clown fish and two anemone from Pasir Ris Farm during last weekend. I love clown fish so much. Gonna learn more and more from everyone here in this forum .. Feel happy to share here. ^^


-
 Hello, I got a new aquarium last December. Now, the corals do not look healthy and the new fishes are dying. The supplier kept telling me that things are fine. Would like a second opinion on what is wrong and how to fix the problems. Can you recommend an expert who can do this?
 -
Hi everyone I am new here currently will wish to convert my 2ft planted to a 2ft nano marine setup I hope to have everyone's guidance & patience aling the way to this new hobby. Please advise if it is possible to keep a seahorse or dwarf lionfish setup using the old stuffs below? What other things do I need other than a additional protein skimmer? My current equipments left over are: Tank: 2ft length x 1ft width x 1.8ft height Lightset: 3x 2ft tube T5HO Chiller: Hailea 150A Filter: Boyu EF 35 (950L/Hr)