


-
Topics
-
-
Latest Update
-
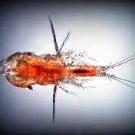
194
WTS live rotifers, tigger pods, phyto
Tigger pods, rotifers, apex pods, Phyto all available Tele me at littlefishaqua Location at tampines/hougang Sent from my 22101316G using Tapatalk -
0
WTS Corals
Hi guys, I have some corals to let go. Please whatsapp 98486979, if you are keen. Pick up at S(090103). Thanks. Gonio Top View -
0
WTS Jebao Wave maker CP120
WTS Jebao Wave maker CP120 @$70. Used < 1mth. RFS: Flow too strong for my tank. @Punggol. -
1
-
1
WTS Corals
2 Head Teal Torch - $20 Vampire In Drag Zoas - $35 Location around AMK/Serangoon
-


Recommended Posts
Join the conversation
You can post now and register later. If you have an account, sign in now to post with your account.