

Singapore Reef Club
-
Posts
758 -
Joined
-
Last visited
-
Days Won
16
Content Type
Profiles
Forums
Gallery
Posts posted by Singapore Reef Club
-
-
1) Silentlurker, design 1, M, 1
2) Silentlurker, design 2, M, 1
3) Silentlurker, design 3, M, 1
4) heckers, Design 4, kid 24 , 1
5) AppleholicKen, Design 3, S , 16) Domvonn , design 3 , XL , 1
7) L0rddracula,design 2,M, 18) Alvarogr , design 3, XL, 1
9) Alvarogr , design 4, 28 , 1
10) Zest2night, Design 1, L , 1
11) Zest2night, Design 2, L , 1
12) Reefrap , design 2 ,M , 1
13) LittleNat1, design 2, XS, 1
-
1) Silentlurker, design 1, M, 1
2) Silentlurker, design 2, M, 1
3) Silentlurker, design 3, M, 1
4) heckers, Design 4, kid 24 , 1
5) AppleholicKen, Design 3, S , 16) Domvonn , design 3 , XL , 1
7) L0rddracula,design 2,M, 18) Alvarogr , design 3, XL, 1
9) Alvarogr , design 4, 28 , 1
10) Zest2night, Design 1, L , 1
11) Zest2night, Design 2, L , 1
-
 1
1
-
-
Please copy and paste and add below your order for easy reference ;
1) Silentlurker, design 1, M, 1
2) Silentlurker, design 2, M, 1
3) Silentlurker, design 3, M, 1
4) heckers, Design 4, kid 24 , 1
5) AppleholicKen, Design 3, S , 16) Domvonn , design 3 , XL , 1
7) L0rddracula,design 2,M, 1 -
10 hours ago, peacemaker said:
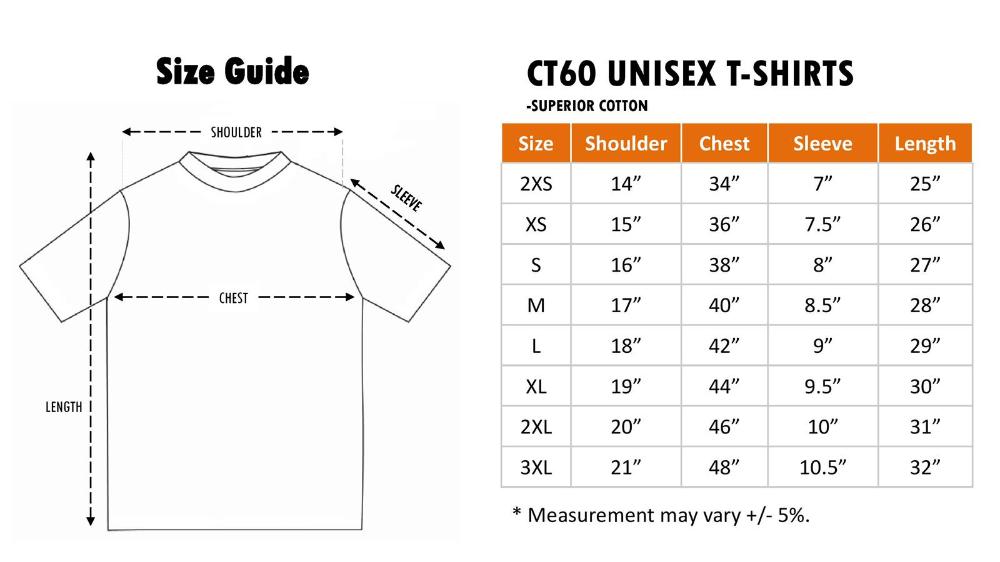
Any pics for polo T? What material? And pretty sure that measurement is in cm and not inches.
Material is 100% cotton, will be only making T-Shirt this round.. just confirm with supplier, size is in inches as per chart.. I just updated the latest sizing chart from supplier.
-
1) Silentlurker, design 1, M, 1
2) Silentlurker, design 2, M, 1
3) Silentlurker, design 3, M, 1
4) heckers, Design 4, kid 24 , 1 -
T - Shirt sizing chart for references;
-
Hi Guys,
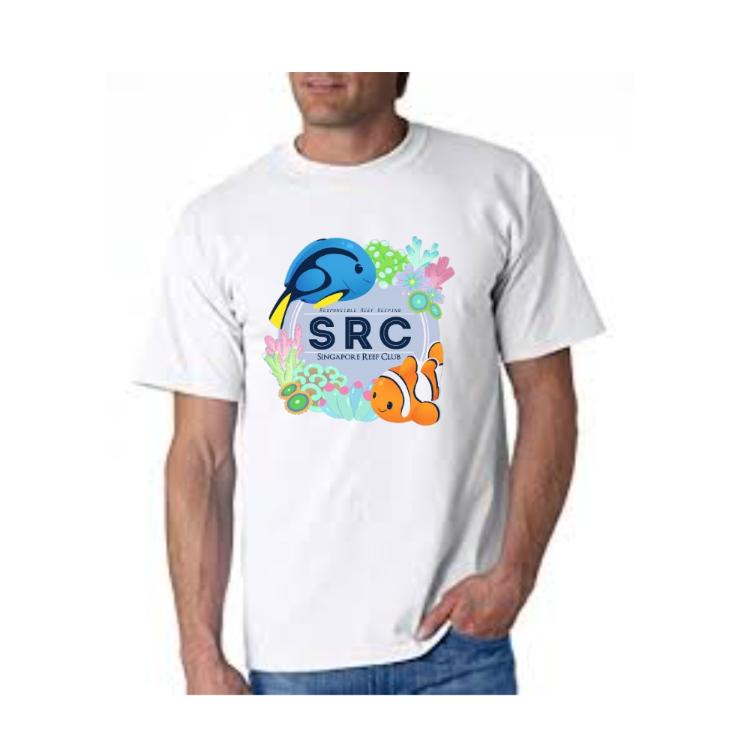
It has been a long time , since we organize our last round of club T-shirt printing , as we are doing a fund rising event for this year activities, our new range of club T-shirt together with a designer T shirt will be available for order as below;
Material ; 100% Cotton Round neck T-Shirt
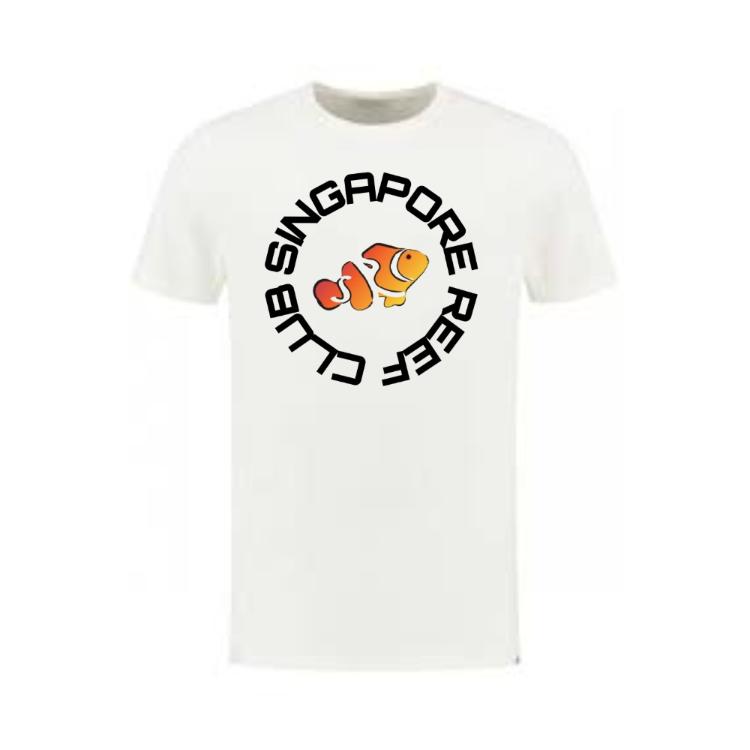
1) Design 1 ( Adult ) -White ONLY - $ 19.00

2) Design 2 ( ADULT) - Black ONLY - Price ; $ 19.00

3) Design 3 ; Adult SRC Shirt - White ONLY - Price $ 19.00
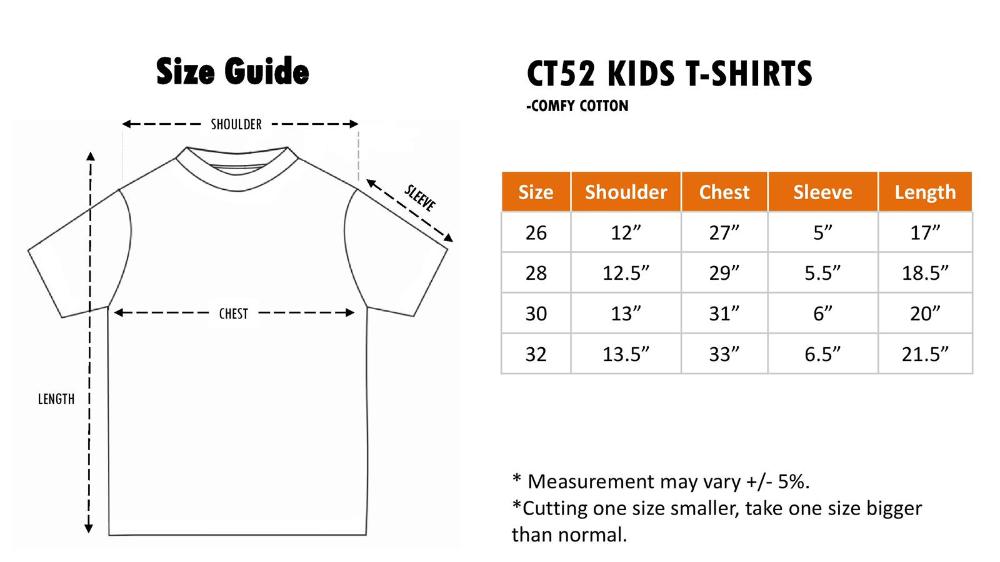
4 )Design 4 ; SRC Kids T shirt - White ONLY ( PRICE ; $ 17.00

5 )Design 5 ; SRC Adult T shirt - White only - Price : $ 19.00 ( NEWLY ADDED )
For order , please indicate your order format as below ;
1) Nickname , Design No , Size , Quantity
For order of more than 1 design, please indicate format as below;
** Example**
1) SRC , Design 1 , M , 1
2) SRC , Design 3, M, 1
3) SRC, Design 4, kid 28 , 1
** Closing Date ; 03.02.2021
Price include local postage, which will be delivered to you. We will PM you for your address and contact info after the order closing date.
Looking forward to your support !
-
Water clarity in a reef tank
Hi ,Today I would like to share about the clarity of the water in a reef aquarium, and what may be the causes of it and what we can do to make your water crystal clear.
The benefit of a crystal clear tank:
- Visually happy – Who doesn’t like coming back home and see a crystal clear tank?
- Better light penetration – Better light absorption by coral ( Higher PAR reading ) due to the clarity of the water.
- Photographs will look nicer because of clearer water.
Check this out below if you want to know some of the tips & Tricks on taking nice photography in a reef tank.
To achieve crystal clear water, I will list down some of the factors I observe and share with you on how we can achieve it.
Bacteria Bloomed in a new cycling tank is a common cause of cloudy tank.
Bacteria Bloom
Are you cycling your new tank? Did you recently introduce a new bacteria product into your existing tank? Unknowing to many new reefers, these are some of the common factors that cause a bacteria bloom resulting in a cloudy tank. The reason behind it could happen because the population of the bacteria is not kept under control, or there is an imbalance of the bacteria population. We are always told to turn off the skimmer during dosing of bacteria which is indeed true in some aspect as protein skimming will remove some of the bacteria away, but if you are facing a situation of a cloudy tank due to bacteria bloom, it is best to run your skimmer to remove the excess bacteria film in the water.
Luckily, a cloudy tank due to bacteria bloom is not a major concern, as most of the time it will clear up by itself over time. However, in some instances, the bacteria bloom could result in a drop of oxygen level in a reef tank, so do make sure that you keep your skimmer running and provide additional air/surface circulation if necessary.
Common Causes of cloudy tank
- Bacteria bloom
- Introducing too much bioload (livestock) at once
- Overfeeding
- Overdose of bacteria products
- Dead livestock decay in the tank.
- Stirring of sand
- Heavy bioload – too many fishes
- Overdose of supplements
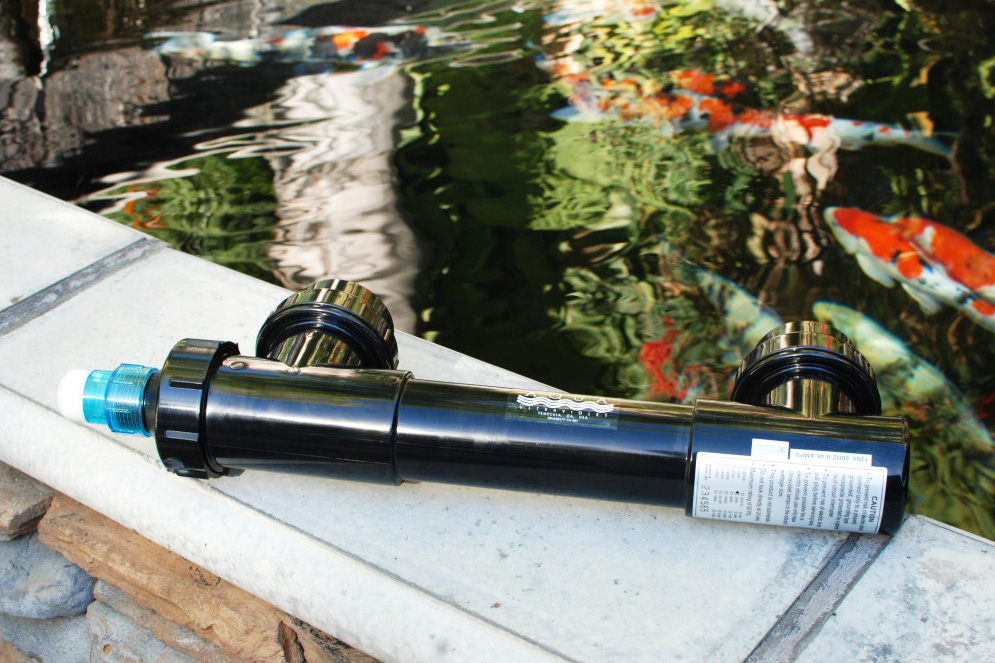
UV is one of the commonly used equipment to keep water clear ( Image ; aqua ultraviolet )
What to do if the tank doesn’t clear over time ?
If in the event that the cloudiness does not clear over time, you could consider running an Ultra violet steriliser, ozone, or even use some commercially available supplement products in the market that can help to clear up a cloudy tank.
Glass

Little did we know that the quality of the glass can actually affect the visual appearance of the live stock / coral that we see in the tank as well.
The clarity of the glass is affected by ;

- Algae on the glass – This is a common problem all reefers has to go through, as algae film growing on the glass will affect the visibility of the tank overall. So do remember to get a good aquarium glass cleaner and clean your glass regularly! I
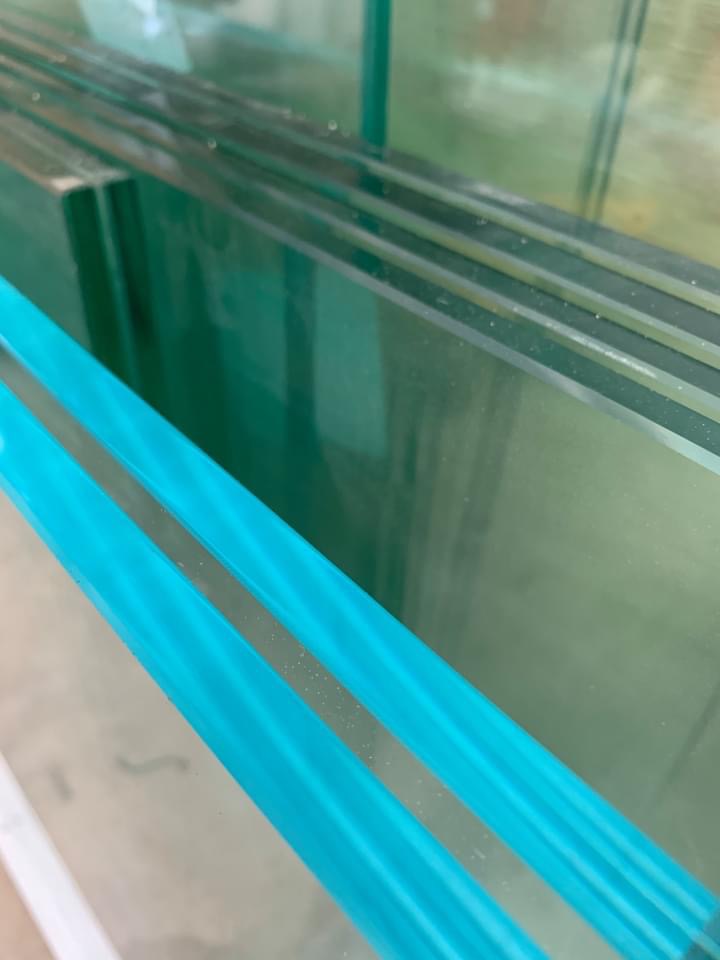
Different grade of glass actually affects the clarity of your tank – Picture from Aquarium artist showing the difference between crystal glass and normal glass. The bottom one is crystal glass.
2. Quality of the glass – Another important factor that affects the clarity of the tank we see is actually the quality of the glass itself. Do you know that there are actually different grade/types of glass being used for making a fish tank ?
If you choose to use normal glasses, your livestock in your tank will tend to look greener due to the green layer found in a normal glass. However, If you choose crystal glasses, it will look much clearer and less greenish look. Remember the time when you look at the coral from the top of your tank ? Does it appear different from the glass itself?
Another factor is that the thickness of the glasses also come into play of the clarity as well, as the thicker the glass it is, the more greenish it will appear on the normal glass. However, don’t go for a thinner glass just because you wanted to look nice, but a thinner glass will also mean higher pressure load from the water inside, so do remember to discuss with your tank maker about it to select the corect glass thickness to use.
Algae in water column
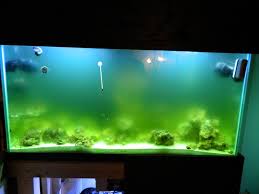
Like bacteria bloom, the concentrated nutrient in the water column could result in algae bloom which will also likely cause the water to be cloudy in fact green. This often happens when you have very high nutrient level without controlling it.
Here are some of the causes of Algae Bloom
- High Nutrient in tank
- Overfeeding
- Large water changes of unknown water source
- Lighting in the wrong spectrum (example using plant light)
- Overexposure to direct sunlight on tank
Biopellets and Rowaphos are one of the commonly use P04 and N03 removal products to control nutrient in a reef tank. A possible solution for this includes doing a major water change, controlling your nutrient level by using phosphate and nitrate removal, installing a UV steriliser, running an ozoniser , setting up a refugium, algae reactor or ATS to keep the nutrient in check.
Phosphate can be easily removed with media like ROWAPHOS. Do take note that it work too effectively to remove phosphate therefore it always recommended starting with a small dose. And nitrate can be remove by using products like bio pellets etc..
Other factors that might contribute to a cloudy tank
Overdosing of supplement – Some supplement like Kalkwasser, KH or calcium if is overdose can cause your tank to turn cloudy, so remember to perform a smaller dose separately.
Dosing of supplement that you didn’t know of – Not knowing what you dose is another clear factor of a cloudy tank, and it might even cause causality for your corals or fishes.
Here are some of the solution you can have in place to make your water crystal clear.
Improving your mechanical filtration

A product like the ClariSea SK-3000 Atomatic(GEN2), is a great way to remove fine particles from your water column. Picture from https://reefmarketsg.com.sg/product/clarisea-sk-3000-atomaticgen2/
Old school reefer like me uses filter floss as it is cheap to be disposed of. However, the new age roller filter provide micron size filter matt filteration which allow both small and big particles to be filter away while automatically turning to a new layer of matt once it get dirty. How easy it that !
Running Active Carbon
To maintain crystal clear water, another option is to run active carbon. Active carbon or Activated Carbon is considered a form of chemical filtration. It works by absorbing toxic waste and fine particles from the water column, however, once all it’s pores are filled, it needs to be replaced.
If I happen to miss out on any good options, hit me up and I will research it and put it in this article to share with our reefers.
Supplements that help improve water clarity
There is numerous product in the market that make claims to make the water clearer, personally I have try a few of them and most of them involving introducing another source of bacteria to clear the water.
Microbe-lift special blend is one of the bacteria that reduce your nutrient in water by consuming nitrate.
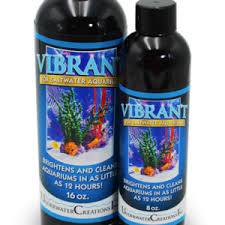
Vibrant from UWC Vibrant, “Vibrant is a new revolutionary liquid aquarium cleaner. You can say goodbye to algae, cloudy water and that grungy, dirty aquarium and say hello to that sparkling, crystal clear, algae free, vibrant aquarium you have always wanted! 8 oz. bottle will treat 2,400 total gallons.” directly quoted from the manufacturer. Personally I’ve use this product however it stop my cheato from growing which isn’t what I want. It indeed help my water to be clearer and reduce algae growing on glass.
SPECIAL MENTION: MICRO BUBBLE IN TANK
Another common issue that reefer often face is microbubble in their tank. If you’re not careful with configuring your setup, you will see micro bubble tend to form in your tank which affects the clarity of the water. What are often the causes of this?
- Return department in sump too low, return pump suction air too when going into the main tank.
- The wrong configuration of the skimmer, resulting in microbubble escaping the skimmer and entering your return pump.
- Wavemaker placing to high, absorbing air along with water causing microbubbles.
- Poor sump design – micro bubble forming in sump compartment.
PS: Clean your lens before taking a picture too, your tank will look clearer that way!
Author @Willy Guccivera Yap
-
Starting your first marine tank. Overview to plan your equipment and budget (Part 1)
Starting a beautiful marine tank is exciting. But upon doing research online, the information may be overwhelming, contradicting & often confusing.
This guide aims to provide a high level overview of areas to consider when embarking on the reefing journey. To help you make educated choices in planning & purchasing the right equipment.
Most of the article will refer to a reef tank.
General planning :
What do you want to keep?
The most popular set up is a reef tank – a mix of both fish & corals.
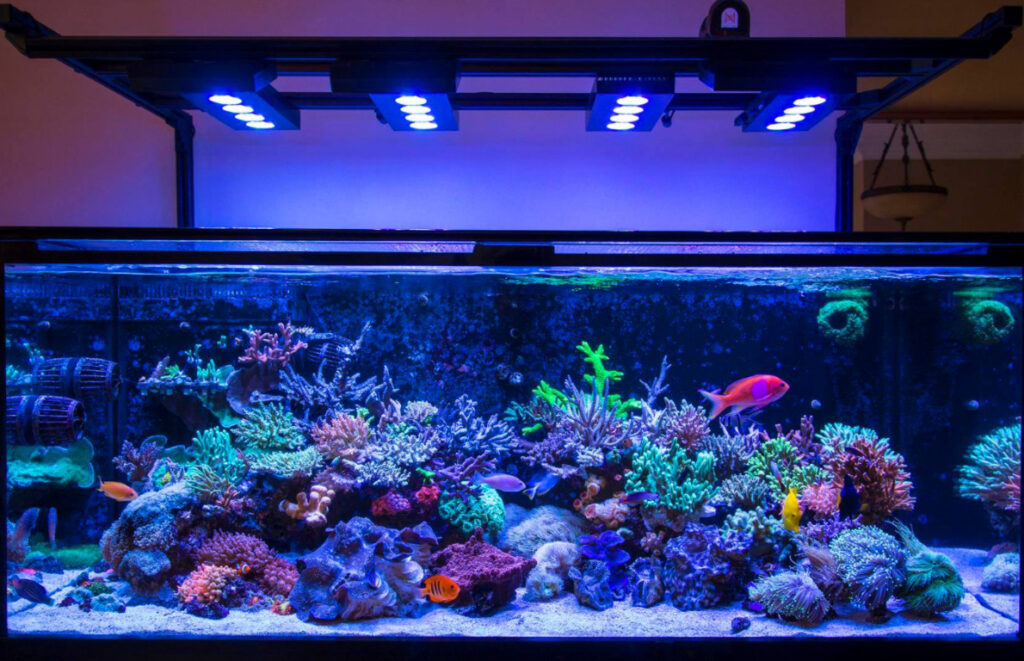
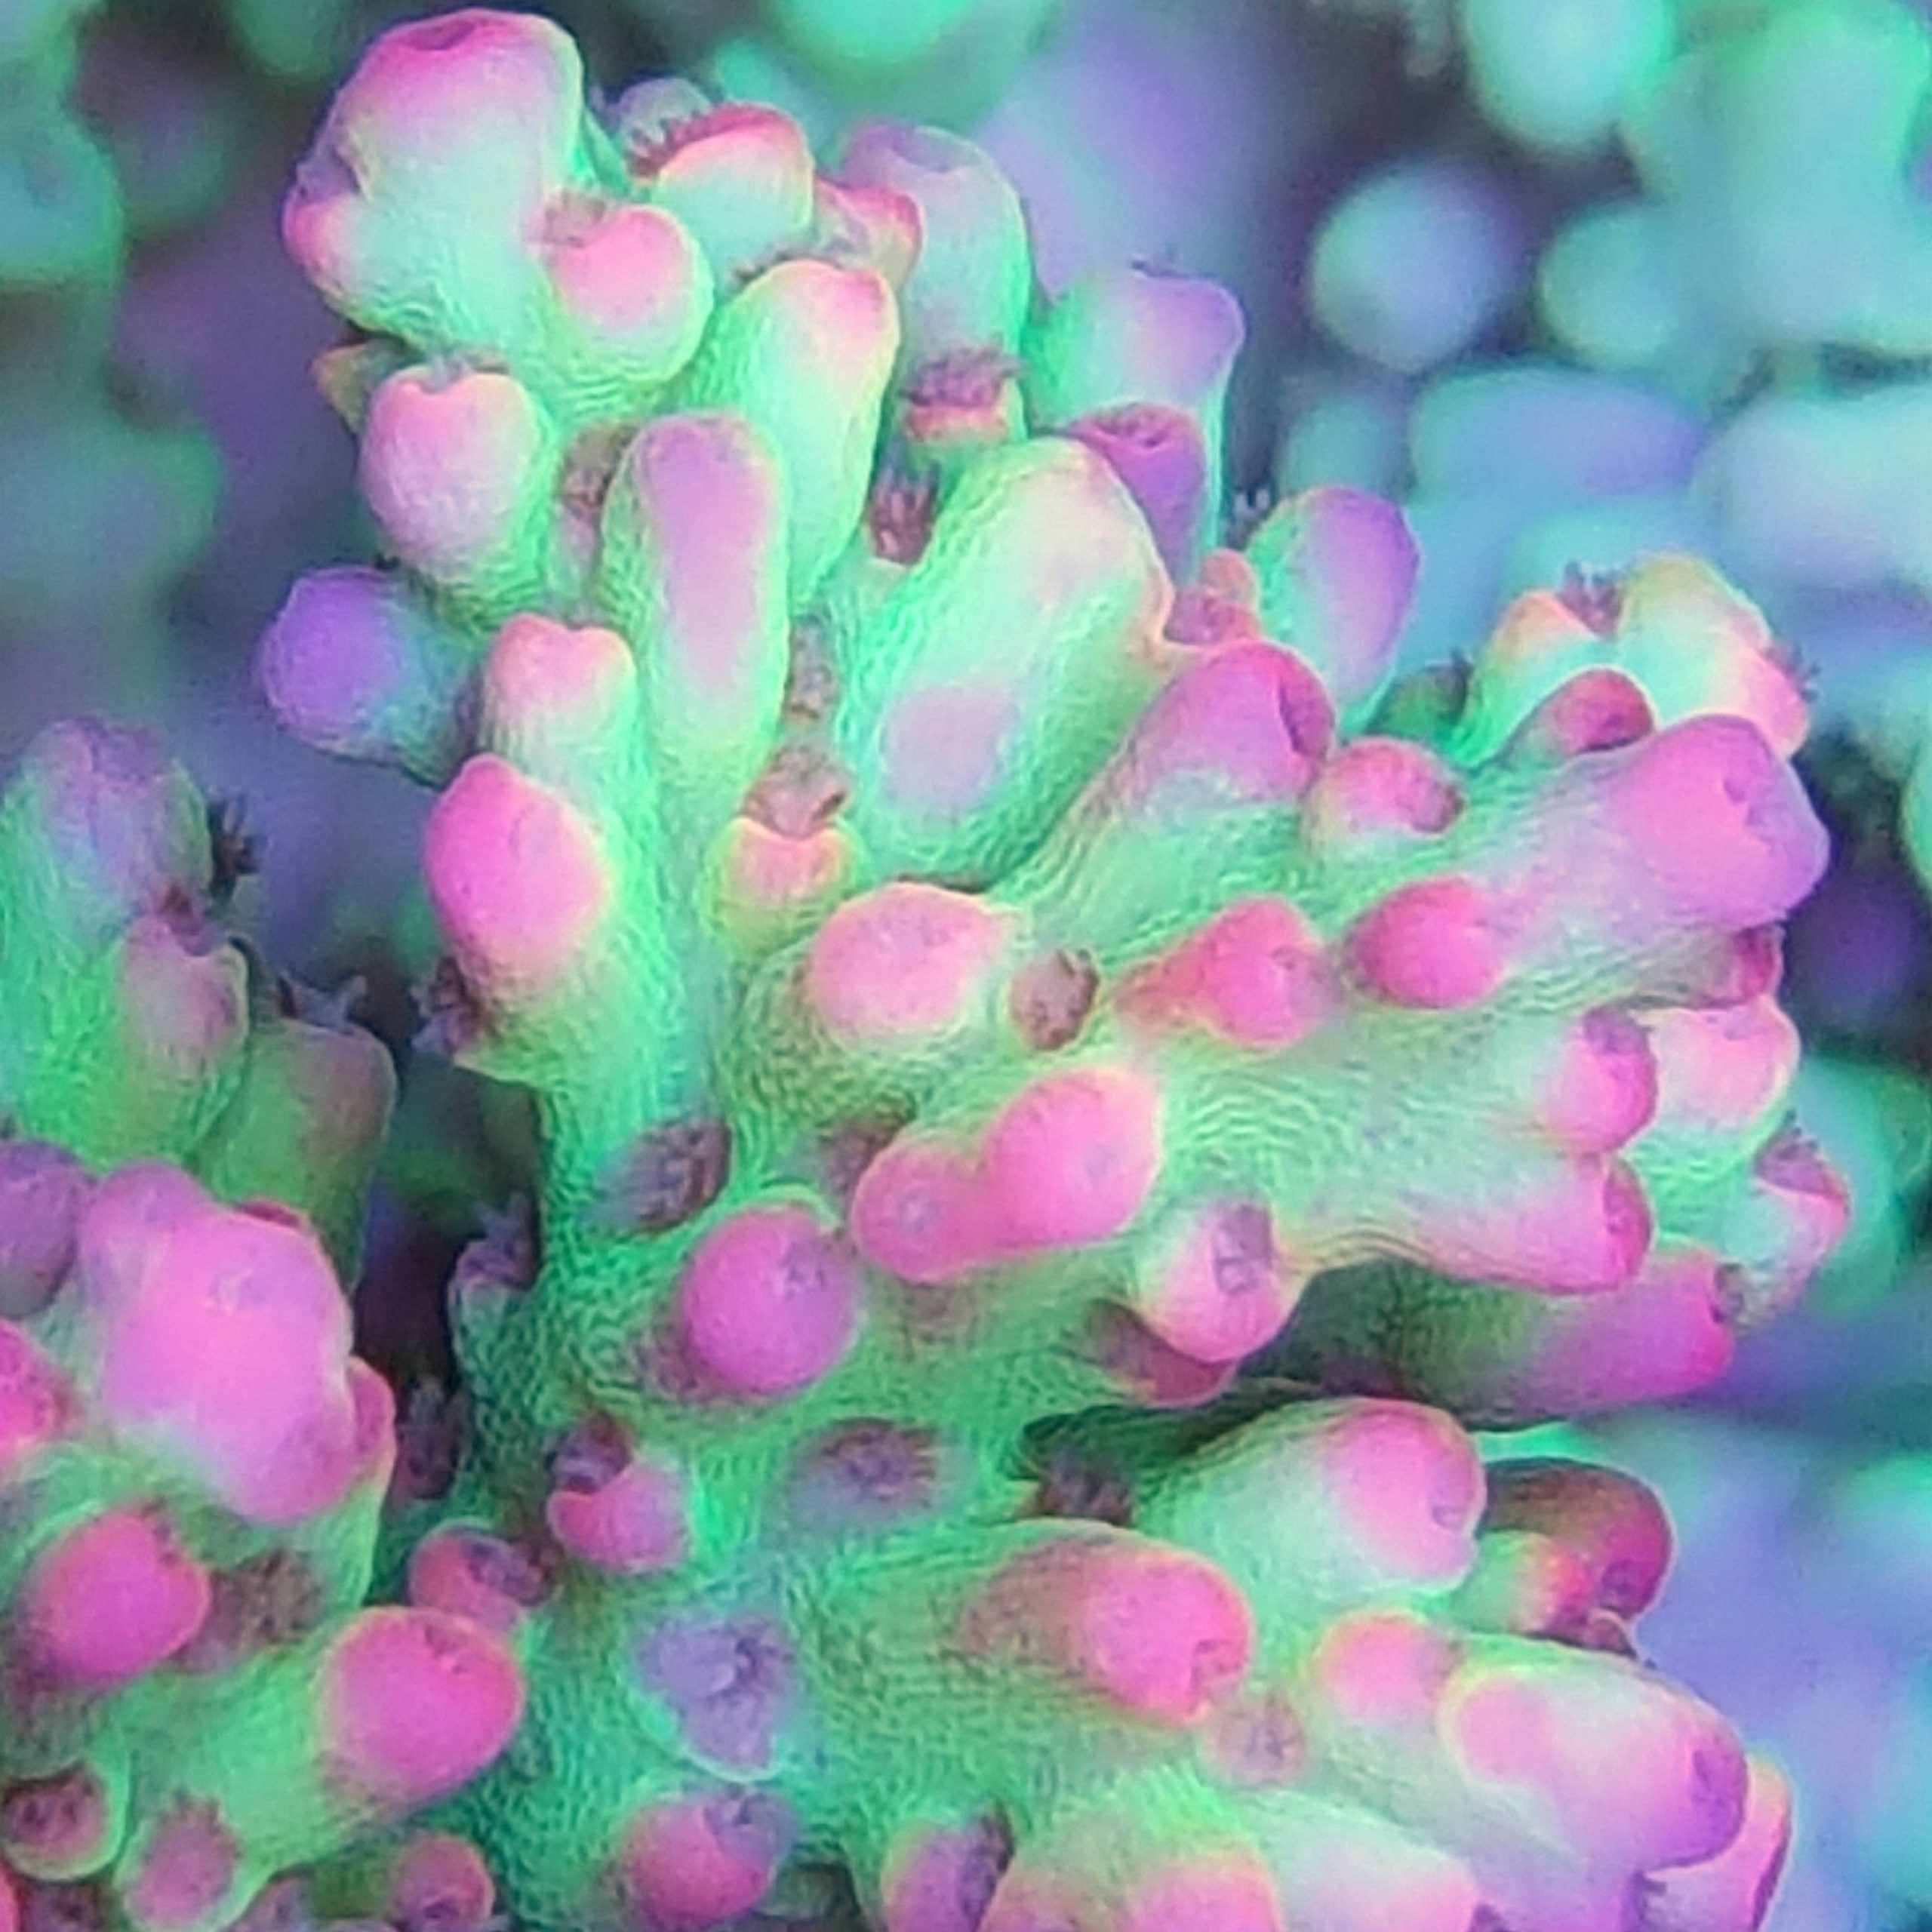
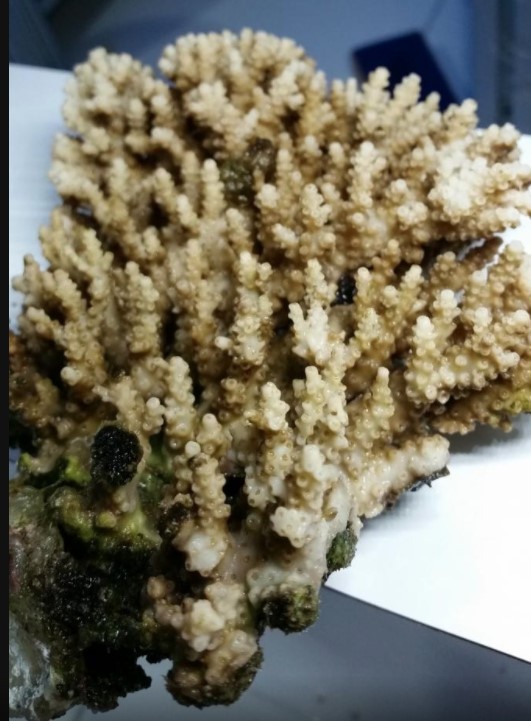
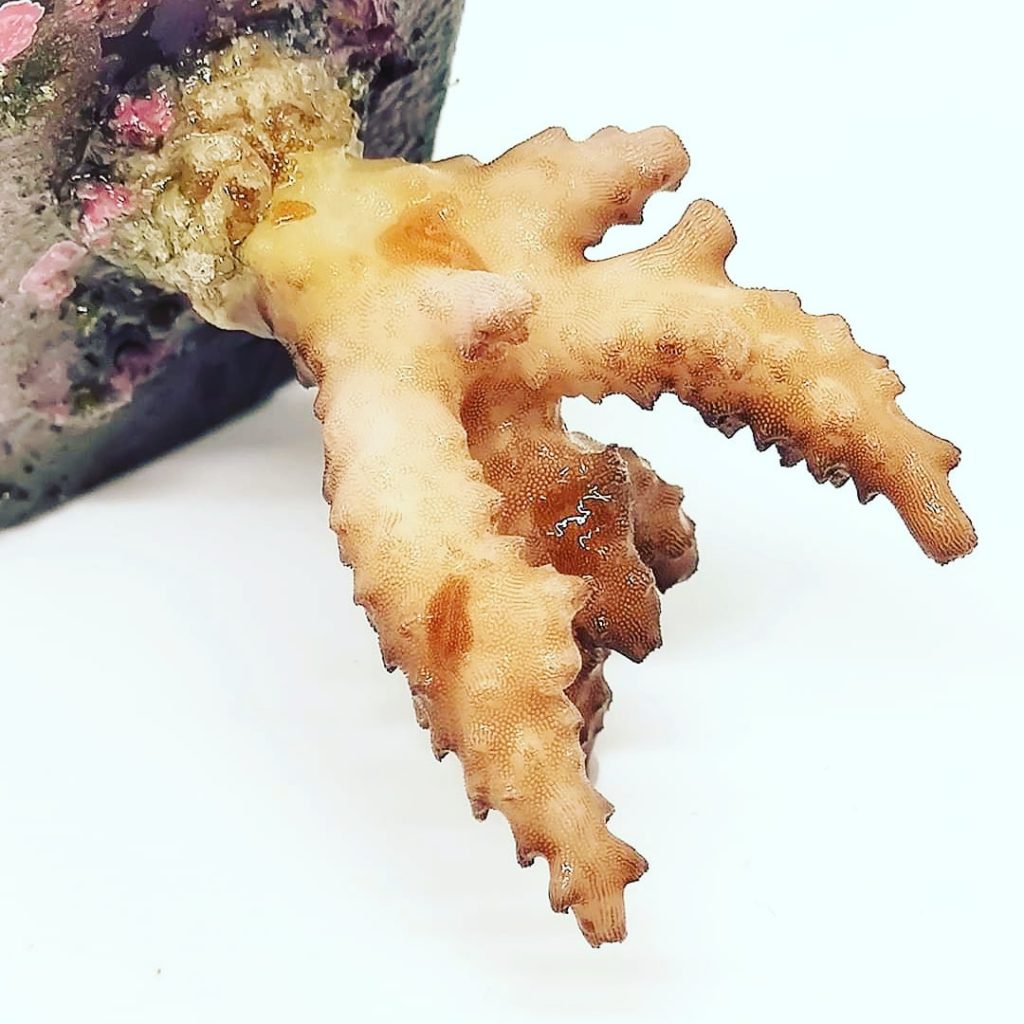
And when it comes to corals, there are options of LPS (Large Polyp Stony Corals), SPS (Small Polyp Stony Corals) and softies. In general, LPS & softies are easier & less demanding than SPS. LPS are more tolerant of imperfect water conditions, require less flow & less light. On the other hand, SPS demand pristine water conditions, strong flow & very strong light. These affect your equipment choice.

Left : Small Polyp Stony Coral (SPS), Right : Large Polyp Stony Coral (LPS) Another popular setup is a fish only system with no corals – commonly abbreviated as FOWLR (Fish Only With Live Rocks). For example, beautiful fish like Angelfish eat fleshy corals & nip on SPS are best kept in FOWLR systems.
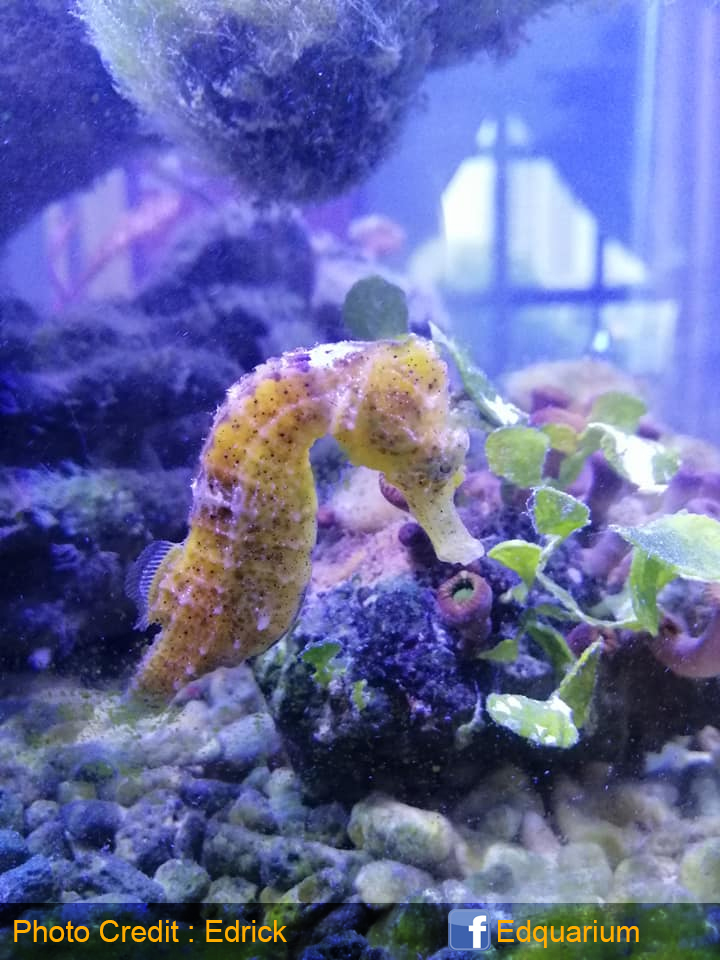
Less common is a species tank, where certain species have specific requirements. For example, seahorses are weak swimmers and require very low flow in the tank. They are compatible with most soft corals and gorgonians. You must avoid any stony corals that have a strong sting as this often leads to injury & infection.
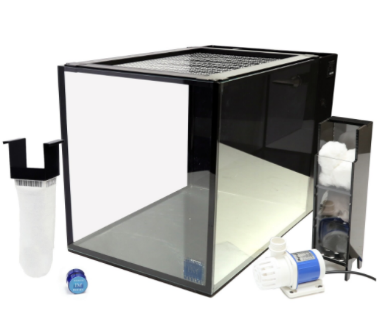
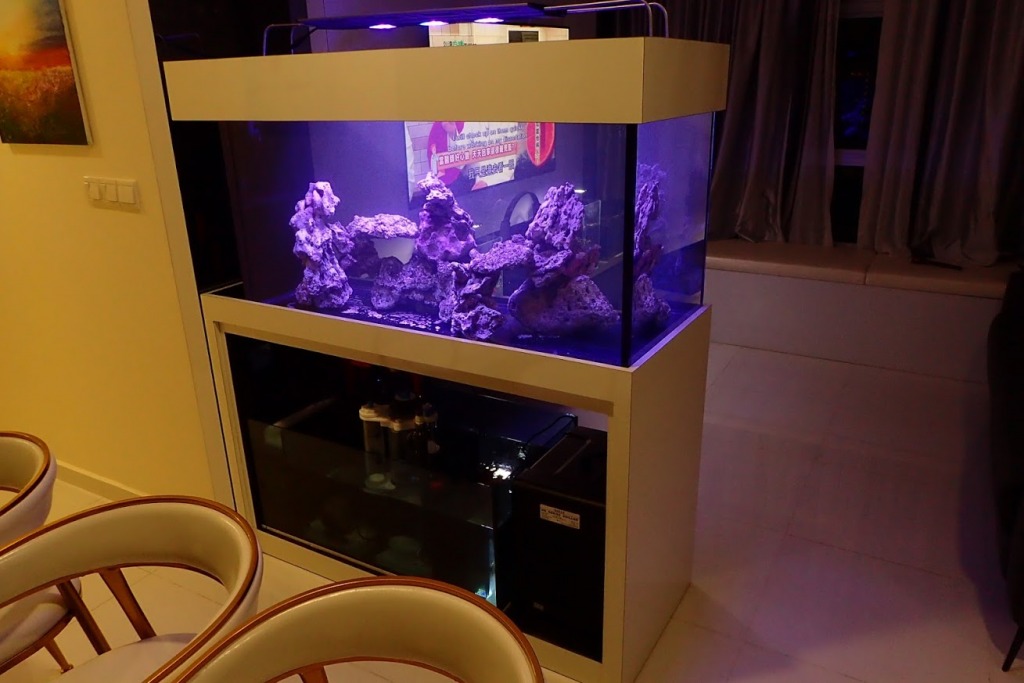
AIO (All in One) tanks. These are usually smaller setups ranging from 10L to 300L. The compartment to place small filtration equipment & bio media are at the back of the tank. AIO tanks are great for reefers with limited space or those starting out to learn the ropes.
Display tank with sump (Recommended set up for marine tanks). A sump is an additional tank usually below the main display tank where equipment and additional filtration capabilities can be enabled. You can have proper mechanical filtration, large skimmer, more biological media and multiple media reactors. A sump allows easy access to the filter & equipment which makes maintenance easier which typically leads to a more successful tank.
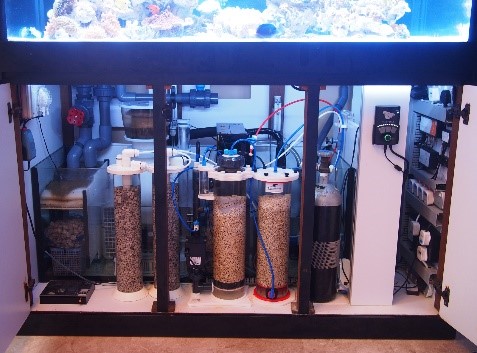
The dedicated cabinet helps hide the sump & clutter of containers & equipment For both the AIO and Tank/Sump options, you can choose from purchasing ready made system, or to have them custom designed.
- Ready made tanks have the necessary components included and are more straight forward to set up.
- Custom made tanks offer options such as tank size, glass type, overflow, piping & cabinet customization. Approach your local fish shop for further advice.
Simple bare tanks (not recommended for a marine reef aquarium). There are some who covert their simple & bare freshwater tanks to saltwater. And attempt to re-use the tank by using canister filters or hang on back filters. Such setups are not recommended as the filtration is not adequate. Using an external canister filter is troublesome & will result in neglect & possible failure. On the other hand, a simple bare tank is adequate as a short term quarantine/hospital tank.
Equipment
Once you have decided on the tank type, start planning for some other equipment. Namely :
Return pumps
Return pumps move water from the sump or IOS compartment back to the main display section. The 2 main types are DC (Direct Current) & AC (Alternating Current) pumps. DC pumps allows adjustable pump speed but are more expensive than AC pumps. DC pumps are useful if you plan to T-off the return pump for reactors & chillers. As you add more equipment, you can adjust the pump speed accordingly.
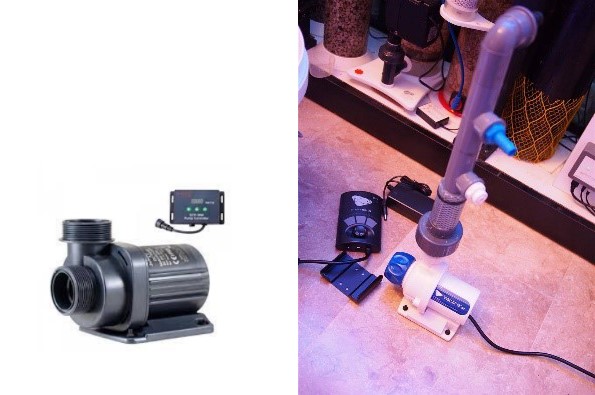
DC pumps. Example of how T-off piping to feed various reactors AC pumps have fixed speeds. You need to purchase the right size for your needs.
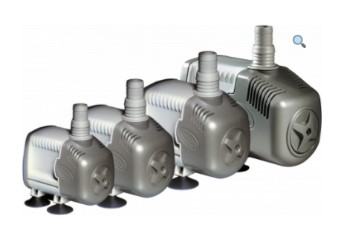
Various sizes of AC pumps Turnover rate from sump to display tank of about 4x is sufficient. For example, for a 500L tank, a return pump speed of 2000l/hr (liters per hour) is sufficient. Note the advertised flow rate on the box depicts maximum flow of a pump (no pipe restrictions or height pressure losses). In a tank system, pipe restrictions (bends, elbows & valves) slow the flow rate down. A general rule of thumb is to assume it slows the pump flow rate by half.
If you T-off the water flow (i.e. feed water to other equipment as well), then pick an even higher rated pump accordingly. With a DC pump, you can easily reduce the power & flow rate.
Wavemakers & Flow
Most popular wavemakers allow adjustable propeller speed & duration. The goal is to create pulses & random flow patterns in the tank, just like in the ocean.
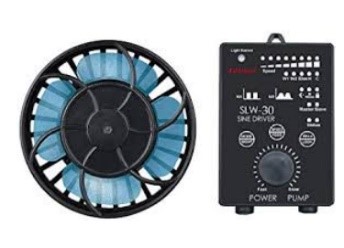
Size the wavemakers correctly for your tank size. Do not place them directly in front of corals as the continuous direct flow will damage coral tissue. Larger tanks will require more wavemakers for better coverage.
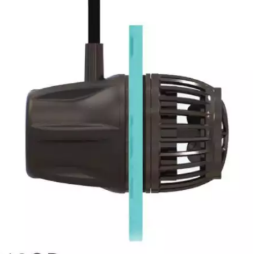
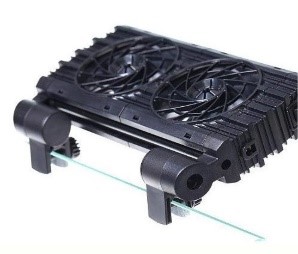
- Motor heat is not absorbed by the water.
- Allows the wet side be removed easily for cleaning.
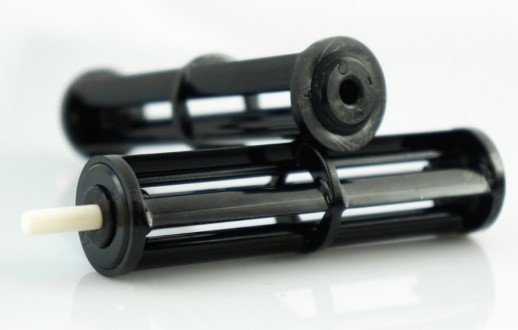
Gyre pump blades Lights
The 2 common light options are T5 & LEDs.
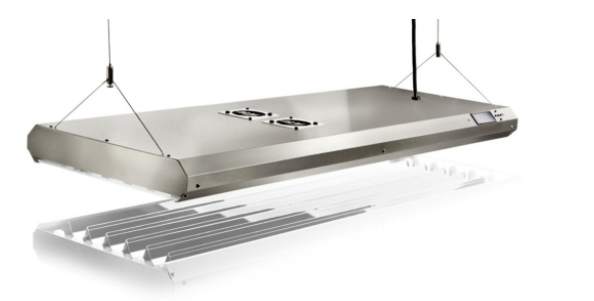
ATI Sunpower T5 light fixture Depending on the tank size, rock scape & type of corals kept, you may need multiple sets of LED fixtures to provide sufficient light energy for the corals to thrive – similar to the energy they receive from the sun.
LED lights are typically mounted about 30cm from the water surface level. This should provide good light spread & not have hotspots (areas of concentrated light which can burn corals)
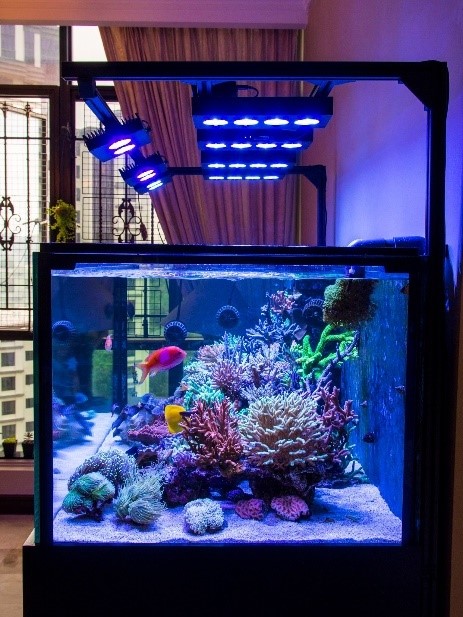
PAR (Photosynthetically active radiation) is measure of the amount of light available for photosynthesis. Corals, clams & other animals originate from different depths of the ocean and have different PAR requirements. In general SPS need more PAR. Conversely LPS require less PAR. Having too strong light can also cause corals to bleach & die. Measuring the PAR levels using a PAR meter takes away the guess work of coral placement. Ask around the reefing community to loan or rent one.
Lighting period
The general guideline is to have about 6-8 hours of bright light for the corals to photosynthesize. It is common to have a few hours of bluish light at night to enjoy the beautiful glow of the corals. This is more of an individual preference. Below is an example of a light profile.
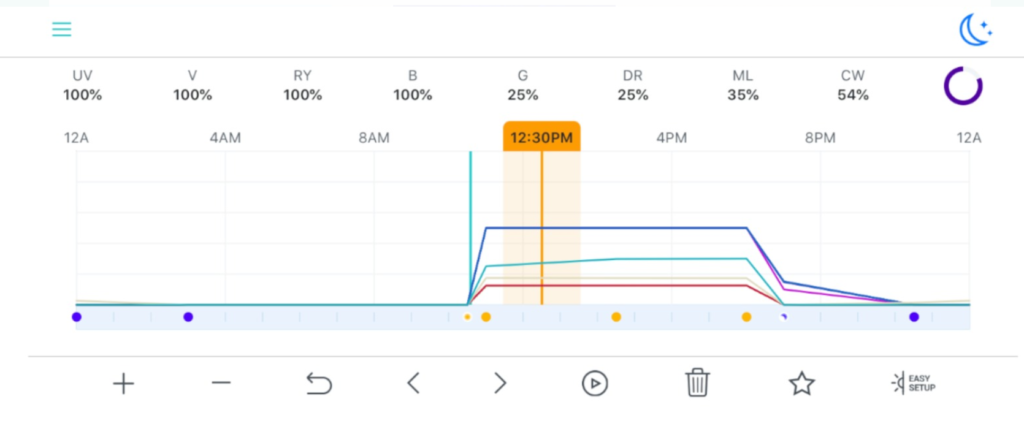
Example of settings for Aqua Illumination Hydra lights Filtration
There are 3 main types of filtration – Mechanical, Biological & Chemical.

Filter wool comes in pre-cut sheets or long rolls - Filter wool. Made of synthetic material. A cheap & convenient option. Use & discard
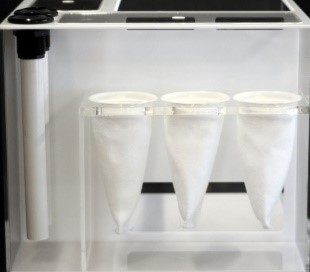
Filter socks Filter sock. More elegant solution but more costly. Socks are made of nylon or felt. Nylon socks are easier to wash under the tap but has less filtering capacity compared to felt socks. Felt filter socks are quite inconvenient to flip & wash thoroughly. Sock pore size are typically in the 200-300 micron range.
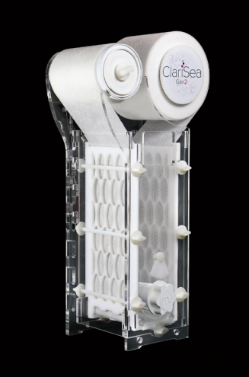
Clarisea SK 5000 Filter rollers. These automatic filters use a thin sheet of filter material (known as fleece) to capture dirt. A motor advances the filter material automatically when clogged. By removing food/dirt quickly from the water, filter rollers ensures minimal decay & contamination of the water. Fleece pore size are in the 25-50 micron range. A roll of fleece should last about 1.5-3 months
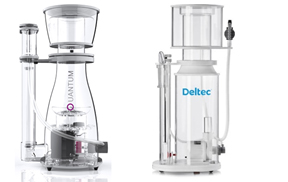
Protein Skimmer is also another form of mechanical filtration. Often placed after the initial filter wool/sock/fleece. A skimmer uses a needle wheel pump to generate large amount of fine bubbles. This causes organic waste (fish food, fish waste & suspended particles) to stick to the surface of the bubbles which bursts when it reaches the top of skimmer. The splattered waste then flows into the collection cup. Having a good protein skimmer results in cleaner water & less frequent water changes. Protein skimmers have a secondary advantage of improving gas exchange & increasing the oxygen content of the water due to the bubbles it forms.
Biological filtration refers to the use of bacteria in the tank to break down dangerous ammonia to less toxic nitrite & nitrates; commonly known as the nitrogen cycle. A term often mentioned in articles is ‘live rocks’ – this refers to a rock where bacteria reside.
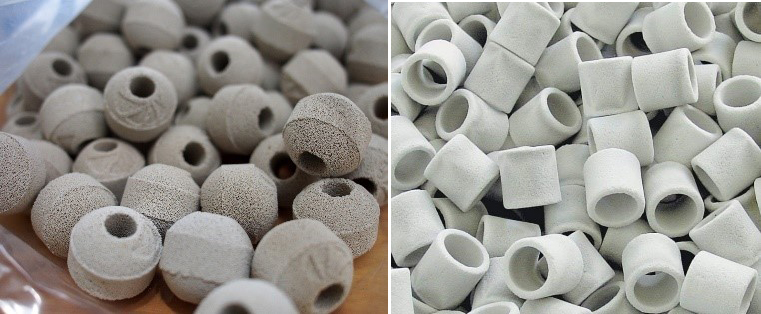
Chemical filtration is a way to removed dissolved particulates using activated carbon, resins or other absorbent media.
- Resins for absorbing phosphates
- Activated carbon to remove toxins/clarify water.
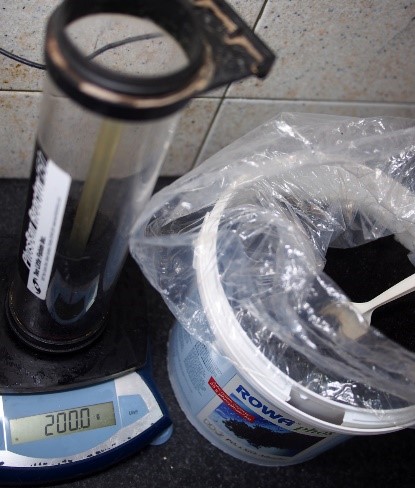
Measuring the right amount of media to place in a reactor. Chemical filtration media are best placed in a reactor to enable sufficient contact time between water & media for the reaction to take place. A less effective but acceptable alternative is to put the media in a mesh bag placed in a high flow area.
Cooling
Cooling Fan. For those on a budget & smaller tanks, you can get away with a cooling fan blowing on the water surface. With this method, evaporation rates increase & you must have a good auto top up system to replenish the evaporated water quickly. Else, water parameters (eg salinity) will have big swings which is bad for livestock.

TEC (Thermo Electric Chiller). An alternative for very small tanks (10-30L range) is a mini chiller using Peltier cooling technology. Such mini chillers are not very energy efficient (about 5% of electrical energy is used for cooling). They have a typical equipment life of 2-3 years.

Electricity cost is not too high. One example of usage for a 1/4hp (~440 watts) chiller running 20min to chill. Turns on once every 3hrs to maintain a tank between 27-28degC. Based on rough calculation, this works out to SGD $0.21 per day. Or SGD $6.40 per month.
For larger 4ft & larger tanks, it is common to use an non-invertor air con compressor with cooling coil. The compressor is best placed outside the house so the hot air goes is blown away. If this is not possible, it is also possible to place the compressor next to the aquarium. Compressors are extremely efficient & cools the tank fairly quickly. For example, a 4ft tank may take about 20min to cool and turns on once every 3 hours.
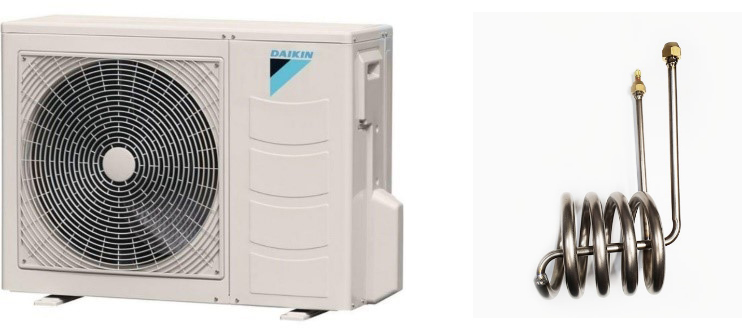
1HP non-invertor compressor unit & titanium drop in coil Auto Top off
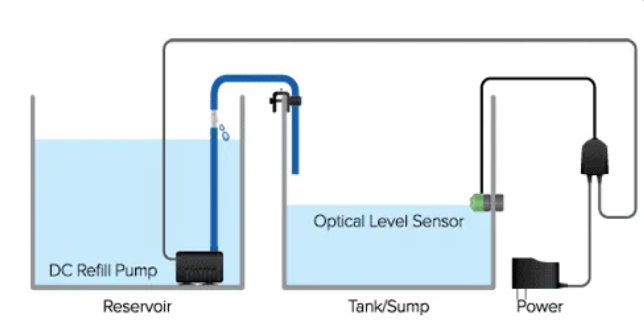
An Auto Top Off (ATO) is a device that detects the water level in the tank or sump. If it is too low, it then triggers a pump to top up fresh water from a reservoir back in.
Take note the ATO should be using water only & not salt water (since only the water component evaporates)
….. to be continued in Part 2
Author - @SubzeroLT
-
1
-
Top 10 common mistakes newbies make when starting up a marine tank.
People study other people’s past so they won’t make the same mistake, that is why we call it his story. (Get the puns?… ok fine sorry). Anyway here are the TOP 10 mistakes newbies make when starting up a marine tank.
Number 10: Jumping into the hobby without research.
When people start to get interested in the hobby, some people tend to try to save money on the equipment they use and at the same time, they don’t do any research on what they are buying. Of course, a piece of better quality equipment will definitely be more pricey than a cheaper one. For example, using a cooling fan to chill off the aquarium instead of running a more expensive chiller not knowing that it actually cause issues such as accelerated evaporation and sudden change in salinity which actually cause more work to maintain those level. And due to this, they might actually end up upgrading their equipment and spending more to getting a chiller later on.
Another example for which some people tend to buy fishes or corals without learning their compatibility and care level and finding out later that they cannot take care of it well eventually causing livestock suffering or even death. Which finally, they might find themselves giving up on the hobby or they will finally decide to do some research to learn about it. (We have a SRC forum for you to do your research on!)
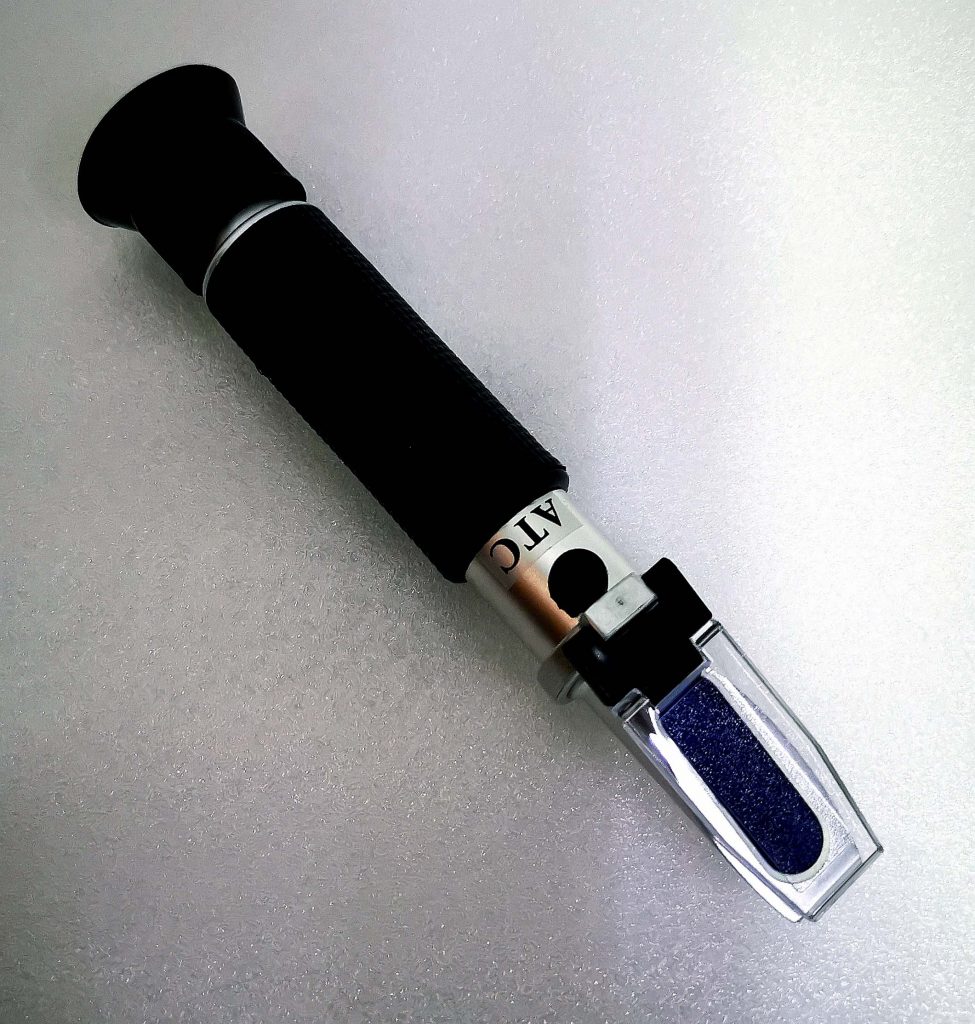
Be a responsible reef keeper and know what you are buying and able to care for it before your next purchase!A refractometer is a more common means of salinity measurement in the hobby Another example is the wrong equipment choice (could be a budget-related concern ) but might find himself ended up with terrible equipment choices not suitable for his/her tank system. For Example, getting a cheaper Swing arm hydrometer comparing to a refractometer to measure salinity which is less accurate. Or buying an optical refractometer from online shops without first checking and knowing that it is not meant for other purposes rather than for the saltwater aquarium (eg for beer-making) .
To summaries, selection of equipment base on suitability is more important than solely on prices alone only.
Picture showing tank cycling process. Number 9: Skipping the cycling process / Adding livestock before cycling process is complete
Very understandable – we are all anxious to see our new tanks come to life when we get our new marine tank setup . Well, it is a mistake that was even made by me in the past. We tend to think after spending hundreds of dollars on equipment, it definitely makes keeping marine life easier. WRONG. Tank Cycling is still a must regardless of how much a product says it can cut off its cycling time.
So what can we do to know cycling is done? With water testing, we can be able to test our water to see if the tank cycling process has been completed anot. In that case when ammonia ( NH4) and nitrite (N02) is zero. Your tank is ready to introduce your first guest into your new tank!
Number 8: Not doing water change.
Water change is tiring and it could be a huge hassle for some, however as time goes by, nutrients in your tank will build up and elements like calcium, magnesium, trace element and etc will deplete too. The best way to maintain your tank is doing a regular partial water change. Not only do you reduce the nutrient, you also replenish the element that is depleted in the system. You still need to test your water and top up elements that are low.
Number 7: Adding more fishes than your system can handle
Well if you google it will show the Rule of Thumb which means The short “Rule of Thumb” answer generally accepted in the marine aquarium hobby is: “One inch of fish (measured from the nose to the base of the tail) per 5 gallons (20L) of system saltwater. However, it also depends on the species of your fishes and how big is your tank is.
Don’t be afraid to always post online to ask about the care level of that particular fish. As for this article, I’ll recommend to always monitor your ammonia and Nitrite level ( Which is toxic to fish ) as well as your nutrient level ( Mainly Nitrate & Phosphate ).
Number 6: Cleaning the sand bed.
Having Sandbed in a reef tank is a beautiful addition in a marine tank, however, if you decided to have a sandbed but not taking care of it could actually cause more harm than good. For a shallow sandbed, it is advisable to do some vacuuming to remove any debris or leftover fish food on the sand surface to prevent any debris from building up.
However, if you have a deep sand bed ( DSB ) , it might not be a good thing to stir the sand bed to prevent any disruption to the biological filtration function of it. Alternatively, it is good to have some cleaning crew like the tiger nassarius snails, and sand shifting star etc to helps keep the sandbed clean…
Number 5: Not acclimating newly bought livestock into tank.
If you ever bought healthy livestock and decided to throw it in the tank thinking everything will be ok, you could be wrong. There could be a great variant of water parameter and temperature differences between the water at the live fish shop store and your tank.
The sudden shift in water parameter if you did not acclimatize your newly bought fish/coral correctly will stress the corals which could result in the death of the newly purchased livestock. Acclimating simple mean adjusting the water parameter for example temperature, PH, and salinity etc of the water between the new and the old to avoid any sudden shift.
This should be done in a slow manner to allow the new fish to adapt to the new water parameter without causing any stress to the new livestock. Be sure to check on the fish compatibility before the introduction of the new livestock, and check out on our detail fish acclimating guide.
Photo showing fishes in an LFS (ABA) that are going through quarantine or medical treatment process. Number 6: Adding fish without proper quarantine.
Quarantine simply means to isolate all new livestock that has arrived from another location that may have been exposed to infectious or contagious disease/parasites, before introducing it into the current system to prevent any form of diseases spreading to existing healthy fishes in the system.
The quarantine period is typically 2-4 weeks to observe if the newly purchased fish shows any signs of illness or disease and make any treatment if necessary in an isolated tank before introducing it into the main display tank. You can read about setting up a simple Quarantine system here
Fish might appear to be well-fed and actively swimming in a fish shop. Even though it went through quarantine in the fish shop, it is surely a good practice to do our own diligence to do our own quarantine as well to prevent any chance of diseases introduction into our existing system. With a proper quarantine system in place, you will not risk risking your existing healthy livestock when you are adding any new fish or corals.
Coral are going through dipping to remove unwanted pests. Number 7: Not dipping your newly bought corals.
If you think that you are ONLY adding your new coral into your new system every time you purchase a new coral. You might be WRONG, hitchhiker like coral Pest could be hidden inside your coral without you knowing it, and these hitchhikers could be invisible to our naked eye. These coral pests could also be buried inside the rock that came with it, and the only way you can actually stop them from introducing into your tank is to perform a coral dip.
After performing a corals dip, you will reduce the risk of introducing any form of the coral pest into your system that could have devasting effects.
Number 8: Adding salt directly into your tank without mixing or testing.
Well well, if you happen to make this mistake, that’s something to learn from. Introducing salt directly to an established tank system which might contain an undissolved component which not only giving you a false salinity reading but might cause other sudden parameter shift as well ( Example, sudden calcium, KH, increase ).
Not only that, you might unintentionally raise more salinity, than needed without testing the salinity in the first place. The sudden increase in salinity could have a serious effect on the livestock in your system. So be sure to always mix it separately in a pail first, and testing the salinity after all salt is fully dissolved before trying to increase the salinity of your existing system.
Number 9: Not performing regular water testing on your water parameter.
Wow, my corals are so beautifully open and fishes are eating aggressively (too hungry?) Joke aside. Doesn’t it really mean that everything in the tank is good? If you decided not to perform your regular water parameter testing regularly and dosing and topping up the elements blindly, you might actually find yourself overdosing certain elements and causing harm to your livestock then actually helping it.
Without performing a regular water testing, you will not be able to tell and replenish any loss or drop of the element to the optimal level for a thriving reef tank to be healthy. Take my advice and schedule to do a regular test . Let us have a beautiful marine tank.
Tangs are aggressive territorial fishes and are to introduce together. Number 10: Adding fishes without doing a properly research
I believe many new reefers has suffered this mistake of happily buying a beautiful fish during one of the trips to a local LFS before making any research or asking the store owner about its care requirement. Which for an example is the bicolour dottyback.
As beautiful it is like a royal gramma, however, due to the fish behaviour nature, once introduced into your tank, it’s aggressive nature may attack any smaller or weaker fish that comes to its path which causing it to die. What is next? New fish lose their appetite and die from stress? From broken fins to death?
As previously mentioned, always Always ALWAYS research on the species before purchasing. Get the smaller to bigger fish so it won’t bully the bigger one when introducing the latter. And ya avoid buying a fish if you do not know it feeding requirement and behaviour.
Thank you all for reading my articles. If you want more, hit the like button. If there are any more articles you want me to write about, comment down below!
Author - @Willy Guccivera Yap
-
2
-
-
Why should we Dip corals? and how to perform it
A colourful SSC Visiting a local Live Fish Shop (LFS) and shopping for corals is one of the best enjoyment in this hobby. However, do you know that if your newly purchased coral is not treated carefully, it could cause a serious effect on your existing healthy corals which is already thriving in your current marine aquarium system ?
What is coral dipping ?
As up to 90% of the corals in this hobby is either collected from the wild or cultured in the sea, there is a high possibility that the corals come with pest without the exporter or importer knowing it. The term coral pest simply means, invert or creature in the natural environment that hosts and eats coral polyps, coral zooxanthellae for its survival, and if left uncontrolled, it will keep reproducing itself which could cause a serious effect on all your corals in the tank.
However, most of the time, it is hard to detect these hitchhikers , as due to their natural defence mechanism, that includes natural camouflage which makes spotting them extremely difficult with our human naked eyes.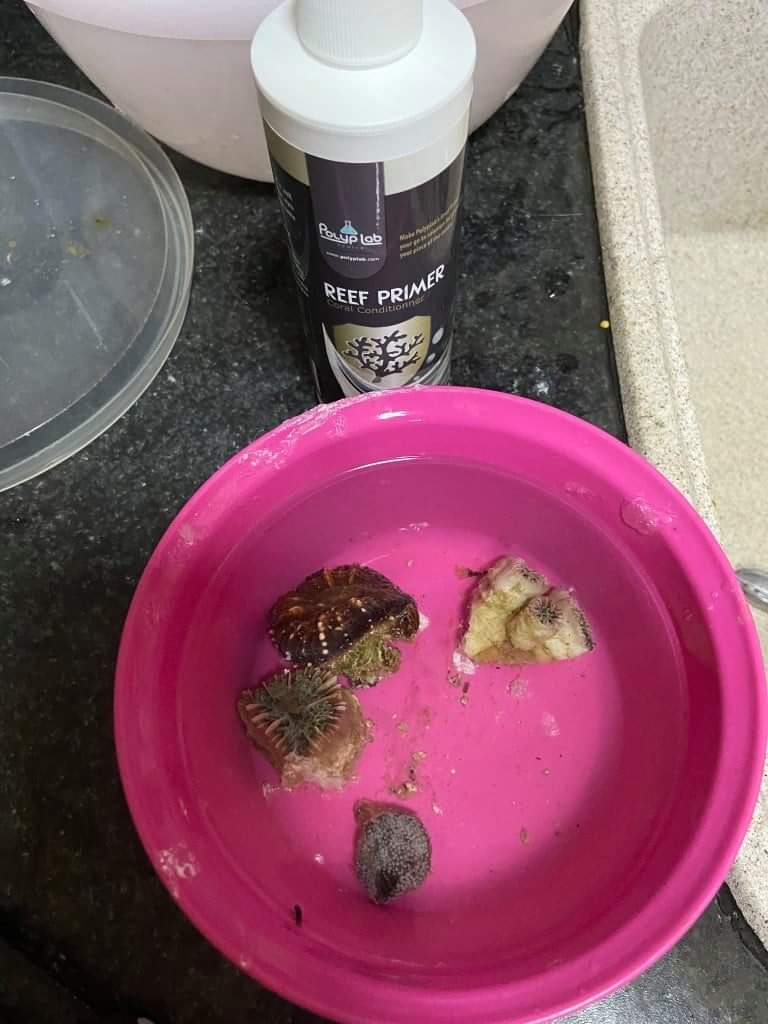
Photo credit; Leon tan Therefore, treating all new or infested corals with a coral dipping is one of the best remedies for this . Coral dipping simply means treating the coral with a commercially available solution that helps to remove those pests from the corals itself without harming the corals.
However, do note that coral dip could be effective against the pest itself, but it can be useless against their eggs.
How to perform a coral dip?
To prevent any unwanted pests getting into your system and eating up all your existing prized corals, we should treat all newly purchased corals “ unsafe “ unless it has passed the quarantine period or safety period deemed by the hobbyist.
Start with preparing two container filled with tank water and applying a moderate amount of coral dip solution in the dipping container and placing the corals into the container.

Two container of water for dip and wash 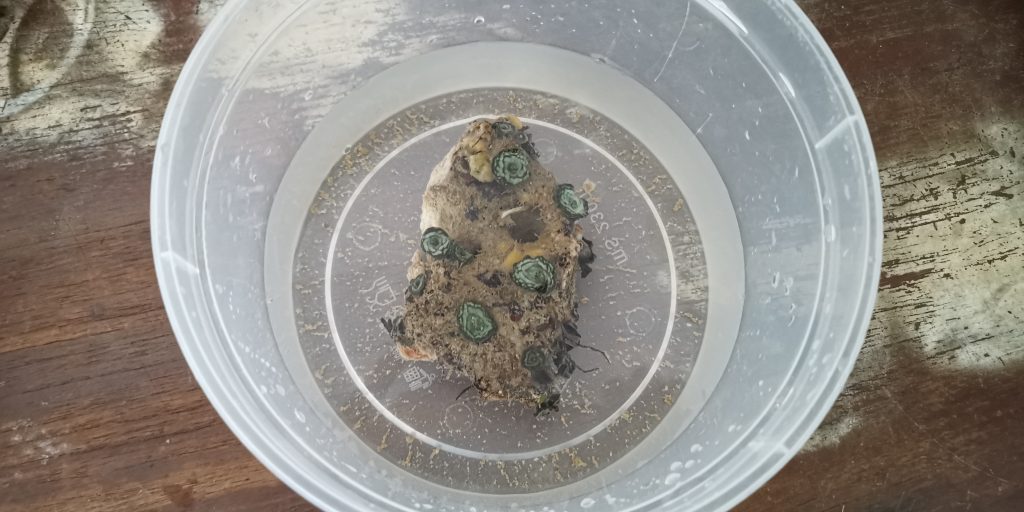
Dipping of corals in a prepared dip solution Follow the instruction of the coral dip products that you are using, and after performing the dip, transfer it to a newly prepared tank water ( Without the coral dip solution ) for a short bath before finally returning it to the tank.
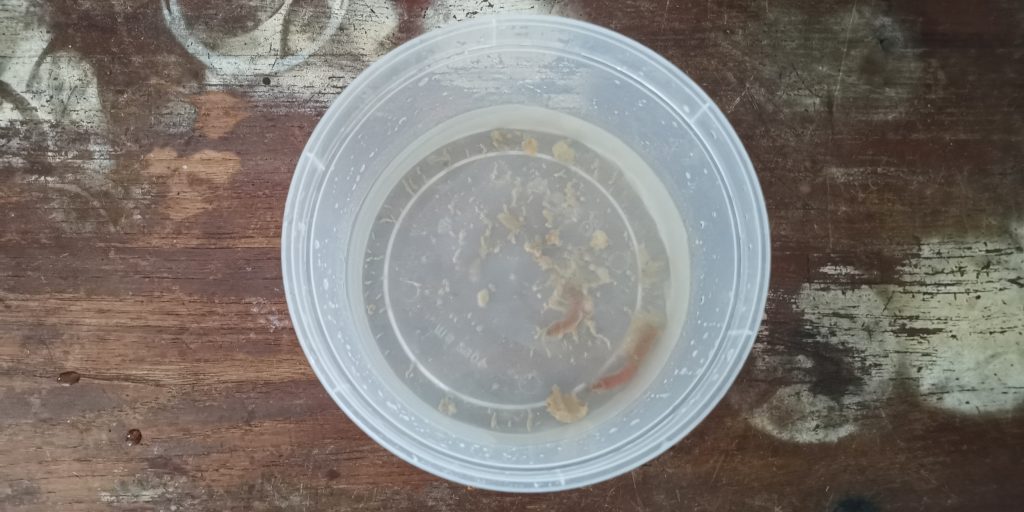
Some of the possible hitch hiker like this that can be found after the dip If any pest is found, do prepare to perform a second and a third dip a few days later as there might be eggs present that need to be redipped for any pest. Do not dip the same coral repeatedly as it might stress the corals and cause it to die from stress. Provide enough rest period for the coral to heal before performing a repeat coral dip again.
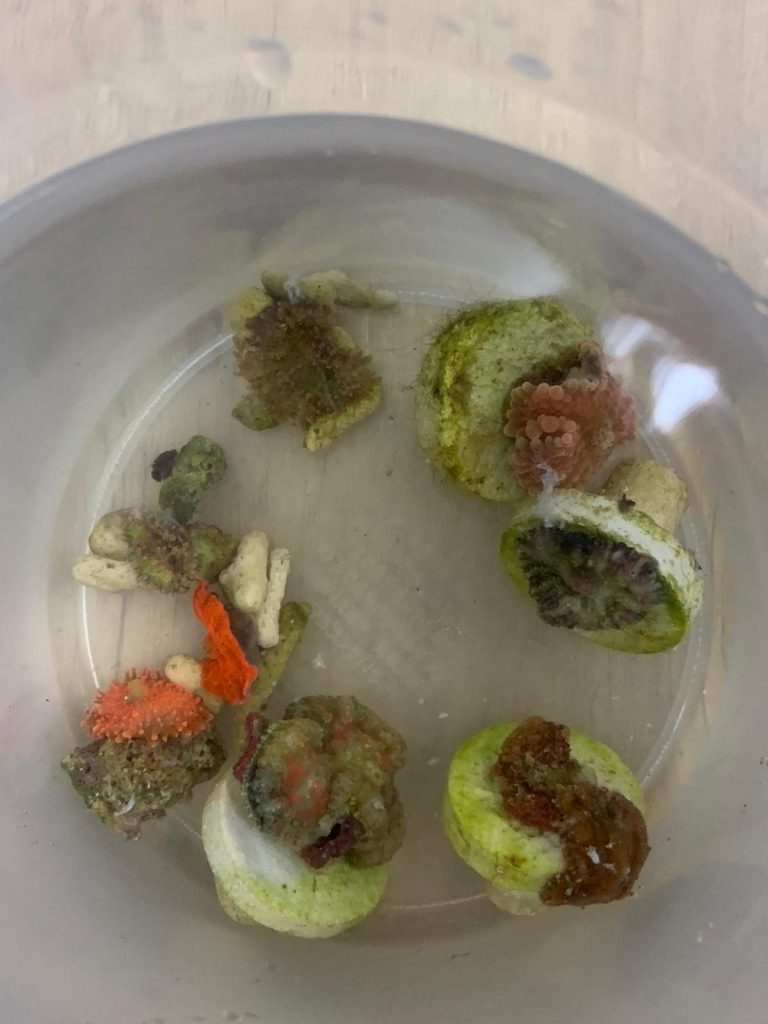
Performing coral dip on mushroom corals However, if no sign of pests is present it might not mean that the newly purchased coral is 100% pest-free, as there might be eggs which are not visible to our naked eye or which has not been hatched during the coral dip that we have done. The dip will not be able to remove eggs, and it has to be done only manually. Which is also why It is strongly recommended to place all newly purchased corals into a separated quarantine system which a schedule dip can be performed over a period of up to 14 – 30 days which ensures that the coral entering the system will be 100% pest-free. If there are any eggs which are not hatched, it will hatch during this quarantine period, and the scheduled coral dip will remove them completely.
-
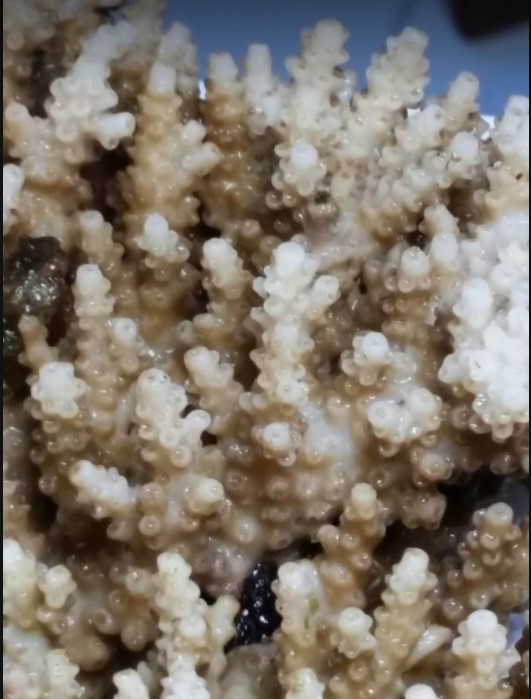
SPS coral turning pale due to FW attack -
A infected colony that losses its color
-
SPS with flatworm -
SPS infected with FW eggs
So be prepared for every new coral, be it mariculture piece or coral frag big or small, there is every possibility of introducing a bad hitchhiker into your system which could cause a nightmare to you trying to figure out how to remove them later from your tank.
A Possible schedule of a coral dipping process for all newly bought corals includes ;
Day 1 – Coral dip and inspect visually for any sign of bite mark, pest, eggs on the corals itself or on the base of the rock that it comes with. ( Depending on the condition of the corals itself, if the coral look stress, or injure it is advisable to postpone this to further stress the coral )
Day 7 – A second coral dip to ensure that there is no coral pest observe during the dip
Day 11 – Hitchhiker pests like AEFW ( Acro Eating Flatworm ) take about 11 to 14 days to hatch depending on the temperature, thus by the period this third dip is performed, the eggs would have hatched and dropped off from this third dipping.
Day 14 – The purpose of this dip is to ensure that all unhatched eggs from the previous treatment will be by then hatched, and removed by the dipping process performed on this day.
Day 30 – Finally the last coral dip is almost certain that all coral entering the main display tank is free of any coral pest and safely introduced into the system.
A tank full of happy growing corals. Yes, this could be a very tremendous tedious process of dipping and conditioning the corals to be almost 100% sure that all corals entering your system are almost certainly pest free. However, the effort will be worthwhile over the long run, preventing any outbreak in your existing system which could lead to a total loss of your beloved corals or a more tedious way to remove them later.
Author - @he
-
1
-
-
Avoid these fishes!
YES, Avoid these fishes!
Here today we will discuss the most popular fish in the trade to be avoided. Given the beautiful color or the fish or perhaps the cheap price, you should always research and prepare for it as the fishes listed might be difficult to keep or difficult to get it fed.

One of the most sough after fish ( Achilles Tang ) which belong to Acanthurus family is very susceptible to ich and require good water quality and large swimming space
Ich Magnet
Tangs are one of the obvious ich magnets, by saying ich magnets means they are easily susceptible to ich. One of the genus to avoid are Acanthurus which consist of Powder Blue, Powder Brown, Powder Black and Archillis tang are the most common fish to be seen in trade and also most susceptible to disease in a Reef Tank. It is not totally impossible to keep this species however you are required to quarantine every single fish that enters your tank from the start and also prepare to dip anything that enters it too because this is to lower the risk of diseases entering your tank.
However, it still doesn’t 100% eliminate the chance of this fish getting caught with ich or die. One way to ensure your fish to be healthy and resistant is to feed them well to build up their resistance and ensure fish is fully quarantined before introducing it to your marine tank. Do also take note of the existing tank mate in your system as if it is not properly introduced, they might be aggressive towards each other and being bullied by established fish in the system which might weaken their immune system making them susceptible to develop ich again. Tangs also required amber swimming space and it is only recommended for reefer with 3ft tank and above.
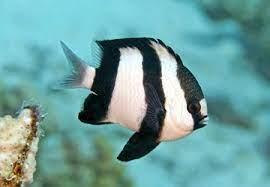
Damselfish
Affordable, elegant and beautiful as it seems to be, however so note that some of the damsel species are notoriously aggressive fishes to other tank mates, that will attack another tank mate once it is established. If you really like this species you should consider introducing it last (Which maybe seem impossible because we always want to add new stuff), or introduce a bigger size fish after it. Be sure to research on the behaviour of the damselfish that you will be getting to avoid any aggression.
Damselfish might do well in a school in the ocean but however, in a small tank, they often chase and bully themself to death as victims of the bullied may find themself hiding and die from starvation.
Copperband butterfly
Even myself, I love the beautiful white and yellow colours and also the long peck. However, do note that this fish diet is only known to eat copepods and aiptasia. You can train them to eat Mysis shrimp but it will require a lot of patience for that. Impossible to keep? No. But it has really come to how much commitment you can keep this fish with some stroke of luck as well.
Once you are able to obtain a healthy specimen, the chance of getting it to feed prepared food will be higher, and you will be rewarded with a beautiful specimen swimming in your tank.
Dragonet (Mandarin fish )
Same as a copperband butterfly, their diets in the wild consist only of live copepods and pods that are small enough to enter their mouth. It should only be kept in an established tank with lots of critters for them to hunt in the while. If you keep in a small tank, train them to eat mysis in a small isolation before release or else they will just ignore the food as they are never going to try to nibble on it unless in a confined area. Weird huh. Fortunately, there are captive breed specimen that is ready train to feed prepared food even pellets as well! However, do prepare to pay a little bit more for these captive breed one.
Bicolor Dottyback
Small yet aggressive. Dottyback is one of the most common fishes in the marine trade that newbies tend to purchase because they look like Royal Gramma from finding nemo. This fish may look gentle and harmless but do not be deceived by its looks, as once settled, they are really really really aggressive in their own space and always tends to bully new tank mates to death. I would totally avoid this fish but then if you really like this fish, do consider introducing it as the last fish without its own kind/body shape with ample swimming space for it.
Pygoplites diacanthus – Regal angelfish is consider one of the harder angel fish getting it to feed prepared food in an aquarium environment. Most eat sponge in the wild.
Picky eater Angelfish
Some angelfish are picky eaters and it could be challenging getting them to eat prepared food in the captive aquarium, as some of their natural diets in the wild usually consist of a wide variety of sponge. Some species not limited to are Regal Angelfish, Multibar Angelfish and Golden Angelfish are the few of the beautiful angelfish that are often reported hard getting them to eat in a captive environment, which often ends up being dead from starvation.
I will only recommend to purchase them if they are eating pellet in a LFS or show sign of feeding .
PS: Do find out what pellet brand it is eating and get them to mix with what you feeding with.
Lastly, other than avoiding the fish, you should also learn about how to pick a healthy fish which I will write on it next time. If you have more fish you wish to bring to attention to avoid, do write on the comment below.
Author - @Willy Guccivera Yap
-
3
-
-
Starting your first marine tank. Overview to plan your equipment and budget (Part 2)
This is a continuation of a 2 part series.
Saltwater
The ideal situation is to start the salt mix with the cleanest possible water. RODI (Reverse Osmosis De-Ionize) filters produce pure water by deploying a series of filters to remove sediments, chlorine and other contaminants such as copper, chromium, ammonia, nitrate & phosphorous that may be present in tap water.
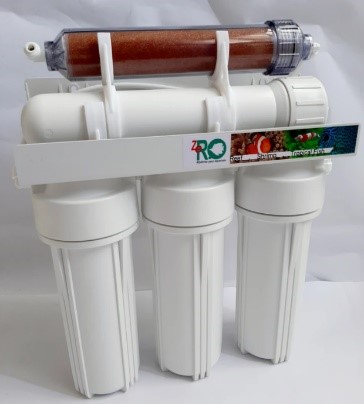
A typical RODI system consists of
- A polyester filter to remove sediments
- 2 carbon blocks to remove chlorine & other contaminants
- Reverse Osmosis (RO) membrane that performs the majority of filtration,
- followed by de-ionisation (DI) resin to remove the remaining dissolved solids.
The ultimate goal is to produce 0 TDS (Total Dissolved Solids). Measure this with a handled or in-line TDS meter.
While the RODI filter may seem expensive, the convenience will pay off in the long term.
RODI system will generate some waste water (that’s how the RO filter works). Some reefers collect the waste water to be re-purposed (laundry, washing floor).
RODI systems need at least 50psi water pressure to operate efficiently (i.e. able to push water through the RO membrane). Generally higher pressure will result with less waste water. If your home does not have such high pressure, then an additional water pressure booster pump needs to be installed. Hot tip : If you live in a high rise apartment, collect water late at night or very early in the morning. Water pressure tend to be higher (because there are less people using water)
For smaller tanks that do not need much water, a more economical option is to use an DI filter which skips the reverse osmosis (RO) membrane.
It is possible to use tap water with anti-chlorine. However, there is a chance of letting contaminants slip through – possibly leading to algae growth or coral/fish health issues.
Salt mix
You make saltwater by mixing RODI with aquarium salt. Some brands are made from evaporated sea waters while others are synthetic. Both are good.
For reef tanks, prepare your salt mix in a large container or water drum to a salinity of 35PPT (parts per thousand) or 1.026SG (specific gravity). There is a misconception that the ideal salinity is 1.025SG. The general accepted natural sea water salinity is 35PPT. For fish only tanks, it is OK to use 30.5ppt or 1.023SG
Salinity is best measured with an optical refractometer. NEVER use a swing arm hydrometer as they are extremely inaccurate.

Key parameters & testing
It is important to test your water parameters weekly to ensure the well being of your livestock. Fluctuations will result in nuisance algae, cyanobacteria bloom & even fish death.
With testing, you will know which parameter has drifted & be able to quickly adjust it back. Similarly, by testing the water, you ensure your dosing regime is done correctly.
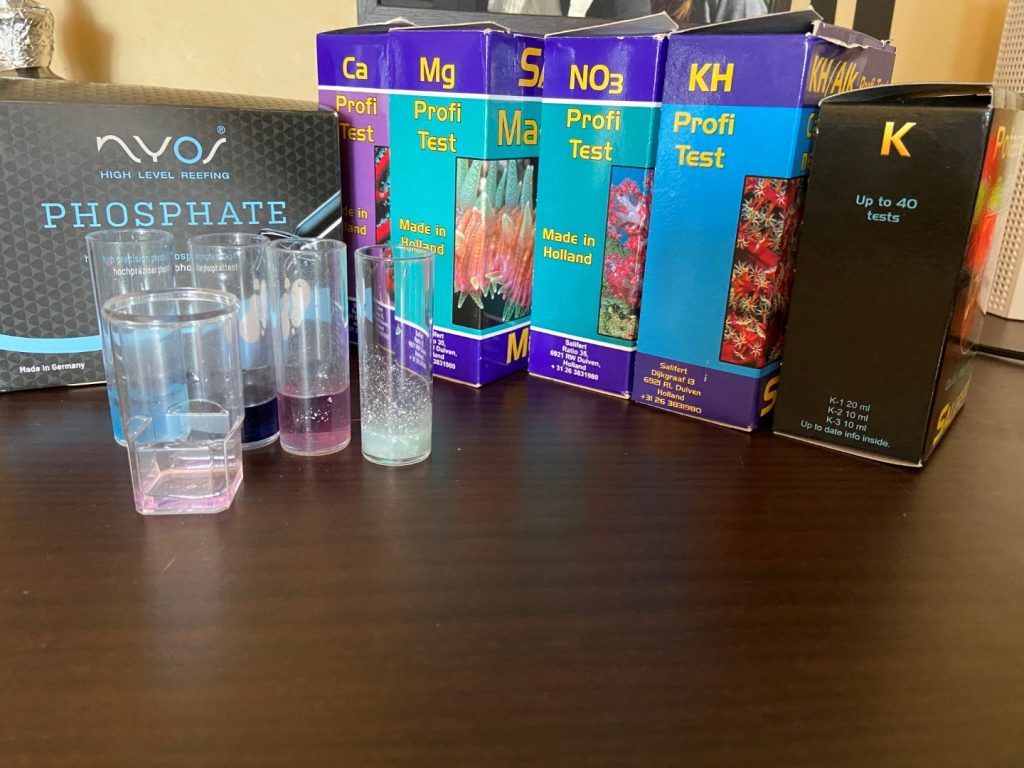
Experienced reefers may get away with not testing their waters since they may have their processes dialled in. But for new reefers & new tank setup, best practice to test weekly (or even more often for a start).
Home test kits are available for the parameters highlighted in bold blue font below. Column in green shows the target for my own tank.
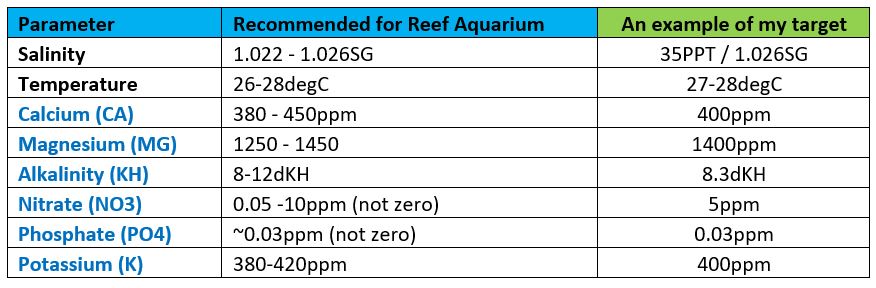
Trace elements and heavy metal contaminants that cannot be detected with home hobby test kits. Once you have set up the tank and settled into a dosing routine, consider going into the next level of testing by sending your water for external ICP (Inductively Coupled Plasma) testing. LFS organise water collection occasionally. Depending on the brand, these typically costs between S$60-S$120 per test.
Additives
Sufficient water change can be done to replenish depleted elements. Water change alone may be possible for small tanks but impractical for larger ones. Hence, adding back elements such as Calcium, Magnesium & Alkalinity can be done using a dosing pump or a calcium reactor.
If you have corals, you should also add trace elements (needed for biological cell function) and amino acids (building blocks of protein needed by animals)
There are many additive products and brands in the market. Do not be tempted to try too many products as some may have overlapping effects. When dosing a new product, take the conservative approach to dose half the recommended amount first. Monitor & adjust the dose accordingly.
Tank maintenance requirements
Water change is a way to reduce nutrients (nitrates, phosphates, waste) by diluting it with clean water. Water change also replenishes depleted elements. A general guideline is to change 20% of water every 1-2 weeks. It is a good idea to siphon the sand bed during water change to get rid of trapped detritus.
Clean the glass. A healthy tank will have some bio film & algae growth on the tank after a few days.
Magnet scrapers are popular. Be careful not to get sand trapped between the cleaner & the tank glass/acrylic as this can scratch the glass. Some have magnetic blade attachments which is an efficient way to scrape off stubborn algae.
Hand held scrapers are good for hard to reach areas and close to the sand bed. Do not apply excessive uneven pressure when using hand held scrapers as they tend to scratch glass easily.
If you have an acrylic tank, use only cleaners with a soft cleaning pad. Metal blades will scratch acrylic.
Cycling & adding livestock
Once the tank is set up, cycle the tank with bacteria additives. This takes about 4-6 weeks to complete. After which you can start to add livestock slowly. Read up about care requirements & whether your aquarium set up is ready or suitable for it. Key points :
- Marine fish can be territorial & aggressive towards fish of similar species, shape or color. Some are just bullies to everything else
- Aggression often lead to injuries, stress & often death. Check compatibility
- Corals of the same family in general will not sting each other. Corals can be aggressive & sting corals of other species.
- Some fish or invertebrates eat corals.
Author - @SubzeroLT
-
Custom Tank or ready-made?
Hi everyone, today I’ll be sharing my own unique short experience about building a custom tank compared to a ready make tank, and hopefully, it will help someone decide on their next project.
To be frank, I would strongly advise to only go for a customize tank build, if you have experience with setting up a marine aquarium before with some experience of the problem and issue of your last build and have also done some research of your own before deciding to go into this route. There are many reasons for this statement however I’ll drop the pros and cons below for you to compare.
PROS
- Custom size to fit in your space. You can choose to be as tall as you if you want, or a customize size to fit a unique corner in your house.
- Enable customization and your own design of the Sump for your equipment.
- Able to choose your own color, wood, lamination , piping and types of glass of the tank and many more depending on what you want.
- Limitless potential depends on how you want to design.
- Able to design where the overflow is. (Bean Animal, Corner, Center, etc…
- Able to expand your creativity allows you to proudly show off your idea.
- Price could be cheaper in my opinion, comparing to a branded ready make setup.
CONS
- If a non-Standize size tank is made, there could be an issue of finding the suitable equipment for it, i.e; light and stand come in standardise size in 2ft,3ft and 4ft etc..
- Risk of water overflow from the system if we design the system ourselves without planning for any emergency siphon break ect, however, this can be solved if the tank makers is experienced on this.
- It could be Harder to sell the tank away in the event of decommissioning of your existing tank, as custom size only fit in your own SPACE and maybe not other people’s house.
- Longer waiting time/duration to receive the tank, as a customize project will generally require more time to build the tank comparing to a ready-made one.
Enough said! Now I will personally show you how I built my own custom tank!
I’ve engaged with Aquarium Artist to build my tank because of the consistency of the integrity of the tank (Especially the piping because it is removable and won’t leak!)
Why don’t we go through with steps so it will be easier to understand.
The excitement of moving into a new house, and finding a suitable area for my new tank. Step 1 : Choosing a location / Planning stage.
I’ve decided the location of my new build to be a partition between my living room and my dining table. Most importantly, the selected location must have enough power point to cater for the numbers of equipment that I will be using. Although it blocks the view of the TV, the tank is the VIEW too! I personally find that it will also look nicer as it connects the corridor together and whenever i return back to my home, I would be greeted by the view of my beloved tank t. Brillant!
Finding the right space and measurement required some skills. Step 2: Measurement.
Plan out your desired size of the tank you wish to have. Invite the tank maker to your house to double confirm the size incase we measure wrongly (Is an assurance as we are not really good at measuring unless we do it often).
Do note to give the tank maker the design you want including the inches of the tank glasses, color of the piping, color of silicon, placing of the bracing and how high is the hood, etc…
Equipment I choose are custom fit inorder to hide and place everything neatly. Step 3: Choosing your equipment.
Plan your types of equipment that you wish to have in your new build. Not only this will allow you to plan your budget, it will also allow the tank maker to know and cater the space for it during the construction of the sump and tank etc.. In any case, do try to discuss with your tank maker and hear his opinion on the design and equipment during the planing stage, as this will helps avoid any problem that you might encounter in future. Try to choose a bigger tank that your budget allowed, as Bigger is always better especially in a marine tank setup, but it also depends on your space as well. After choosing your equipment or letting your tank maker know your equipment list, he will then be able to cater the sump design for the equipment used.
Personally, I prefer custom fit as I do not like to see empty space in my sump.
PS: Chiller inside the cabinet indeed make the cabinet HOT, that is why I have a ventilation cover on my door. Everything that can squeezed into one sump! Including a frag tank. Step 4: “Skin and Emblem.”
Ok not really emblem but making a reference to gaming. Skin is choosing the color of your cabinet and hood, well also to choose the type of glass you want your tank to make of.
A crystal glass will result in better clarity compared to normal glass. Best to ask for a sample of each to compare so you won’t make the wrong choice and regret later on.
And also to choose the type of door you want like hinges, magnetic or sliding door. For mine I choose a magnetic door because I want it to be minimal.
My tank after a month of cycle. Start to put some fish into it. Step 5: Getting update (Optional).
There might be instances where some problems arise if due to some miscalculation or change of equipment, i.e our skimmer is too big to put into your sump or you might suddenly recall you want the silicon of the tank to be in black instead of transparent or you want the pipping to be in a different color, that is where you have to inform your tank maker in a timing manner for them to change it for you. For a ready make tank, this is definitely not posibble.
Tank at 3 months. Feeding mysis to the fishes. Step 6: Receiving the tank.
This is the last step of making a custom tank. When we receive the tank, try to insect for any crack or scratch on the glass or cabinet, conduct a water test to see if there is any leak.
That is all for building a custom tank! Please understand that it is from my opinion of building a custom tank. The most important of success of keeping a marine tank is more on your discipline on water change or measuring parameters.
Thank you.
Author - @Willy Guccivera Yap
-
From the Fishes’ Mouth
Imagine, to eat a box of popcorn chicken on the table, such an easy task right?

Now imagine the popcorn chicken is thrown at you from a third floor window. Not that easy anymore right. The same great tasting popcorn chicken now becomes very difficult, if not impossible for you to enjoy.
Such is the struggle of the fishes in our aquarium. Just like we human are not adapted at catching flying bits of chicken, few fishes are well suited to catch dropping bits of who-knows-what from thrown into water by some alien looking beings.
So the question of the day: How does fish eat? To answer this question, one only need to look at ideas such as the activity level of the fish, it digestive system, its living environment, its eyes, mouth, fins, lateral lines, camouflage, etc. etc. Today, we look at the most obvious. The mouth.
Position and Orientation
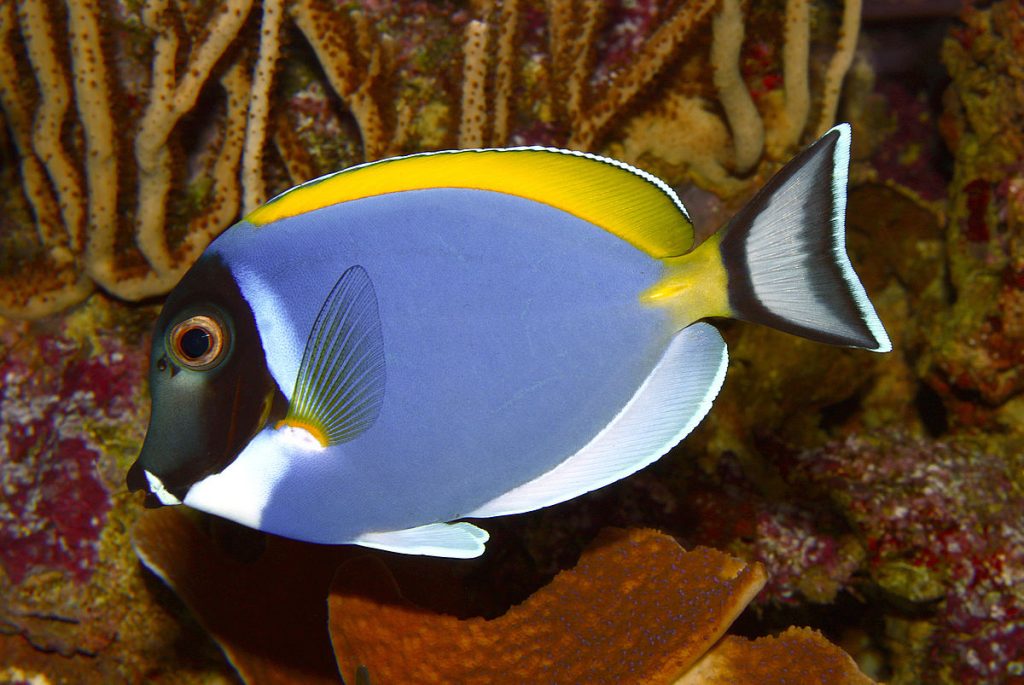
If a fish spend most of its time picking up food from the substrate, it make sense to have its mouth pointed towards the bottom of the sea, like this powder blue tang here. The downward facing mouth allows the fish to remain mostly horizontal as it grazes on the algae on the rocks. Nobody likes to do a headstand and eat happy meal, right?
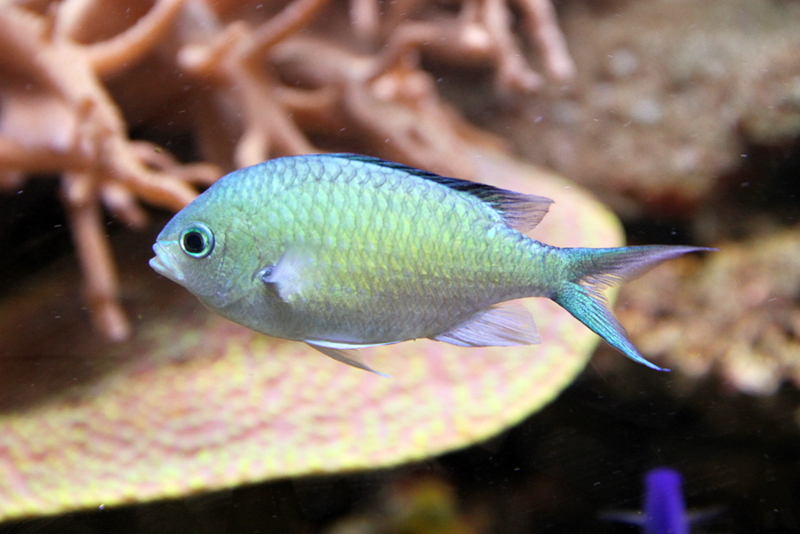
On the other hand, a blue green chromis, which is a planktonic feeder, consumes phytoplankton, zooplankton and various copepod from the water column. These food stuff either drifts with the current in the sea, or swims actively. The chromis needs to chase after them, and naturally, a front facing (a.k.a terminal) mouth is the sensible one to have. Nobody enjoys doing a backflip whenever he eats a piece of fries.
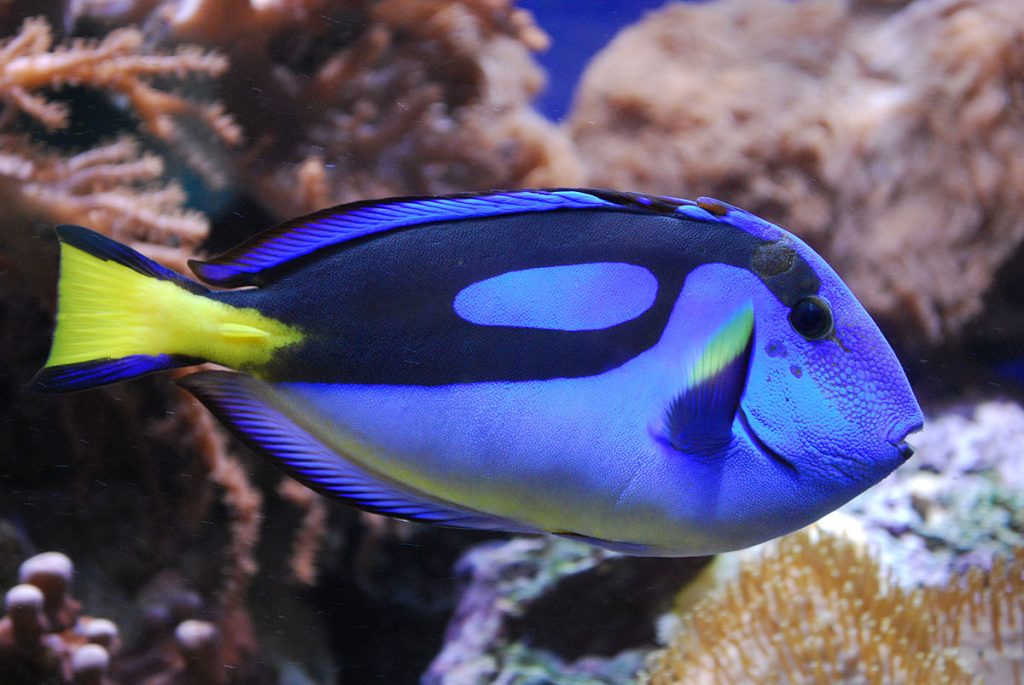
Take a look at this all-so-familiar picture of a hippo tang. What do you think is the main diet of this cute “Dory”?
Unlike a typical Acanthuridae, the mouth of a hippo tang is terminal, and pointed forward. This position and orientation suggests that the fish chase down their meal. Indeed, the planktonic food and copepods are the main diet for these fishes in the wild, quite a bit different from the algae feeders of the rest of the tang family. I suppose this is one of the reason why this fish belongs to the genus of Paracanthurus, where the prefix “para-“ means “resembling” or “apart from”.
Anatomy of Mouth and Teeth
It is common sense to know that the mouth and teeth of a lion is very different from that of an ox. The structure of the mouth and teeth are largely determined by the food they prey on. The mouth must open and close fast enough to capture the prey; the jaw must be strong enough to manipulate the captured prey, the teeth must be well suited to cut, sweep, or detach the food from the substrate and hold the prey firmly. Therefore by looking at the feeding apparatus, we can have a glimpse of how the fish might feed in its intended environment.
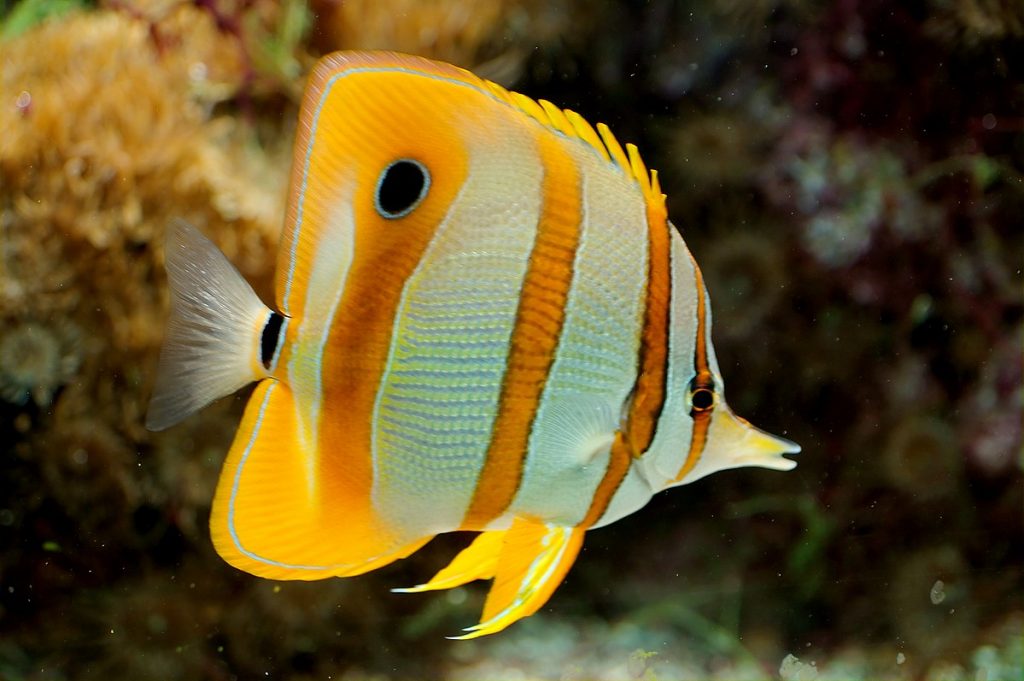
Let’s take a look at a very popular candidate, Copperband Butterflyfish. Firstly, the mouth is located ventrally (near the tummy). It is also slightly pointed in the ventral direction. This arrangement suggest copperband butterfly fish is a benthic feeder. However, it will be greatly mistaken to think that this fish will gobble up hair and turf algae like a yellow tang
The mouth of the copperband butterfly is long and narrow, ill-equipped for grazing, but perfect as a pair of forceps to pickup things hiding in the nooks and crannies. The leverage of the long mouth comes at the cost of weaker bite force, so it will be unrealistic for the fish to crack open the shell of a vermetid snail. It will more likely than not, go for softer food. In addition, the teeth of the copperband butterfly are fine bristles. These relatively soft teeth is ineffective at scraping and cutting algae off the rock, nor can they break off a small piece of food easily. What they can do very well, however, is to provide a good grip things which are small and soft (any maybe slimy), such as a worm, or aiptasia.
Take a moment to appreciate the difference between a pellet and a fan worm hidden in the rocks. Let the difference sink in, and perhaps it is clear why copperband butterfly can be hard to feed in an aquarium
So how about us (aquarists)?
One of the key question always asked by an aquarist is “is it feeding? Does it eat pellets?” This is a sensible question to ask, because a non-feeding fish will eventually suffer a long and painful death through starvation. I’m not here to give you a silver bullet, but to offer a few idea for you to consider.
- Are there food items in the tank which resembles what the fish might eat in the wild? Some algae on the rock, some detritus in the sand, some flat worms hiding on the coral. These might be just the thing needed for the fish to start feeding. However, almost always, these food is non-sustainable in the tank.
- Can we provide food of the suitable size and texture, and present it in a way which the fish can access easily? It’s a happy sight when u see an Achilies tang dashing for pellets, but it more natural for the fish if they get to pick the pellet up from the substrate. Some new fishes are often deprived of the chance to check out pellets on the substrate, because their greedy tank mates wipe out the food before they can hit the ground.
- In the long run, can we teach an old fish a new trick? Sure, pellets are not the “ideal” food for marine fish, but aquarium keeping is a compromise. In this aspect, a fish which eats pellet heartily is more likely to do well in the long run. So there are merits to getting fish to be pellet eating. A good thing that fishes are very adaptable. Very often, they can observe other fishes and learn to take pellet from the water column even if that is unnatural to them.
- Eating does not mean the fishes gets the nutrients it need. Is the food of good quality? Is the food of the suitable nutrition profile? Does the fish have a healthy digestive system and its microfauna? May be this will be discussed in a different article.
- What is true for fish is true for other things we keep. Many corals and invertebrates have differently designed mouth/mouth-equivalent. By considering the anatomy of these parts, we can also get a rough idea of how they should be fed.
Form follows function. Observe the fishes and you may just hear what your fish is telling you all these while.
————————————————————————————————————-
Photo Credits;
By Mike Mozart from Funny YouTube, USA – KFC Popcorn Chicken, CC BY 2.0, https://commons.wikimedia.org/w/index.php?curid=49005426
By H. Zell – Own work, CC BY-SA 3.0, https://commons.wikimedia.org/w/index.php?curid=15338597
By Citron – Own work, CC BY-SA 3.0, https://commons.wikimedia.org/w/index.php?curid=14915752
By DerHans04 – Own work, CC BY-SA 3.0, https://commons.wikimedia.org/w/index.php?curid=10762038
By I, Luc Viatour, CC BY-SA 3.0, https://commons.wikimedia.org/w/index.php?curid=3745890Author - @JiaEn
-
BASIC REEF CHEMISTRY (PART I)
This is the first in two articles dealing with the basics of reef chemistry. This will be written as a crash course on what hobbyists need/ ought to know. The article to follow touches on information, which is useful but not necessary to know.
SALINITY
The salinity of seawater is typically given either in units of parts per thousand (PPT) or specific gravity (SG). The ideal range for salinity in a reef aquarium is usually placed between 33 to 38 PPT, which approximates to 1.024 to 1.028 SG. The middle ground of 35 PPT (or approximately 1.026 SG) is typically recommended and is the accepted “standard”.
-
Refractometer that measure PPT and SG level
PPT
PPT is a measure of the total weight of salt dissolved in seawater in relation to the total weight of the seawater reference. In the case of 35 PPT, this translates into 35g of salt in 1000g of seawater.
However, to evaporate 1000g of seawater each time to determine the salinity of a solution is obviously impractical. Therefore, there are other methods developed to determine the salinity of seawater.
-
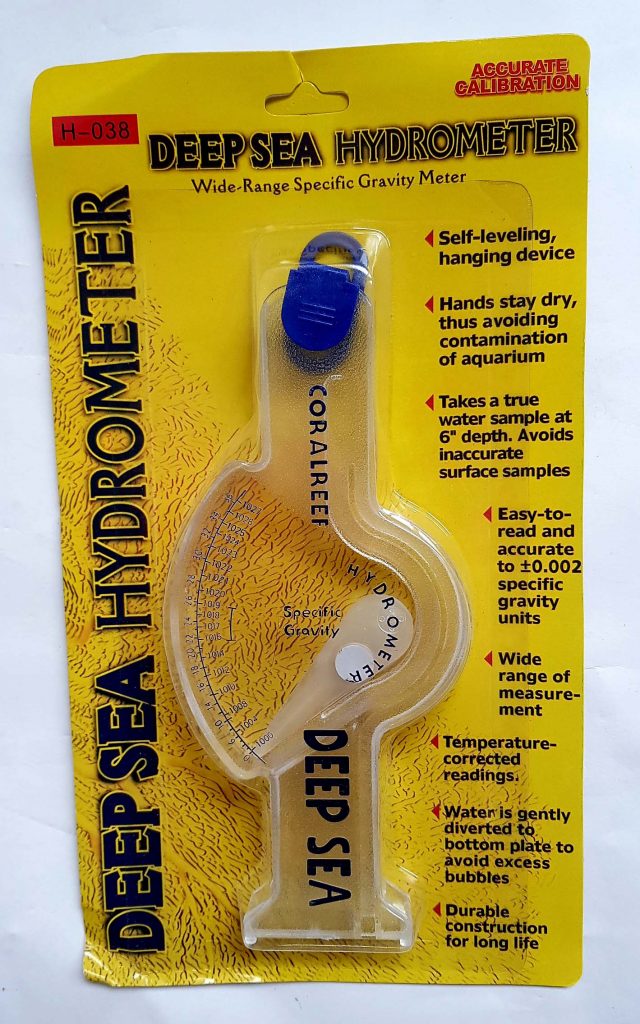
Hydrometer that measure SG level
SG
SG measures the density of the object being measured relative to the density of a reference. For the purposes of the reef hobby, this refers to the density of seawater relative to the density of pure freshwater.
Since density is a measure of an object’s mass to its volume, and the volume of an object changes depending on its temperature, it is important to note that the density of seawater changes with temperature too. As a corollary, the SG of a sample of seawater also changes with temperature. For this reason, some devices used to measure salinity state particular temperatures at which samples should be measured at. This is especially important when using a hydrometer to measure the relative density of a sample of seawater.
How then does a refractometer measure salinity?
As with a hydrometer, a refractometer does not measure salinity directly. Instead, it is an instrument which measures the refractive index of a sample and correlates it to an SG value.
It is important to note the following when using a refractometer:
- Have the sample at 25 degree Celsius, or simply use a refractometer with automatic temperature control (ATC) which compensates for changes in temperature;
- Read the refractometer through a light source closest to daylight; and
- Use only a refractometer designed for seawater, not one that is designed for sugar, alcohol or brine.
PH
pH is the measure of concentration of hydrogen ions (H+) ions in a solution. The more acidic a solution is, the higher the concentration of H+ ions and the lower its value on the pH scale.
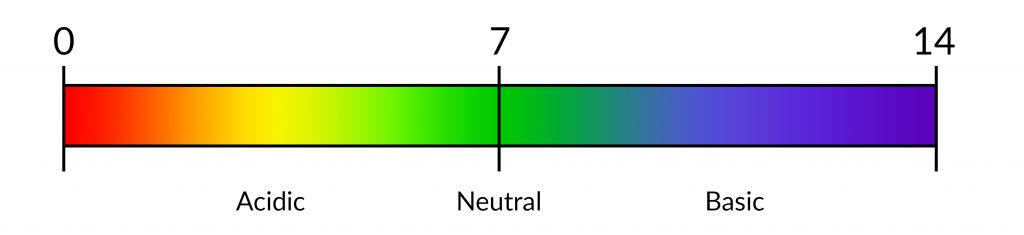
As can be seen above, pure water registers a pH of 7 on the scale.
It is important to pay attention to pH in a reef tank. A low pH is stressful to fish and can inhibit coral calcification. The recommended pH sits between 7.8 to 8.3.
-
nyos test kit
CALCIUM
The importance of Calcium, Magnesium and alkalinity in seawater cannot be understated.
Aside from Sodium and Chlorine (plus Hydrogen and Oxygen which form water itself), the most abundant elements in seawater are Calcium and Magnesium. In seawater, Calcium and Magnesium are dissolved in solution as Ca2+ and Mg2+ ions. The significance of this is a topic for another day. For now, it is sufficient to note that the amount of Magnesium dissolved in seawater has a bearing on the amount of Calcium that can be dissolved.
Calcium is needed for coral calcification. Hard corals use Calcium dissolved in seawater, together with carbonates present, as the primary building blocks for their skeletons. It is no surprise that this process is aptly termed “coral calcification”. Without Calcium, hard corals would not exist as they do today.
MAGNESIUM
Magnesium is the second most abundant cation in seawater. Its presence in seawater enables a higher concentration of Calcium ions than otherwise possible to be dissolved in seawater. Like Calcium, Magnesium is also incorporated by hard corals into their rigid skeleton.
ALKALINITY
Alkalinity completes the trinity of crucial components in seawater. Alkalinity is not an element. Instead, it describes the buffering capacity of water i.e. its ability to resist changes in pH.
In seawater, alkalinity is affected by two main systems. First, the carbonate buffer system. Second, and to a much lesser extent, the borate buffer system. This article focuses solely on carbonate buffers, save to state that while the presence of borate ions contributes to the alkalinity levels measured in seawater, it itself is not used for calcification.
Carbonate buffer (CO32-)
Seawater naturally contains carbonate ions (CO32-) and these exist in a chemical equilibrium with other ions. What this means is that carbonate ions, as one reactant, and some other ions, as other reactants, are both present at the same time. Whenever a reversible arrow (⇌) is used, think of it as a reaction that can go in both directions of the arrow.
When Carbon dioxide is dissolved in water, it partially dissociates in the following manner to exist in equilibrium with Carbonic acid:
Equation 1
CO2 + H2O ⇌ H2CO3
Carbonic acid itself can further dissociate to give H+ ions and bicarbonate ions:
Equation 2
H2CO3 ⇌ H+ + HCO3–
The bicarbonate ion also exists in an equilibrium with carbonate ions:
Equation 3
HCO3– ⇌ H+ + CO32-
If nothing is done to a solution containing ions in equilibrium, the ions do exactly what they suggest – maintain an equilibrium. However, if either side of any of the arrows above is disturbed, the equilibrium will shift to account for this change. In other words, a “buffer” against the change.
For example, if an acid is added:
- There will be more H+ ions in solution;
- The bicarbonate-carbonate equilibrium at Equation 3 shifts to the left to account for the H+ introduced and more HCO3– is present; and
- This process continues for Equations 1 and 2, with more carbonic acid and more Carbon dioxide resulting.
What eventually happens is that the concentration of H+ ions when added to a system containing a buffer does not increase the concentration of H+ ions in the total system as much as would have been the case if there were no buffers present. In effect, the system “neutralises” acids added. A titration curve of such a reaction would look roughly in the form of the sketch below.
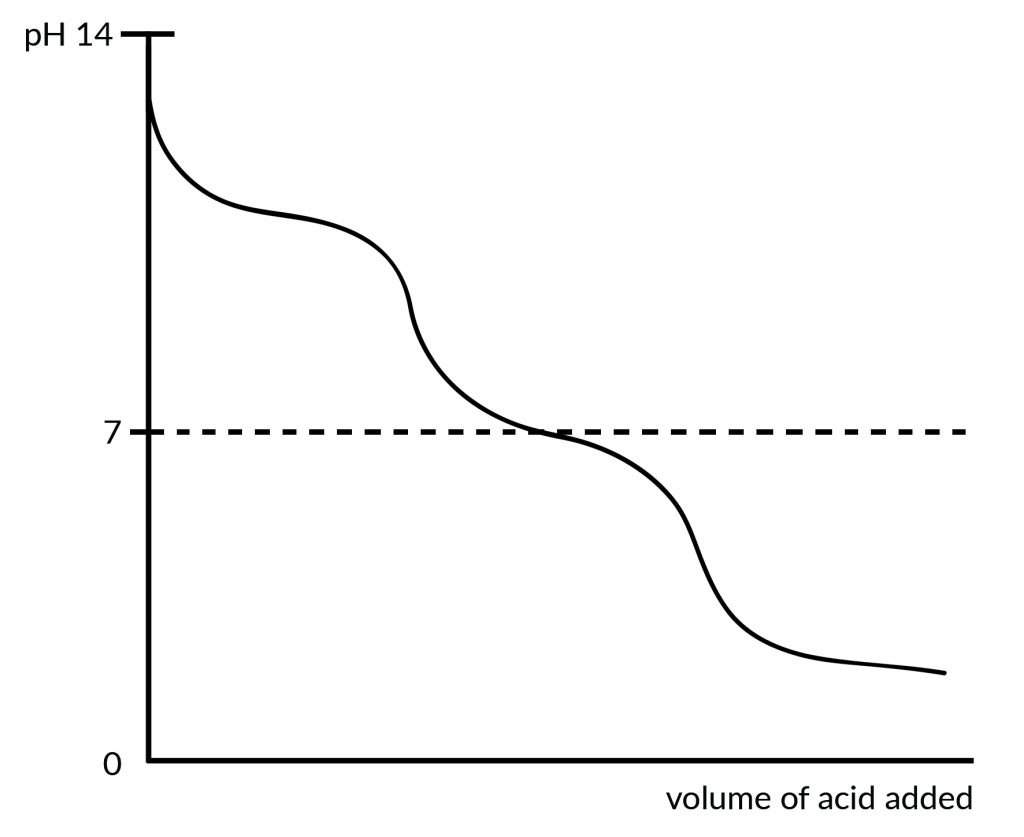
The same reasoning also applies if a base is added, although the Equations above will be pushed towards the right instead.
Importance of alkalinity
Maintaining the appropriate levels of alkalinity is important for three main reasons:
- It is a buffer against swings in pH;
- It is a good gauge for the amount of carbonates in seawater for corals to use for calcification; and
- It has an effect on the amount of Calcium ions that may be present. This will be explained in the second article to follow.
Do look out for Part 2 of the Reef chemistry ..
Author - @pcw
-
1
-
-
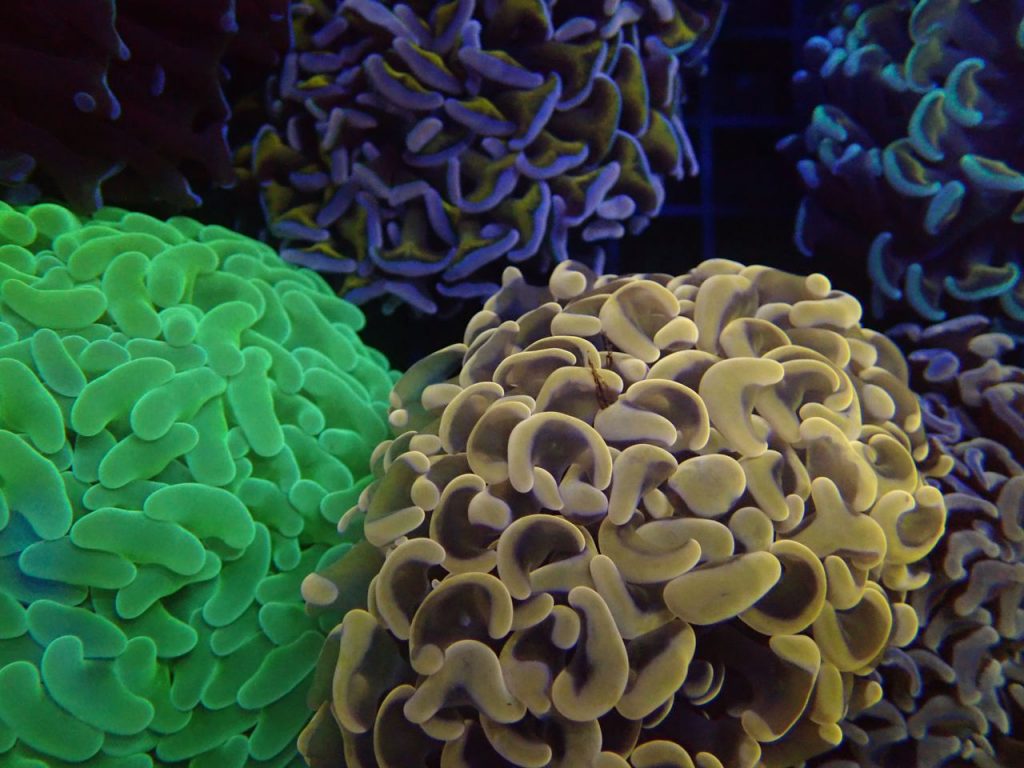
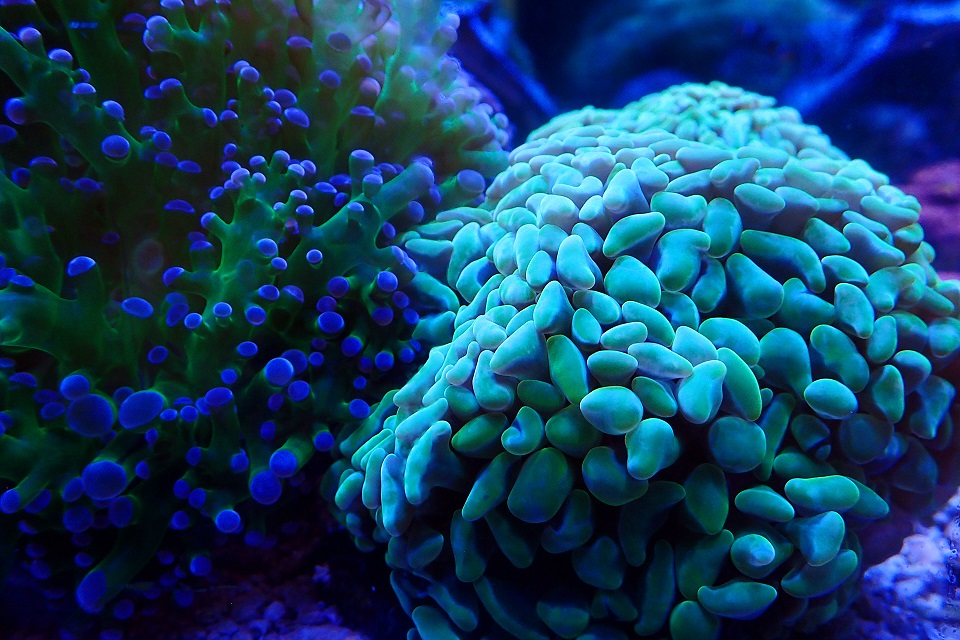
Hammer Coral Highlight!
Euphyllia ancora aka Hammer coral due to its polyps which shape like a hammer is a beautiful coral for your reef tank. They grow their own stony skeleton and come in a variants colour of polyps which are also photosynthetic energy-obtainer and easy to keep. Which make it ideal for beginner hobbyist.
Hammer corals have a wide range of colors starting from brown to rose red. They are categorise under LPS aka Large Polyp Stony.
However, for today’s topic, we are not going to talk about how to care for hammer coral. Instead, we want to highlight some of the hammer corals spotted in some of our local fish shop during my recent visit.
Striking blue hammer spotted at recent Coral Fanatics shipment
This unique Australian blue hammer are uncommon yet beautiful.
Other than this striking blue hammer, we spotted many other variants of hammer corals available too.
Some of the macroshots.

Master orange hammer in their display!
Check them out below.
Location:
Coral Fanatics
160 Changi Road, Hexacube, B1-04, S419728
Contact no : +65 8857 2044https://goo.gl/maps/upUCY6fTMQf1ntkdA
Shop Tour: A trip to Coral Fanatics !

Photo credit to Coral Fanatics
Like all corals, lighting plays an important part in how our eyes visualise the colours. So do your research on whether you should get a T5, LED, or hybrid if you plan to have Hammer corals as the highlight of your reef tank! These coral are easy to take care and either of the lighting systems will meet its requirement.
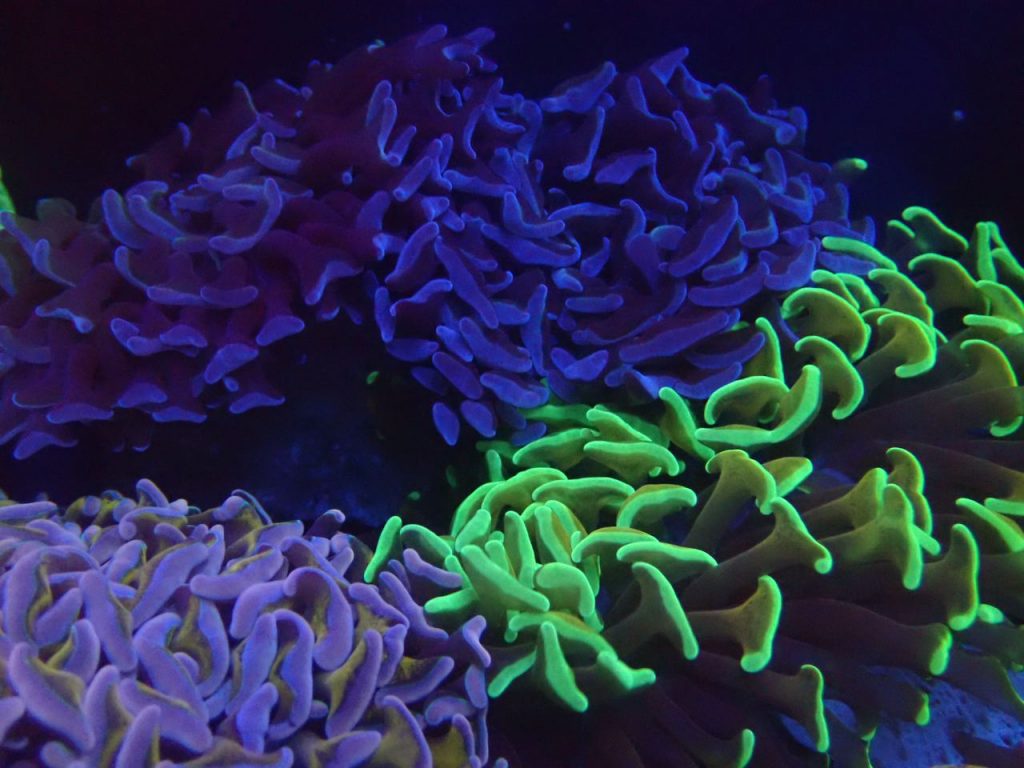
The often question that reefers tend to ask when keeping hammer corals if we can place hammer corals of different color together?
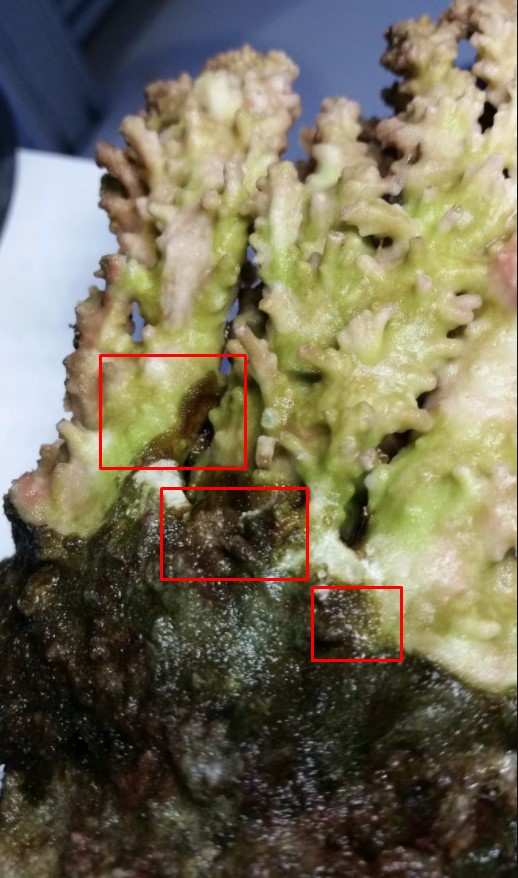
Fortunately, they do not sting each other when placed together. However, like all introduction of new corals, do remember to perform a coral dip on all newly introduced hammer coral before putting them into your tank as brown jelly disease could be found in these newly purchased corals. This disease can easily spread from one head to the others if not handled promptly.
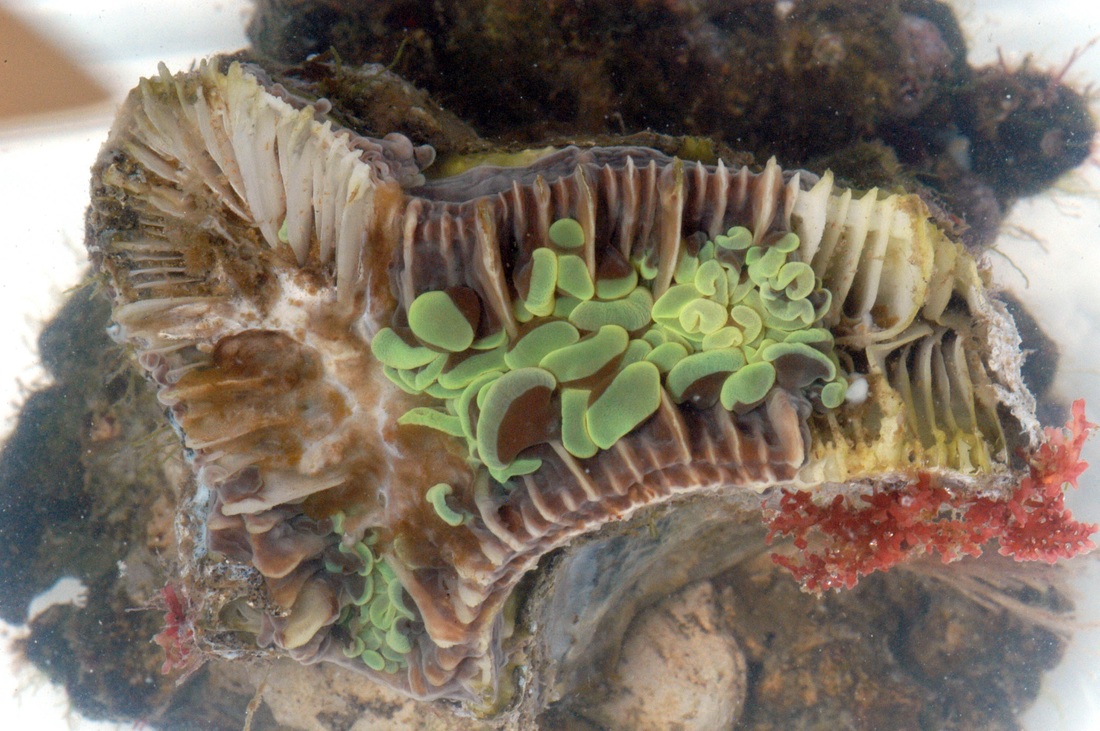
Here’s what Brown Jelly Disease looks like
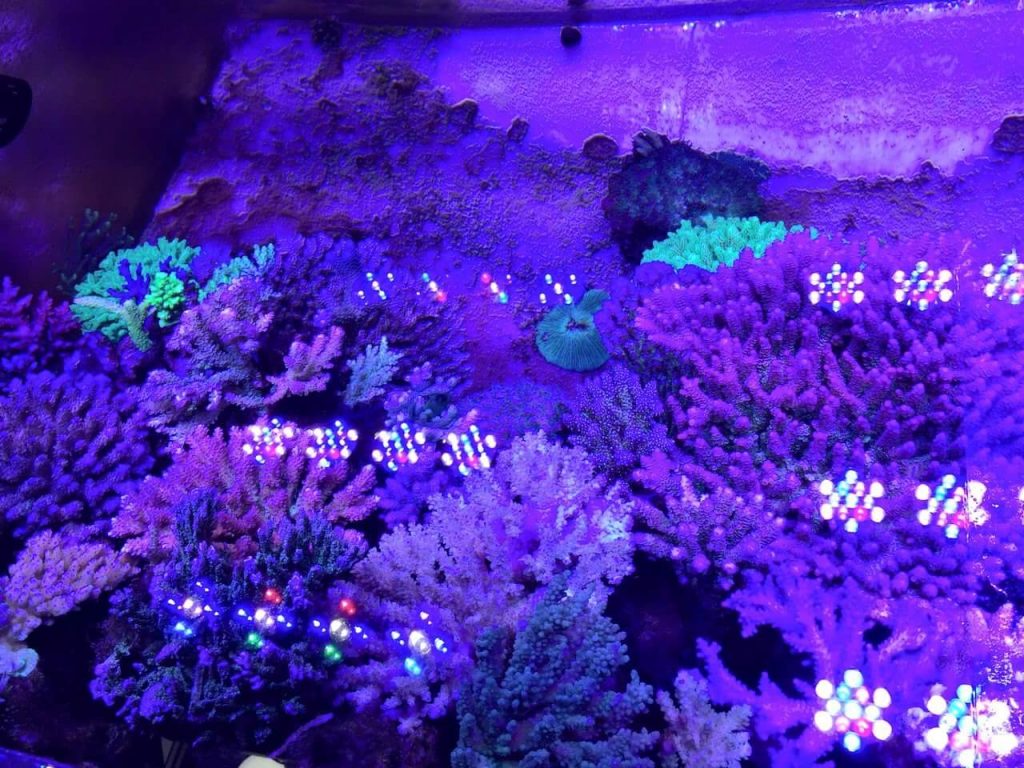
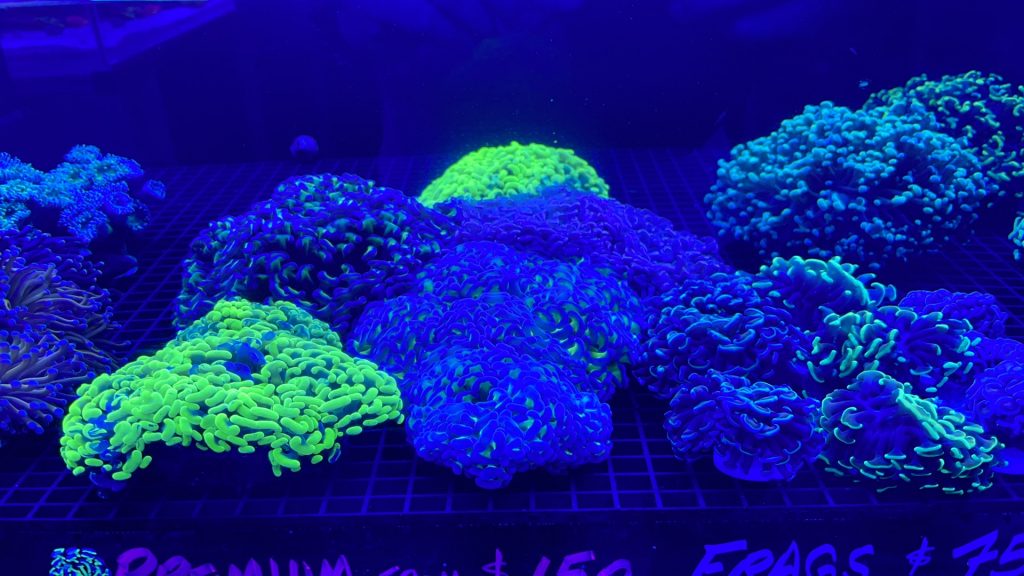
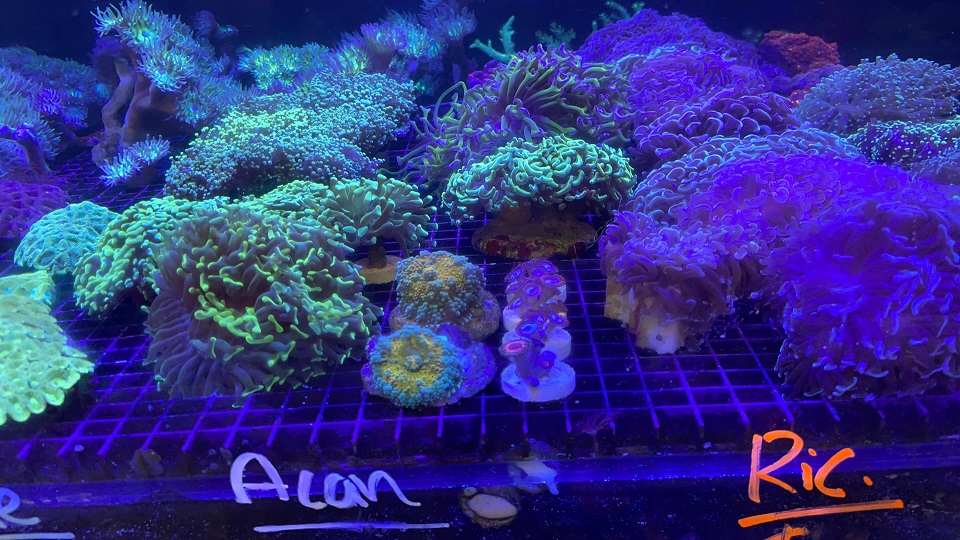
Below are some of the beautiful hammer garden kept by some of our fellow reefer:
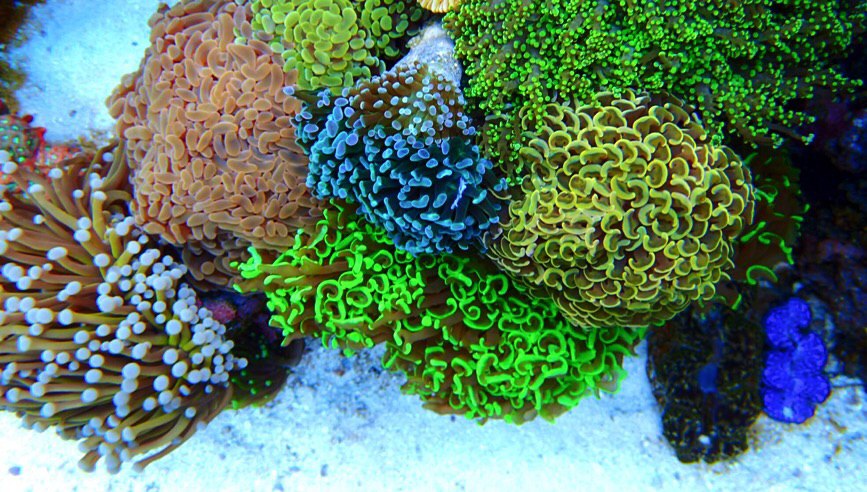
Photo credit to Alex
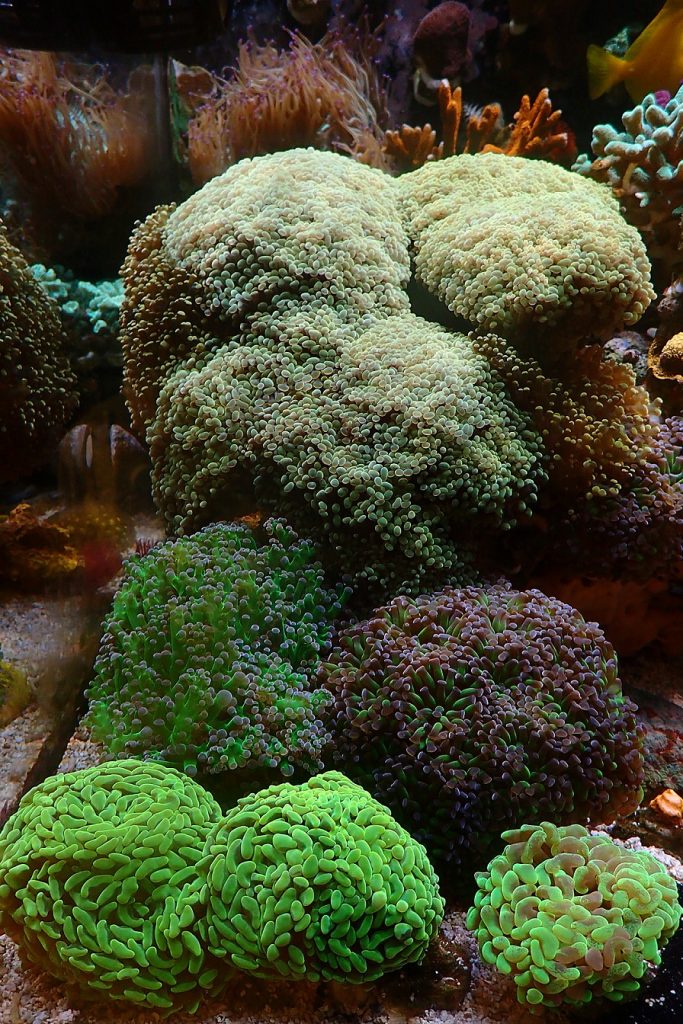
Photo credit to Leon
We have enquired Leon on how fast does his hammer corals grow and what are the special needs of hammer corals. Leon responded:
“Just give it enough space to expand as they open quite big after a while. Strong flow is OK but no constant direct flow. Not necessary to feed. OK to touch frogspawn/octo. Light 100 – 400 PAR is OK. If there are any signs of brown jelly. Dip in iodine IMMEDIATELY, cut out the infected part (discard or isolate).”
Hammer corals can be placed near Octo as they are both from fimbriaphyllia family but not other LPS as it will sting each other. Therefore, it is always important to do your research on the compatibility and genus of corals before placing them together.
As we visit Coral Fanatics, we also went to another LFS and check out the variety of hammers in stock as well!
Wide range of LPS spotted at DE Aquatics
Location:
DE Aquatics
706 Geylang Rd, Singapore 389621
We have also visited a nearby LFS, Ah Beng Aquarium. And yes, they have a large range of Hammer available too!

Photo credit to Ah Beng Aquarium
Location:
AH BENG AQUARIUM
471 Geylang Rd, Singapore 389430
9776 1341
https://goo.gl/maps/hYuVYaw9NJAZoDQaAAs there are promotions going on this weekend, it is a good time to do some shopping maybe to start your own hammer garden ?
https://www.sgreefclub.com/home/promo-in-december-2020/
That is all for today. Even though I didn’t mention other LFS but there are many hammer corals available at their shops too. Do check out their telegram or subscribe to our one-stop broadcast telegram to see the corals that are available weekly.
Broadcast Telegram: https://t.me/sgreefclub
What article should I write next? Perhaps an itinerary? Let me know!
Author - @Willy Guccivera Yap
-
Reef Photography Tips & Tricks
Ever wonder how in the world people is taking those amazing photography of their reef tank and corals on those social media? Today, I am going to share some tips & tricks about taking photographs of your reef tank, which you can learn about easily. As part of this hobby, taking beautiful and nice corals of your tank and being able to share it with your friends via social media is rewarding, however, due to the camera setting or lighting, taking a nice macro shot might not seem easy after all, if you do not know what you are doing. It might not just about your photography skills, but also, understanding how lighting and your camera setting affect the output of your shot.
Taken with TG-4 without any filter or white balance
Although I might not be a professional photographer, however, through some personal experience and trial and error, here are some of some tips and trick that hopefully can help you take a better photograph of your tank the next time.
Underwater camera vs Camera phone
We do not need to compare the specifications between a latest iPhone 12 Pro and an Olympus TG Camera specification, but most importantly getting yourself familize with the function of your camera or phone setting that you can play around with especially the color temperature setting which will affect the oversea effect of your photograph .
Problem
Most of the time, reefer will find that the photo that they are taking using their phone is either too blue or out of balanced, this is mostly due to the LED lighting which makes up of most of the aquarium lighting nowadays.

Complementary color wheel
So in order to solve this problem, you can either set/adjust your white/ balance or color temperature of your camera setting to warmer color to compensate the ” Blue” effect. Or else, thanks to the product available in the market, you can easily purchase a coral lens which usually makes up of a few color lens which will absorb its complementary color of the blue effect making it look nicer. This will allow you to capture the colors of the coral more accurately, try play around with the filter lens that come with it and you might get some amazing color of your corals that you didn’t know it exists.

Coral taken without camera lens on a Iphone 12

Currently, there are many company brands that produce these types of camera lens, be sure to find one that fits your phone model. This small and simple gadget will make it convenient for you to take better photos on the go.
Coral taken with camera lens on a Iphone 12
Exploring Underwater camera
For those reefers who love to explore more in-depth and would like to take better quality photos, investing in an underwater camera would provide you the nearest take that you can find inside your reef tank. Yes , i mean inside your tank, as these underwater camera, for example, the popular Olympus TG series is able to submerge fully into the water for your underwater photograph.

Not only does a underwater camera allow me to take pictures underwater ,it also has varies function that allow better photography underwater, for example the white balance setting allows user to auto-filter the blue light effect .
For those using Olympus TG camera, i am going to share with you some tricks how to set the auto white balance easily .
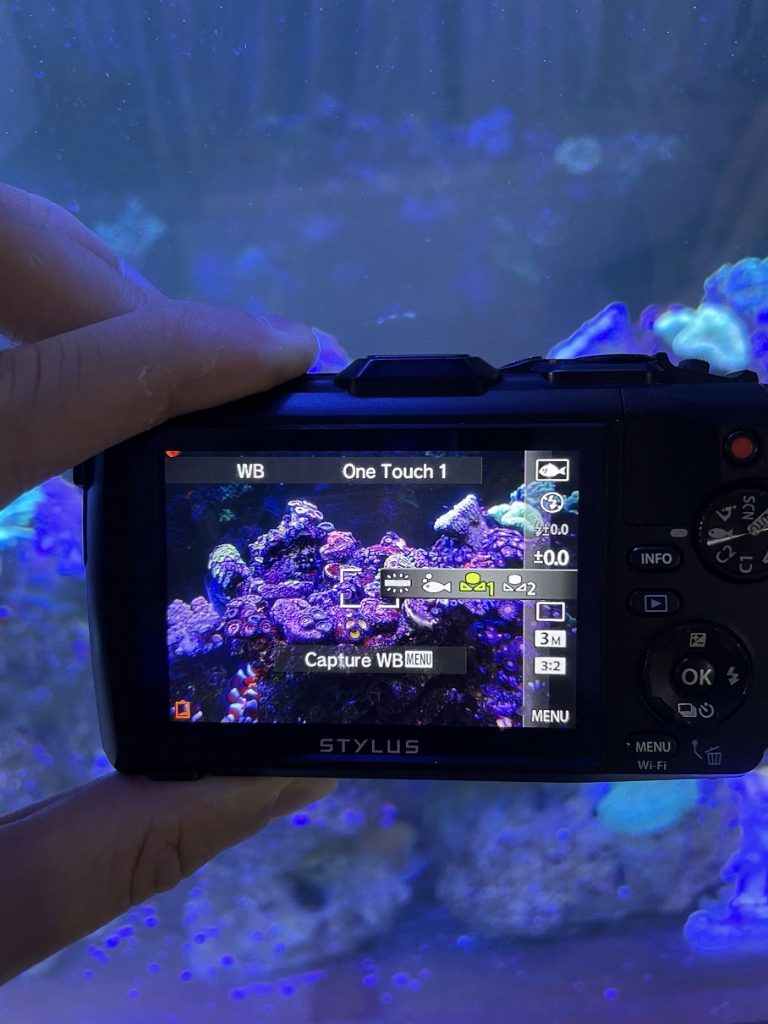
Firstly, point your camera to a clear white surface that has blue light background. Alternatively, You can also find place a white acrylic plate in the tank for the camera to be able to set the auto white balance. Press “Capture WB (Menu)” and save the setting!
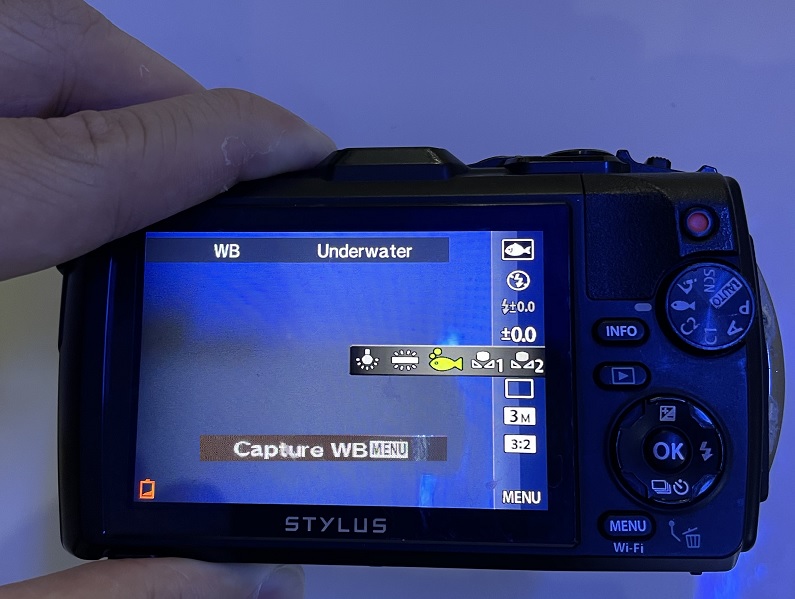
Setting the auto white balance function
And thank god you only need to set this once, and the next time you take pictures with your camera, you can quickly select the filter effect and start taking imdiately.

The image on the left is taken with an auto white balance function, and the image is taken without the white balance function
Other than being able to take photo underwater, some of the underwater camera has a macro shot mode which enable you to take up close up shot of your corals enabling you to see all the fine details of all the colors /polyps ect .
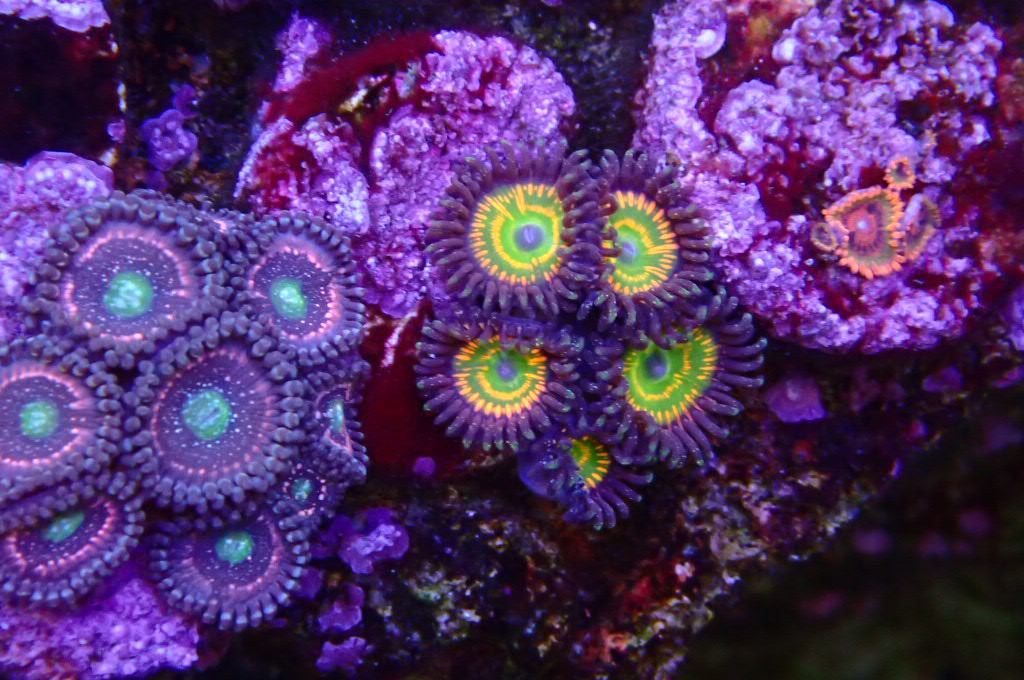
Closed up of macro image of zoas taken underwater Tips for Reef photography
Now we have suggested ways that prevent your photos that get too “Blue” , the next thing that affects your picture quality is the glass wall barrier that come between you and the corals that could affect the image quality. Subject to the thickness of the glass, the pictures you take might tend to be blurry and not focused even when you are using a good camera. So below are some trips you can use to improve your photography.
- place your camera as close as possible to the glass or even touching it so that the autofocus function of the camera is not detecting the glass as the ” Object”.
- If you do not have any camera lens or filter, adjust your lighting to warm white or a more natural white lighting. 12k and 14k lighting is good for photography.
- Use an acrylic box, take your photo on top of the water surface.
- Stop all pump and wavemaker in the tank
- Do not use the zoom function unless necessary, as it will result in poorer quality picture.
Camera Phone or Underwater camera?
We make an comparison between using a cameras phone and a Olympus camera to see the difference.
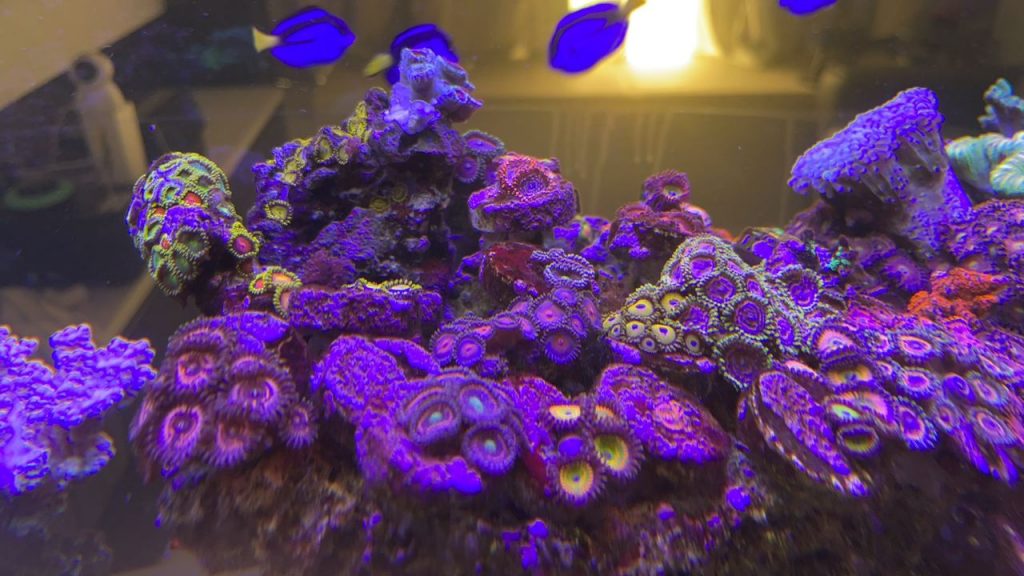
Image Captured using iPhone 12 Pro with a coral lens
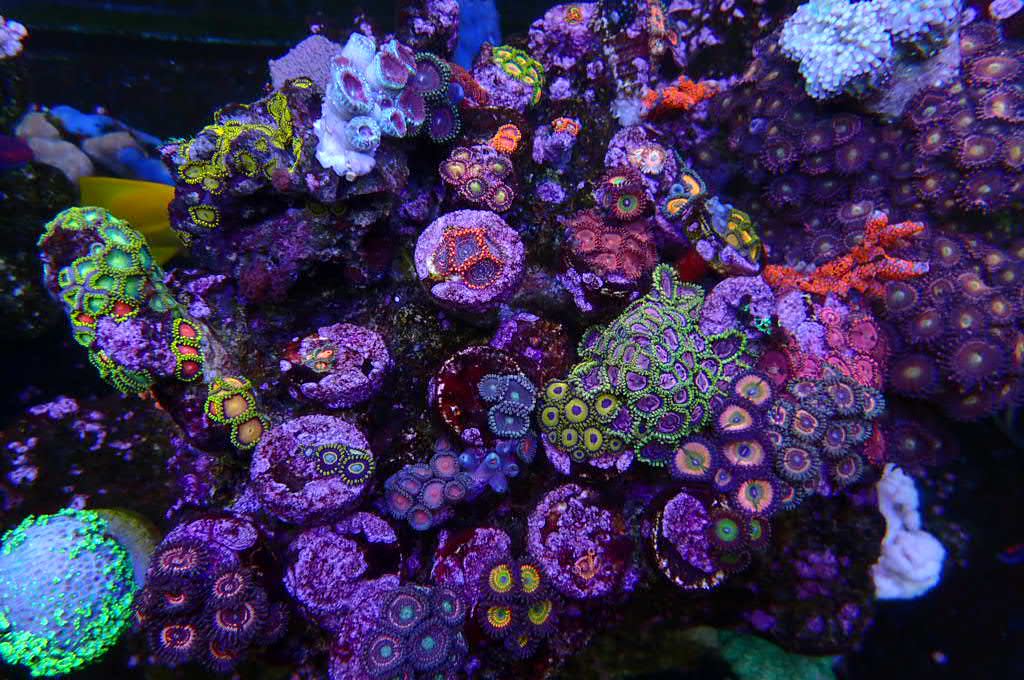
image Captured underwater, inside of the tank using Olympus TG-4 with auto white balance function
Thank you for reading my article. I will share some of the macro shots taken below for everyone to enjoy!
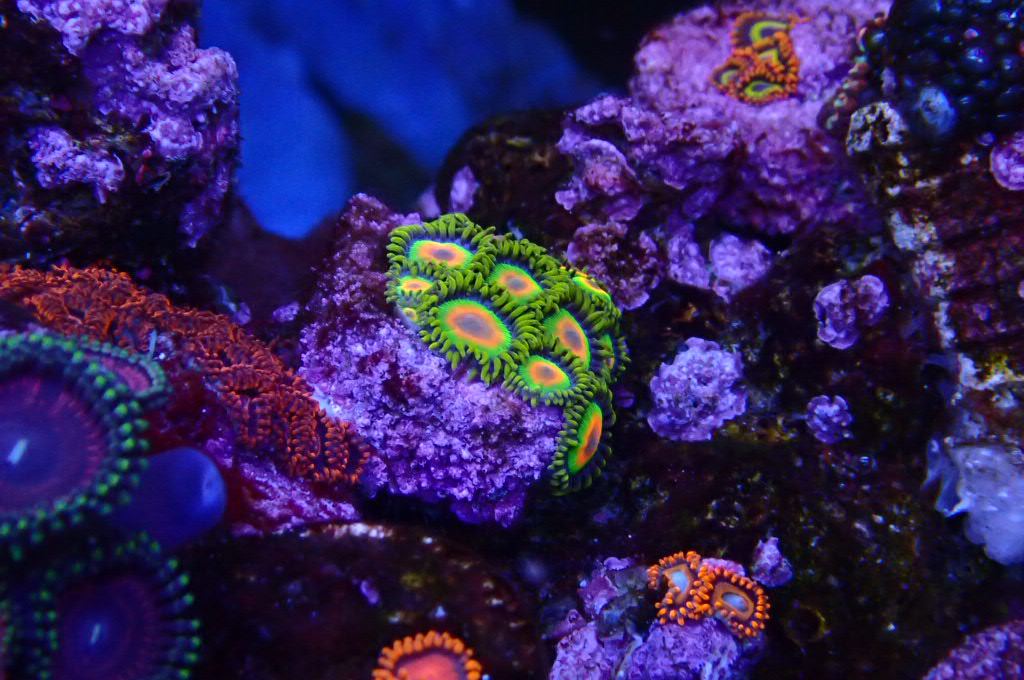
True Rasta taken using TG-4
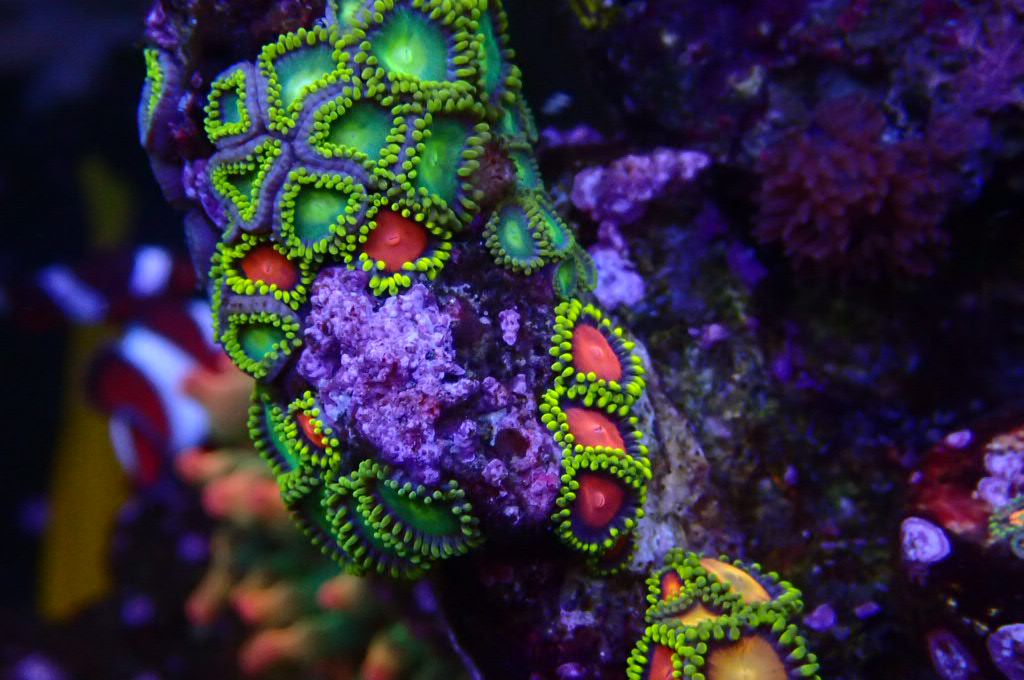
My favorite dragon eye zoas
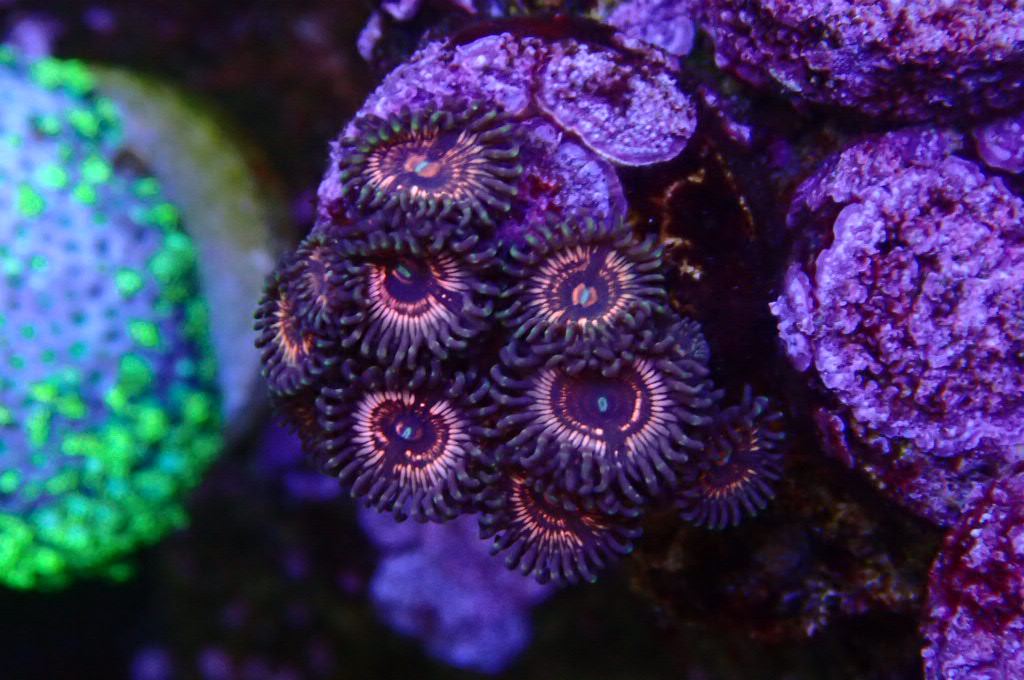
Vampire Slayer taken using TG-4
Are you able to identify these three zoas?
Author - @Willy Guccivera Yap
-
The Reef Bully: Confession of a Misunderstood Fish
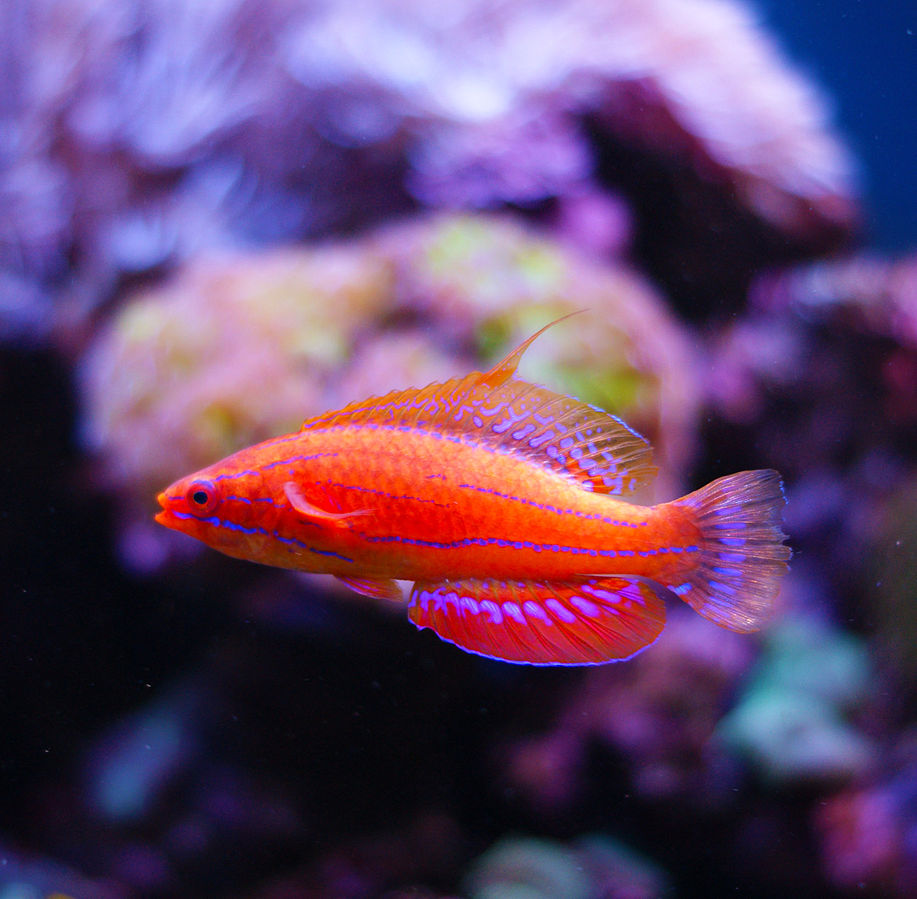
By Gdiggers – Own work, CC BY-SA 3.0, https://commons.wikimedia.org/w/index.php?curid=25121932 Have you ever asked yourself: “why is my fish such a jerk?”
You are not alone.
However, it’s costly and tedious to be a bully on the reef. Rather than lazing around in a corner, enjoy the sunlight, gentle wave, and the beautiful corals, the bully has to patrol the rocks endlessly, flaring the fins, and put up impressive colour display, chase, nip and fight some harmless new comers. The opportunity cost for reef bullies are extremely high, they have less time to feed; they use up more energy swimming; and they also expose themselves more to the potential predators.
Then why would they do that?
Let us consider the fundamental drive of life – to reproduce, and perhaps we can make sense of these “unreasonable” creatures.
Purpose of Life
In order to produce the next generation, reef fishes needs to be able to navigate through many challenges. It needs to avoid predators so that it won’t meet an untimely demise. It need to find sufficient food source to allow it to grow and become mature. It need to have an opportunity to spawn with another fish. Both parent fishes needs to be healthy enough to produce viable offspring. All these are life-and-death situations for reef fishes.
Predator Evasion
Let’s take about predator evasion first. On the coral reef, a fish can’t call 995 and expect some law enforcement to save them from a hungry grouper. Some fishes arms themselves with spines (like porcupine fish) or toxins (such as rabbitfishes), but most of the fishes are basically swimming McNuggets. For these fishes, the only possible defence is to run and hide. This need becomes more pressing as the fishes prepare to go to sleep, becoming completely defenceless and mostly unawares. Therefore a place to hide is critical for any reef fish. Losing the right to this shelter is tantamount to a death sentence to a hungry mouth. Wouldn’t the fish be very worked up if someone threatens to evict them? It’s a fight for live.
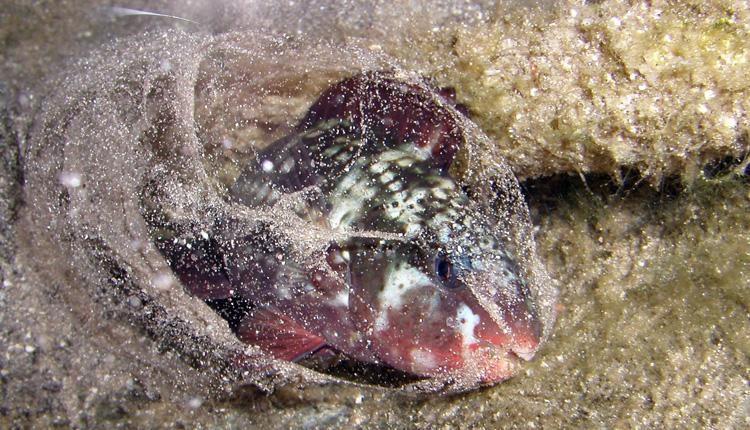
https://ocean.si.edu/ocean-life/fish/parrotfish-mucus-cocoon Feeding
The next item on the checklist is food. The reef is teeming with life, but for fishes, food is nevertheless in short supply. Herbivorous fish, such as clown tang, has to take 17000 bites per day to eat enough algae for its growth needs. If there is competitors which feeds in the same area, the grazing pressure increases, and there is a risk of insufficient food for everyone. Therefore, reef fishes defends their feeding turf very aggressively, especially from those fishes which shares similar food source with them.
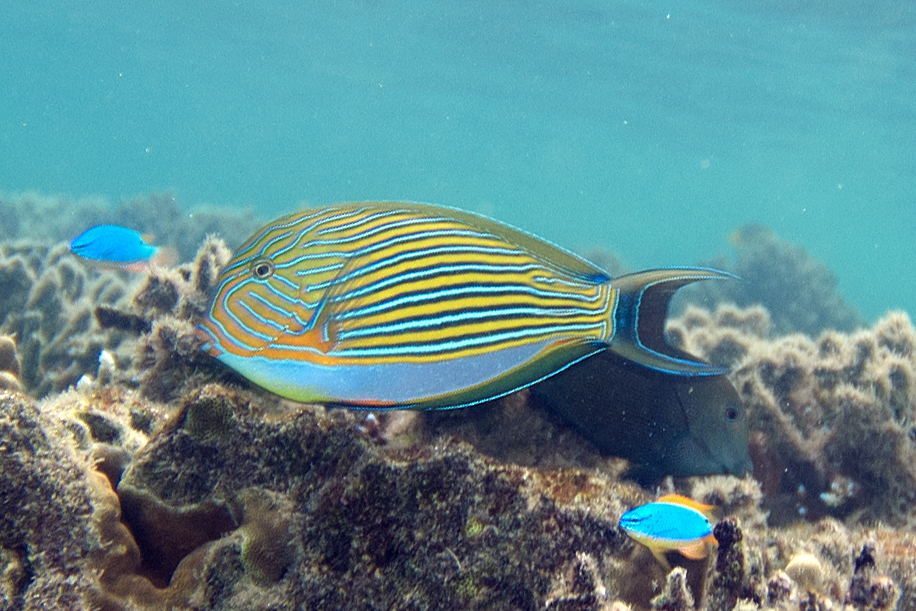
By Paul Asman and Jill Lenoble – lined surgeonfish Acanthurus lineatus (striped surgeonfish)Uploaded by Amada44, CC BY 2.0, https://commons.wikimedia.org/w/index.php?curid=25253580 Reproduction
Lastly, let’s look at the ultimate goal of the fishes, to reproduce and keep its genes in the gene pool. The right of breeding is hard earned in many reef fishes, clownfishes, anthias, wrasses among others. Many of these fishes are hermaphrodites. The ability to change sex maximizes the possibility of having spawning population in a particular site, it also allows selection to take place so that only the fittest individuals are able to reproduce. Therefore, the alpha and beta of the group have to constantly harass and suppress the smaller ones, minimizing the possibility that one of them will grow faster and bigger, and usurp their position.
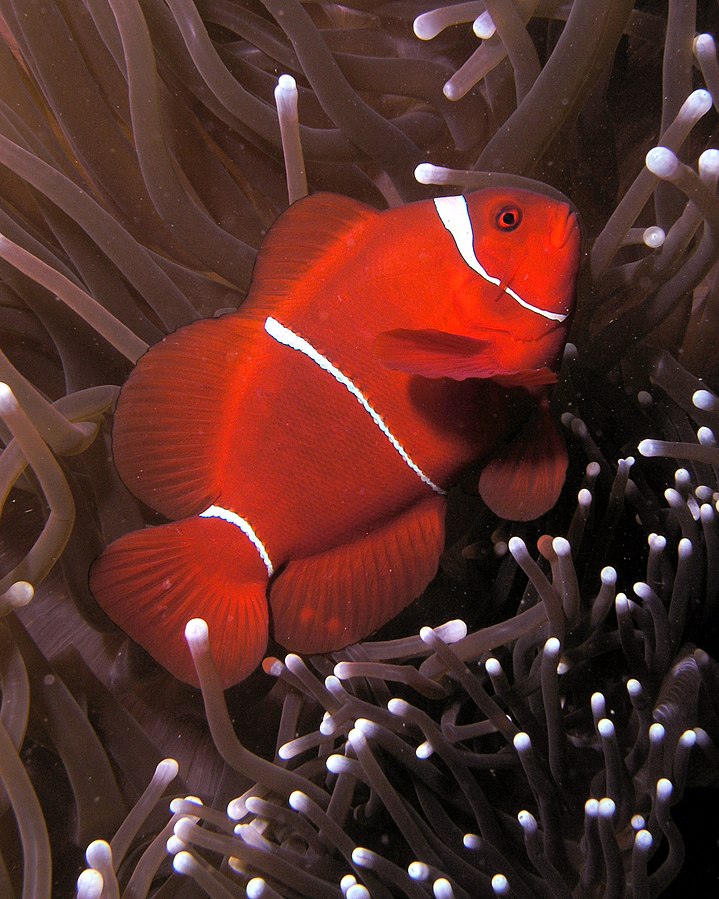
By Nhobgood – Own work, CC BY-SA 3.0, https://commons.wikimedia.org/w/index.php?curid=15479601 In the Aquarium
So, a fish have to behave aggressively not because they are born a jerk. They do it because it’s the only way for them to survive and reproduce. These behaviour are written in the genes from centuries of evolution, and it’s not about to change when the fish is moved into an aquarium.
As a conscientious aquarist, we can’t change what the nature intends, but we can try the level best to mitigate some of these stressors, and hope for the best.
- Allow for correctly sized and shaped hiding place for every fish in the aqua scape. A cave will do very little to make a cleaner wrasse comfortable, while chromis would much prefer a colony of acropora rather than a pile of rocks.
- Provide sufficient food for the fishes, both in terms of grazing/hunting opportunities, as well as feeding of prepared food. Abundance of food will not remove the drive to defend a grazing ground, but it can potentially reduce such behaviour.
- Understand and provide proper social structure for the fishes we keep. For example, lyretail anthias lives in harems, where a dominant male keeps a group of females in check. The constant harassment prevents the females from changing to male. If the harem structure is absent, when an aquarist keeps a pair, for example. The harassment will be focused on a single female, which will have a higher chance of succumbing.
- Finally, understand that fishes are individuals. They can have their own quirks. As pet owners, we need to accept them for what they are, and do what we can to care for them. We must also understand that as fishes grow and mature, they needs may change, and be prepared to cater to the new needs.
Author - @JiaEn
-
Review on the H2Ocean Skimmer Guardian
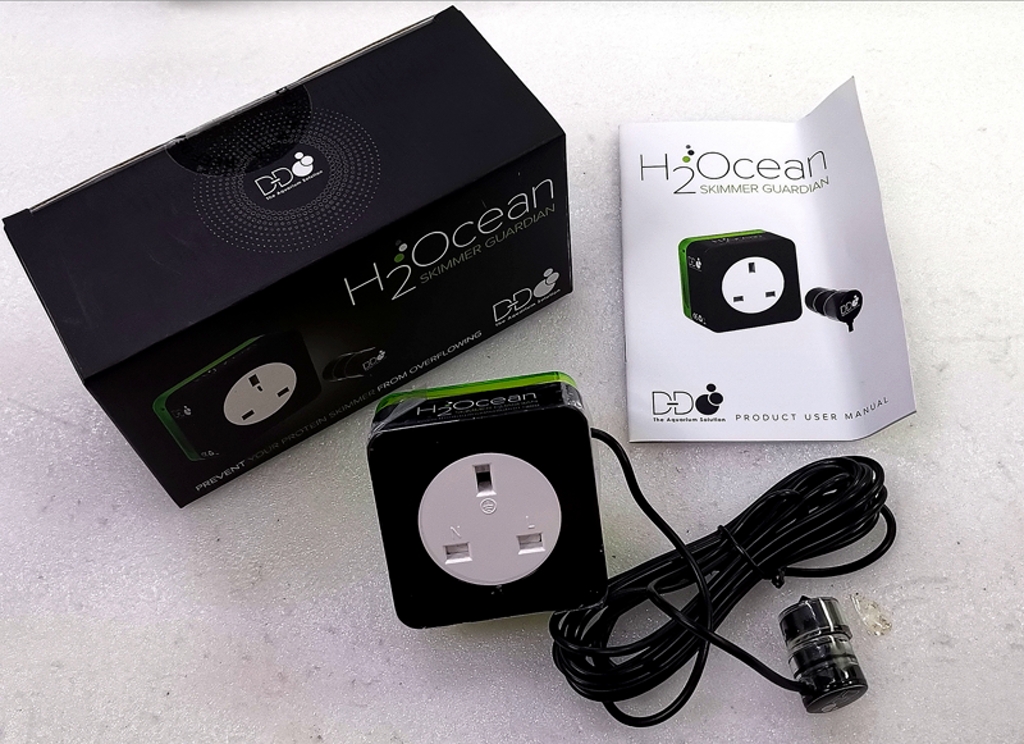
DD skimmer guardian Not a hero we deserve, but a hero we need.
Introduction. / Background
As a fish lover myself, i tends to keep a lot of fishes in my reef tank, and which I am running a slightly higher wet skim setting on my 422 system to try to keep the water clean while controlling the nutrient in my system. However, the downside of this setting is that the skimmer cup tends to get fill up rather quickly which might cause an issue.
Problem
There will many a time, when I came back from work or waking up in the morning walking to the living room with a wet floor , that is when I found out that the skimate overflow again from my skimmer cup . Some might suggest that I try to place the skimmer inner to prevent it from overflow out to the floor, however the concern of the dirty skimmate flowing back to the sump tank causing nitrate or ammonia issue frighten me more.
So what may happen when your skimmer overflows into your system or your floor ?
– Your nutrient will go up (Ammonia,No2,no3,po4 and whatever dirty stuff inside as it’s left for days before clearing might get back into your system).
– Floor will be wet .
– Corals or fishes may be shocked for the sudden parameter change and could casualty if left unattented.
– Wife won’t be happy
Solution
I came across this device DD guardian which seem to be able to help me on the issue and thus decided to try it out and write a review on it at the same time.
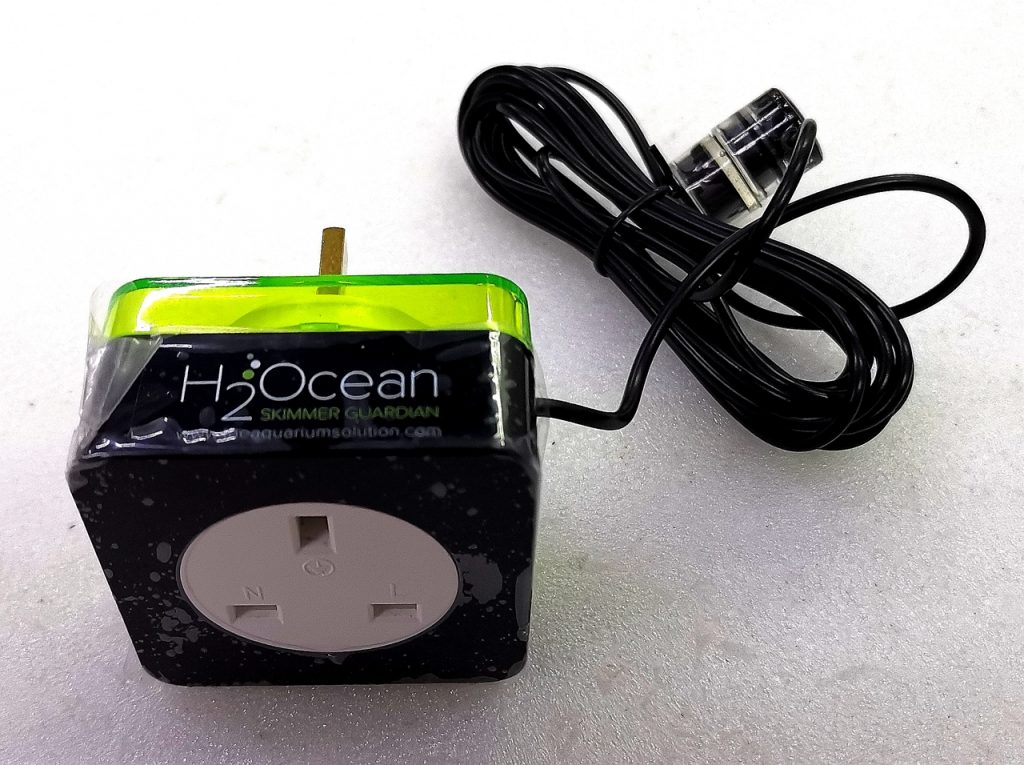
Skimmer Guardian plug with sensor It is basically a very simple device with a power plug and with a sensor that is able to sense water level rising in the skimmer cup and cutting off the power supply to the skimmer when it hit the skimmer cup level preventing any overflow.
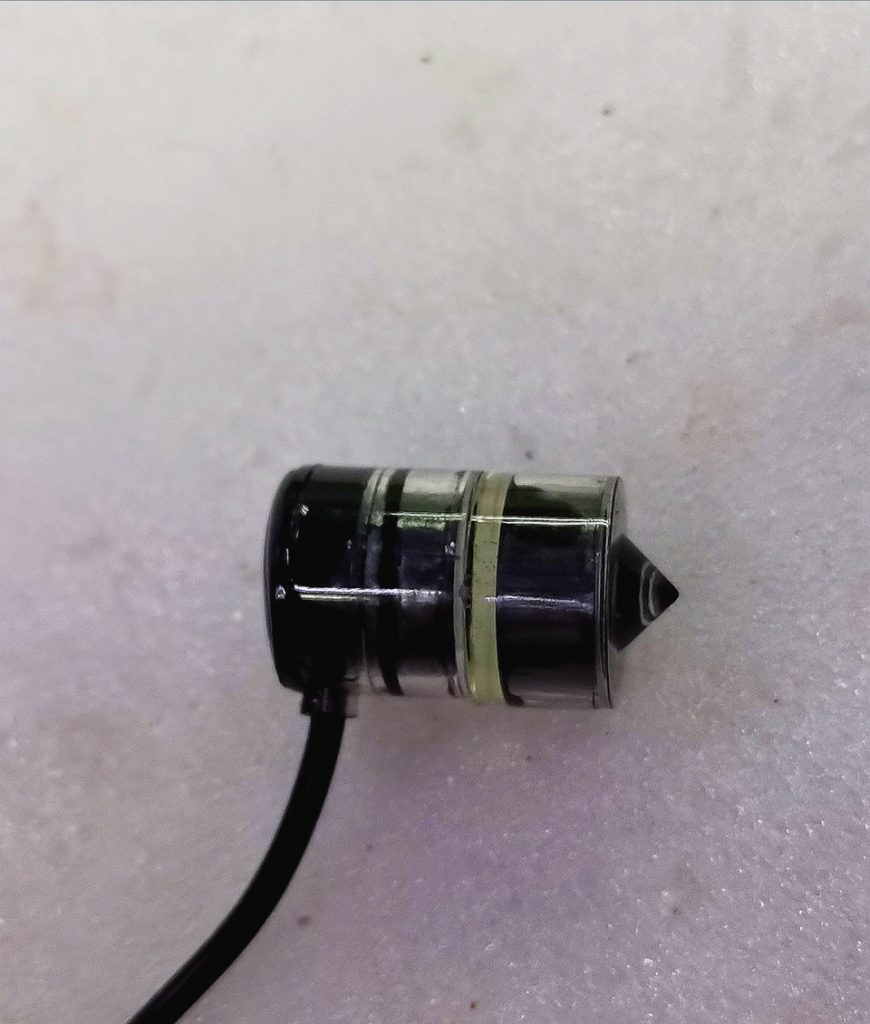
Sensor 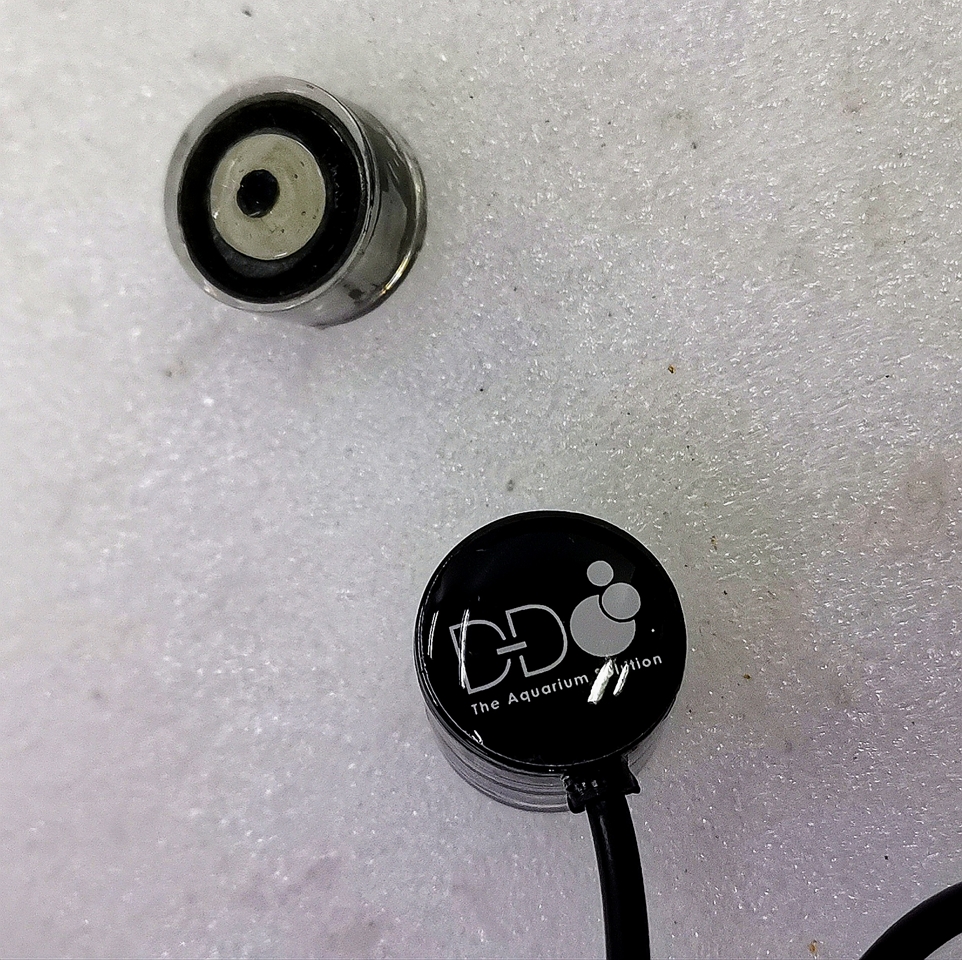
It come with a magnetic sensor which make it easy to mount on any skimmer cup. I am not sure why they make the plug with a transparent casing which make all the chip board and wire clearly visible, but it look abit scary to me at the first look.
Skimmer Guardian plug front 
Skimmer guardian front look For myself, it only took 2 minutes to set it up and running. Yes, some might say that this function can be achieved with use of an aquarium computer system like the apex, however comparing the price of getting a full aquarium system vs this simple device, I think the choice is rather clear.
So far for the past one week of operation, it has help save me twice from shutting off my skimmer in time thus preventing me from mopping the floor , and getting scolded by my wife for a wet floor..
Hurray once again the day is saved, thanks to SKIMMER GUARDIAN!
Summary
So thank you for reading this short review on this product. Now I’m able to go home in peace of mind every day knowing that I do not need to worry about an overflow skimmer anymore.
Author - @Willy Guccivera Yap
-
Specialised Aquatic Shop Tour Dec 2020
As part of our #supoprtlocal and #locallfstour episode, we will be doing our tour around Singapore to share with you guys some of the highlights and features of the LFS that we visited. Hopefully, you will make full use of your visit when you are there !
And not forgetting our LFS video tour too on our Youtube channel. Please subscribe and support our reefing channel ( https://www.youtube.com/sgreefclubcom )
While we have a video to showcase what is happening in SAS – Specialise Aquatic Solutions, I highlight some of the “Did You Know?” to bring you some of the shop highlights which maybe you Might not know.

So… Did You Know that all the corals in their display tank located near the cashier are actually available for sales too?
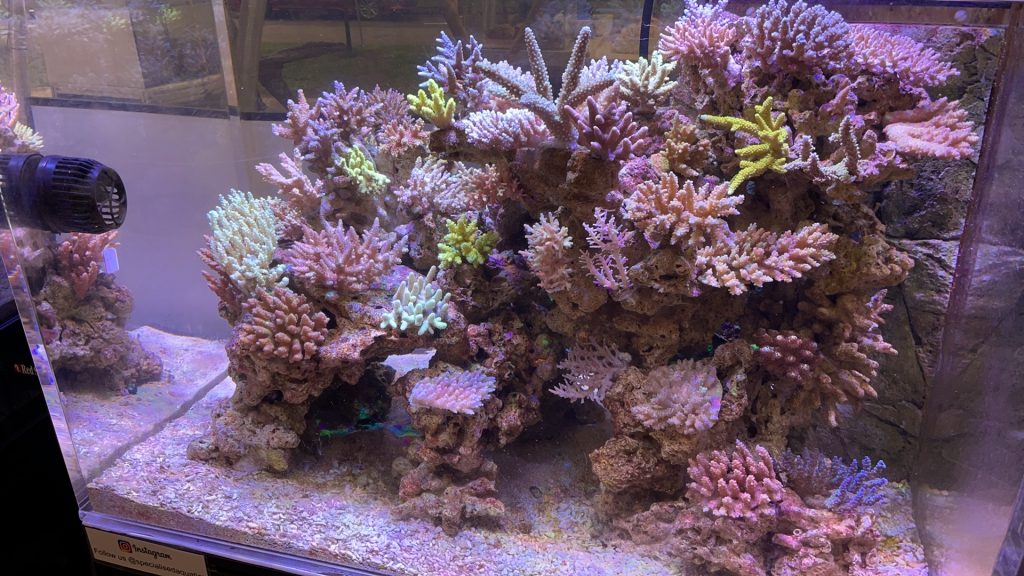
Yes! You might have noticed these beauties in their display tank, however, not knowing that these are available for sales too !
The best thing is that the price remains the same even if it starts growing bigger or conditioning better, isn’t it a great deal?

I am surprised about this too! So maybe on my next visit, I will probably walk towards the display tanks first to check out their livestock, before heading to their livestock holding area as most probably I might find a Gem there.
Below are some of the coral display in their display tank.
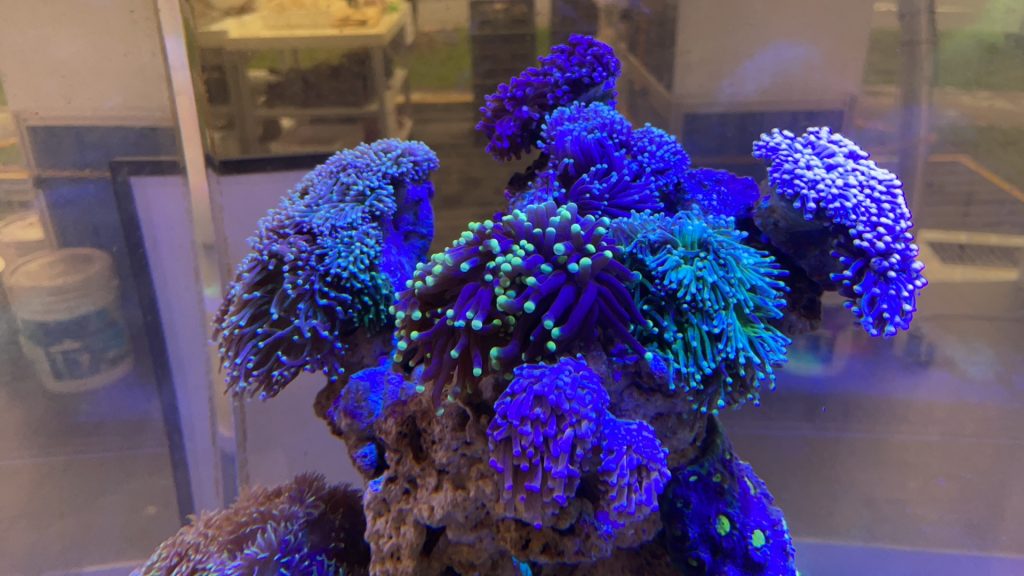
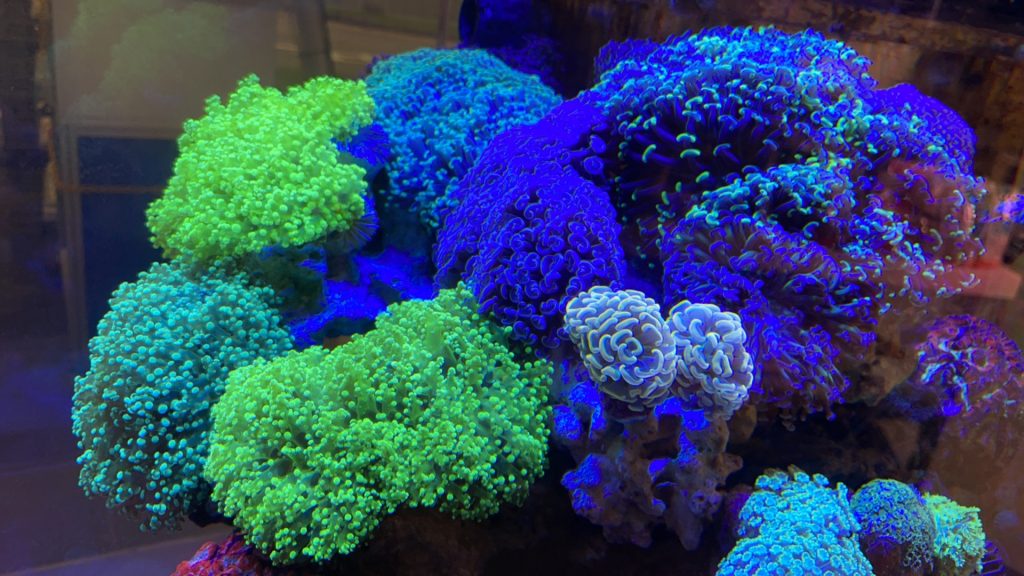

So remember the next time when you are there, be sure to check out what is available in their display tank as well, and not forgetting the Dec promotion is still running as well.

Below are some of the live stock selection taken during my recent visit.


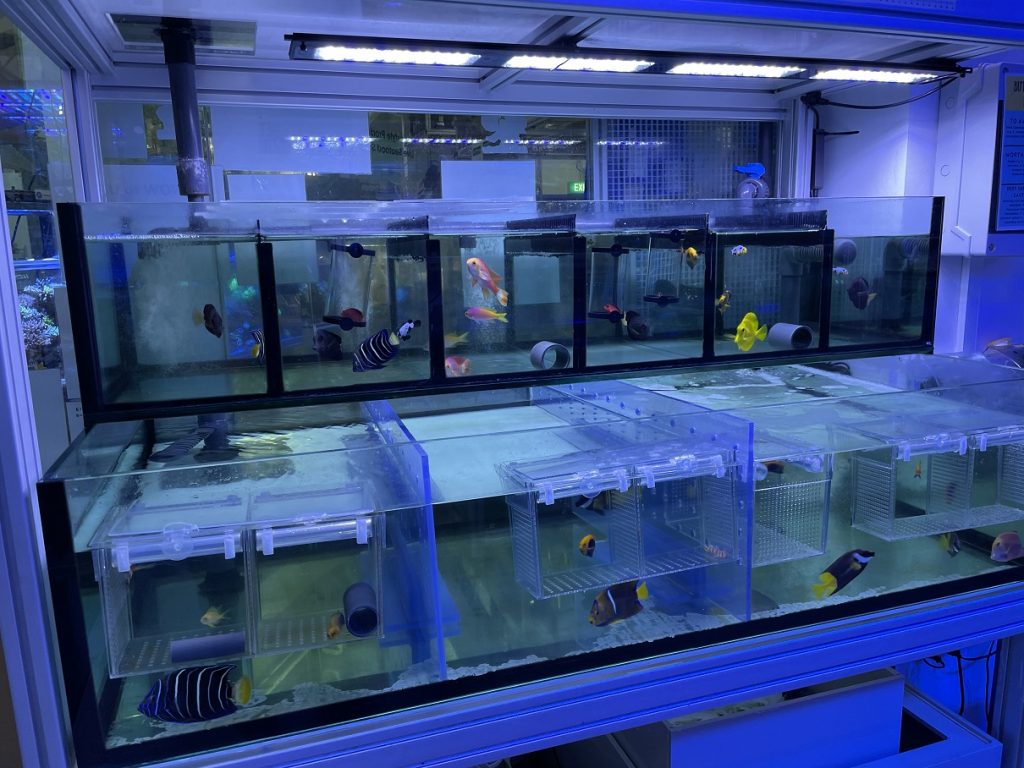
For updates of weekly livestock shipment of all LFS in Singapore, don’t forget to subscribe to our Telegram broadcast channel Here ==> https://t.me/sgreefclub
And not forgetting to check out these promotions that are on-going in the month of December!
-
Driving the Reef Aquarium like a Car
Consider this, what does it take for you to keep the car on the road? You right foot is pressing on the accelerator, your hand is steady on the wheel, your eyes are taking in the sights around you while checking if there is any obstructions. This is how you can keep your reef aquarium too.

Ok, maybe not this car.
The Accelerator
For a car to keep its cruising speed, one must step on the accelerator just enough. When the road goes uphill, step a little bit harder, when the road goes down hill, let go a little bit. Keeping the speed of car constant in real life often means we make constant, small adjustments. This is true as well when we are trying to maintain a miniature ecosystem in our reef aquarium.
An easy to understand example is use dosing to achieve stability of kH in a reef tank. Dosing supplements into the aquarium is like holding down the accelerator; and just like driving we need to do it consciously.

T. Maxima in the reef
(CC BY-SA 3.0, https://commons.wikimedia.org/w/index.php?curid=28742)When you look at your aquarium, and see that many SPS has shown new growth tips. Should you wait until the scheduled water test to find out it’s impact on kH? When a fast growing clam suddenly closed up tight for a few days, should you reduce your dosing, or keep things the same? Just like a good driver gently accelerates before approaching a ramp, we reefers can adjust our maintenance to keep things stable.
Another important pedal for our aquarium is that of the nutrients. Nitrogen, Phosphorus and Organic compounds. Reef nutrition is a complex topic, but suffice to say that if we adjust our maintenance based on the reality of the aquarium, stability is not difficult to achieve.
The Accelerator (II)
All these are well and good, but where are the accelerators for my reef tank? Just like how you wouldn’t go for a road trip when you can’t find the accelerator and the brakes of your car, not knowing how to control the various parameter of the reef aquarium is a recipe for disaster.

Phosphate Ion, Friend AND Foe of reefers How do I reduce kH? How do I increase phosphates? How do I reduce the organics? I believe as a conscientious reefer, we need to know where our accelerators are. When faced with an emergency, that would be the worst time to start reading the manuals.
Another interesting thing about accelerators is, once you pressed on it, it doesn’t immediately produce the result you want. Want to go faster? sure, step on the pedal, the car will accelerate and reach a faster speed. Need a emergency stop? you step on the brake, but the car doesn’t stop immediately, it decelerates, and stop. Therefore it’s important to understand how long it will take before your action leads to change. Dosing kH supplement make take 15 minutes to register on test kits, but commissioning an algae turf scrubber may take a week or two to see the impact. While waiting for the effect of kick in, do not overcompensate.
The Steering Wheel
Even when the car is driving on a straight road, once in a while, the driver needs to nudge the wheel to keep it on course. The same is needed for the aquarium.
Firstly, the elements in the aquarium must be in balance. Without going into too much details here, there are three important balance to consider.
- The major-elements (sodium, chloride, potassium and sulfate)
- The reef building ions (bi-carbonate, calcium and magnesium)
- The nutrients for life building (Carbon, Nitrogen and Phosphorus)
If the ratio is not maintained within reasonable range for these elements, undesirable things can happen. Therefore, even as the reef tank cruises along, we need to occasionally apply a light touch to the steering wheel, and correct any imbalances.

What is the direction for your reef tank? Another decision on direction is how the tank would be run. As an aquarist, we can have an aquarium with barely detectable nutrients, or have an equally successful aquarium with elevated nitrates and phosphates. We can choose to have elevated reef building elements for faster growth, or we can have the alkalinity at natural sea water levels. Some aquarists strive for high input and high export when it come to nutrients, while others strives for efficiency. There is no one way to achieve success in reefing, and the steering wheel in your hand can point to your destination.
Eyes on the Road
When on the road, no doubt the driver needs to check the speedometer, but more importantly, the driver needs to keep his eye on the road. Only then can the driver be prepare for the dangers ahead, but also enjoy the view. As aquarist, observing the aquarium and the lives within not only is the process of enjoyment, it can also tell you volumes about the state of your aquarium.
Did the algae on the rock become more dense because the tangs were not grazing as much? Does that mean the tangs were behaving abnormally? does that mean that tangs may be sick or otherwise stressed?
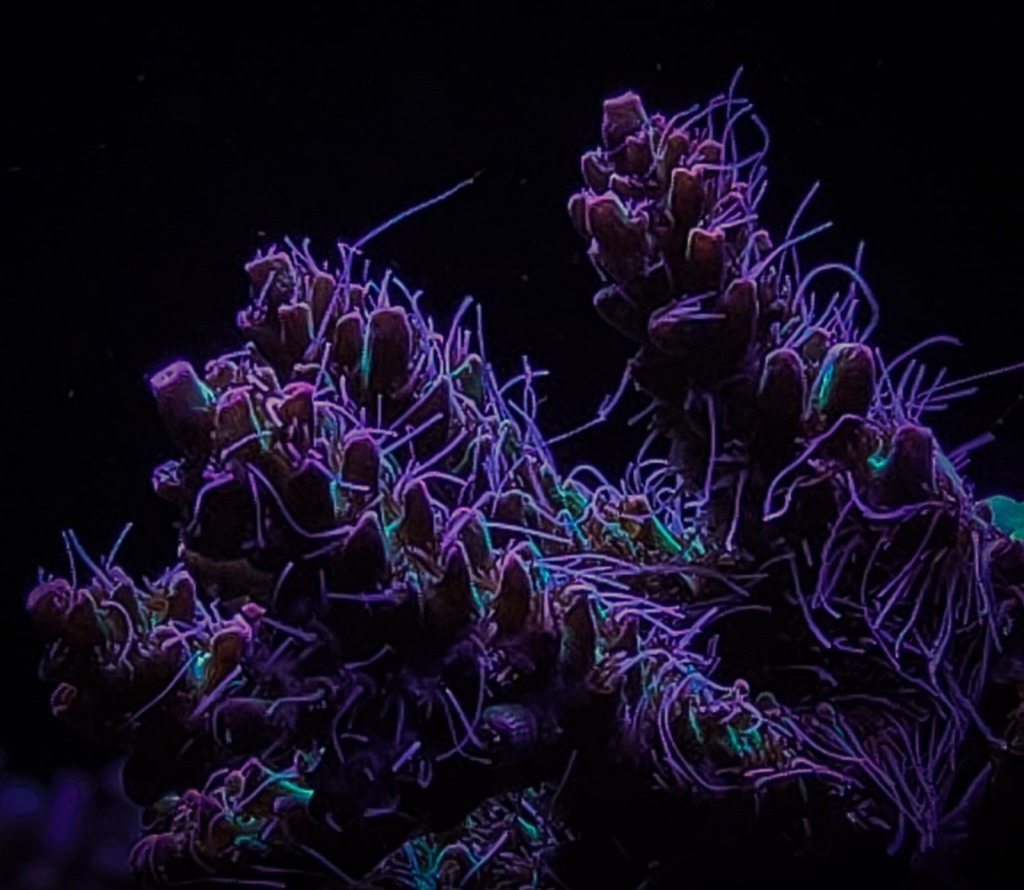
What do the polyps say? Did the polyp extension of the corals become more prominent? Does this tell us that more food is available in the aquarium, or that the inorganic nutrients are lower?
Did the color of the sand bed and glass change? Did the hair algae gets a dusting of brown algae on top of it? What does this tell us about the nature of nutrients in the aquarium.
Who is the tank boss, who is the coward, who is the joker and who bullies who?
Watch the aquarium more. That’s why we have one in the first place.
A Pleasant Ride…
Keeping an aquarium with understanding is not as straight forward as following a manual, but to me, it is definitely more rewarding. This article barely touched on some important reefing ideas, let’s discuss and improve, and enjoy this ride together.
Author - @JiaEn
-
Water Test: Is yours working?
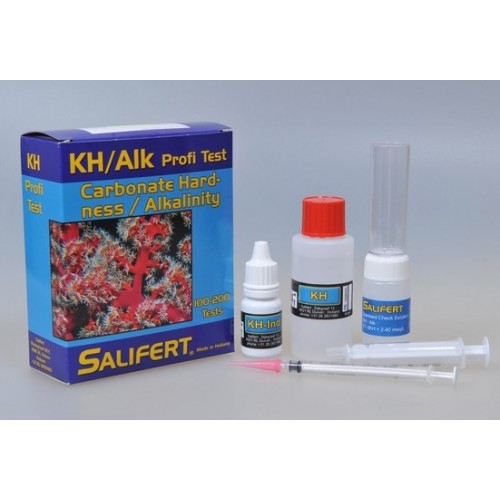
Salifert Test kit – One of the popular aquarium water testing brand
For many avid reef keeper, one of the favourite past time is to conduct water test. Since the fishes and corals we keep come from an environment which is very stable, it is meaningful for us to ensure our little water tank imitate the natural environment as much as possible. One of the common methods for us to get that peace of mind is to carry out various water tests.
However, when you get a reading of 1ppm nitrate, or a pH of 8.21, or an alkalinity of 7.50 dkH, how much confidence should we have about the value? In this article, we will briefly look into different types of water test, and appreciate what they can (or cannot) do.
Accuracy vs. Precision
This is a topic which have been discussed repeatedly. In short, an accurate result is close to the actual value, while a precise result means different tests results are close to each other.

Accuracy and Precision (By Pekaje at English Wikipedia – Transferred from en.wikipedia to Commons., GFDL, https://commons.wikimedia.org/w/index.php?curid=1862863) For instance, for an aquarium water with a pH of 8.2, a set of test results is {7.8, 8.6, 8.1, 8.0} can be considered accurate but not precise, since the tests averages to the true value, but the results are not consistent (repeatable). A different set of tests has a result of {8.4, 8.4, 8.4, 8.4, 8.4} for the same water. The second test is precise, but not accurate. It is far from the actual value, but repeatable.
A test is meaningful only when it is sufficiently precise and sufficiently accurate for our needs. There is really not need to use a stopwatch to measure the time to braise a chicken stew. Only when we know the test conducted is suitable for our needs, then we can be confident in the result of the test, and then follow up based on the test result.
Another character to consider is the resolution of the test. Resolution is the difference between the two adjacent values. Higher resolution allows us to differentiate two close values, but it does not imply accuracy or precision.
Finally, there is the limit of detection. This indicates lowest possible level to be able to register a reading on the test. Again, this does not imply accuracy or precision, but if the actual value is at or near the detection limit, the test may be difficult to produce usable results.
Water Test Techniques
We shall look at different types of test briefly, so that we can understand the pros and cons of each of them.
Inductive Coupled Plasma – Atomic Emission Spectroscopy (ICP-AES)

Triton ICP-OES, One of the many test providers ICP tests are currently held as the golden standard of water test. Believe it or not, it has a lot of similarities to the good old neon lights. Water samples are filtered and misted into a jet of plasma. This breaks down everything into individual atom. Different atoms in the plasma emit different wavelengths of light. By detecting the wavelength and intensity of light, we can deduce the amount (concentration) of different elements. It’s not hard to accept that ICP-AES process is extremely competent, but are there any caveats?
- Test protocol: Different test provider may use different protocol for sample preparation. This can affect what goes into the spectrometer.
- Atomic Level: The test is good at detecting elements such as phosphorus and potassium, but cannot detect ions such as bicarbonate (kH) and Phosphate. If an ICP test provide kH reading, it is done the same way as you, through titration.
- Detection Limit and Accuracy: Many elements in ICP are of very low concentration in the seawater, often below the detection limit of ICP-OES tests. In addition, the accuracy of the tests may be quite low in certain cases.
So is ICP-OES useful? I’m not an ICP user, but I do believe there is value in the ICP testing. Not so much as to tell us that the copper level is 10.00 µg/l, but to high light glaring problems in the reef aquarium. In another word, use it, but know what it can and cannot do.
Colorimetric Tests
We now take a look at one of the most common test conducted by aquarists, the colorimetric tests. In essence, colorimetric tests make use of formation of colored dye. The intensity of the color can be linked to the concentration of ions to be tested. After mixing the sample and test agent, we just need to compare the color of the liquid to a chart, and find the closest match. Most of the phosphate and nitrate kits belongs to this category.

Hanna Phosphorus ULR Colorimeter. Many reefers swear by this. There are some challenges inherent with colorimetric tests. More often than not, the color differences are minute at the lower range of the scale, and generally difficult to discern. Coincidentally, many of our interested parameters falls at this lower end. Another obstacle to quality test is the color perception of individuals, poor color vision can negatively impact the test result.
The alternative to “eye power” is the colorimeter. A colorimeter shine a light though the water sample. Some light is absorbed, and the detector picks up the difference. This process eliminates the need for tedious color comparison, however, it also introduce a new set of problems. Bubbles, finger prints, water stain, scratches, all these can reduce the transmitted light into the detector, affecting the result. In addition, if a different cuvette is used for the reference sample, they must be optically matched to ensure accurate results.
Titration Tests
Titration tests works by slowly adding a standard solution (titrant) into a prepared test sample. The volume of titrant used when the color of the sample changes will tell us the concentration of the sample. With proper technique, titration is a very reliable test method. Most kH, Calcium, Magnesium and Potassium kits are titration based.
Salifert Potassium Kit, based on the principle of titration Here are some tips to achieve reliable test results for titration.
- Prepare the pipette as carefully as possible. It’s normal to have an air gap between the plunger and the top of the liquid. However, it is not okay to have air bubbles in the liquid column.
- Use one hand to swirl the sample vial, while using the other hand to dispense the titrant. Take care to minimize titrant landing on the wall of the vial
- It’s sensible to add about 3/4 of the expected volume of titrants quickly. However, the last 1/4 or so must be added drop by drop.
- Mix the sample well after each drop, and follow the test kit instructions. some tests may show a color change, only to disappear when mixed briefly.
- The first drop of permanent color change is the end point of titration. That is where the test should end. It’s okay to add one more drop to ensure the color don’t change any further, but do not count the additional drop into your reading.
Electrodes

Pinpoint pH Monitor, a type of Ion Selective Electrode
With the introduction of reef controllers, electrodes become more and more popular. Aquarists have been using temperature probes to control chiller and heater; conductivity probe to measure the salinity of the water; and pH probes to tune their calcium reactors. The discussion of measurement using electrodes is a daunting endeavor. Let’s just look at some points to note for this article.
- Most electrodes have limited life span. However, for some electrodes, they can be refreshed with a new membrane and filling liquids.
- Most electrodes need calibration with known standards. This ensure the reading is accurate.
- The electrodes needs to be routinely checked for calcium deposits, or algal and bacterial growth.
- Understand that there are inherent inaccuracy in signal processing, Do read up on the technical details if you can find them.
Conclusion
There are much more to discuss about water test techniques. For instance, to know more about refractometer, you can read up on this article by Leon. In any case, as long as we know the limitations of different tests we conduct, and know that they give us reliable enough results for our need, We can have the confidence that we are on the right path, water wise.
Author - @Willy Guccivera Yap
-
Bioload of an Aquarium: How much is too much?

My fairly high bioload (ex-)aquarium How many fishes can I keep in my aquarium? Finding the limit of the bioload of our reef aquarium is a frequently debated question. On one hand, we don’t want to pack our fish tank like canned sardines. On the other hand, it’s nevertheless good to understand the limitation of our little glass box. If you ask our friend google, it’s easy to find suggestions such as “1 inch fish per gallon of water“. For an absolute beginner, it’s an easy to understand guideline (with a lot of caveats). However, for you, my dear reader, you deserve to understand better. I will not discuss how many fishes (or corals) can be kept in a reef tank. Rather, I would like to discuss about what is stopping you from keeping more and the chemistry/reasons behind it. This article touches on many topics, so buckle up!
Challenges of High Bioload
To answer the question about bioload, we need to understand the negative impact of an overly heavy bioload. When the bioload is too high, there are two critical challenges:
- The social dynamic of the reef fishes is compromised. This manifests as aggression, stress or neurotic behaviors. If there are too many fishes in the aquarium, the fishes are more likely to compete for food, hiding place and dominance. Therefore, undesirable behaviors are more likely to occur. You can read more about fish aggression in this article.
- The chemical balances of the reef water is compromised. In a closed system such as our reef aquarium, reefers make use of a variety of techniques to counteract the impact of shifting chemical balance. We strive to keep components (nutrients, reef-building elements, dissolved gases, etc.) of reef water within a range of acceptable values. When the change in water parameters outpaces the coping ability of the reef system, the aquarium may spiral out of control.

A lot of unseen chemicals exist in this clear water
The breakdown of the social dynamics and the water chemistry can cause the fishes to experience a higher level of stress. The affected fishes may turn aggressive or becomes withdrawn. The immune system of the fish becomes compromised, and the fish is more susceptible to infections due to overcrowding.
This article, we will focus on the chemical balance of our aquariums.
Chemical Balances
Unlike in the open ocean reef, keeping a boxed aquarium is an enclosed system where Reef water is the immediate environment of marine lives we keep. Therefore the “quality” of the reef water in an enclosed marine tank is paramount for the success of the aquarium depending on our filtration systems and caretaking routine. When fishes and invertebrates eat, breath and releases wastes, the chemical balance of the water changes. We will look into three categories in this article.
1) Dissolved Gasses
Hold your breath, count to hundred. It’s difficult isn’t it. It’s the same for the fishes in our aquarium.

Concentration of dissolved gases in Seawater. We are only interested in the top 20 m or so.
Respiration is the process of producing energy from food. Vast majority of living things relies on aerobic respiration for energy needs. When a fish goes about its daily business, it extracts oxygen from water, and release carbon dioxide at the same time.
When the dissolved oxygen level in the water drops to a very low level, fishes will have labored breathing. In the most extreme of cases, fishes die due to asphyxiation. I vividly remember my trip to Tibetan plateau. Over there, the air is very thin at high altitudes. and the oxygen concentration is very low. For the first few days, I have to be very conscious about breathing. Even then, I experience headaches and fatigue due to lack of oxygen. I guess fishes in an aquarium with low dissolved oxygen would feel the same – not at all pleasant moment to be in.
On the other hand, the released carbon dioxide presents a different challenge for the aquarist. Dissolved carbon dioxide ( C02 ) is in a delicate balance with bicarbonate and carbonate ions (alkalinity). The ratio of the three determines the pH of the aquarium water. Therefore when there is too much carbon dioxide in water, the pH level drops. This can impact the physiology of marine lives.
2) Maintaining Gas Balance
So how do aquarists deal with these two parameters in check? Easy. We promote gas exchange. The law of nature dictates that matters will move from more concentrated area to less concentrated area. This is called diffusion. When we create a water-air boundary, diffusion can take place. Oxygen molecules enters water from air, while the carbon dioxide molecules does the opposite. If there is sufficient air-water boundary, the dissolved gasses will take care of itself.
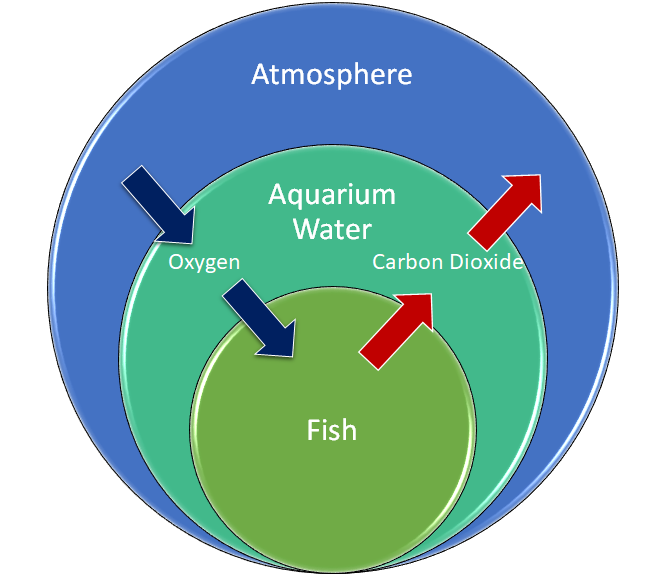
Simplified diagram representing gas exchange. A tank of water have very limited surface for gas exchange. Fortunately, we have some ingenious tricks to massively improve the situation.
- Water flowing down the overflow weir increases gas exchange.
- Protein skimmers creates numerous microbubbles. As a result, this vastly increase the air-water boundary.
- Good circulation using wave maker etc breaks the water surface and improve gas exchange.
- Keeping an algae refugium or scrubber take advantage of photosynthesis. This produces oxygen while consume carbon dioxide in the system.
3) Nutrient Balance
Nutrient in reef is a complex topic. Perhaps we can discuss about this in detail later. For now, I would like to offer a simple approach towards understanding nutrients.

Unsurprisingly, Reef Nutrition adds … nutrition Nutrients in the Reef
What is precious and often fought over in the nature become an evil in our reef aquarium. Elements such as Nitrogen, Phosphorus and Carbon are resources on the natural reef. Fish, corals and invertebrates evolved to take advantage of what little nutrients available on the reef. For example, coral produces mucus, which is capable of collecting phosphates from surrounding water. As a result, the phosphate level in coral mucus can be more than 100 times of surrounding water. For this article, I will not discuss about what the ideal level of N:P:C is; or if the red-field/buddie ratio is applicable in our aquarium. Instead, I would like to look at the big picture of how we account for the nutrients balance in our aquarium.
Chemical Engineering 101
When it comes to understanding how nutrient level changes in the enclosed reef aquarium, I find it sensible to apply a basic chemical engineering Concept.
Input – Output + Generation – Consumption = Accumulation
In the context of reef nutrients in aquarium water, for instance, nitrogen, we can think of it in the following manner:
- Input: How nitrogen is added into the system. Generally, nitrogen elements are added into the aquarium through feeding. At the same time, cyanobacteria fix some nitrogen from atmosphere.
- Output: Surprisingly, there are very few ways to directly export nitrogen from water. What little output there is generally comes from the action of activated carbon, water change, or polymer resins.
- Generation: When fish and coral carry out their biological activities, they produce nitrogenous wastes, such as ammonia. When microbe bacteria break down organic compounds or dead organism, some nitrogenous compounds are produced.
- Consumption: Lucky for us, most living things in our reef tank consume nitrogen in one way or another. Fishes consume the food we feed, taking up some nitrogen. Certain Bacteria, algae and zooxanthellae consume nitrate as they grow. These processes help remove excess nitrogen from water.
Case Study
I feed my aquarium a mixture of pellets and coral food, say, 4 grams of nitrogen per day. This is the input. The activated carbon and zeolite extracts 0.5 gram from the water per day. This is the output. Out of the 4 grams of nitrogen in the food, 2 grams are eaten by the fishes and coral. This is the consumption. The bacteria and algae also make use of the nitrogenous compound in the water. As the result, they increase their biomass by 1 gram of nitrogen. This is also consumption. Fishes release 0.5 gram of nitrogen in to water in the form of ammonia. This is generation.
As the result, for this aquarium, the accumulation of nitrogen is:
Accumulation = 4 – 0.5 + 0.5 – 2 – 1 = 1 gram

Diagram illustrates the processes which increase (blue) and decrease (red) nitrogen in water This means the nitrogen content of the aquarium will increase by 1 gram per day. This also means, for a 500 L aquarium, the nitrate will increase by about 9 ppm per day.
Hidden Cost of Nutrient Export
Get ready for an “eureka” moment!
If we can export nutrients simply by having more bacteria growth, does that mean there is no limit to the amount of nutrients a system can handle? If it sound too good to be true, it probable is. Unfortunately, There is a hidden cost for an aquarium to export these nutrients.
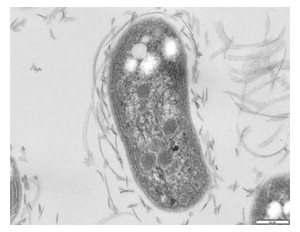
Nitrobacter sp. One of the bacteria involved in nitrification. It consumes oxygen as it work.
When bacteria breaks down organic compounds, they consume oxygen and gives out carbon dioxide. When bacteria make use of C, N and P to grow and multiply, they consume oxygen and give out carbon dioxide. The hidden cost for nutrient export is dissolved oxygen. We can have gazillion bacteria to help us deal with all the nutrients. However, when they consume all the oxygen in the aquarium, things will start to die, fast.
Here we are, back to square one, the chemical balance of nutrients is ultimately limited by dissolved gases. This decides how many fishes and coral we can keep in an aquarium.
Mineral Balances
The balances of reef-building minerals are critical for corals especially so in an enclosed boxed aquarium tank. At the same time, they also have a measure of impact on fishes and invertebrates affecting their growth and health. In a reef environment, these minerals need to remain within an acceptable range. For a quick recap of these minerals, you can read this excellent article by Chun Wai.
When coral consume these minerals, we must add them back into water. Some of the techniques adds back the consumed ions in a balanced way, while others may upset the ratio of ions in reef water. We shall briefly discuss some popular methods.
- Kalkwasser: this unbalanced method increases calcium and alkalinity, without topping up magnesium and other trace elements. it also increases pH slightly. The adding of kalkwasser depends on evaporation rate.
- 2- or 3-part dosing: this unbalanced method can increase major and trace elements. However, it has some impact on the salinity and ionic balance.
- Balling: this balanced method will not affect the ionic balance or salinity of the reef.
- Calcium Reactor: this balanced method will not affect the ionic balance or salinity. However, it tends to increase the dissolved carbon dioxide in water. This puts pressure on gas exchange.
Back to Bioload
We have covered quite a few topics in this article. Let’s return to the original question: So what is stopping us from adding more fishes?

Mixing of microbubbles and water in a protein skimmer creates plenty of surface area for gas exchange My answer is : gas exchange. We need to maintain a reasonable level of oxygen, while removing carbon dioxide. We do this not only to ensure the fishes and coral will stay alive, but also in support of the nutrient cycles through bacteria. Therefore, I believe the rate of gas exchange is the limiting factor for the bioload in reef aquarium. Keeping this in mind, it makes sense to have a largest possible nutrient export method, for example, an oversized protein skimmer, or largest algae refugium; So that your aquarium has a higher limit for bioload.
Author - @JiaEn
-
1
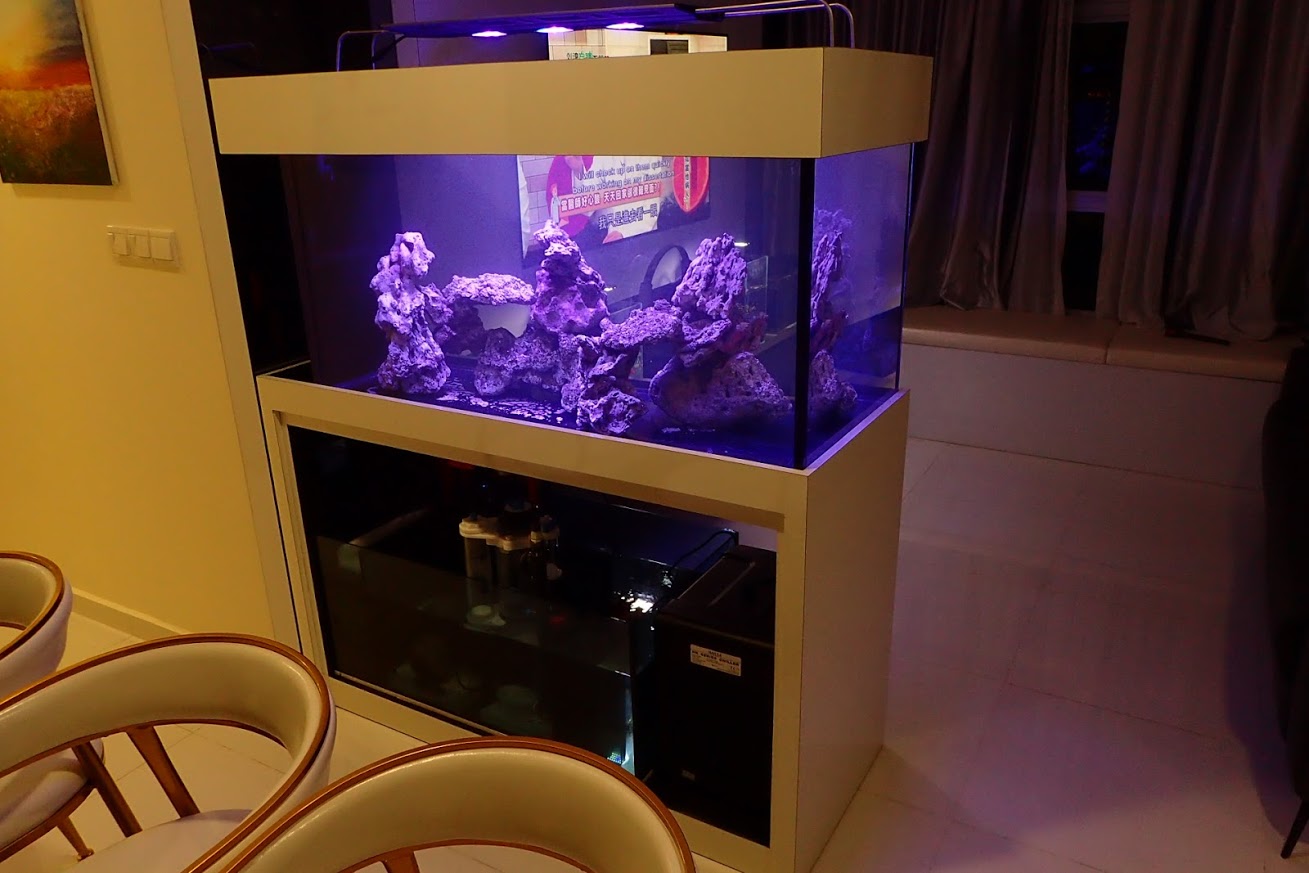
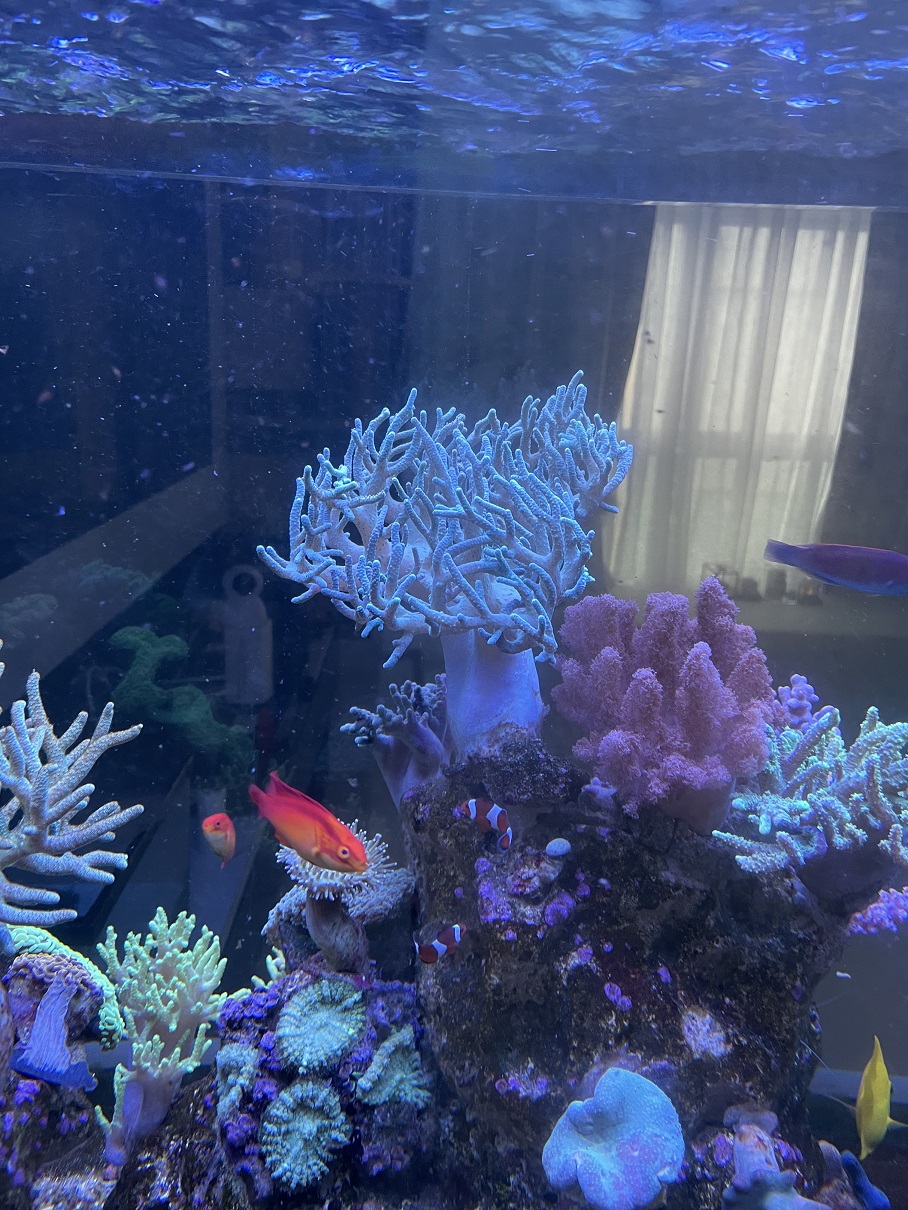
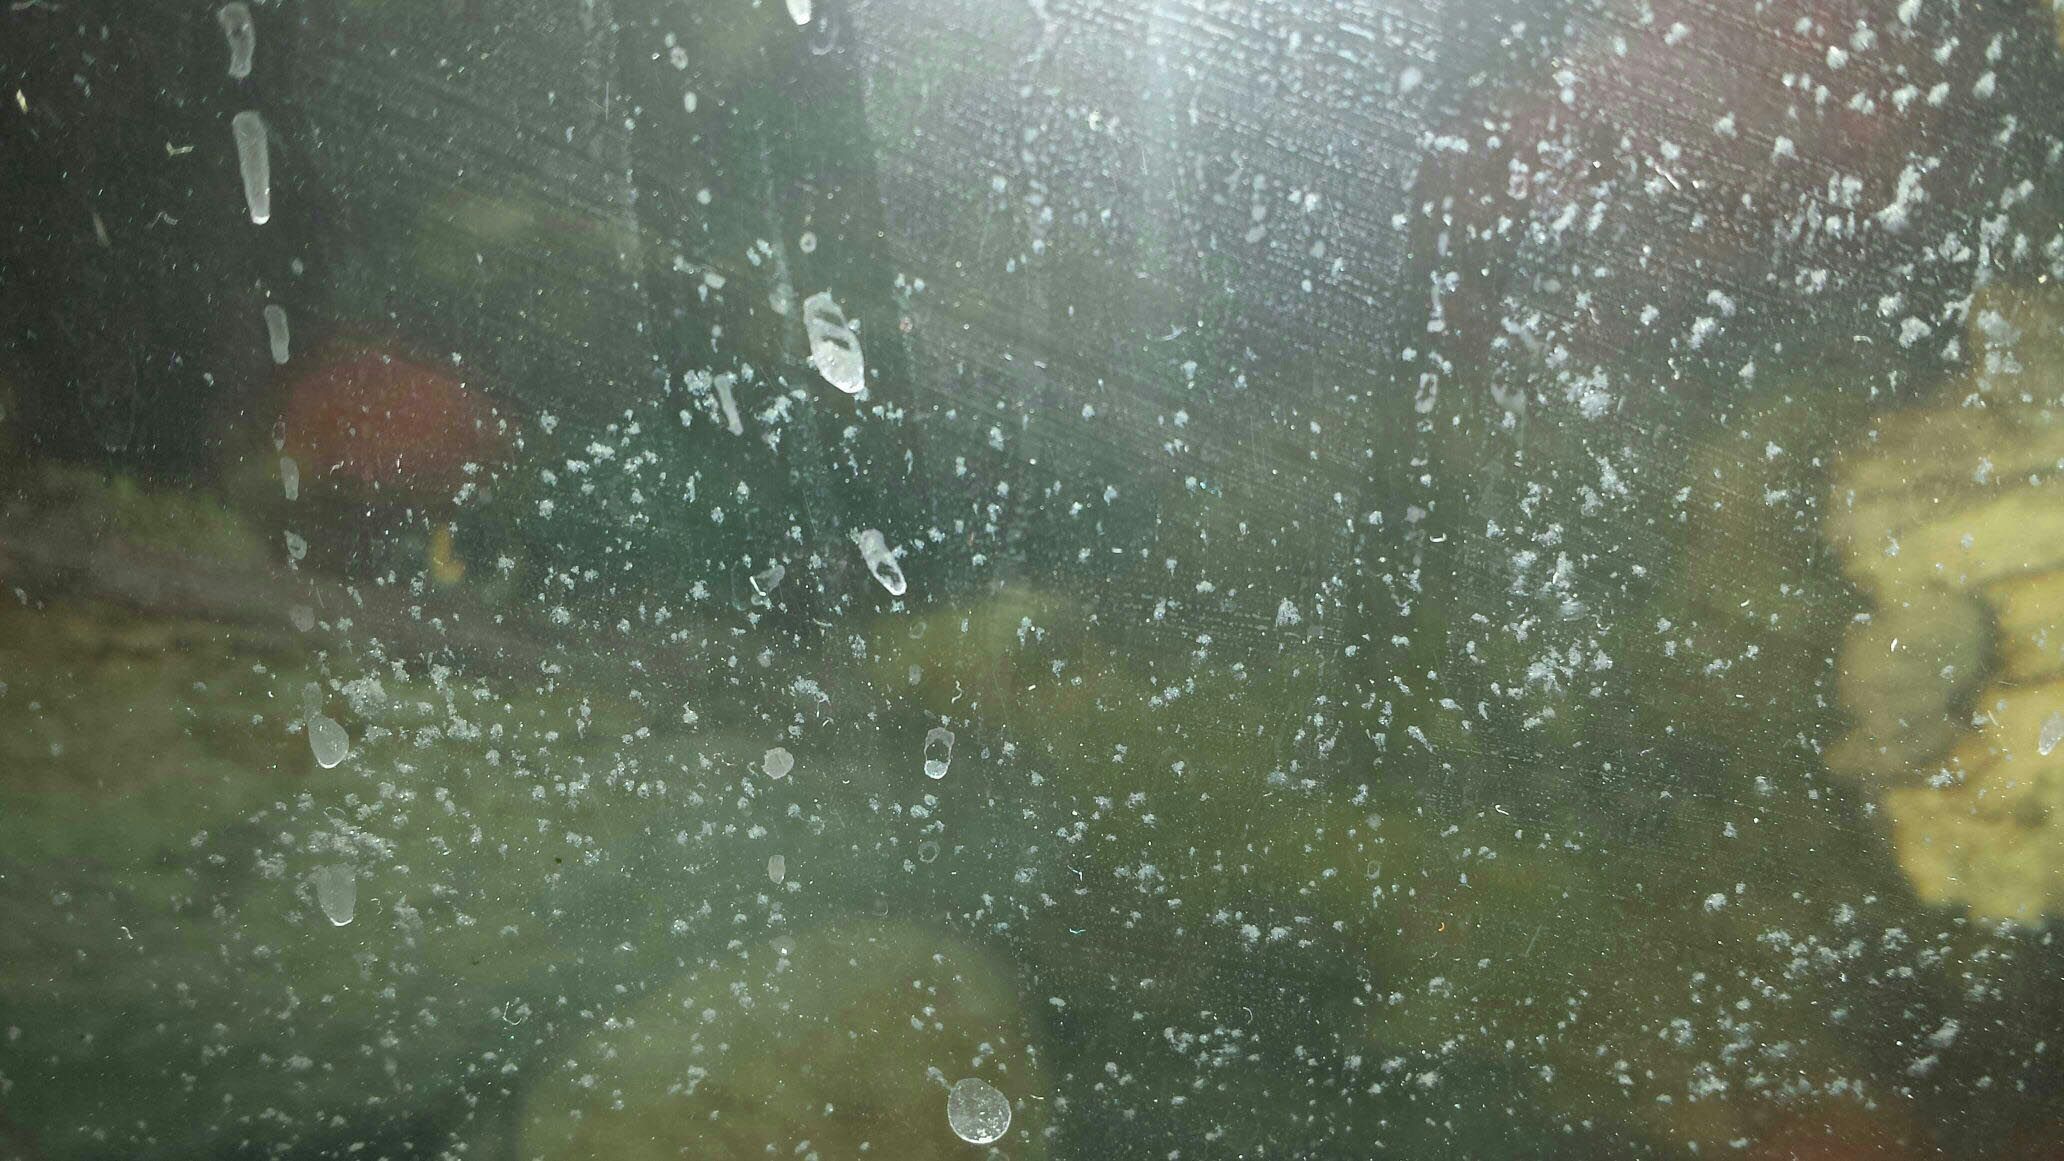
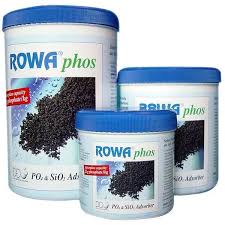
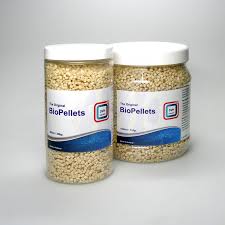
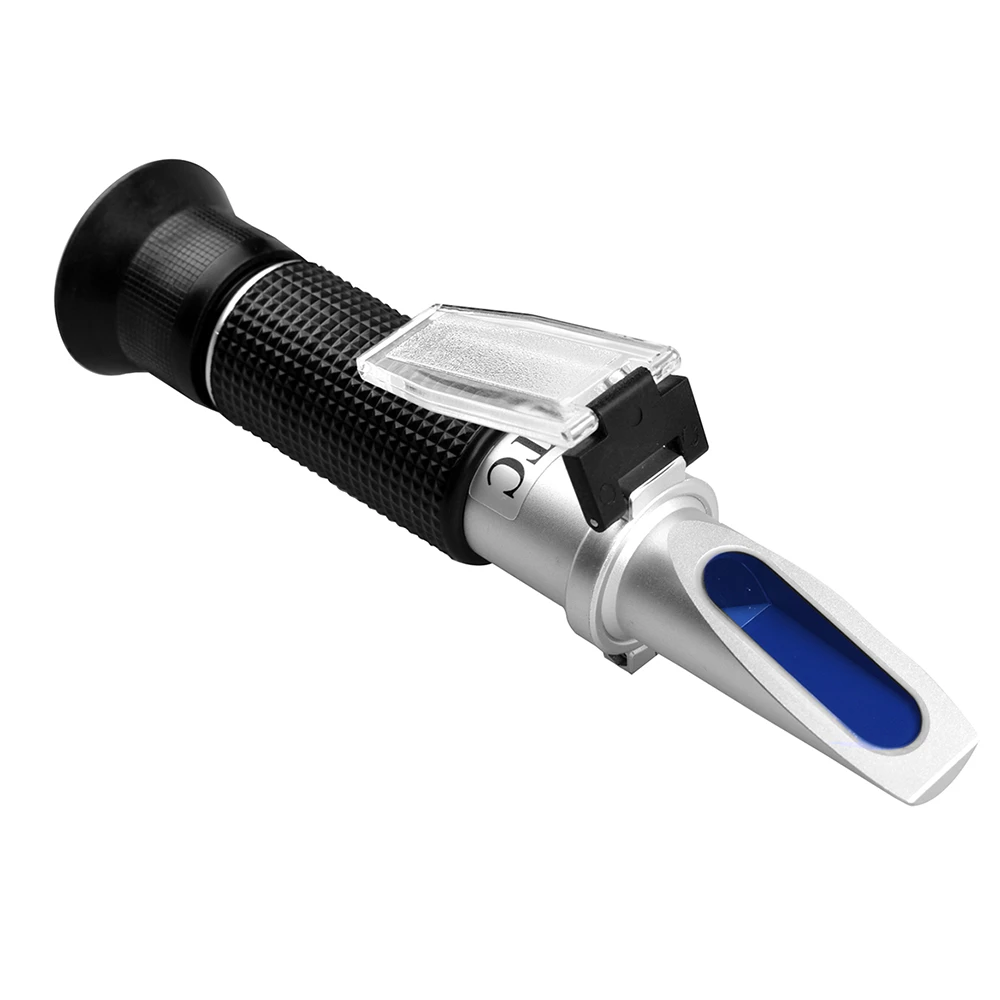
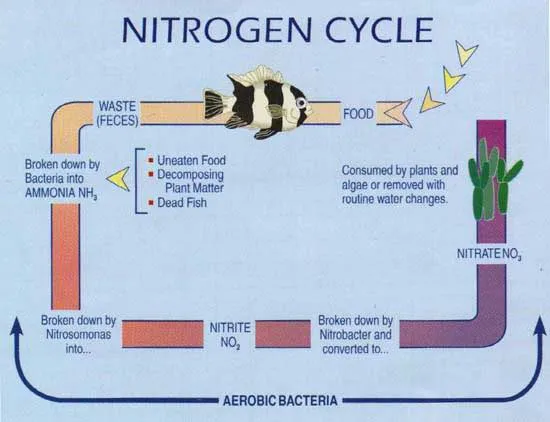
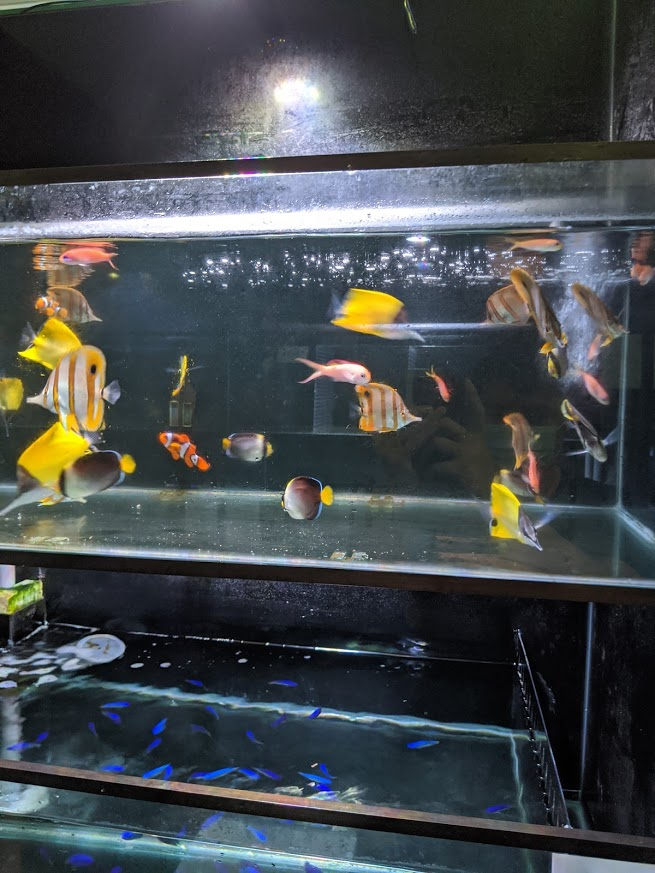
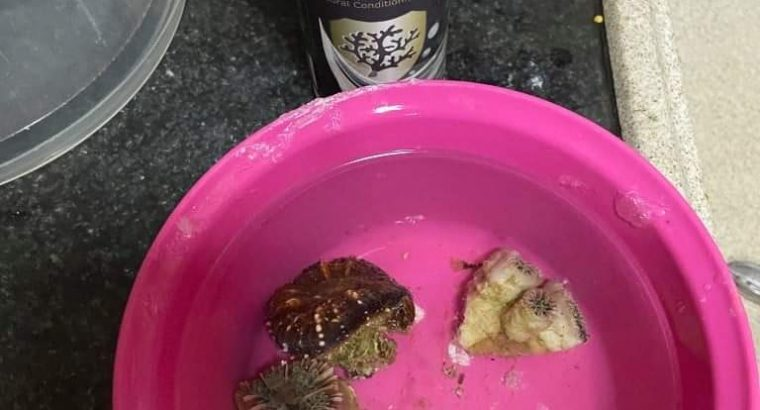
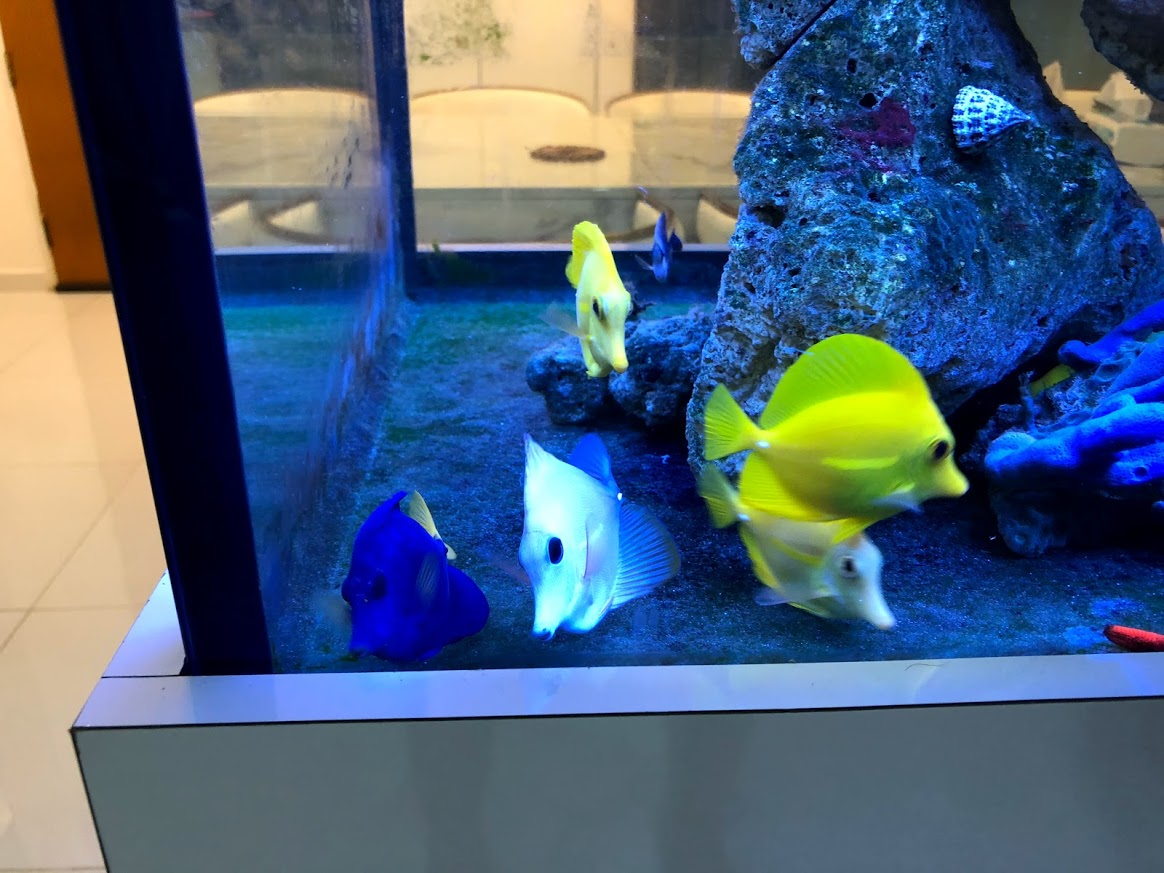
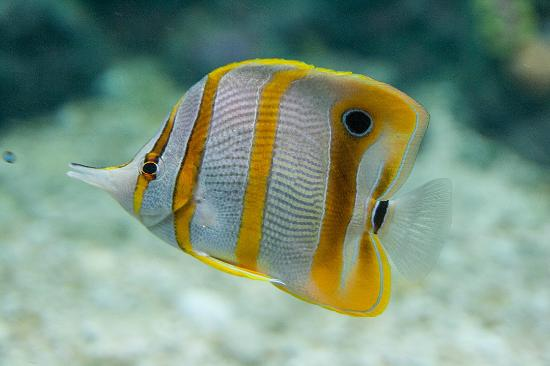
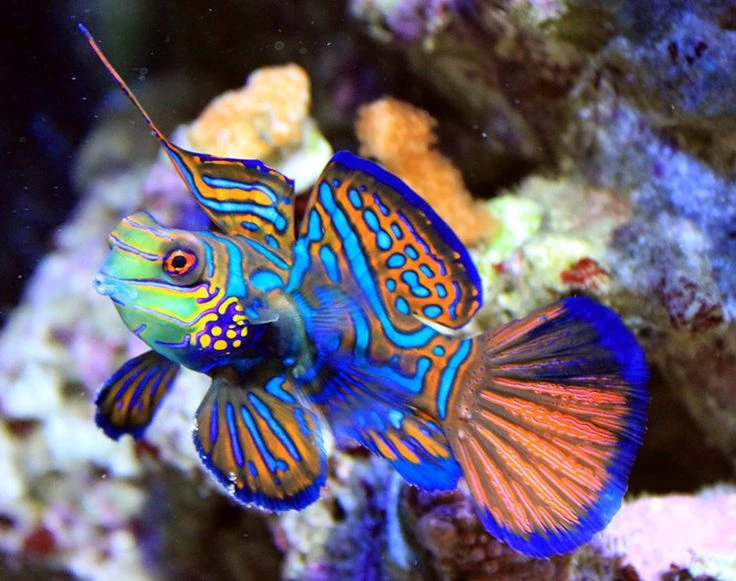
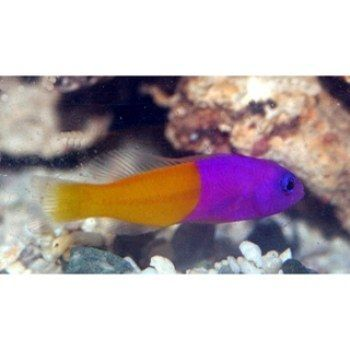
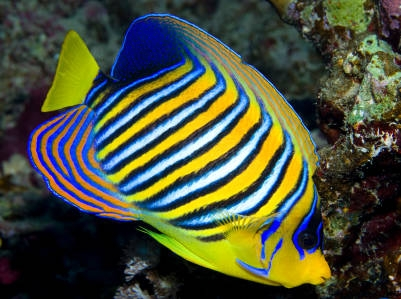
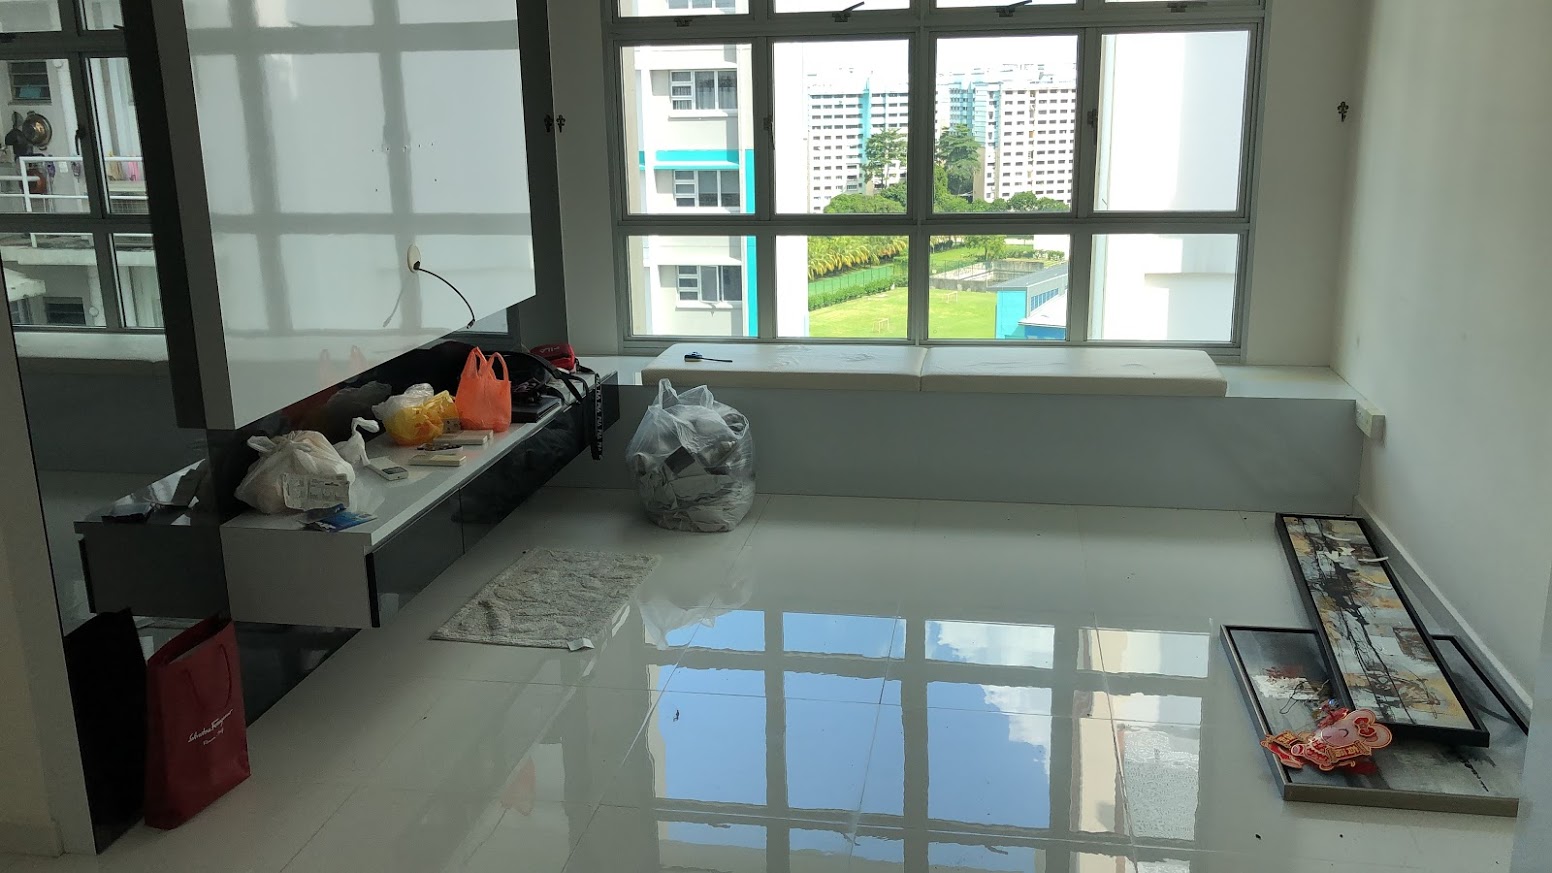
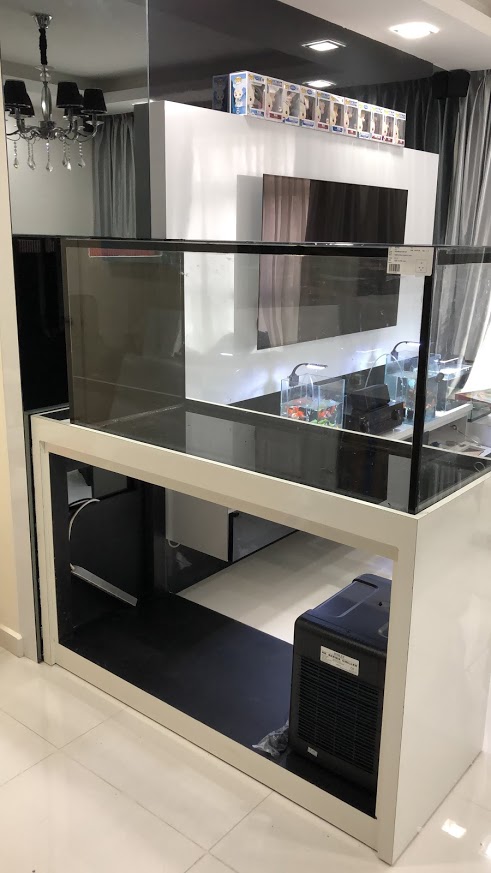
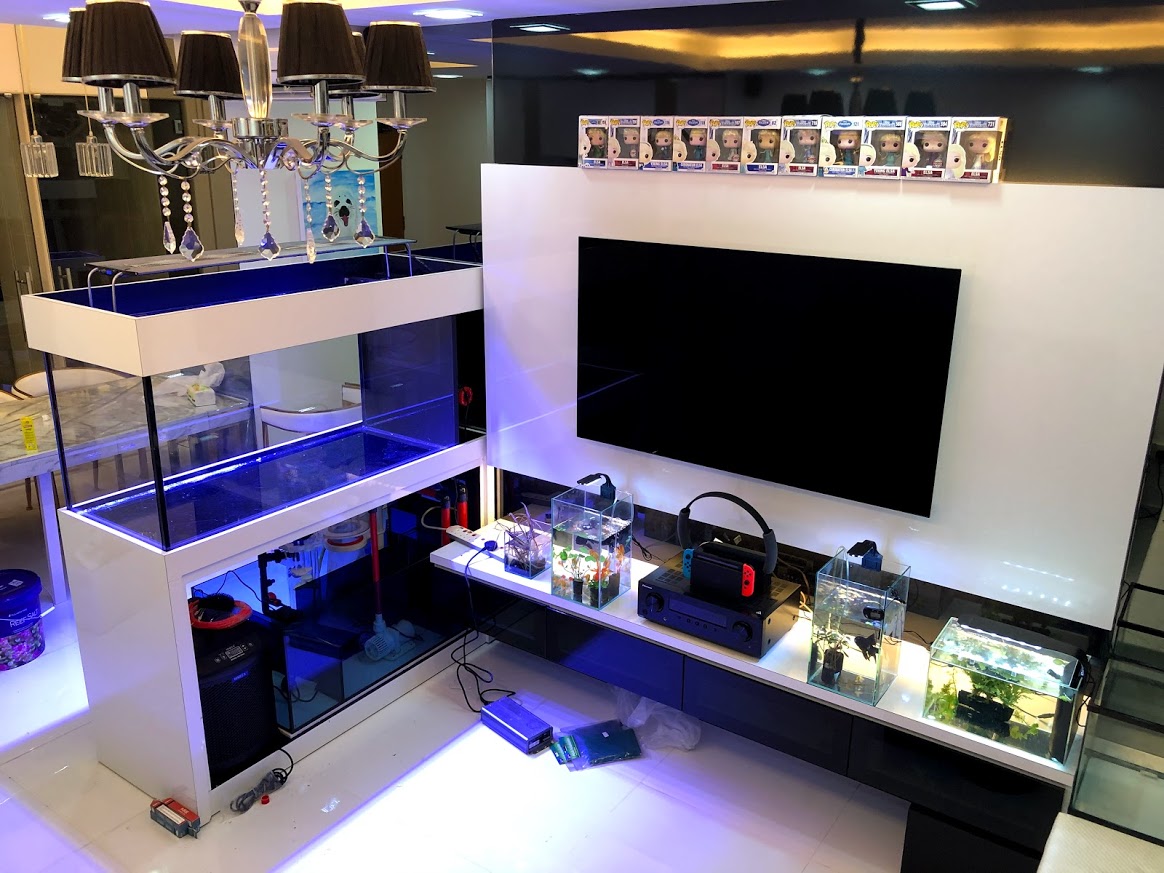
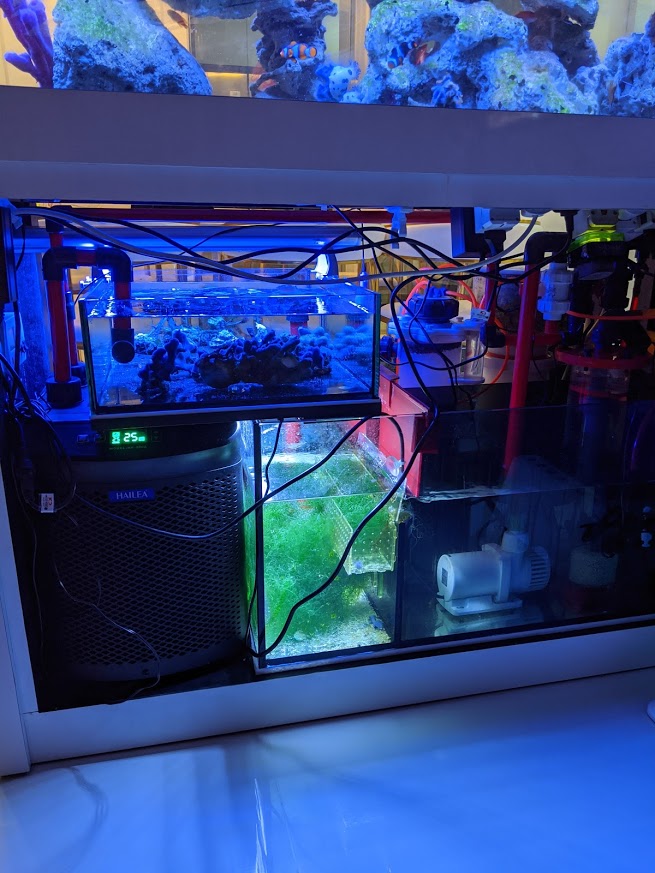
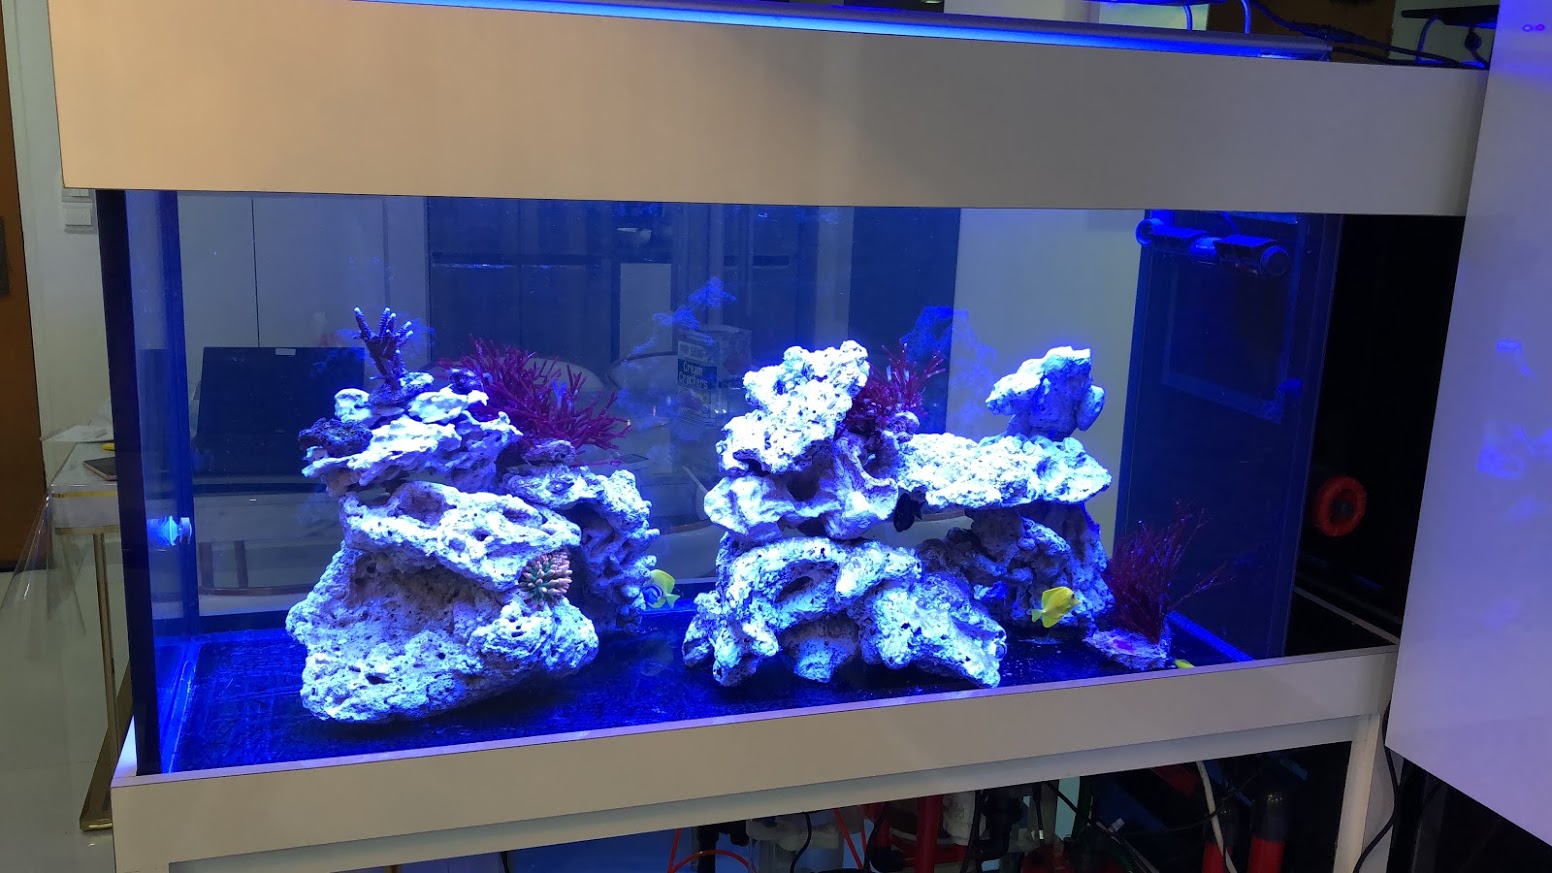
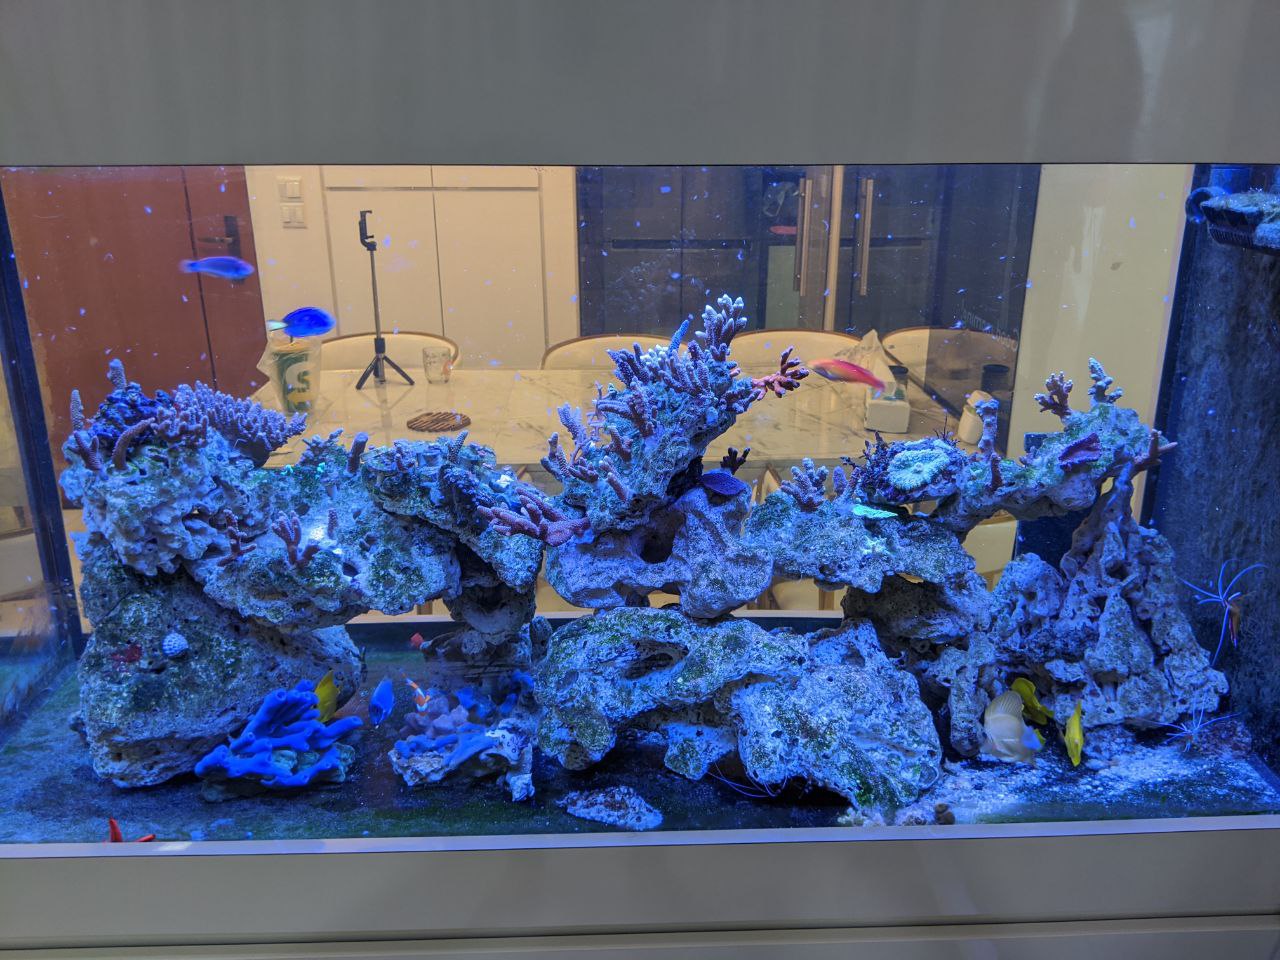


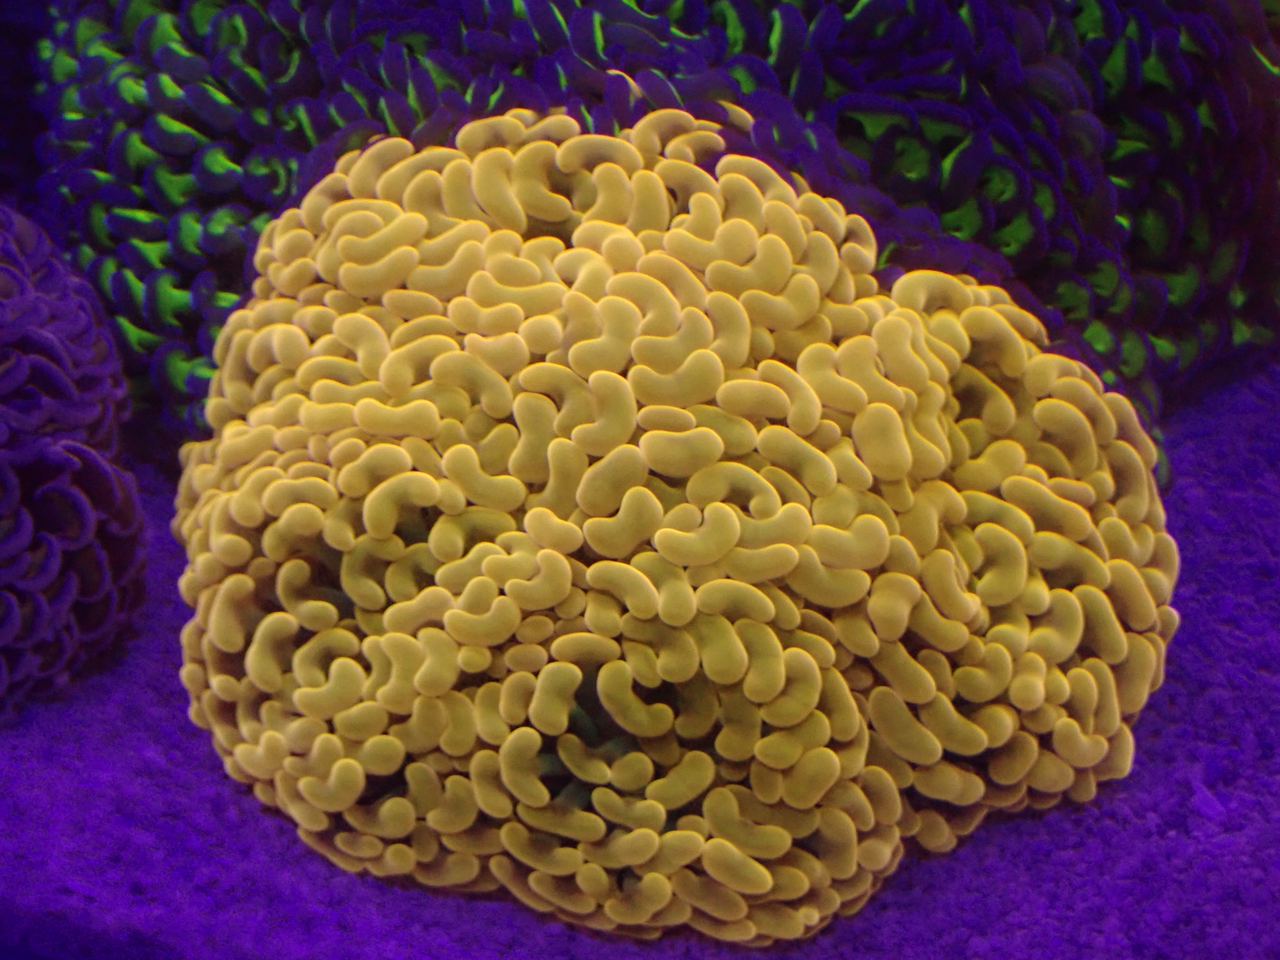

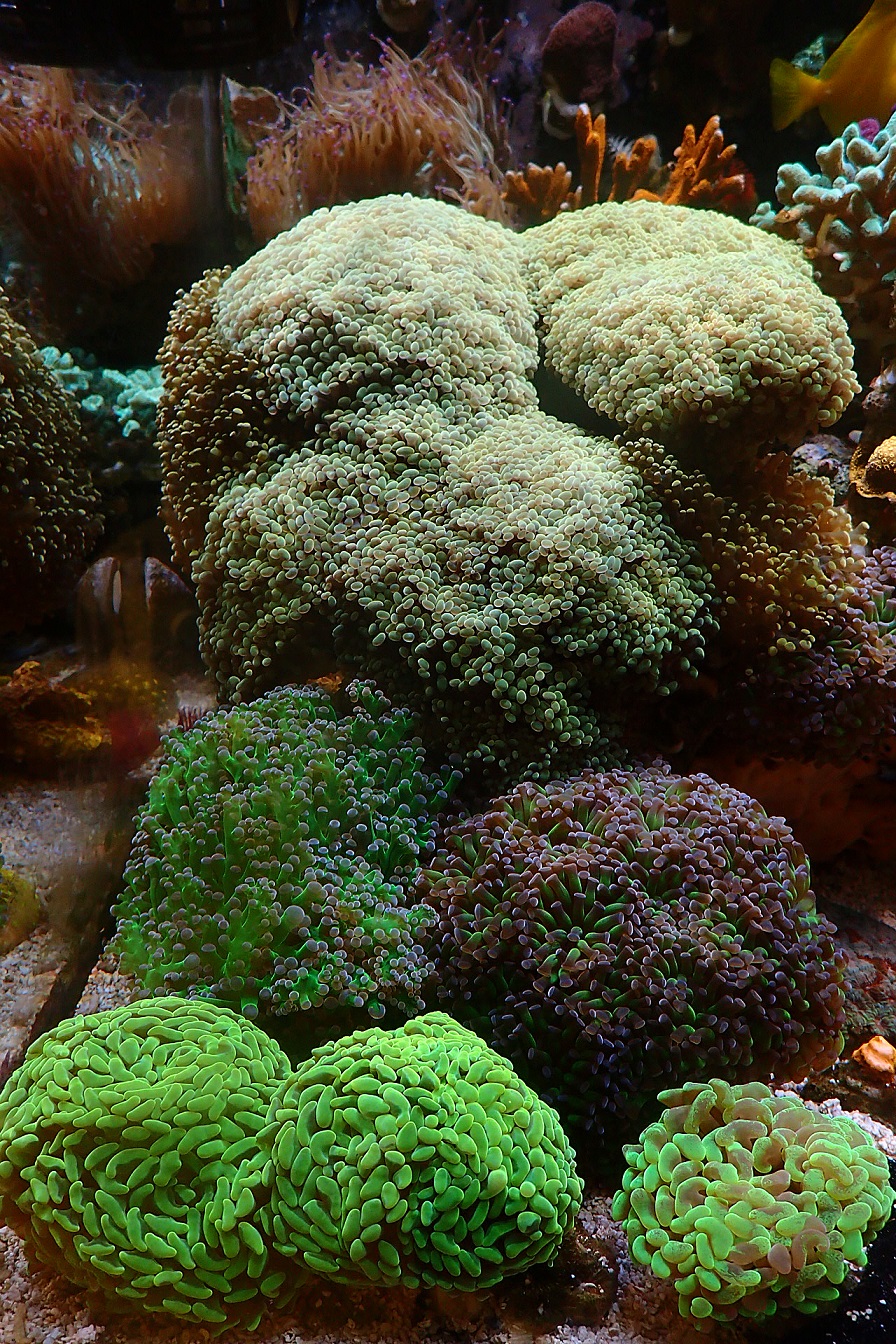
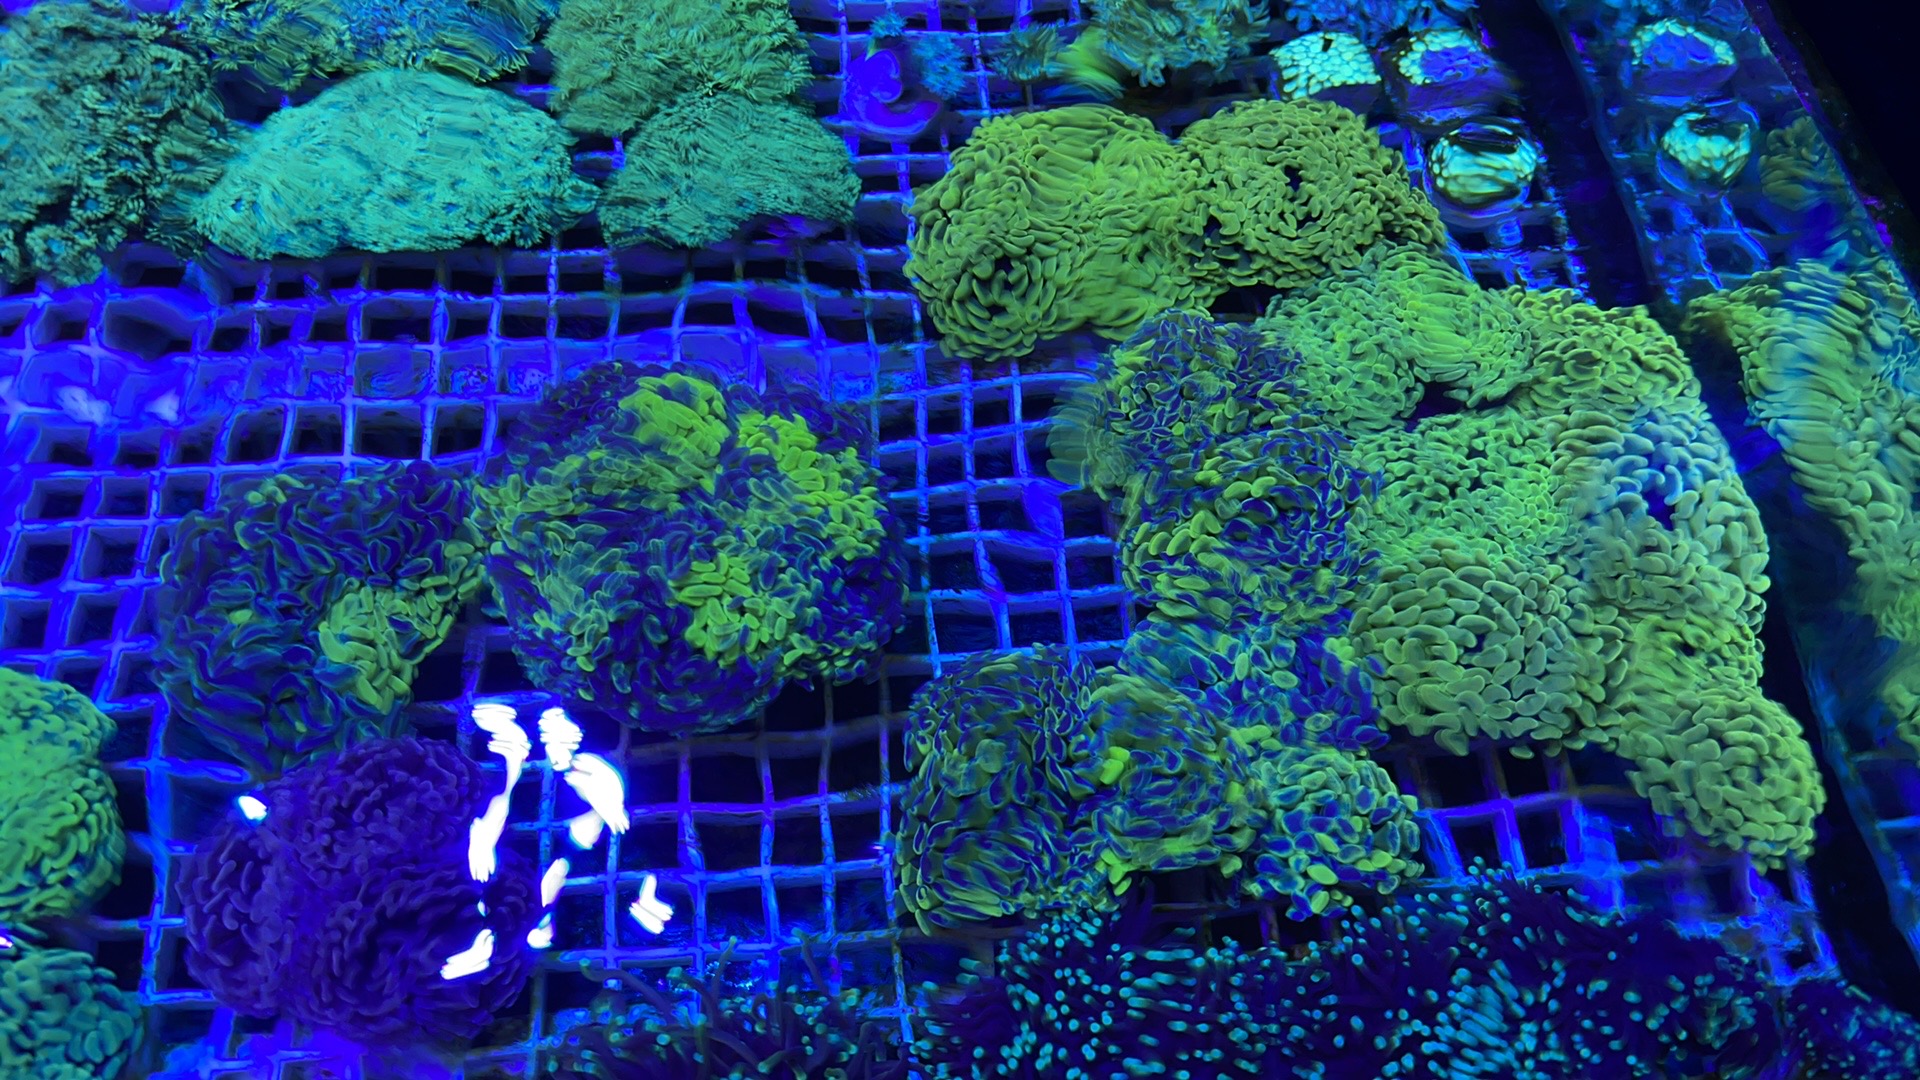

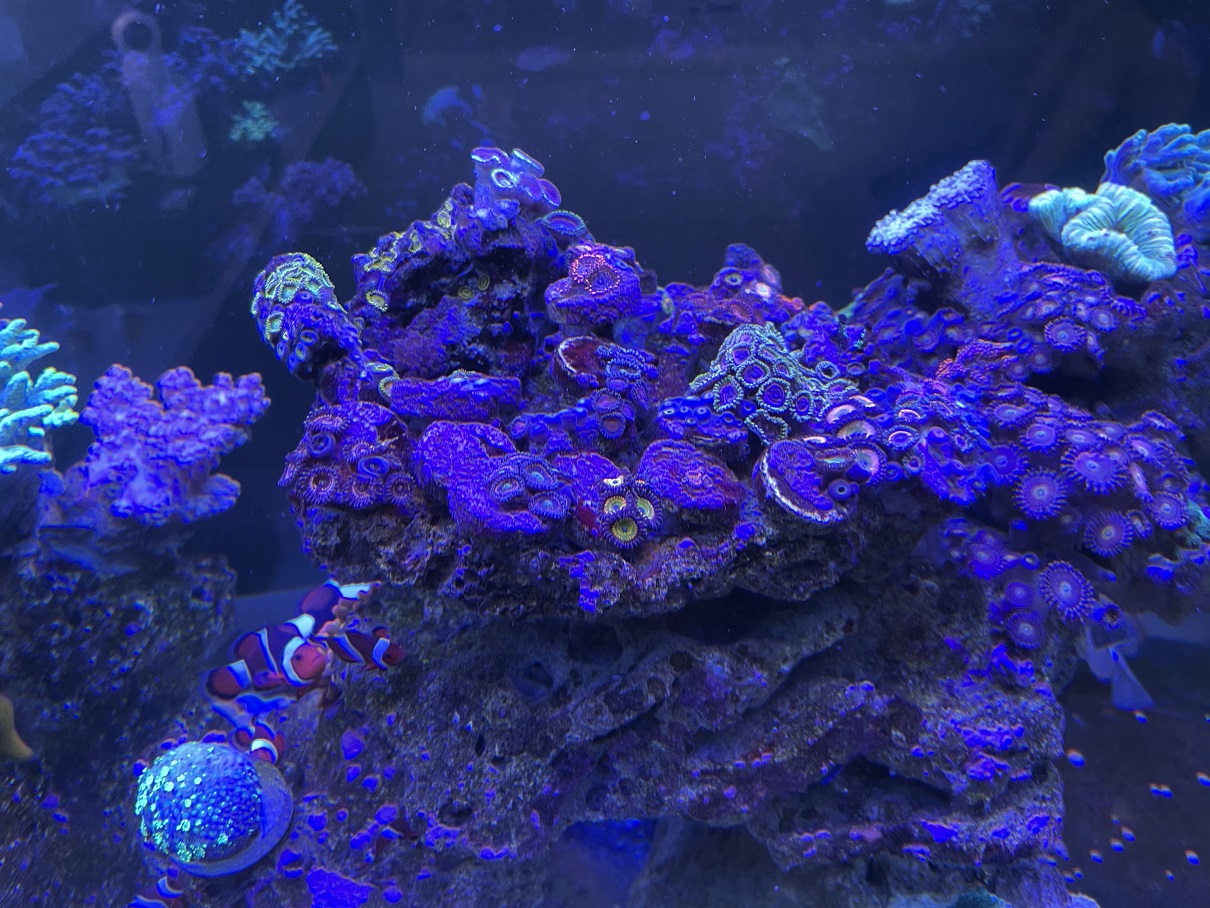

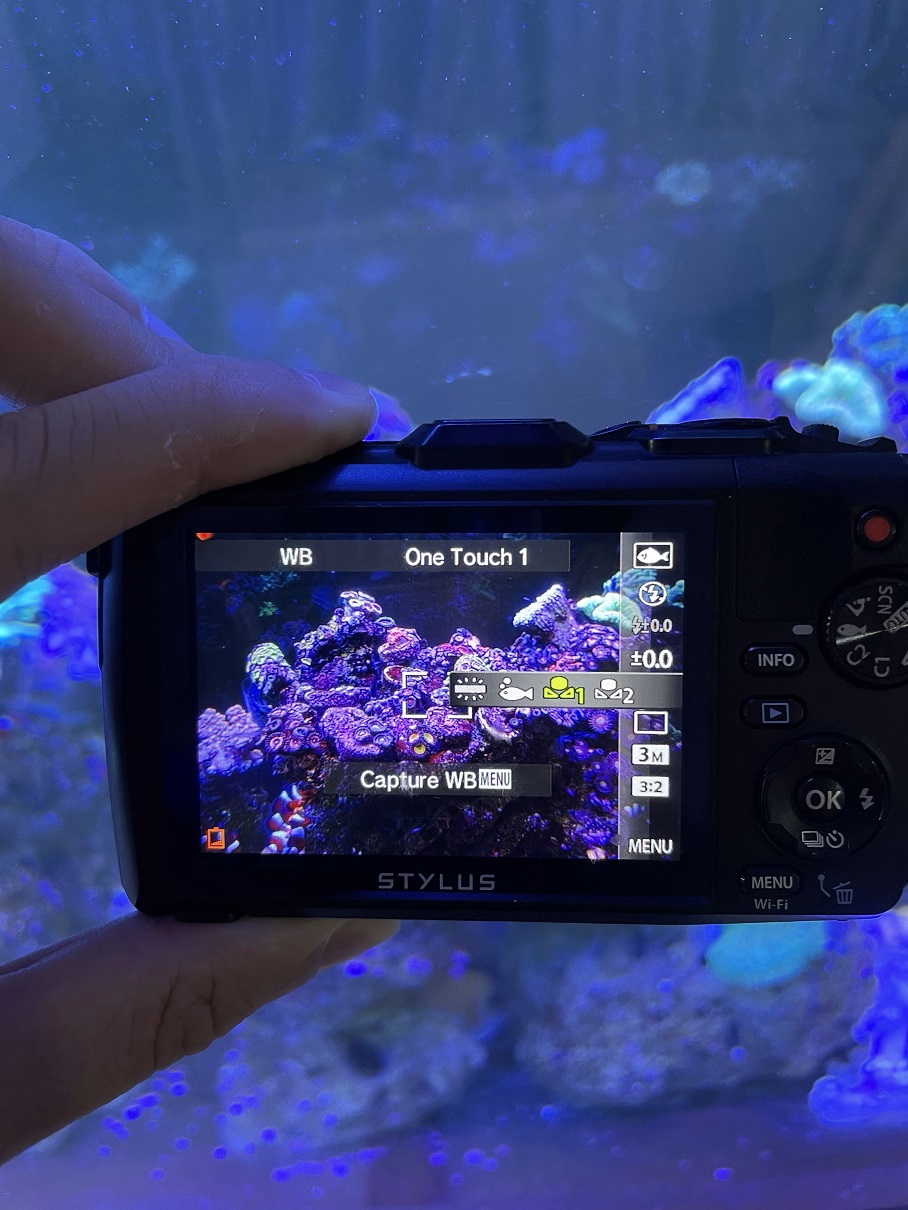


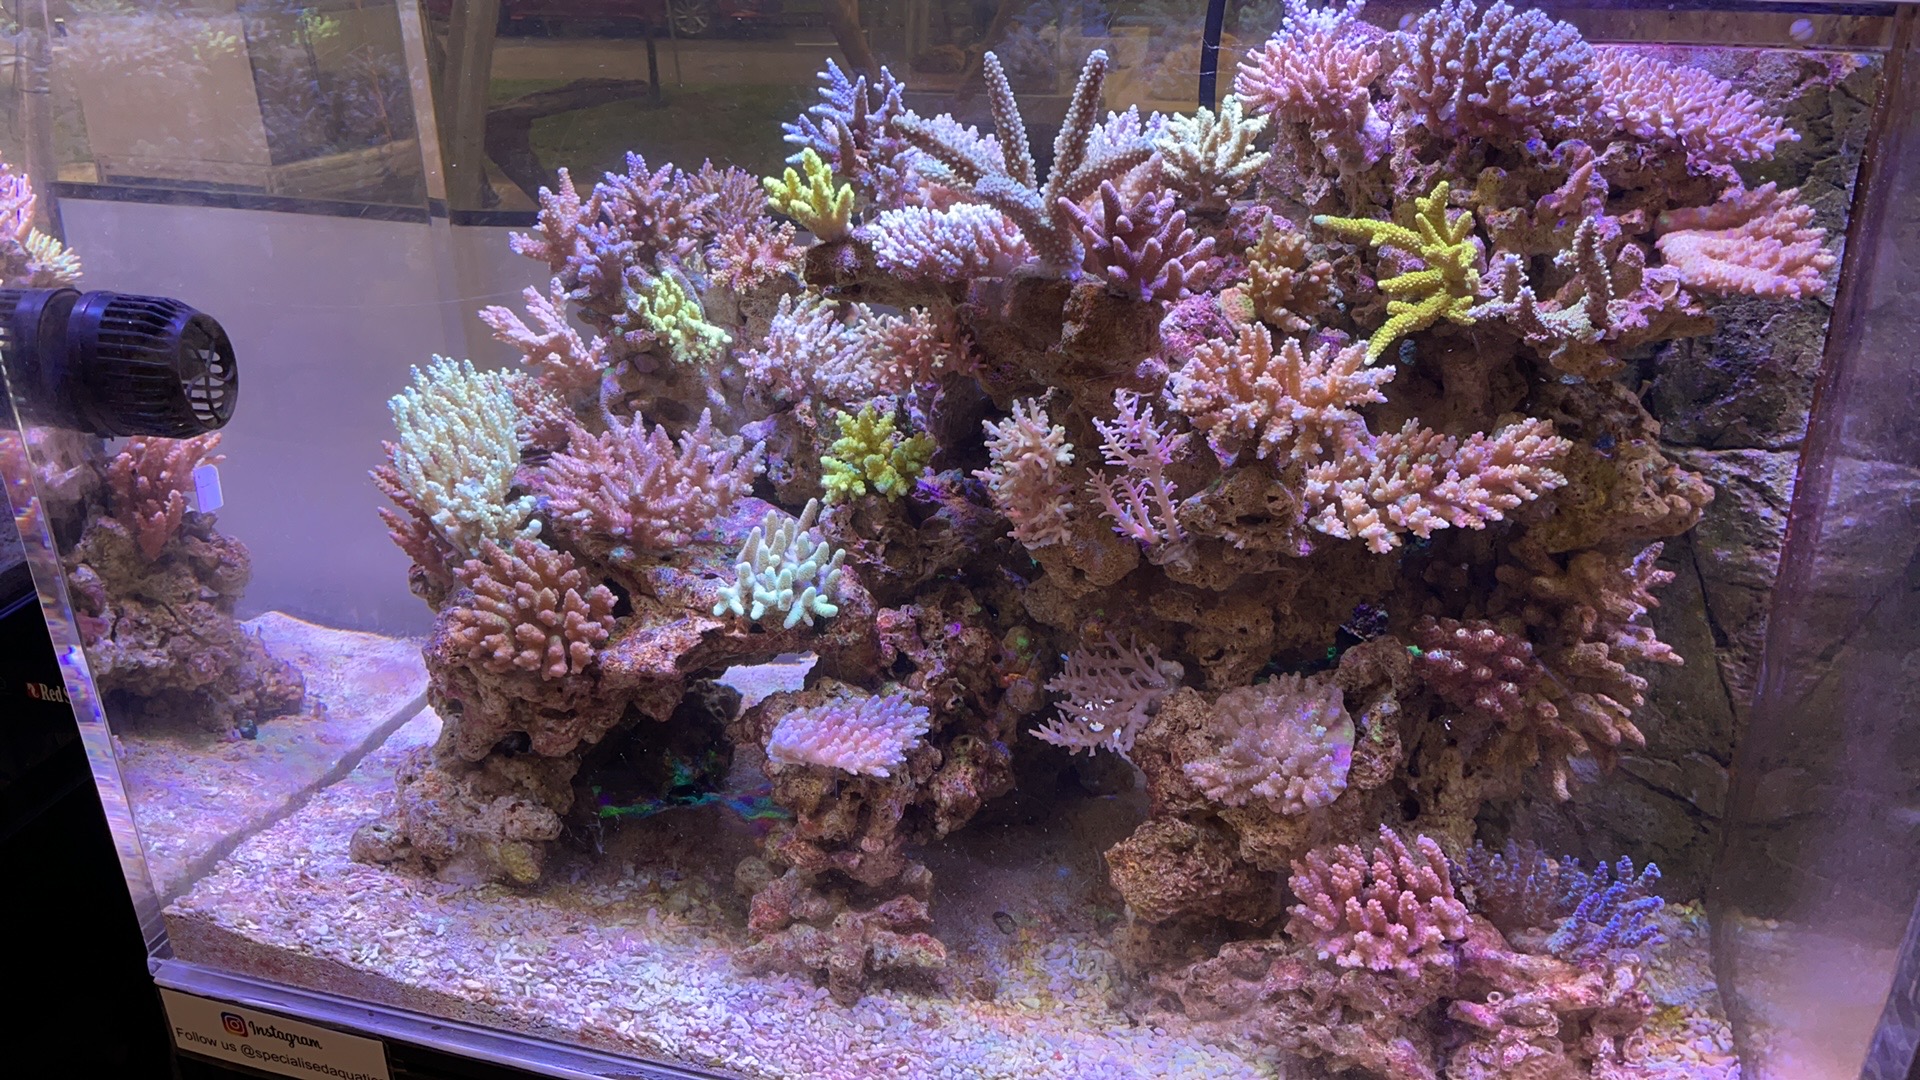
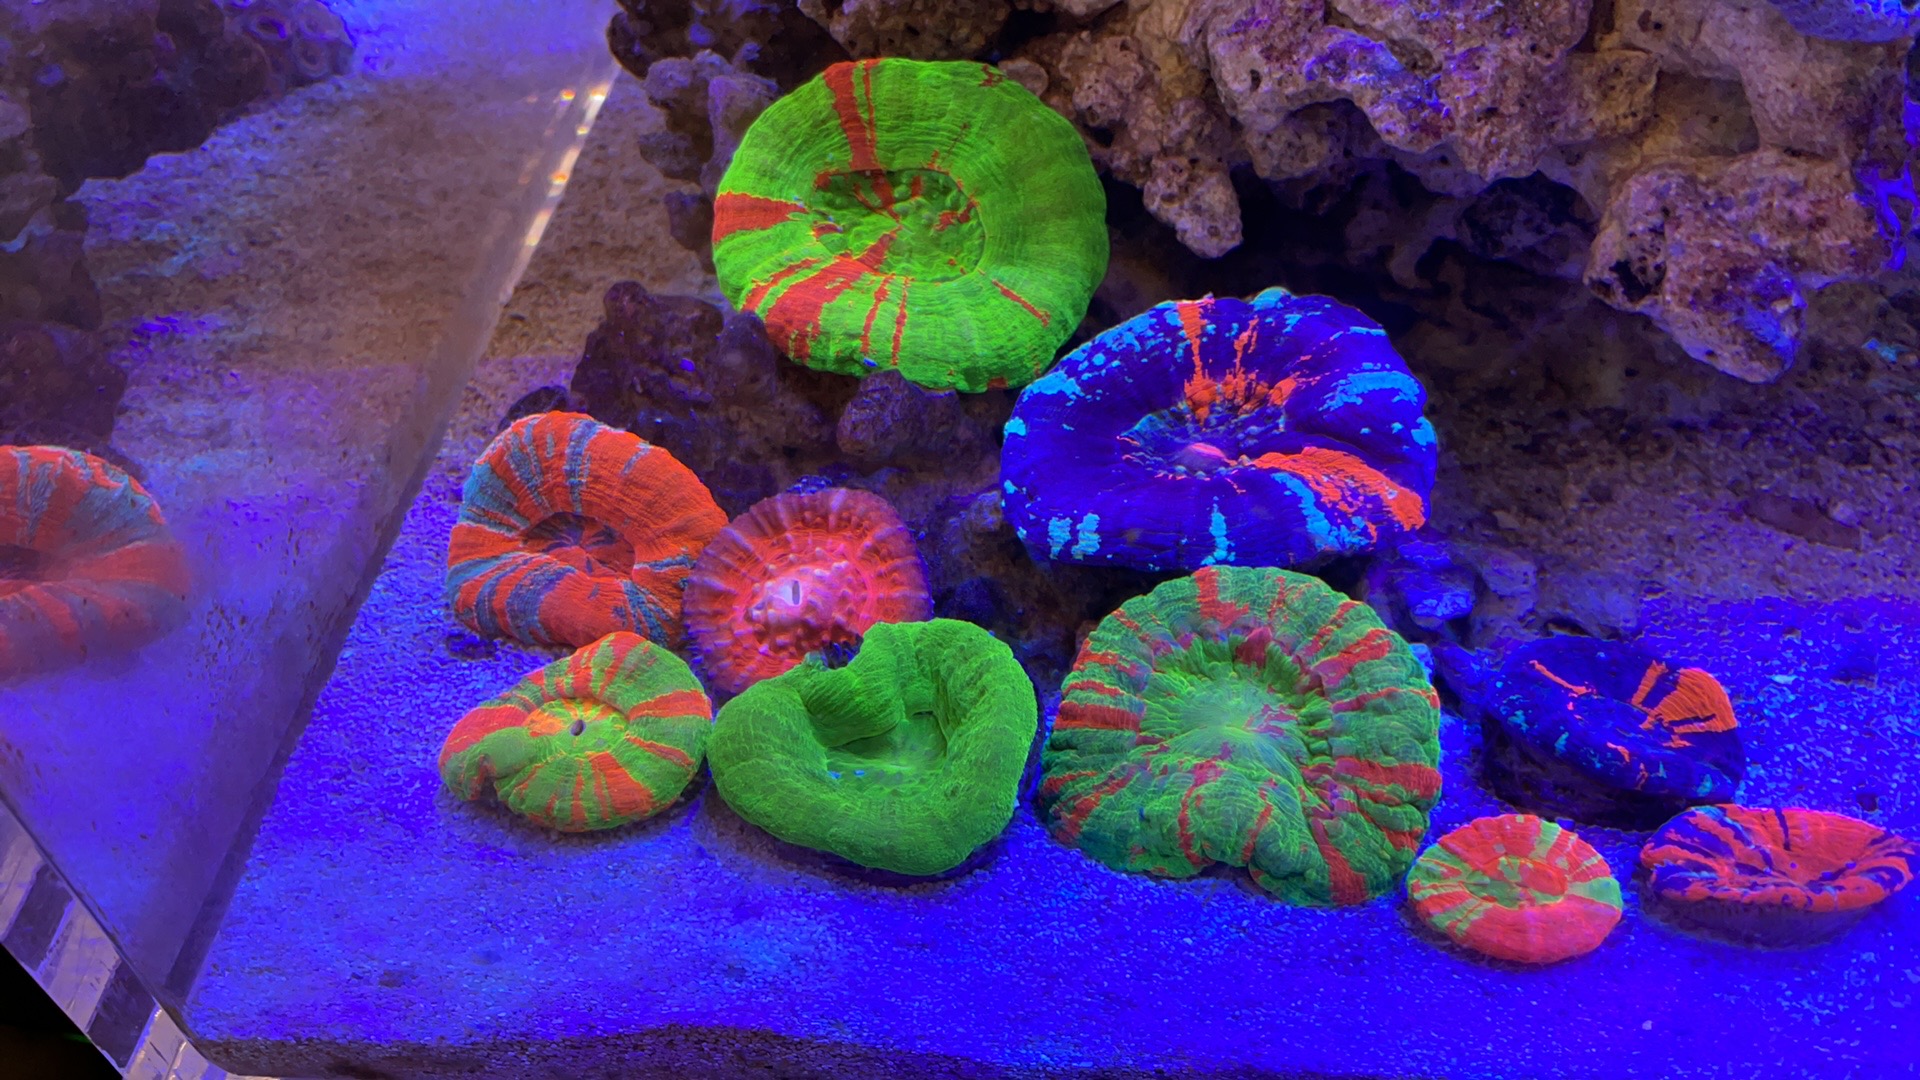


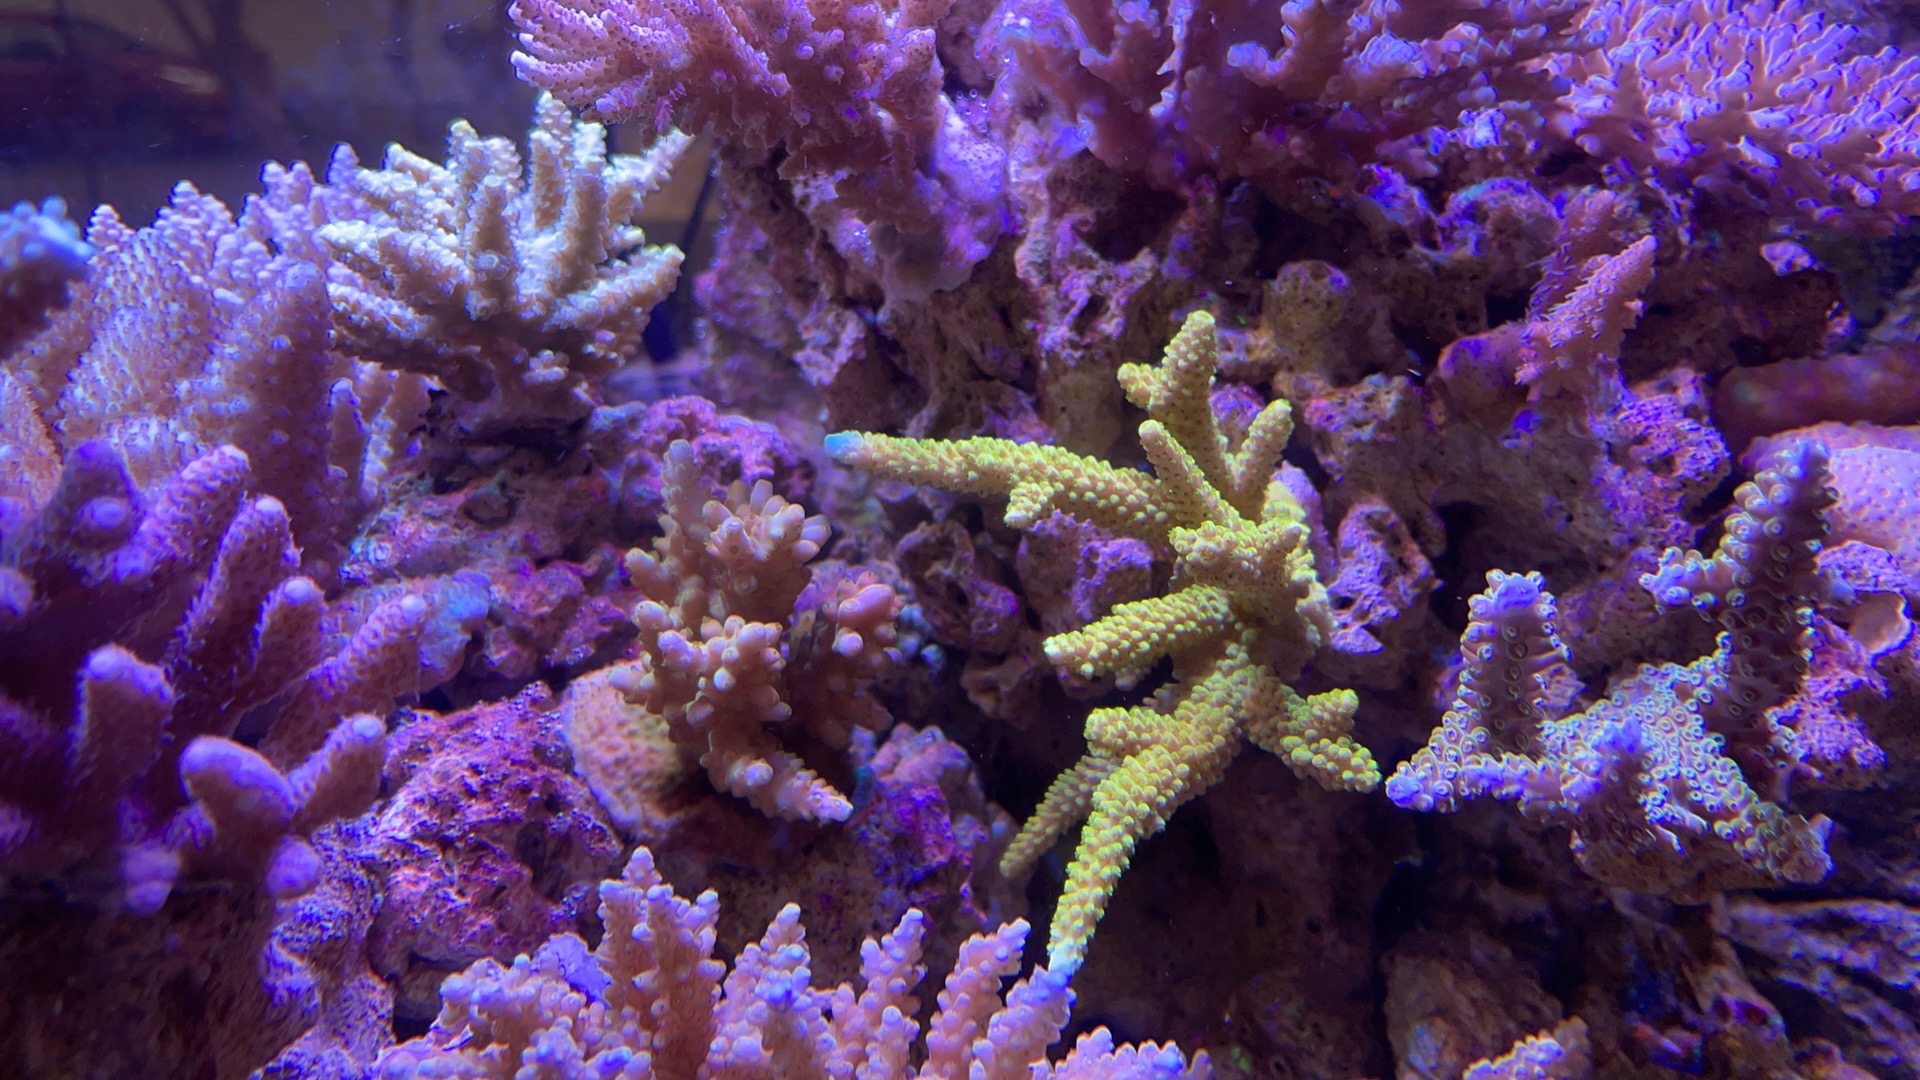
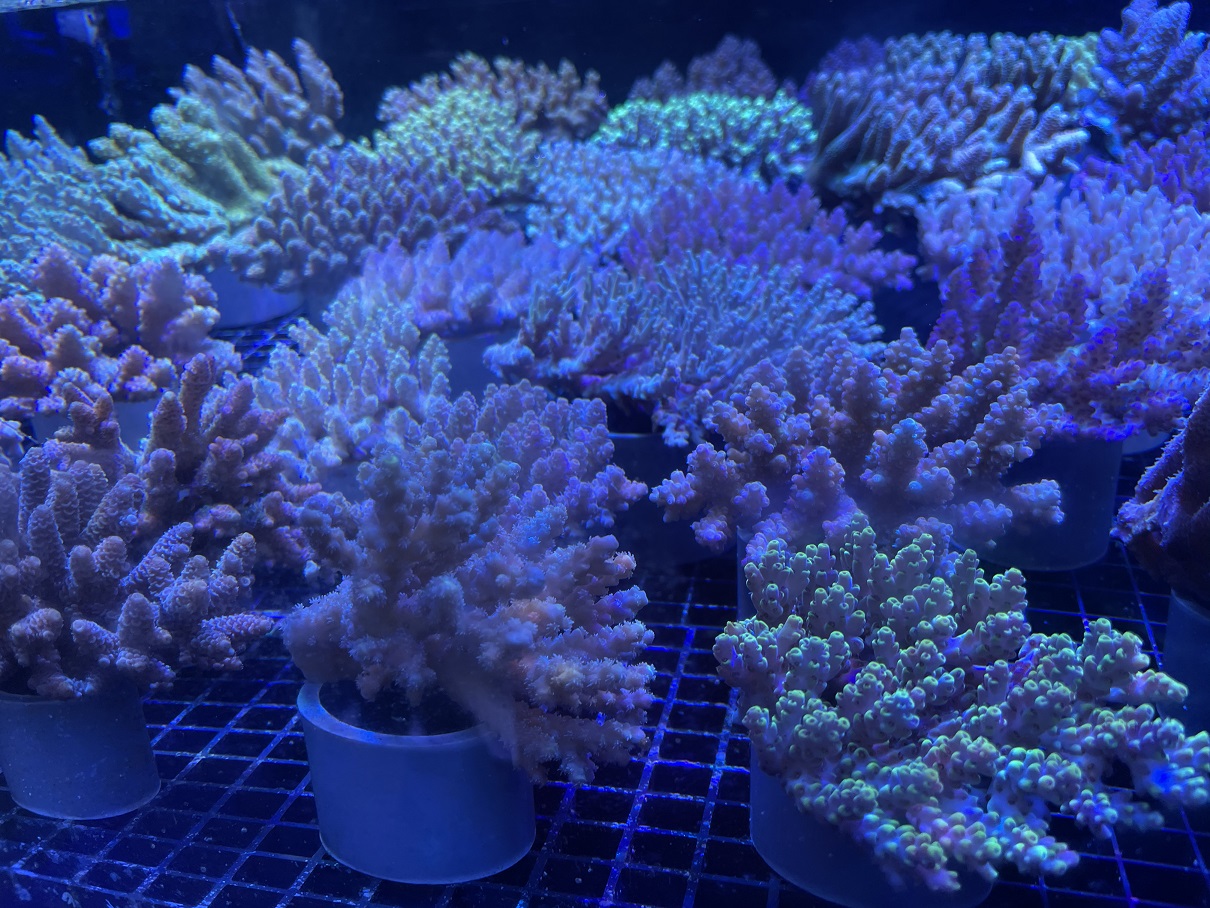
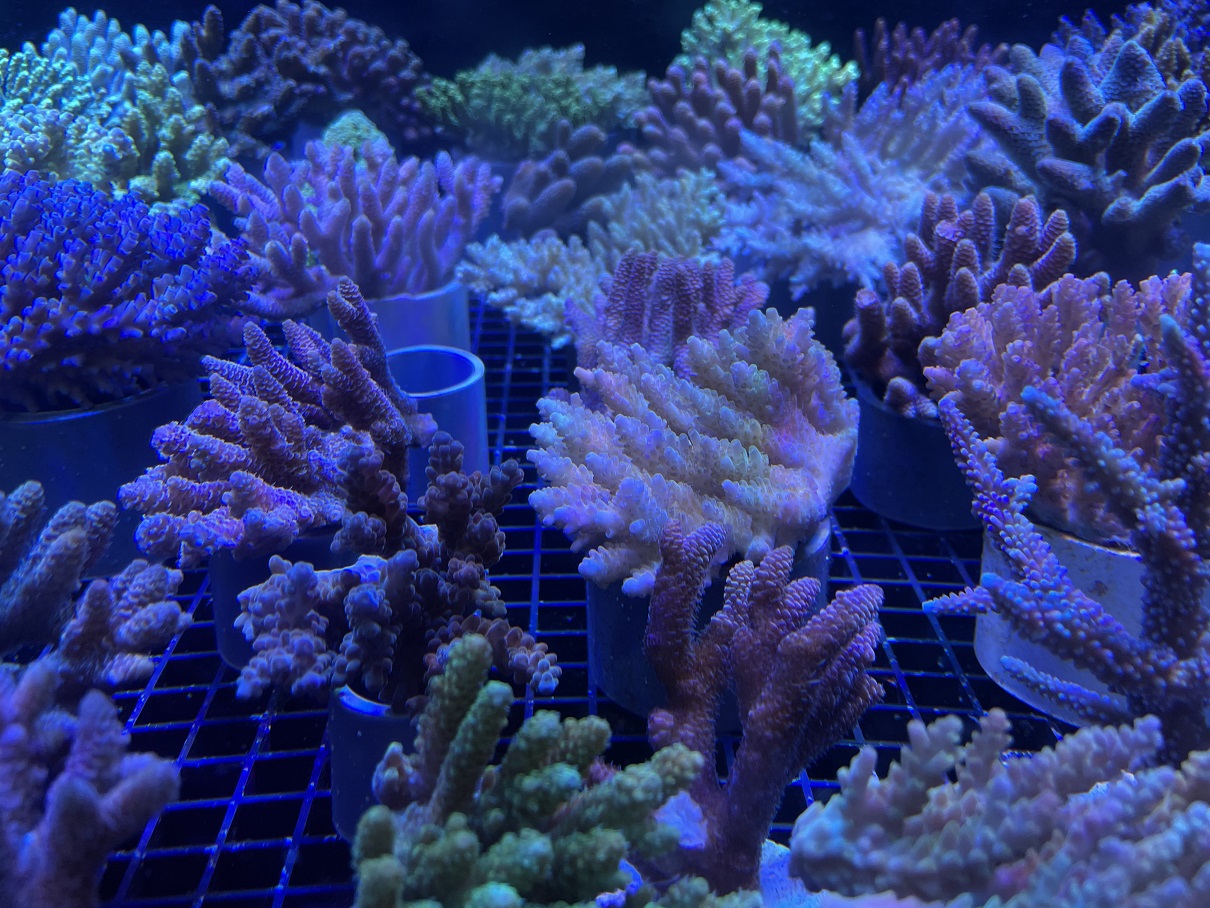


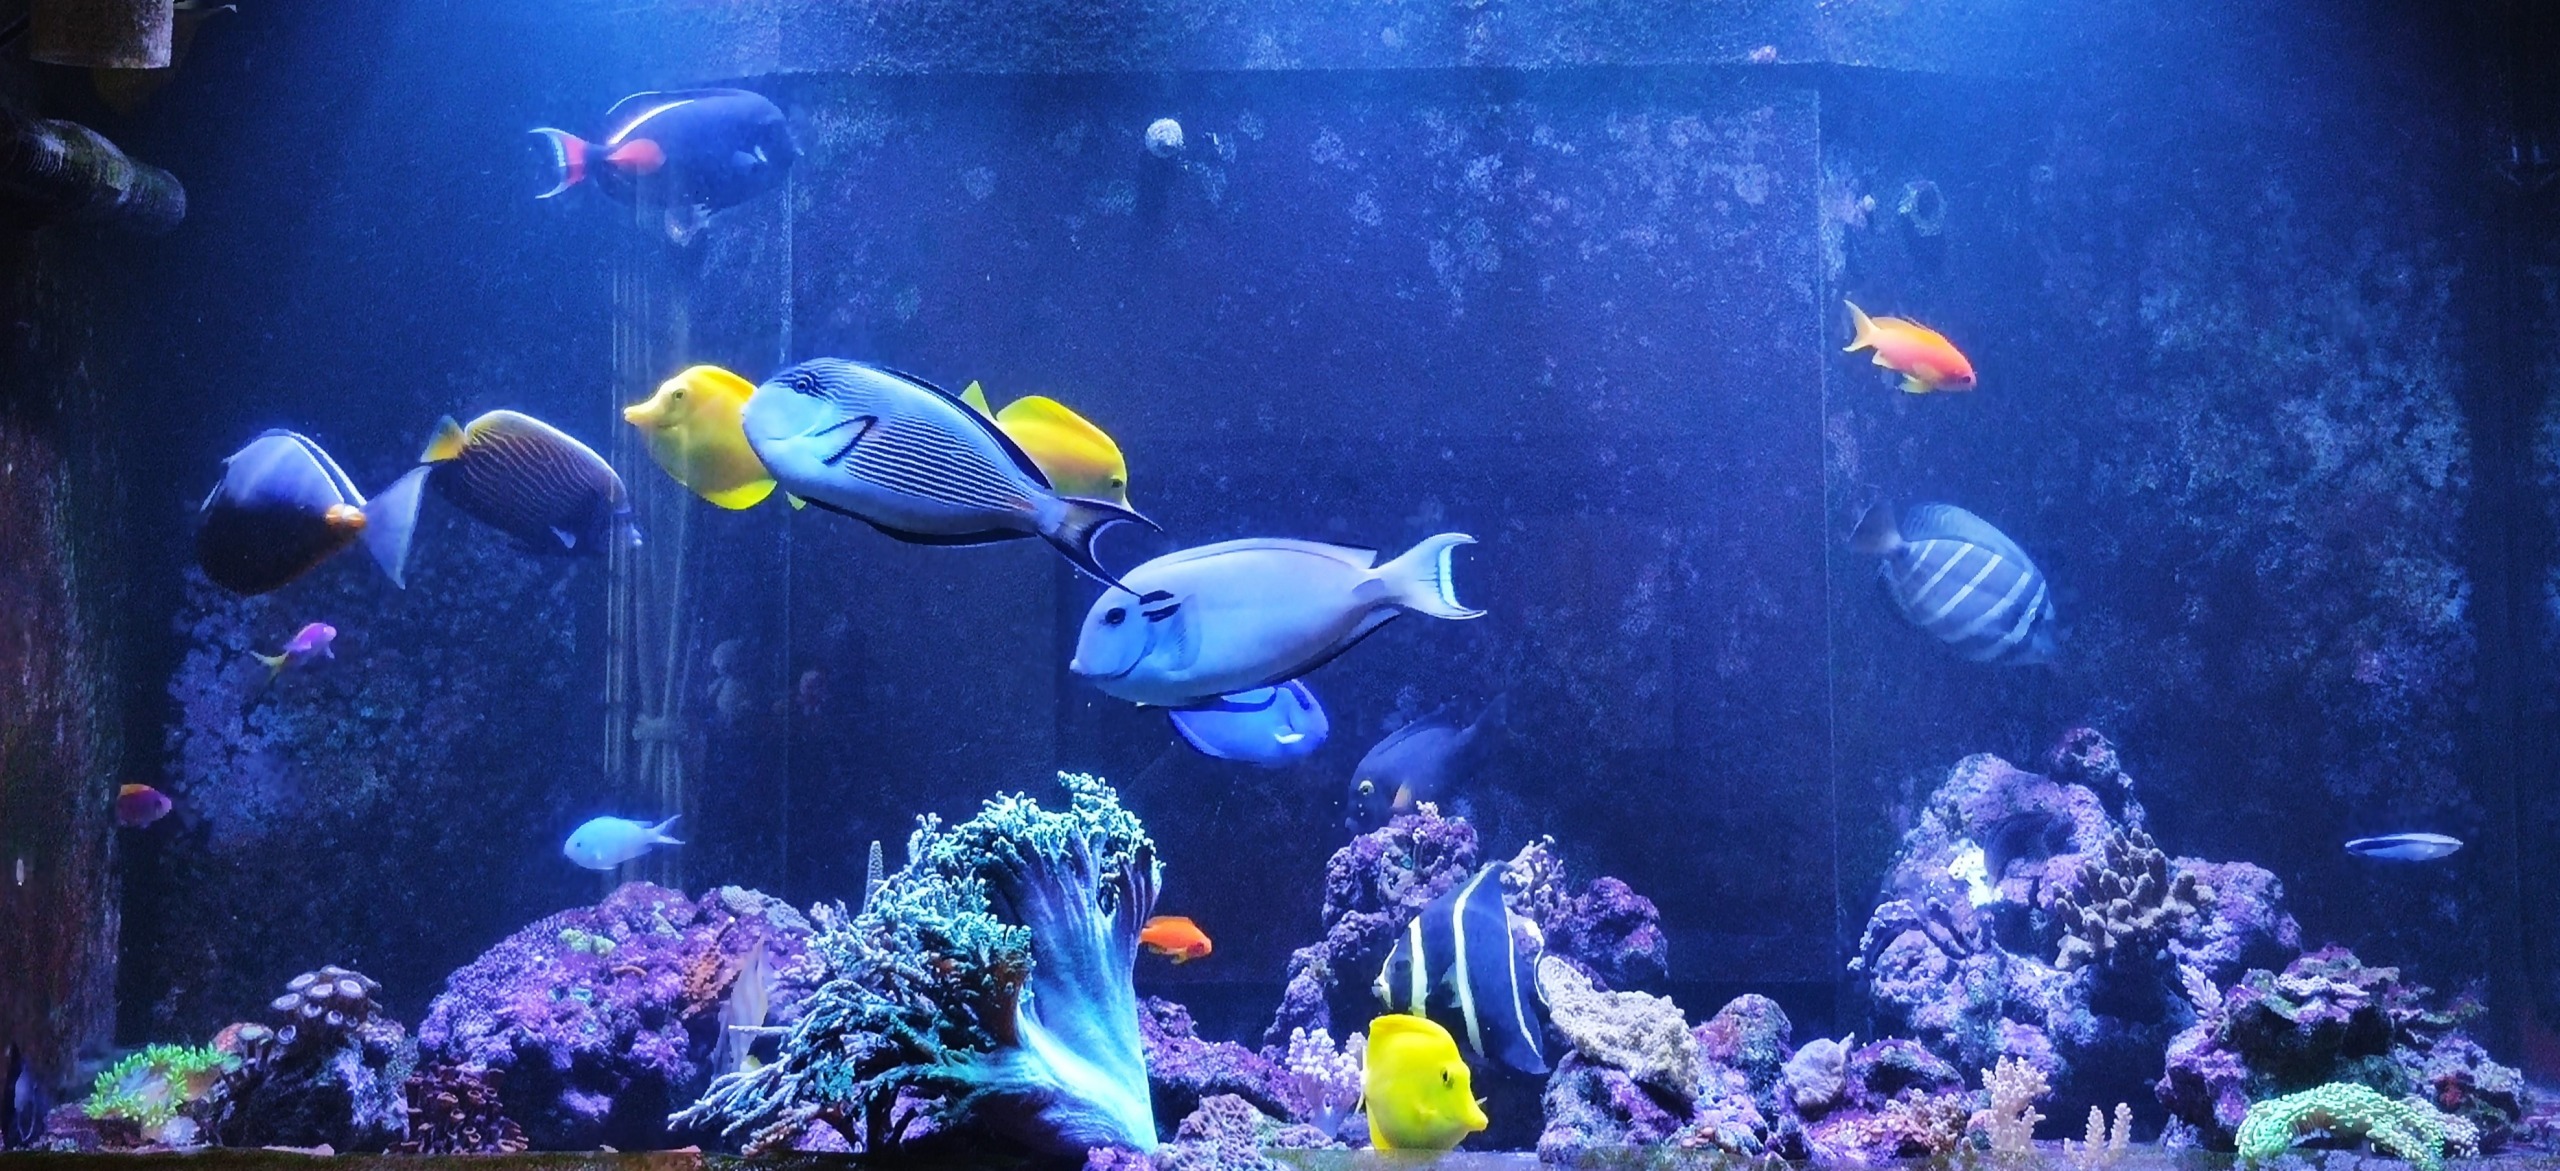
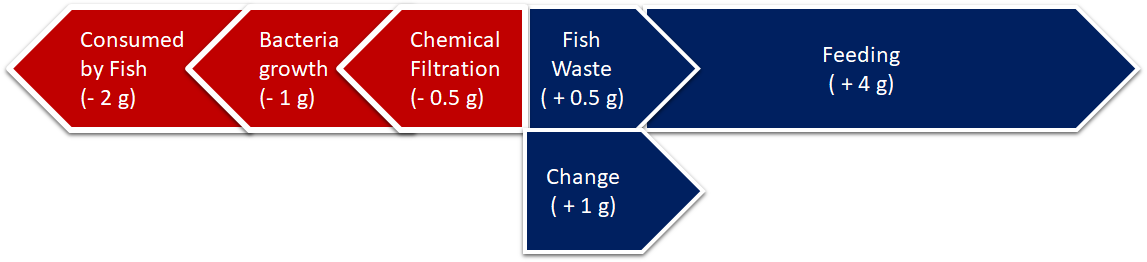
** Official SRC T-Shirt ordering **
in SRC Contest and prizes section
Posted
1) Silentlurker, design 1, M, 1
2) Silentlurker, design 2, M, 1
3) Silentlurker, design 3, M, 1
4) heckers, Design 4, kid 24 , 1
5) AppleholicKen, Design 3, S , 1
6) Domvonn , design 3 , XL , 1
7) L0rddracula,design 2,M, 1
8) Alvarogr , design 3, XL, 1
9) Alvarogr , design 4, 28 , 1
10) Zest2night, Design 1, L , 1
11) Zest2night, Design 2, L , 1
12) Reefrap , design 2 ,M , 1
13) LittleNat1, design 2, XS, 1
14) JiaLin99, Design 4, XS, 1